Rust Repair and Repaint

ANYTHING FROM BUFFING YOUR PAINT TO REPLACING A DASH PANEL
Post Reply

Topic author
delsafari
I am smitten with my van
Posts: 34
Joined: Wed Jul 25, 2007 12:32 pm
Location: Edmonton AB Canada

Rust Repair and Repaint

Post by delsafari »

What I hoped would be a minor rust repair and repaint on my '94 Safari AWD expanded into something much bigger. Not a big surprise!! Some of you might find this interesting. Some might think I'm crazy, but I've seen much more extreme things here, so what the heck?

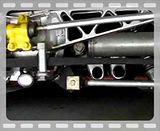
Just before doing a V8 swap last August, I decided that if I'm investing a bunch in the motor, I should clean the body up too. A few years earlier I had installed a fibreglass roll pan and removed some of the original moldings and trim to get a mild custom look. It turned out fine, but now some rust was starting to show up around the fenders, and the leaf spring shackles were rubbing holes through the roll pan due to insufficient clearance. So first I replaced the fibreglass springs with steel ones, and made sure the shackles were OK. Then I proceeded with the "minor" rust repair. Ha!!
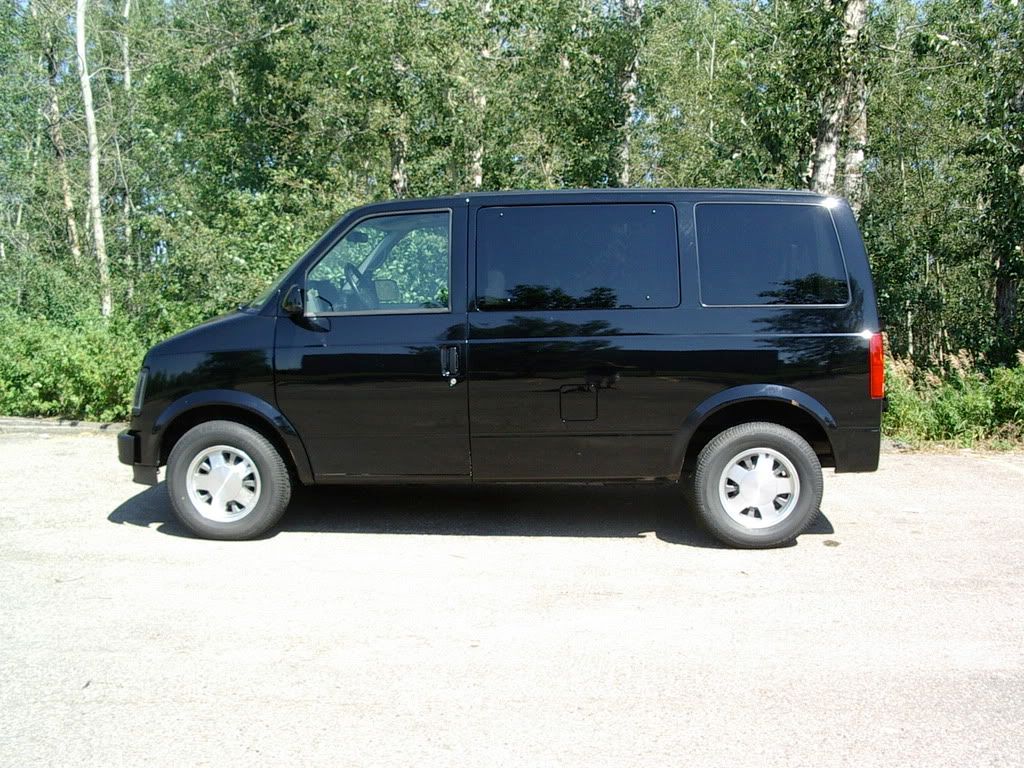
Roll pan.

Image

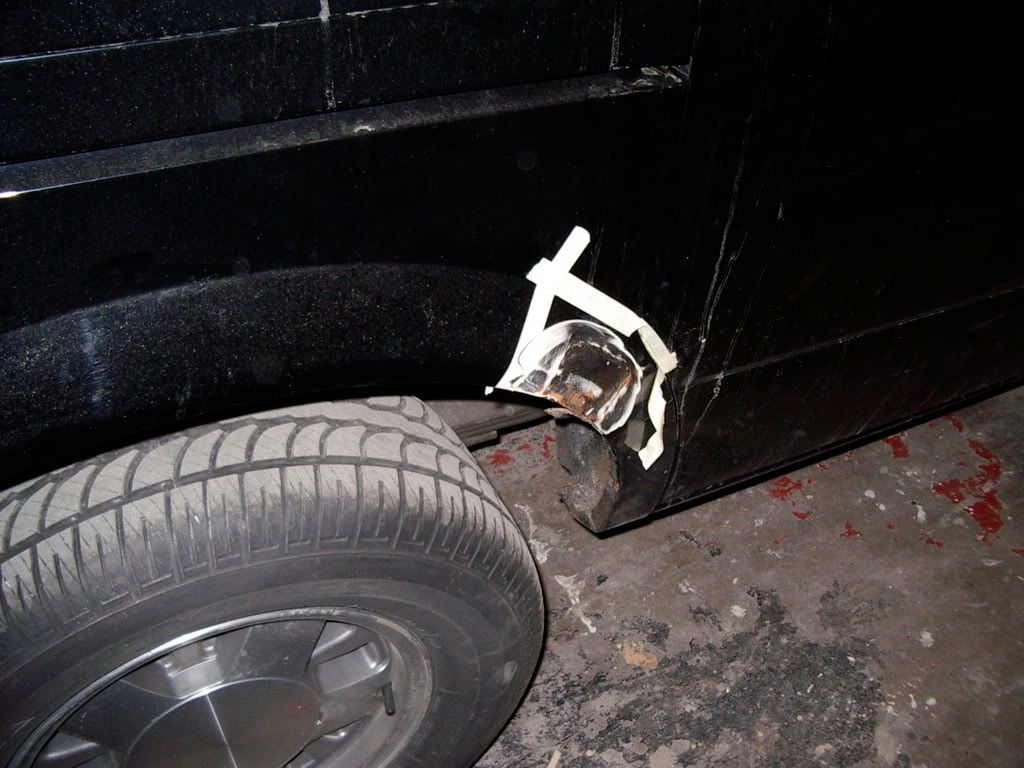
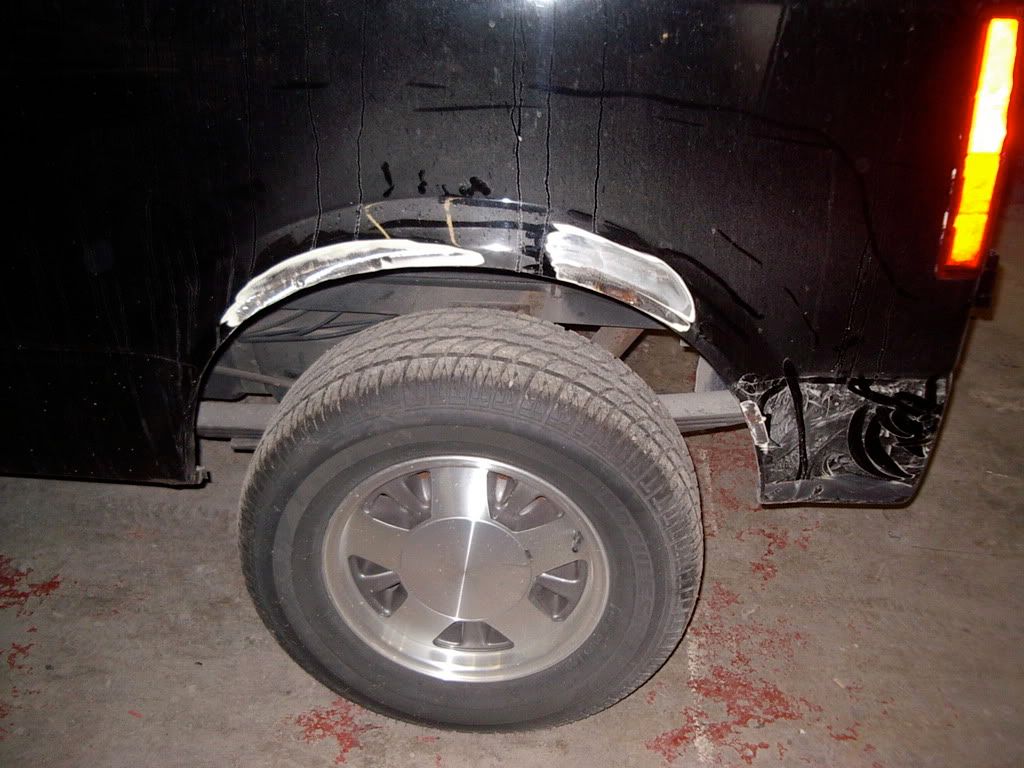
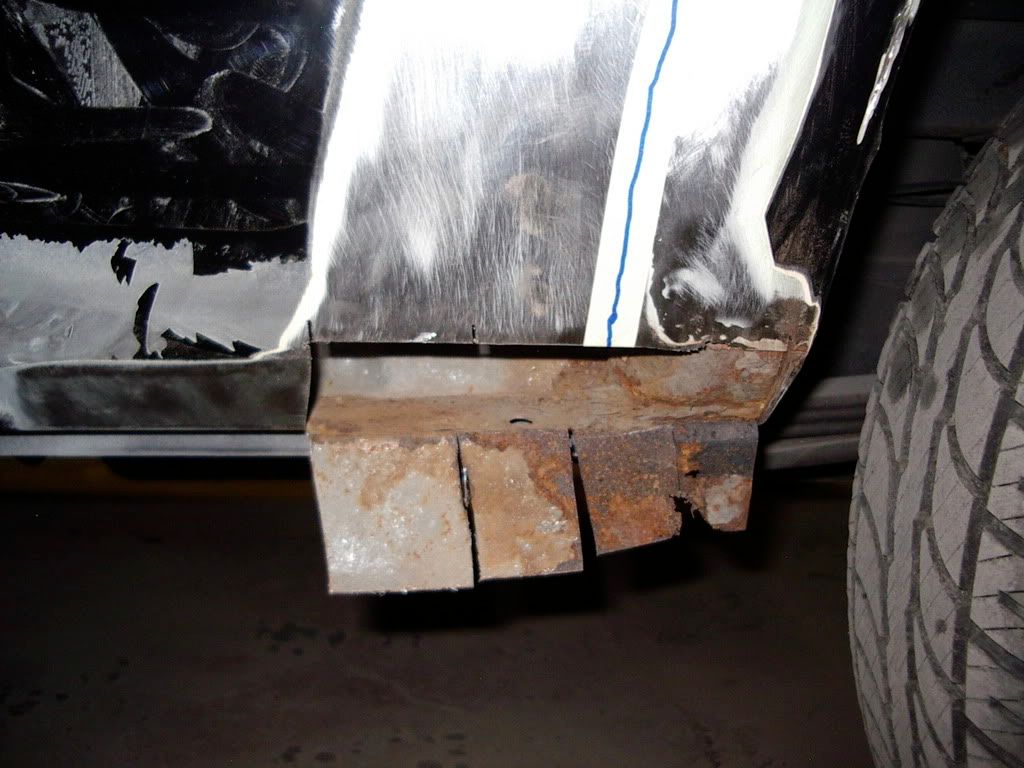
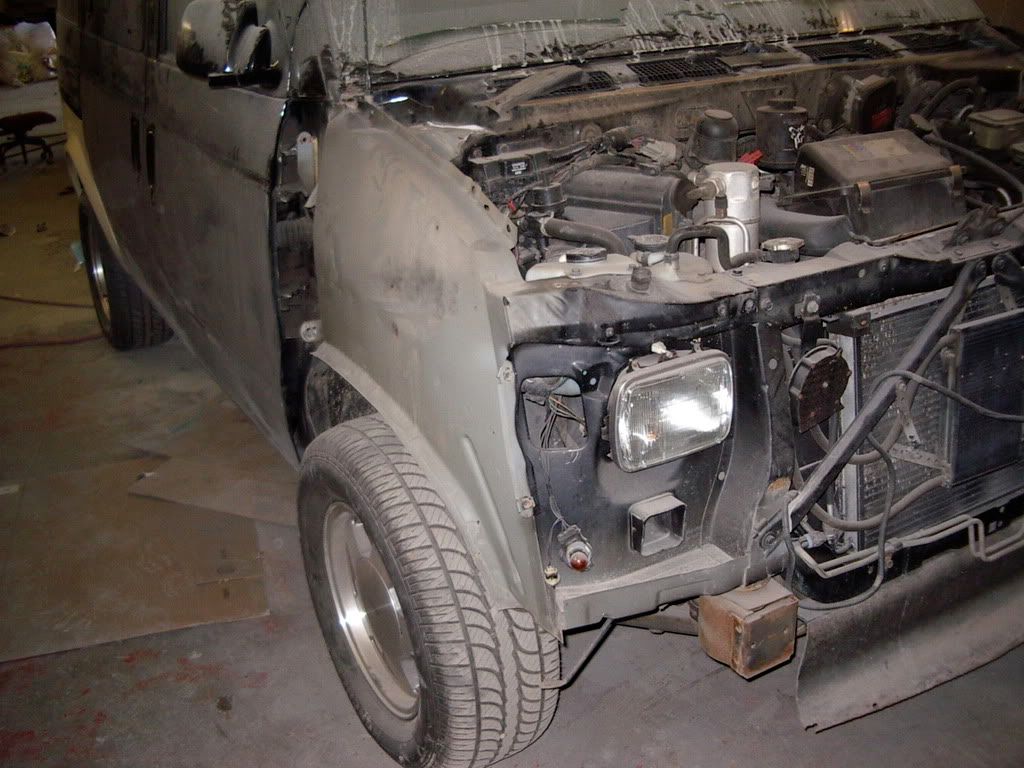
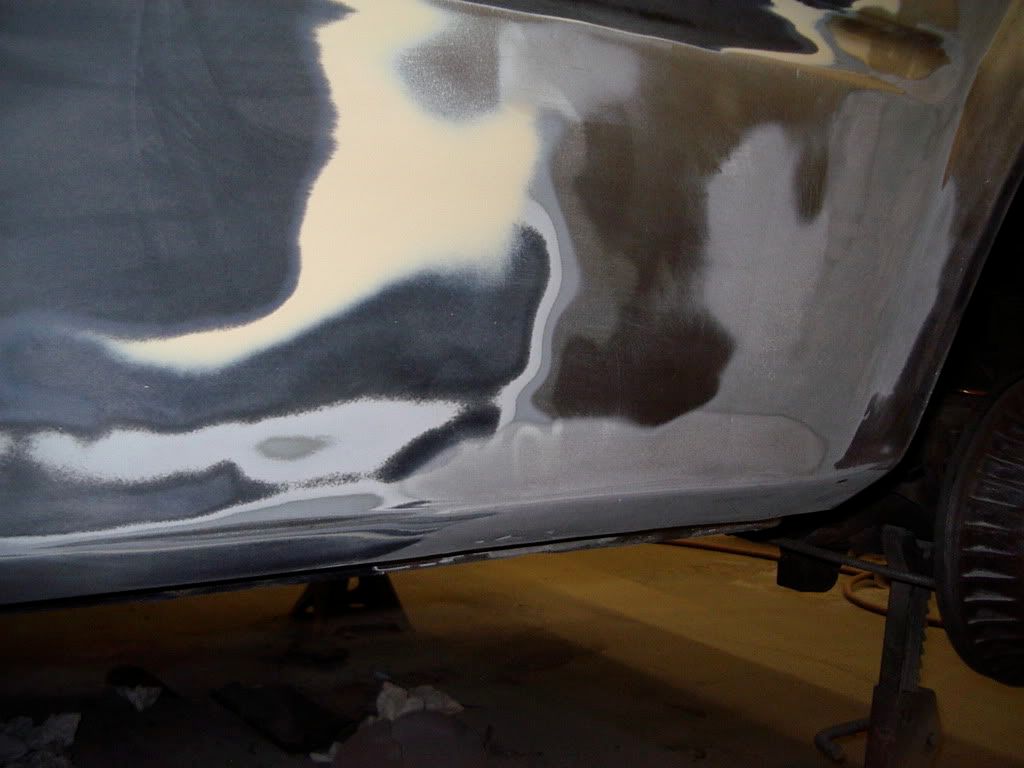
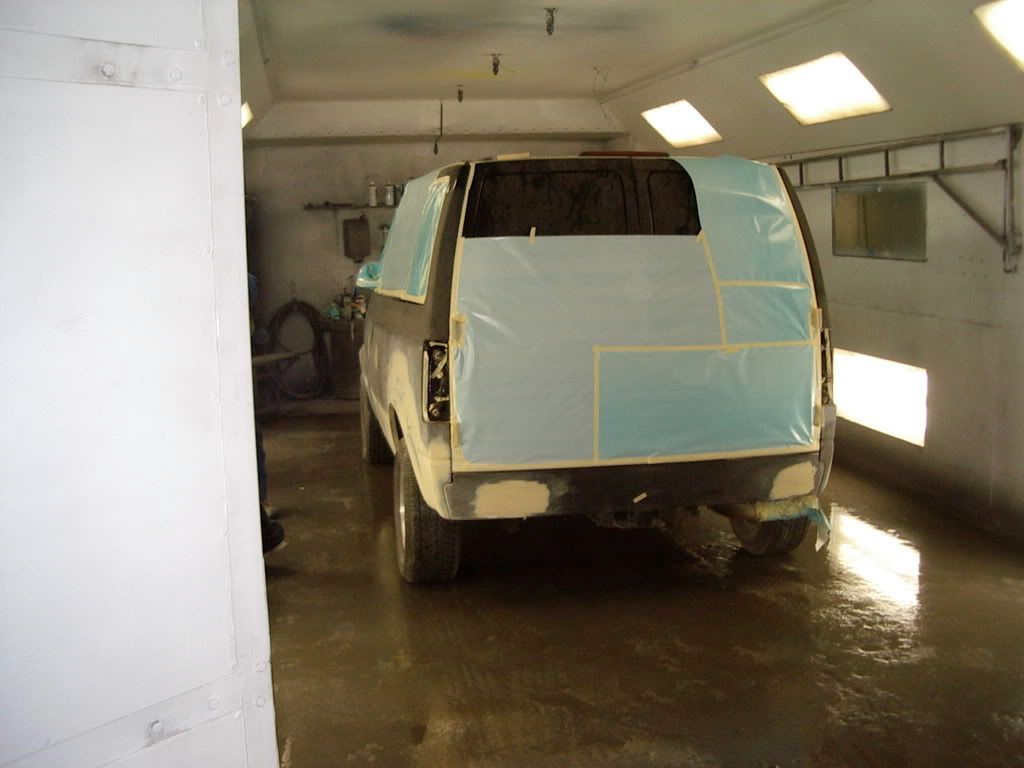
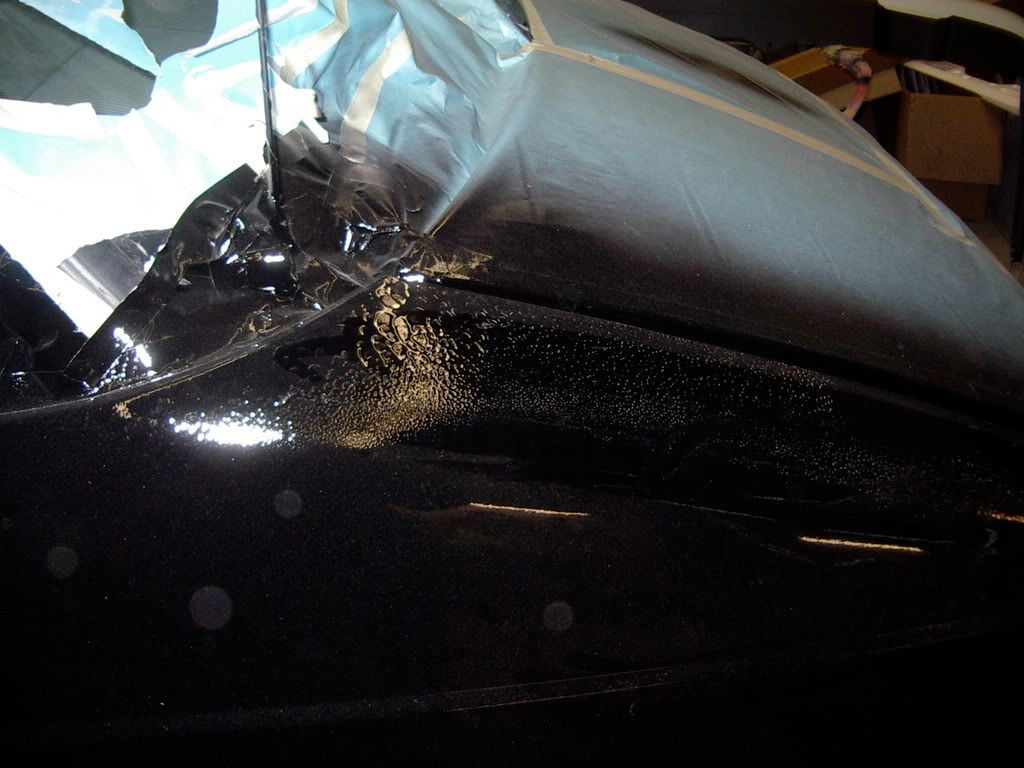
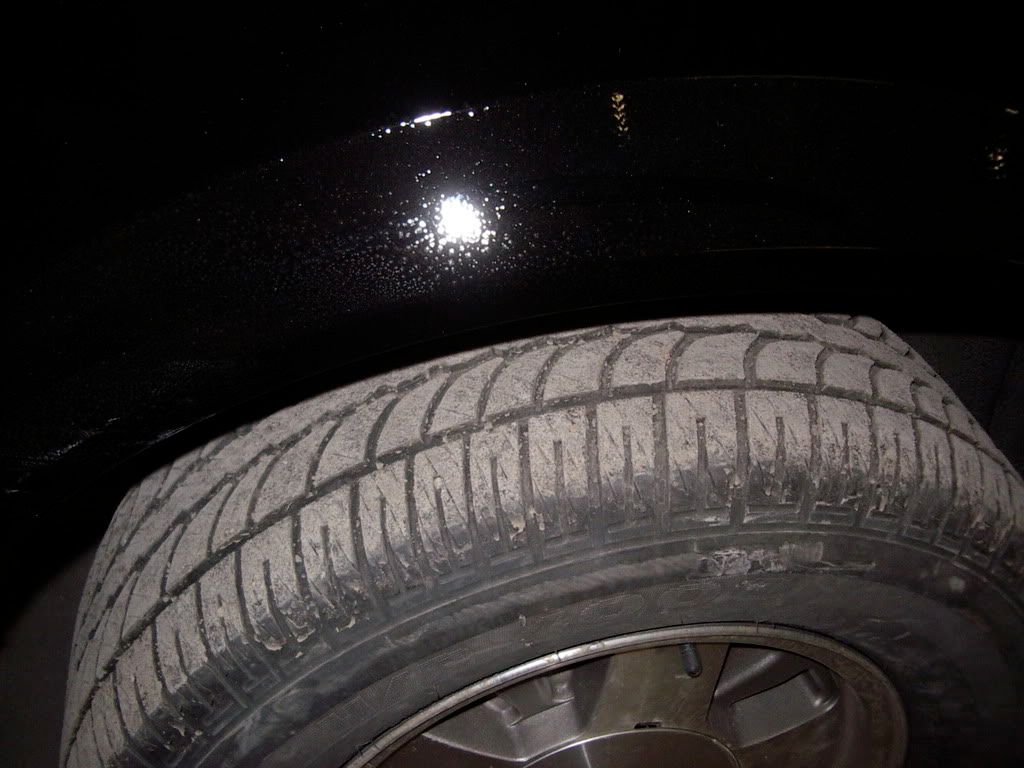
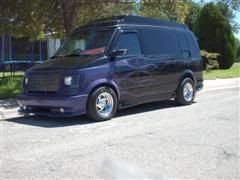
This shows the little bit of rust showing through around the fenders, and rocker panels. I didn't want mud flaps, so I had put 3M film along the rockers to protect from rock chips too, and it was peeling along the edges, on the door.

Image

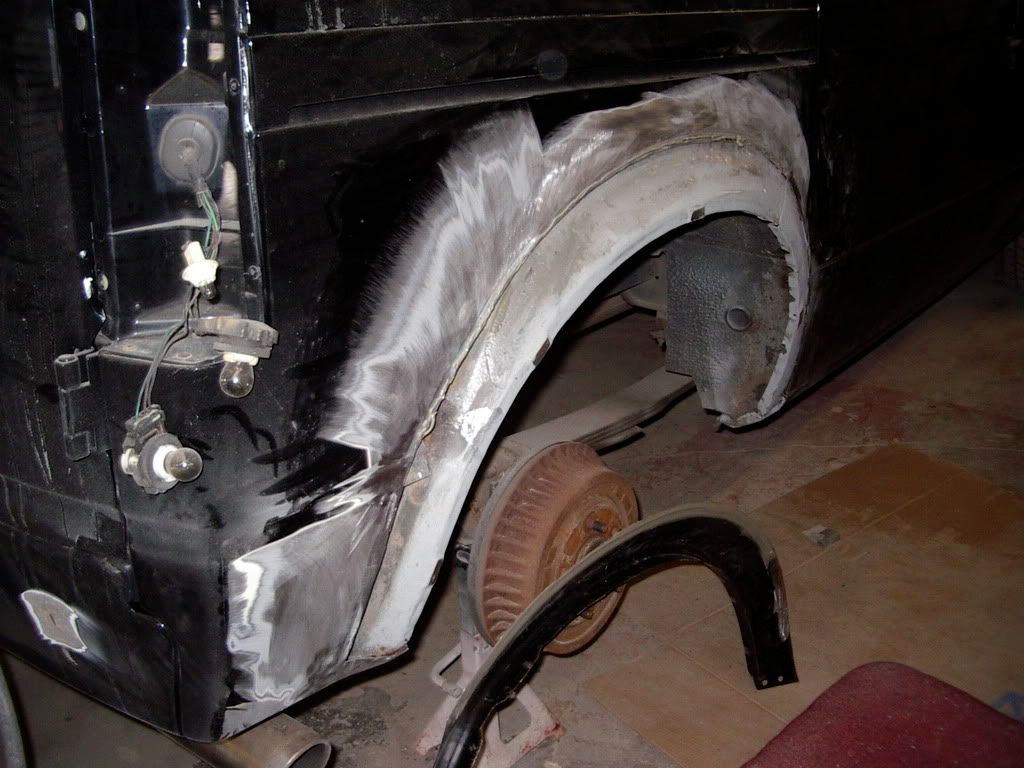
So the body mechanic started to expose the rust, and, like cockroaches, for every spot you see, there are 10 more that you don't.

Image

Image

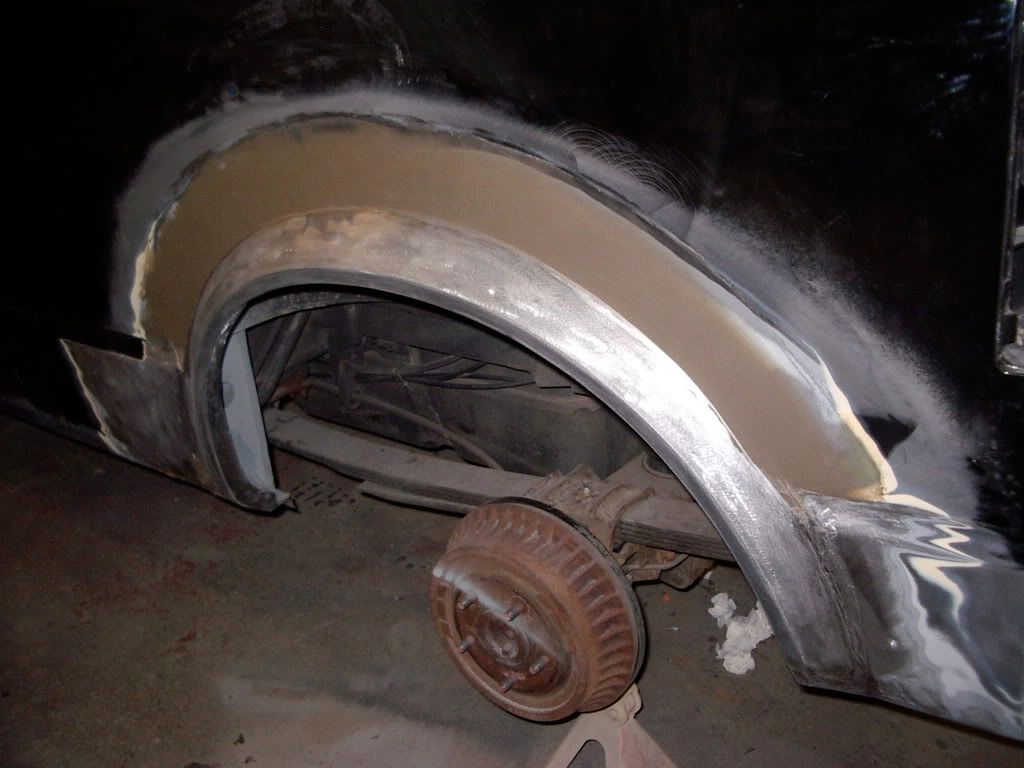
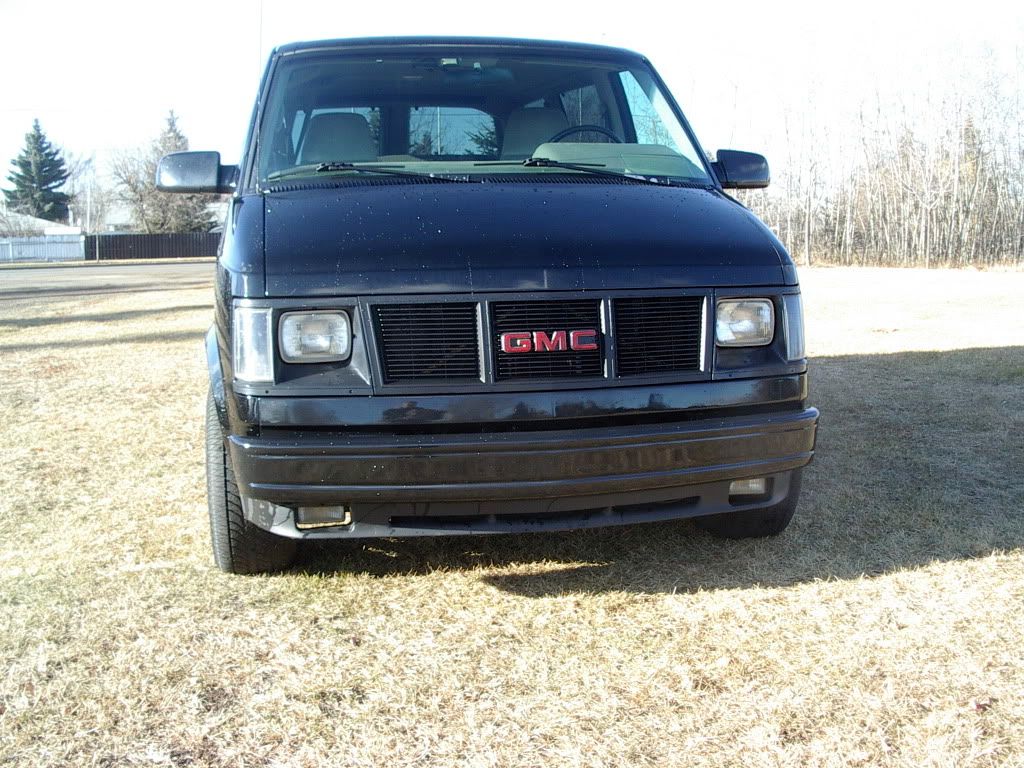
Cutting and patching the wheel openings was going to be tricky. New front fenders were $140 + painting, so that wasn't bad. They bolt on. But replacing the rear fenders would require replacing the panels on the sides. Passenger side ear panel is small, but for the driver's it includes the whole side of the van, up to the driver's door. Major. And only the wheel openings were rusting.

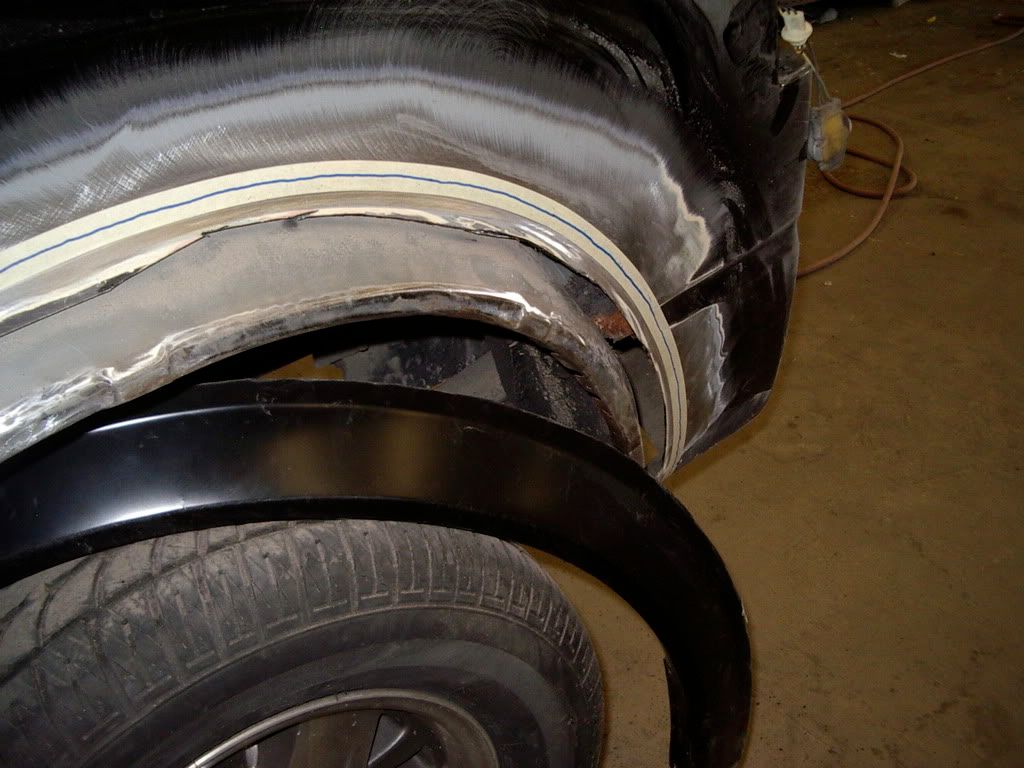
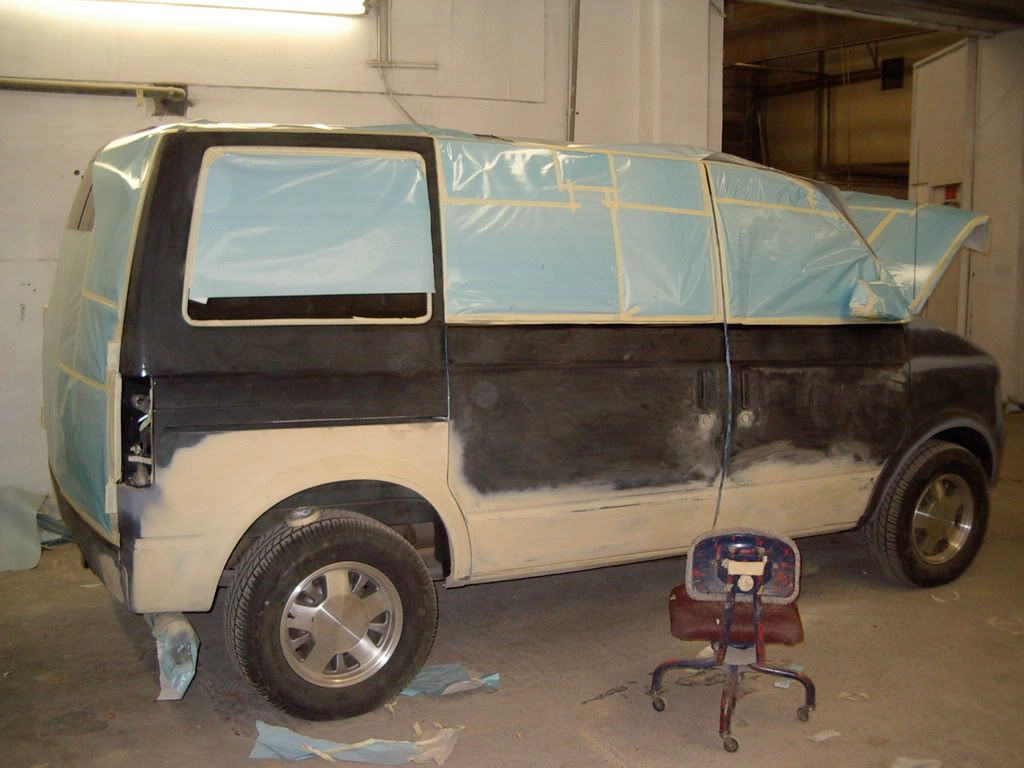
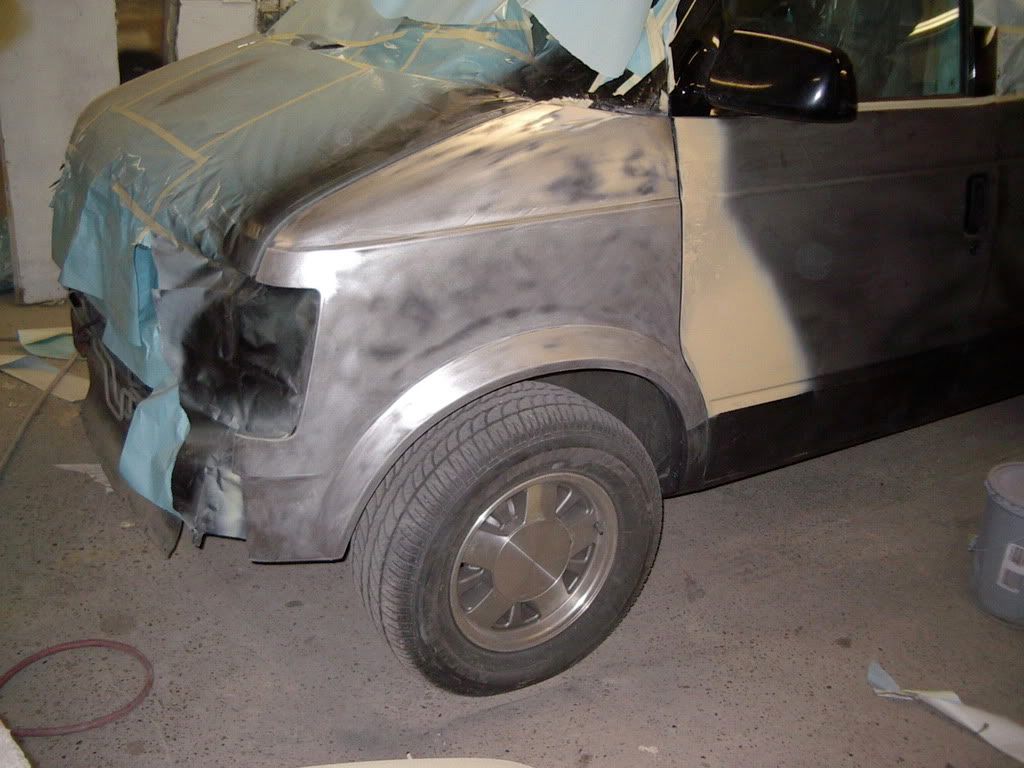
So, the body mechanic did some measuring and comparing, and he figured out that the lip of opening from a new right front fender would match the left rear opening, and the left front would fit the right rear. This way, $140 each for the 2 new front fenders, and some cutting, gluing, welding, filling, and the rear fenders should be like new. So they ordered 4 new front fenders - 2 left and 2 right, and proceeded to install.

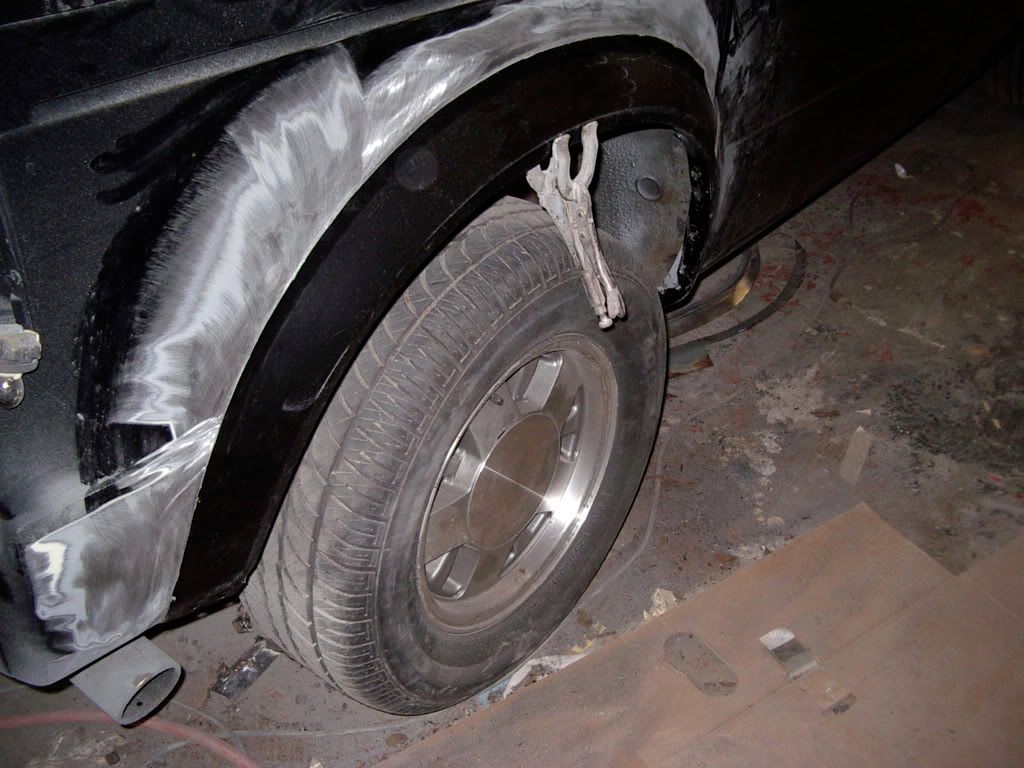
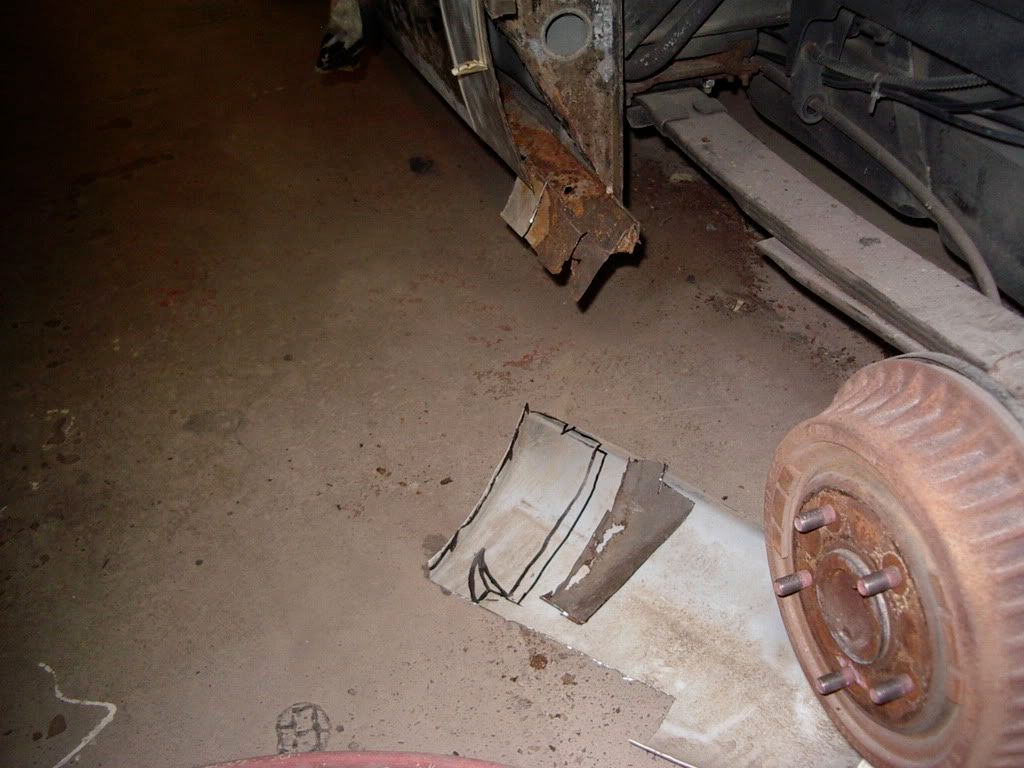
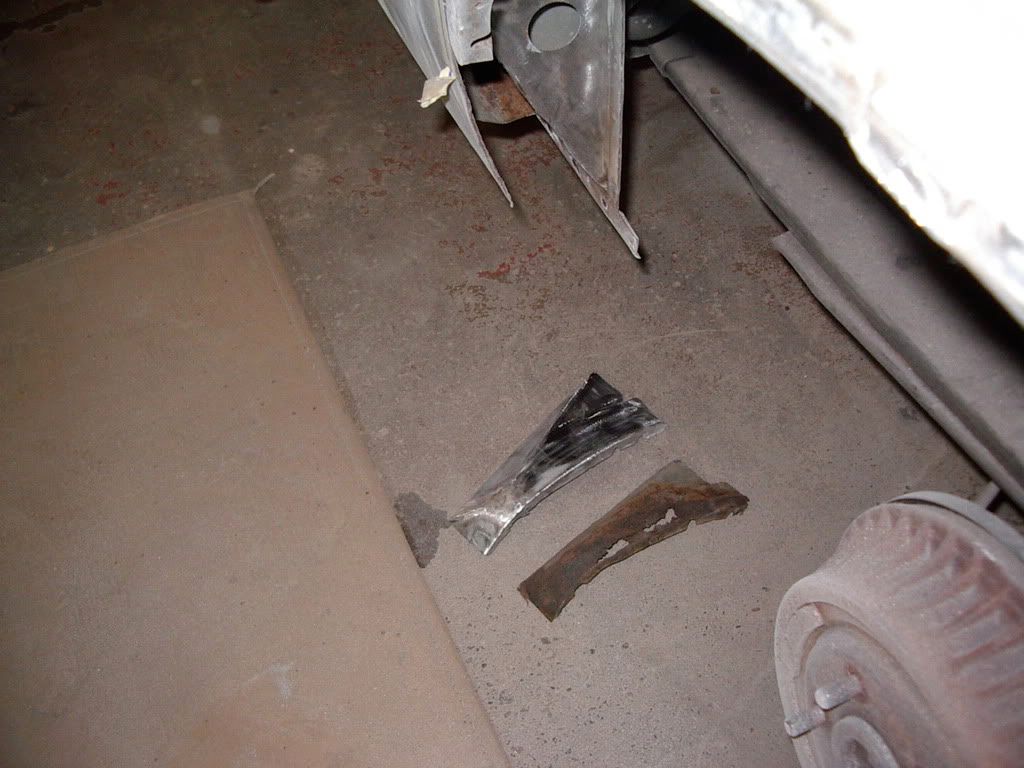
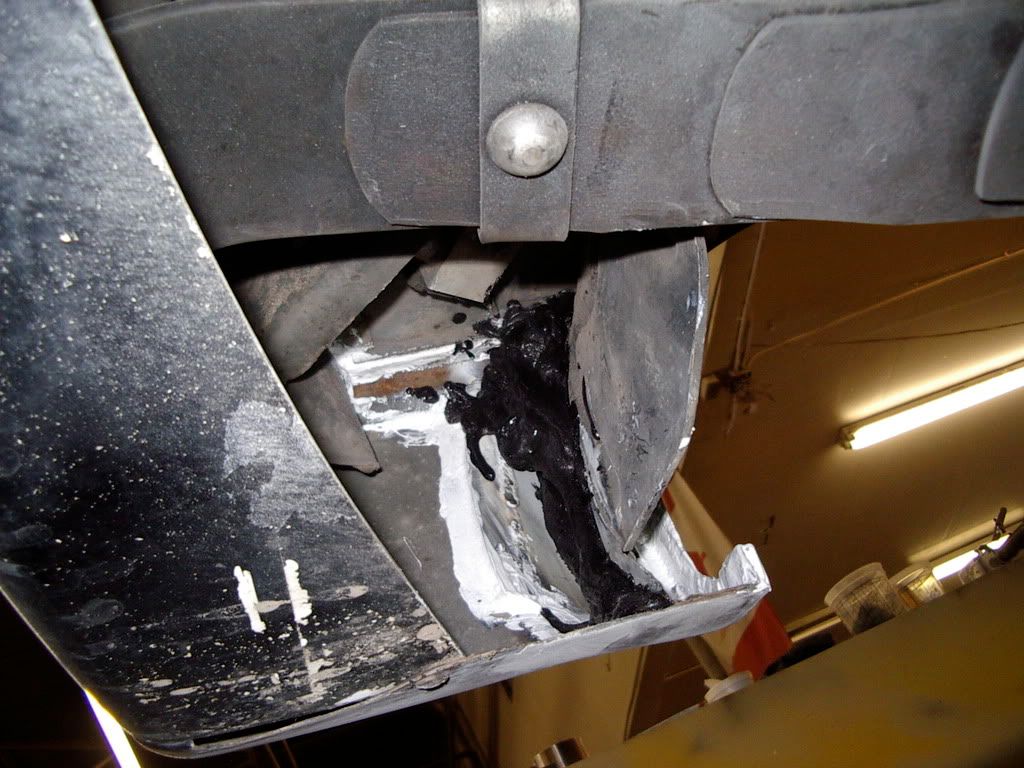
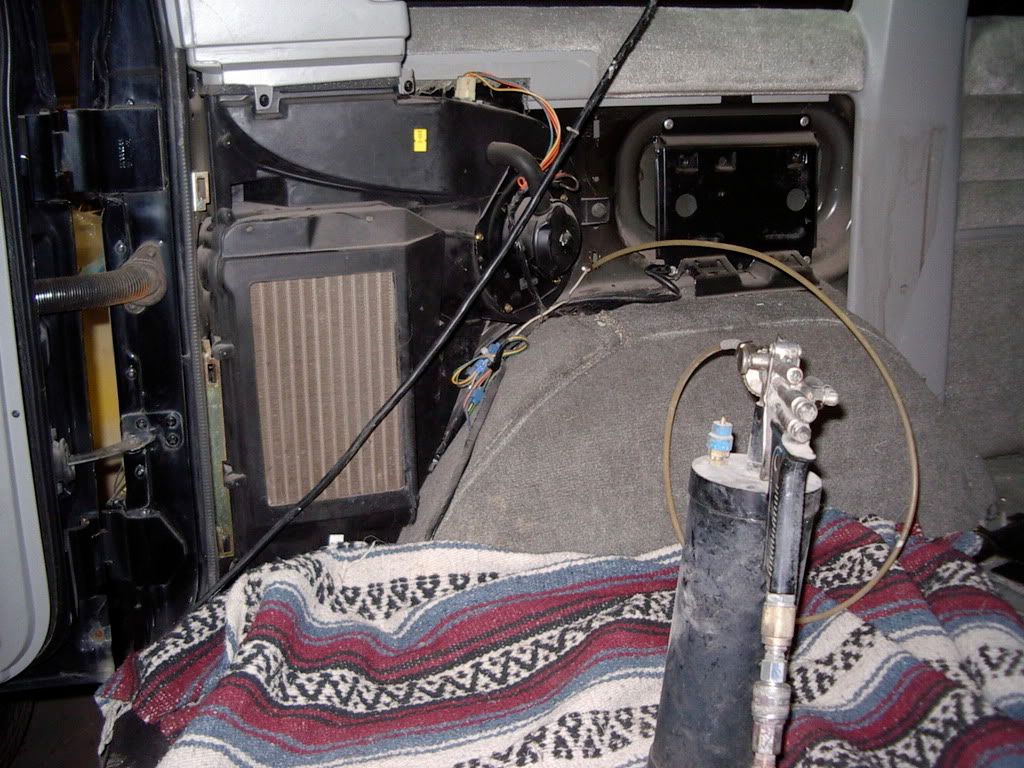
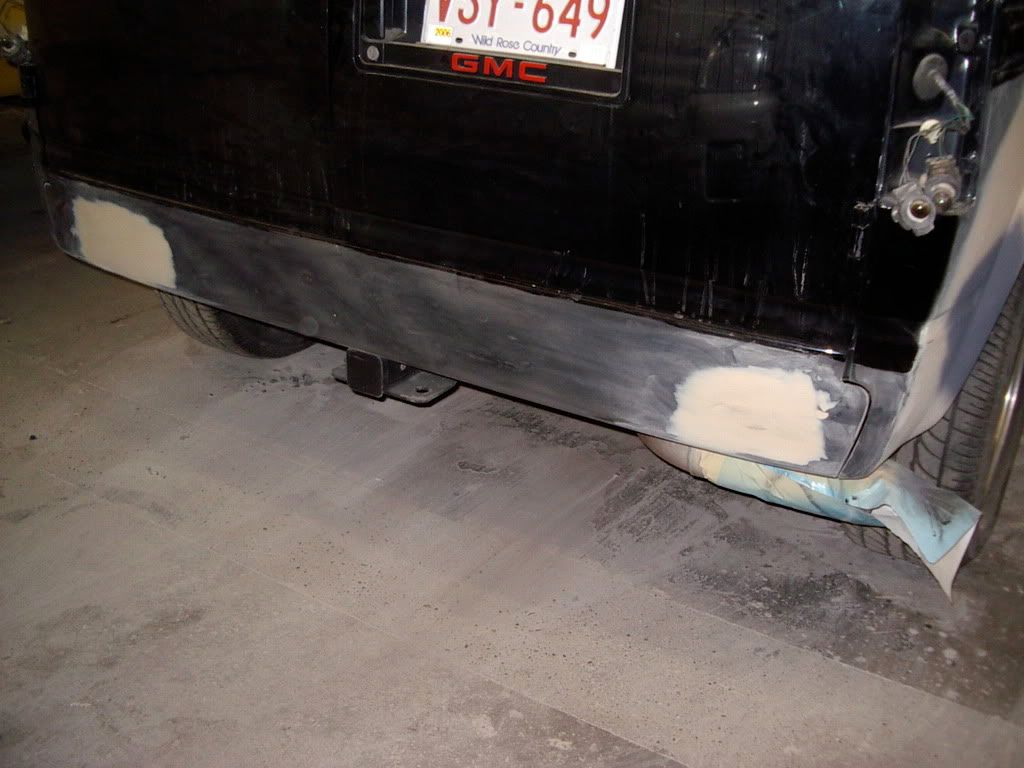
There were also some areas on the rocker panels that were cut out and patched, and a couple of parts fabricated from scratch.

A picture is worth a thousand words, so comments here will be brief. Any questions asked, I will gladly answer.

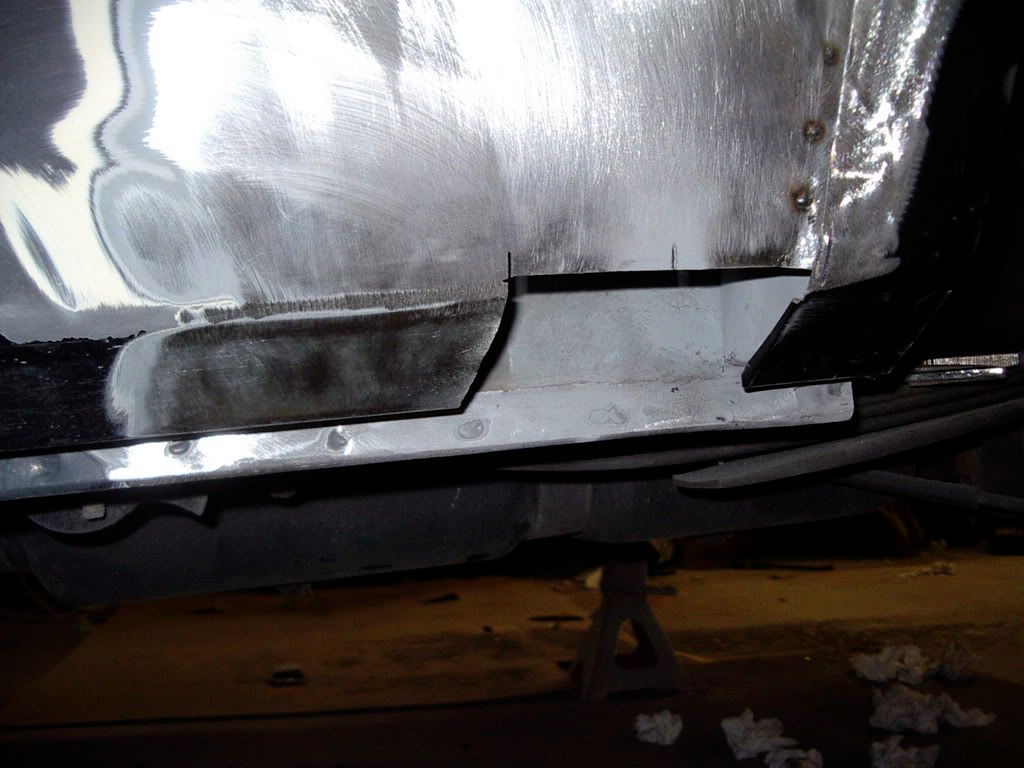
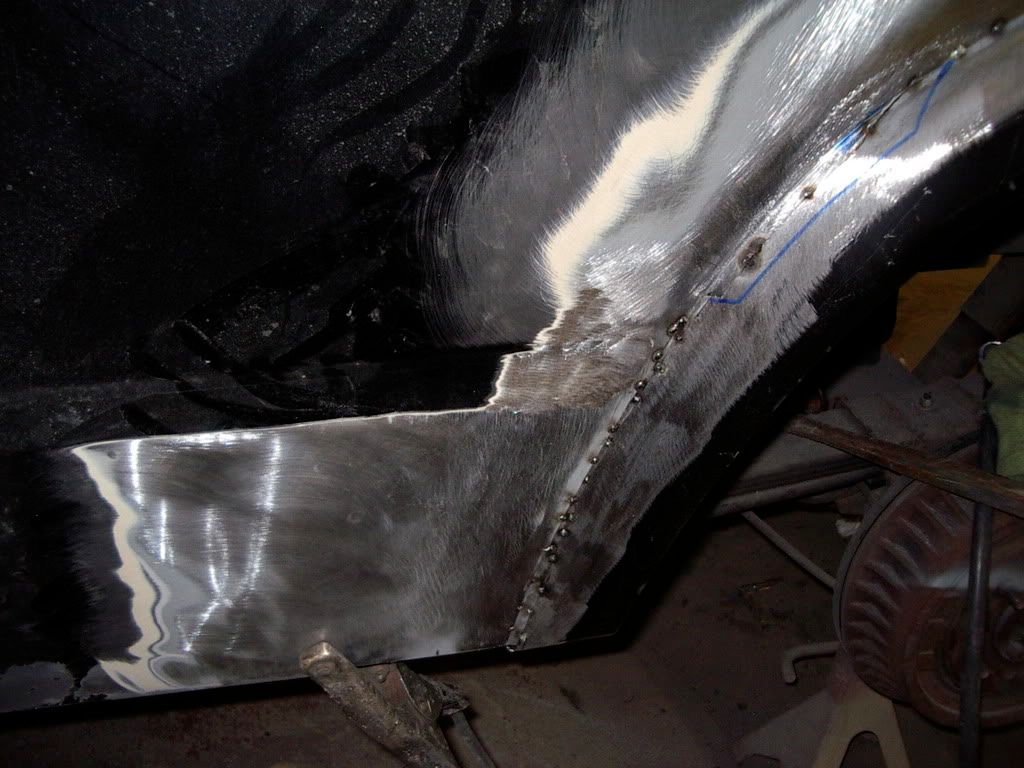
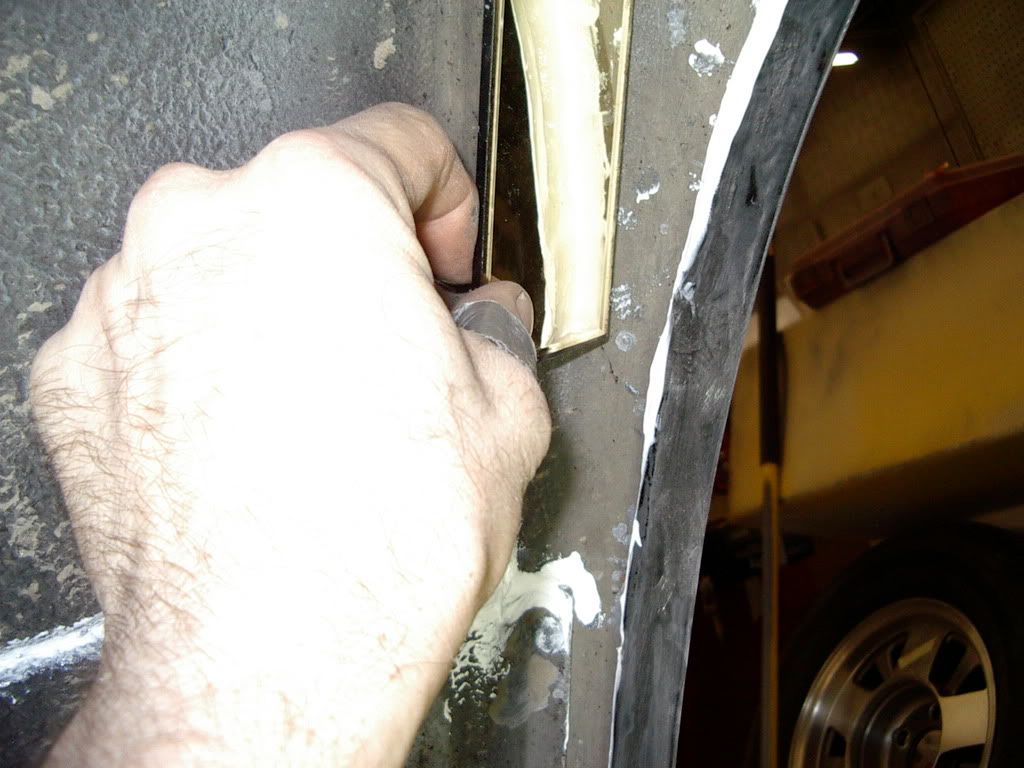
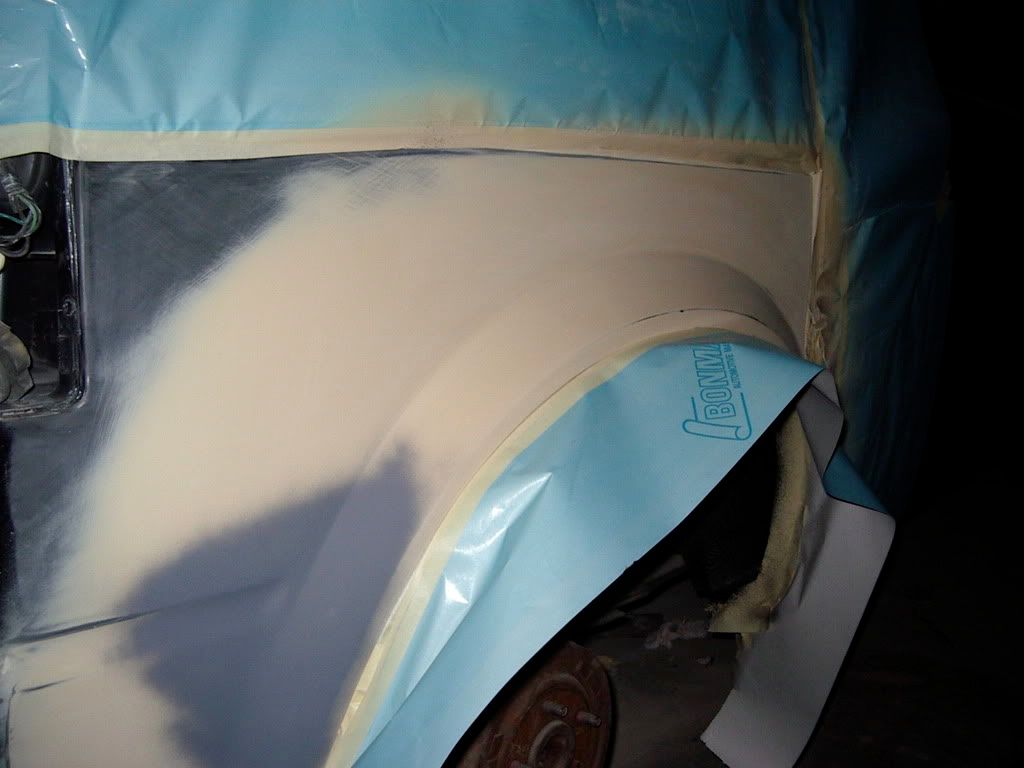
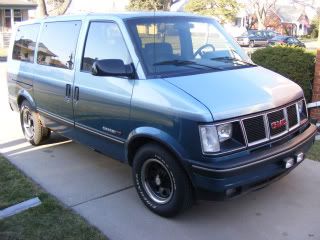
Rusted strips are cut off the 2 rear fenders, corresponding strips cut off the new front fenders.

Image

Image

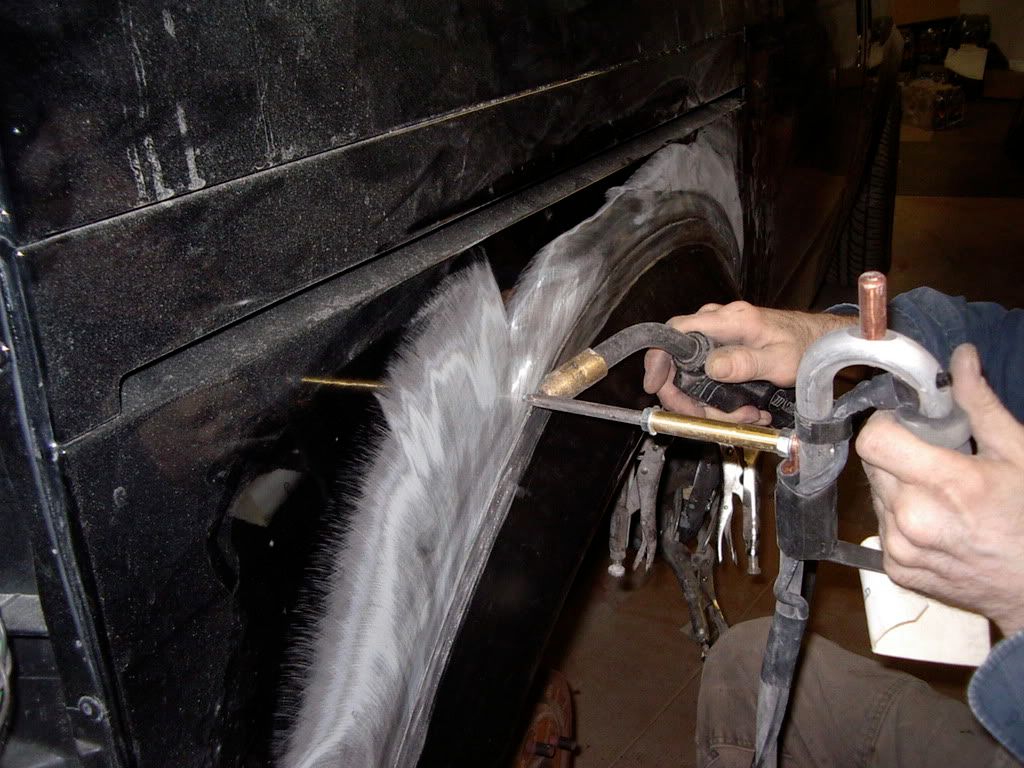
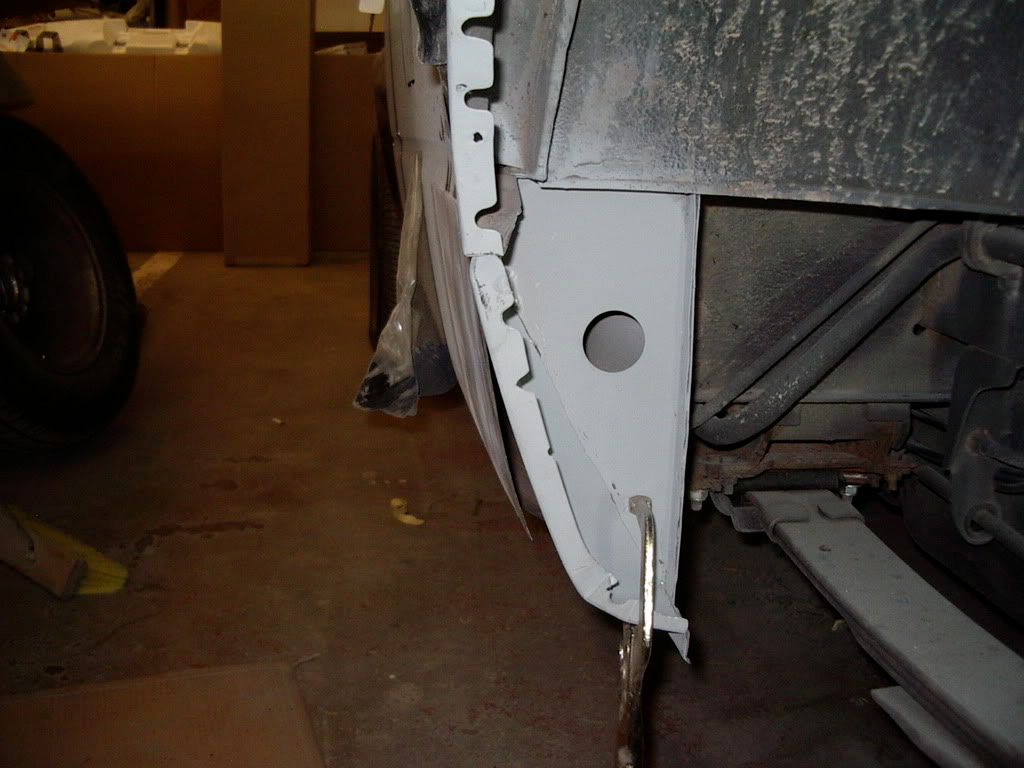
Fitting new strip onto fender.

Image

Image

Image

Image

Image

Image

Image

Image

Image

Image

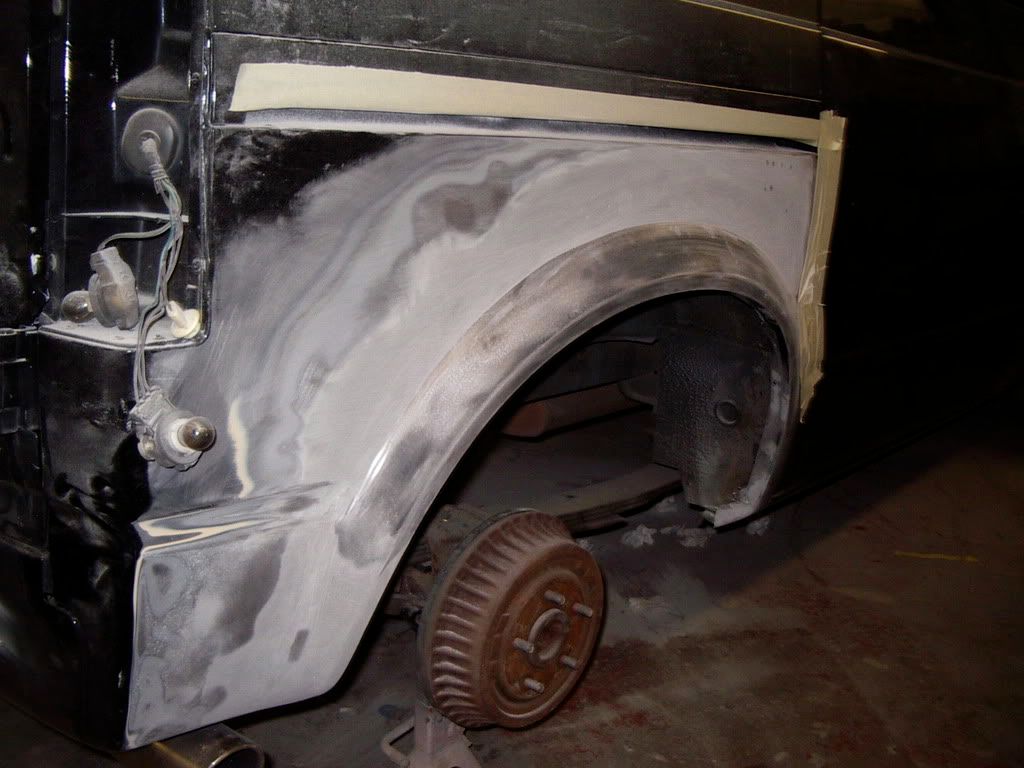
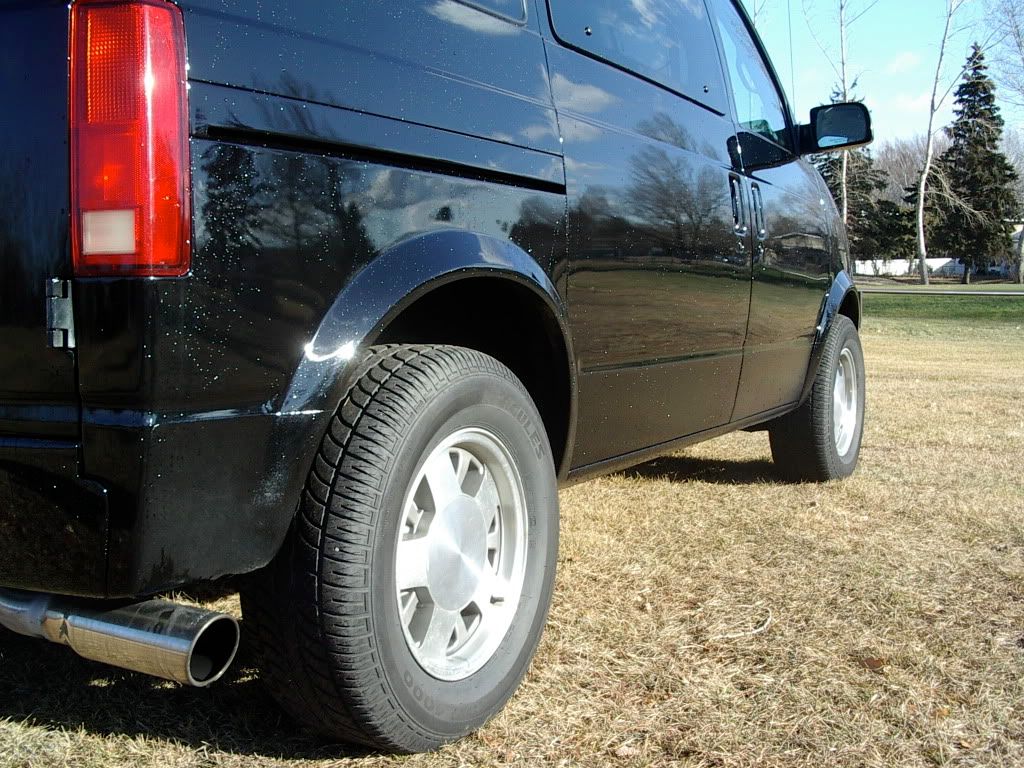
See next post for body filler, prep and painting.
delsafari

Topic author
delsafari
I am smitten with my van
Posts: 34
Joined: Wed Jul 25, 2007 12:32 pm
Location: Edmonton AB Canada

Re: Rust Repair and Repaint

Post by delsafari »

Continuing - front fender removed.

Image

More repair and preparation for painting. Tried to seal off areas prone to rusting. Mechanic took pictures showing sealing and undercoat which was applied to underside of the new panels.

Image

Image

Image

Then, filling and sanding.

Image

Image

Image

Image

Continued on next post.
delsafari

Topic author
delsafari
I am smitten with my van
Posts: 34
Joined: Wed Jul 25, 2007 12:32 pm
Location: Edmonton AB Canada

Re: Rust Repair and Repaint

Post by delsafari »

Now, prep for the painting.

Image

Image

In the paint booth.

Image

First, to protect the rocker panels from chipping, not using mud flaps, I asked for flexible chip guard to be sprayed on before painting. Product is similar to sprayed on truck box liner. The body shop balked, but I insisted. I had it on a Ford truck many years ago, and it worked very well. They wanted to spray only a light coat, but I insisted on a heavy application, numerous layers. The result is an "orange peel" texture which is hardly noticable.

So, here is prep for the chipguard spray application.

Image

Chipguard spraying.

Image

Chipguard before painting.

Image

Now, when the rest of the van was painted, something WEIRD happened. One of the primer touchup products that was used, an aerosol grey in color, was apparently contaminated with a silicone substance, they said. Apparently silicone is bad news in a body shop. The result was a nasty "fish-eye" texture on the paint finish. Lucky we had photos, because it was easy to confirm that wherever the grey primer was applied, the fish-eye occurred in the final coat!! You can see the grey primer areas on the earlier picture.

Here are some pictures of "fish-eye" paint finish.

Image

Image


The supplier / manufacturer of the aerosol undercoat product paid the shop for re-sanding and repainting the van again at this point. Of course, no cost to me. Just a couple more days in the shop.

Here is re-sanding and prep for repainting.

Image

And, the final product!!!! You can see the textured finish of the chip guard on the rocker panels.

Image

After 6 months and a harsh Canadian winter at -40 degrees (that's the same temp in Canada and the US) it still looks like it did the day I got it back from the shop. Hope that's the case after 5 years.....and 10.... wouldn't that be nice!!!

Image

That's it. Happy vannin' !!
delsafari

astrozam
I have my van tatooed on my cheeks
Posts: 2770
Joined: Fri Sep 08, 2006 2:57 am
Has thanked: 1 time
Been thanked: 2 times

Re: Rust Repair and Repaint

Post by astrozam »

Cool pics,interesting seeing how the repairs and paint came along,learn a little more everyday around here.
Thanks for posting for us delsafari. =D>

91AWDAstro
ASV Supporter
ASV Supporter
Posts: 264
Joined: Fri Jan 11, 2008 5:14 am

Re: Rust Repair and Repaint

Post by 91AWDAstro »

:yikes: Rust, I hate rust. Try living in Michigan. They use salt like a cocaine addict on a weekend pass in Colombia. I had to replace drivers side lower panel behind the door, entire passenger side rocker panel, passenger side quater piece after the slidng door, and re-skinned the sliding door. I only wish I would have done the drivers rocker panel because it's showing signs of cancer now.
---------
I don't understand all I know about that.
----------
Chris
91AWD 350
and a bunch of other wrecks...

Rebel
I plan to be buried in my van
Posts: 2009
Joined: Thu Sep 14, 2006 7:24 am
Location: Evergreen, Al. 96 mile marker, where life is slow and there are no rules.

Re: Rust Repair and Repaint

Post by Rebel »

Hey, thanks for posting the pics. Would have never thought about the front fender lip fitting the rear,,good move and very interesting post.
Curious,,the pic of the driver side repair panel,,where does the top lip meet the existing body panel ?

Some really nice work on the rear fender replacement. =D>

These pics should give everyone up north an idea of where their rust may be starting that hasn't come through yet and think if I lived in the north and had a lot of money in my ride,,I'd go by a body shop and get rust convertor injected in my rockers and a few other places and then shoot undercoating inside some of those rust prone areas. The only prblem with the convertor product is, if you don't have rust, it can make it start rusting. I've used the stuff for along time on areas where I had surface rust underneath and it will convert rust to a hard sealed black surface and then spary undercoating.
89 Astro, 350 V-8, Shaved doors, Filled Slider, Corvette IRS, 94 Mustang GT Rack & Pinion(Thanks to Skip), Cad Tail lights from SoCalliV8 ( RIP) Miss you my friend.

VIDEO

Image


If you drive illegally, they take your driver's license. If you're here illegally, they want to give you one :)


Image


If guns kill people, do pencils misspell words

trybe13
ASV Supporter
ASV Supporter
Posts: 410
Joined: Sat Sep 09, 2006 6:53 pm
Location: Artesia, NM -a beautiful desert oasis
Contact:

Re: Rust Repair and Repaint

Post by trybe13 »

Looking at some of your pics sent a chill down my spine. Reminded me of my 18 month body shop nightmare!! (I'll share that story some other time. LOL!)
Kudos to your bodyshop! Your ride came out looking great! =D>
Image
90 Safari XT Hi Top
Lead guitarist for The Jericho Effect
Click the link to bang that head! http://www.ilike.com/artist/Trybe13
Image

Topic author
delsafari
I am smitten with my van
Posts: 34
Joined: Wed Jul 25, 2007 12:32 pm
Location: Edmonton AB Canada

Re: Rust Repair and Repaint

Post by delsafari »

Thanks you guys.

Yea, rust is a nightmare. It's not nearly as bad this far north, as it is in the east (so they say). They don't use as much salt here because it doesn't really help much at colder temperatures. I suppose it's one small (tiny) benefit of the colder climate.

Rebel, on your question,
Hey, thanks for posting the pics. Would have never thought about the front fender lip fitting the rear,,good move and very interesting post.
Curious,,the pic of the driver side repair panel,,where does the top lip meet the existing body panel ?
Both sides are the same, the upper edge of the new strip was slipped underneath the edge of the existing cut panel, just around the perimeter of the opening. Then glued, welded, filled etc.

Here's another picture of the driver's side, before it's filled, if it helps.

Image
delsafari

Topic author
delsafari
I am smitten with my van
Posts: 34
Joined: Wed Jul 25, 2007 12:32 pm
Location: Edmonton AB Canada

Re: Rust Repair and Repaint

Post by delsafari »

Another point that I didn't include - the front end of the van. When I previously repainted, I also replaced the front chrome bumper with one from a cargo van, and painted it black as well. The black paint didn't last long of course. Within weeks it was pelted with rocks and looked bad - primer showing through.

This time around, I had it powder-coated, and then applied 3M film. It seems to be working well - one full winter, and no chips so far. I also powder-coated the narrow panel between the bumper and grille. Mine is off an Astro, you probably noticed. The Safari one has 3 openings lining up with the grille sections.

And the hood and fenders (the front parts) are also 3M filmed.

So on the front of this van, every forward facing surface is plastic, glass, powder-coated/filmed, or painted/filmed. The film isn't as nice as new paint, but much better than chipped paint.

Corner lights are clear with black background, yellow bulbs. Need to replace the passenger side - it gets moisture inside. A whopping $7 each on eBay, plus $25 or so for shipping.

Here's the picture.

Image
delsafari
User avatar

safariobsession
I finally get the smurf thing
Posts: 113
Joined: Wed Jun 06, 2007 1:16 pm
Location: Wyandotte, MI
Contact:

Re: Rust Repair and Repaint

Post by safariobsession »

Nice work! I'll be following this when i get to bodywork on mine. They say rust spreads 3 inches in every direction from behind from from where it pops through on the front side.
Van sold April 2009 -->

Image Image

Current Mods:

Diamond-Cut Headlights.......................Clear Corners.....
Gloss Black Wheels......P235/70-15 Firehawk Indy 500 tires
Pioneer CD/MP3 Player.....800W Legacy Amp.....Two 10" Sonys
Dynomax Super Turbo......SunPro Tach......GMC Truck Badged
Heated/Cooled Center Console......750 Watt Inverter with Custom 120V outlet

Rebel
I plan to be buried in my van
Posts: 2009
Joined: Thu Sep 14, 2006 7:24 am
Location: Evergreen, Al. 96 mile marker, where life is slow and there are no rules.

Re: Rust Repair and Repaint

Post by Rebel »

Your 6th pic is the one I was asking about but I see now that it's a front fender and not rear quarter.
Again,,real nice work.
89 Astro, 350 V-8, Shaved doors, Filled Slider, Corvette IRS, 94 Mustang GT Rack & Pinion(Thanks to Skip), Cad Tail lights from SoCalliV8 ( RIP) Miss you my friend.

VIDEO

Image


If you drive illegally, they take your driver's license. If you're here illegally, they want to give you one :)


Image


If guns kill people, do pencils misspell words

blacknome
I sleep in my van
Posts: 269
Joined: Mon Jun 18, 2007 12:58 pm

Re: Rust Repair and Repaint

Post by blacknome »

good job. This post reminds me how much I hate bodywork.

Grind the area cut paste and weld then clean the shop

Apply bondo, dry, sand then clean the shop

Wipe down the area and prime.

Touch up the low areas with spot putty, dry, sand then clean the shop

Prime, dry, block sand clean the shop

Then you paint and it wrinkles and fisheyes, uggghh !!!!!
User avatar

crash
ASV Supporter
ASV Supporter
Posts: 1289
Joined: Thu Sep 21, 2006 11:18 am
Location: Woodstock, Ontario

Re: Rust Repair and Repaint

Post by crash »

great step by step!!

I totally understand your reasoning for doing these 'touchups' ... but man.. you are so lucky to not have the salt on the roads that we have in Ontario.. :cry: a newer vehicle looks like yours started only a year or two after being new.. LOL
Rob Image

current rides:
04 Mazda 6 V6 5spd

vans owned: Image
97 Astro AWD (selling by summer .. i think) SOLD
99 Astro LS Sept 08 ASV VOM
94 Astro LT
93 Astro LT
96 Astro LT AWD * parts van*
Post Reply