Homebrew Con-Ferr Style Porthole Roof Rack Build

FROM BUFFING YOUR PAINT, TO REPLACING CRINKLED FENDERS TO SWAPPING A NEWER FRONT END ON, TO SHAVING DOOR HANDLES. TO REPLACING DOOR HANDLES OR INSTALLING CUSTOM TAIL LIGHTS, POST THEM HERE.

Topic author
97CargoCrawler
I sleep in my van
Posts: 754
Joined: Thu Jan 24, 2008 11:50 pm
Location: Near Los Angeles, CA
Contact:

Re: Homebrew Con-Ferr Style Porthole Roof Rack Build

Post by 97CargoCrawler »

One full ring is welded up now. I stared with two short test rails to see if I could weld them end to end without burning through and have them come out perfectly straight.

I used my handy $5 square to align and clamp the two pieces:

Image

Then I blasted them with the welder:

Image

I then ground the weld beads down with a 4" angle grinder and polished it smooth with a sandpaper disc on the end of my drill:

Image

Nice and straight:

Image

The setup was a PITA with the larger pieces:

Image

Same procedure:

Image

Image

Image

Image

Image

Image

Image

Image

It came out much straighter than I thought it would. Nearly perfect. Tomorrow I will do the other half. After that's done I just need to weld in some cross braces on one then start with the corners and finish with the side plates. All of that should be pretty easy. I think I'm going to use shallow electrical strut channel for the bottom cross braces. It's strong due to the curled channel design and it will allow me to attach all sorts of goodies using strut nuts. I have used strut channel for a lot of other projects and it welds good and is super strong. Maybe a bit on the heavy side though.
1997 SAFARI 2WD CARGO
Image
"I do not think there is any thrill that can go through the human heart like that felt by the inventor as he sees some creation of the brain unfolding to success... Such emotions make a man forget food, sleep, friends, love, everything." Nikola Tesla

astroturf
ASV Supporter
ASV Supporter
Posts: 1658
Joined: Wed Sep 09, 2009 6:25 pm

Re: Homebrew Con-Ferr Style Porthole Roof Rack Build

Post by astroturf »

Lookin Good

Thanks for the update

Jim
User avatar

WoodButcher
ASV Supporter
ASV Supporter
Posts: 421
Joined: Wed Apr 06, 2011 7:01 pm
Location: Woodbury, CT.
Has thanked: 1 time
Been thanked: 18 times

Re: Homebrew Con-Ferr Style Porthole Roof Rack Build

Post by WoodButcher »

Image

Your gonna shoot your eye out kid!!! :muhaha:

Nice work.
'93 Safari shorty, 350 swap
'05 Astro AWD, lifted, 6 liter, cammed, ported and programmed for fast.
'93 cargo, work in progress

LiftedAWDAstro
I have my van tatooed on my cheeks
Posts: 4379
Joined: Sat Sep 09, 2006 3:35 pm
Location: New Haven, NY

Re: Homebrew Con-Ferr Style Porthole Roof Rack Build

Post by LiftedAWDAstro »

Looking good. I'm watching! What amazes me is how clean your steel is staying...so damp and cold here it rusts almost instantly! :muhaha:
Current rides:
2013 Toyota Tundra DC 4x4
2008 Dodge Nitro 4x4
2005 Nissan Sentra 1.8S Special Edition

Mileage spreadsheet

Vans owned:
1986 Safari 2.5L 4 speed manual - scrapped
1995 Astro 2WD conversion 4.11 posi, shift kit, DHC rock rails - sold to Skippy
1998 Astro 4x4 D44, D60, NP231, full hydraulic system with 9k# Milemarker winch and snow plow - sold to Lockdoc
2003 Astro AWD all stock - traded for a 3/4 ton truck
2005 AWD, 4.10's - sold to skippy
User avatar

Smiliesafari
ASV Supporter
ASV Supporter
Posts: 2667
Joined: Sat Dec 02, 2006 12:34 pm
Location: Orlando, FL

Re: Homebrew Con-Ferr Style Porthole Roof Rack Build

Post by Smiliesafari »

I'm watching also. Lookin' good so far. Ya gonna powdercoat it when you're done?
1996 Safari SLX Hotair balloon transport vehicle

Topic author
97CargoCrawler
I sleep in my van
Posts: 754
Joined: Thu Jan 24, 2008 11:50 pm
Location: Near Los Angeles, CA
Contact:

Re: Homebrew Con-Ferr Style Porthole Roof Rack Build

Post by 97CargoCrawler »

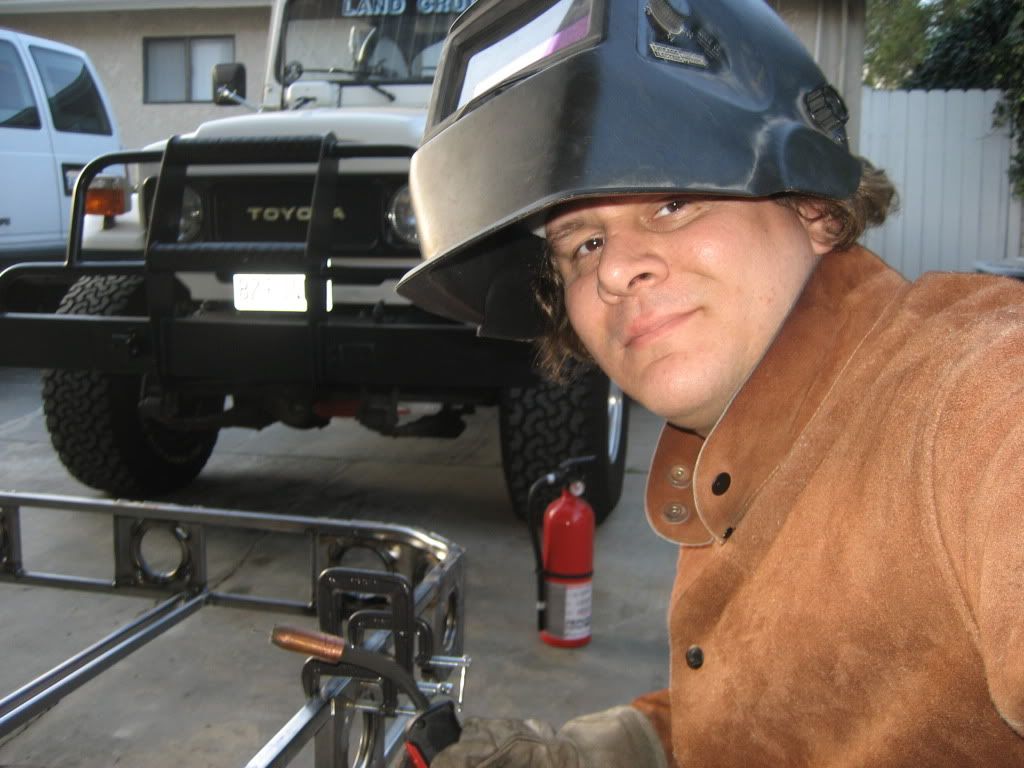
Thanks gentlemen, I appreciate the support.

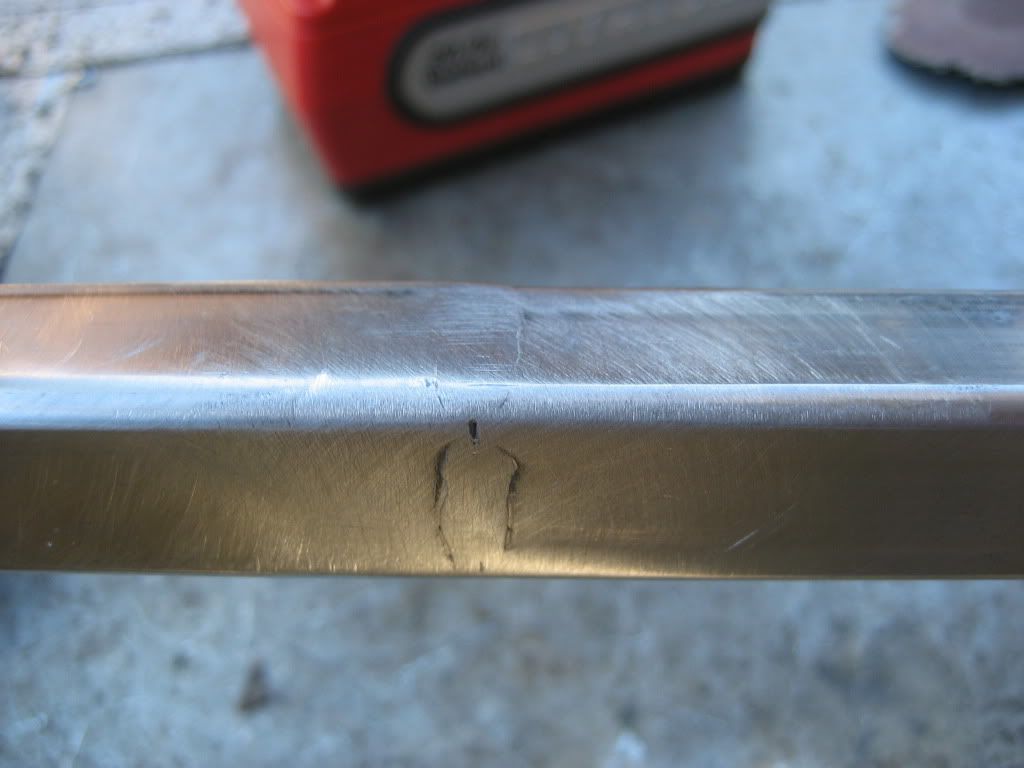
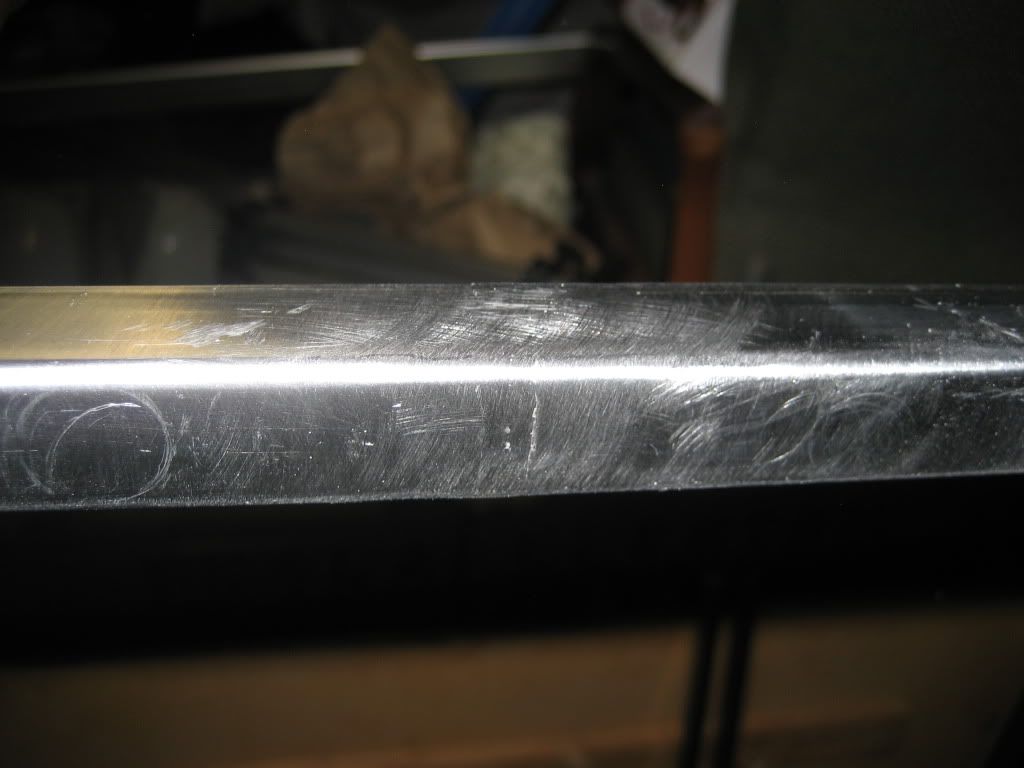
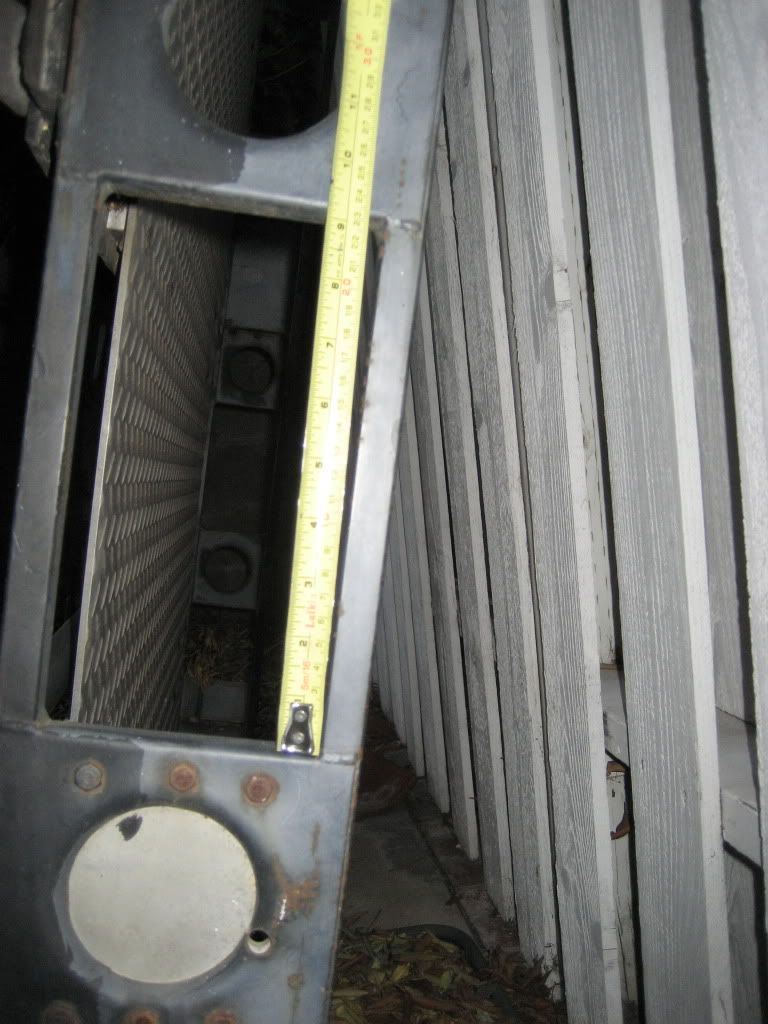
I bought "pickled" hot rolled steel. This stuff literally had oil pouring off of it as I loaded it into the van. Hence the lack of rust! I just wiped it a bit before I started welding. I will clean it with Dawn before I paint it.

I am going to primer it then paint it flat black, rattle can style. From experience with my original Con-Ferr rack anything besides flat paint chips off. Being so high off the ground makes for a lot of sliding of materials along the rails to get it up top. Scratching up an expensive powder coat job would sting and chipping off a semi-gloss or gloss coat would start to look pretty bad after a few touch ups because it's so thick. I find that a quick sand and spot spray with flat blends in pretty good. I paint all of the wear surfaces in my FJ40 with flat black so I can easily touch them up (center console, toolboxes, etc.).

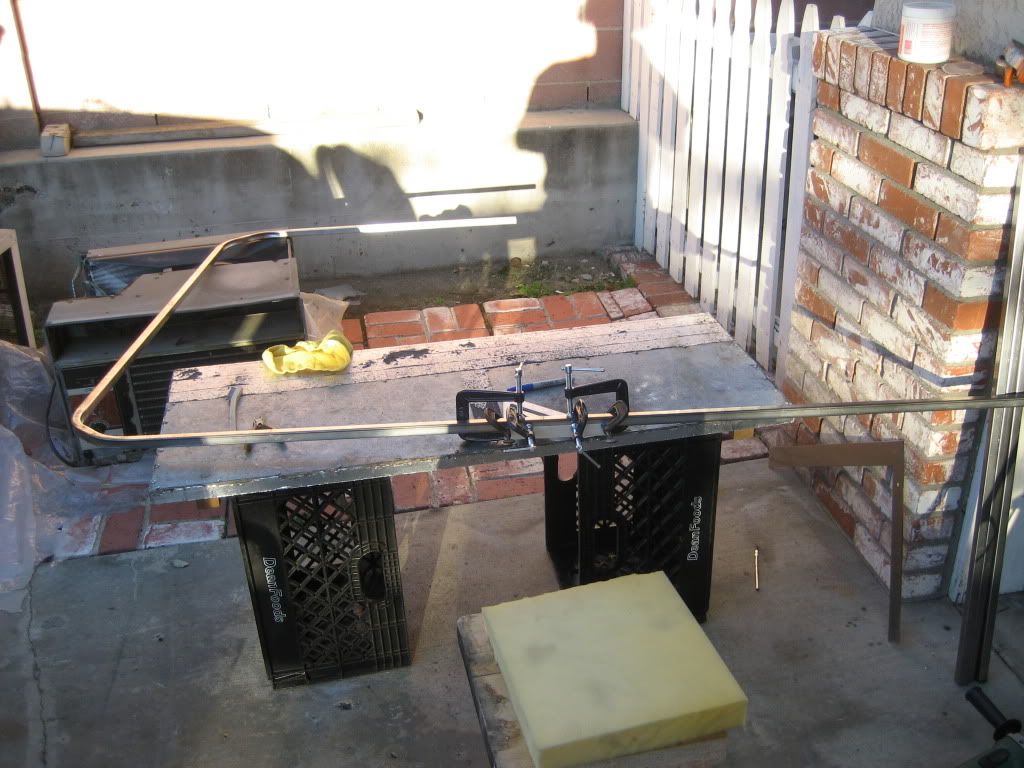
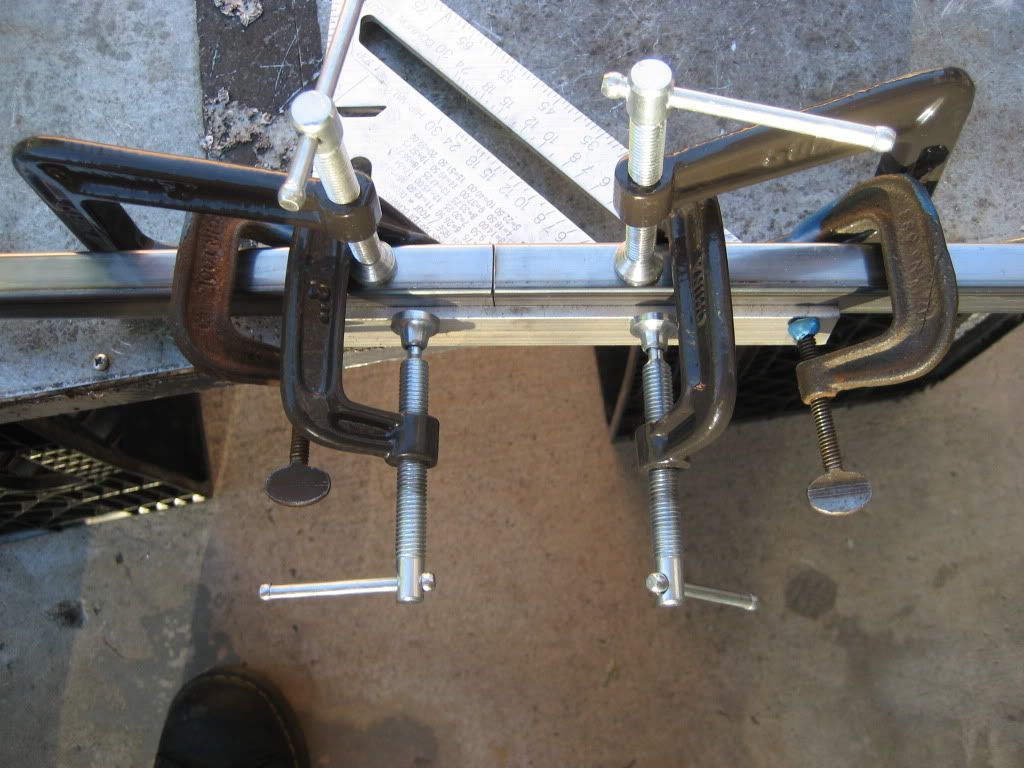
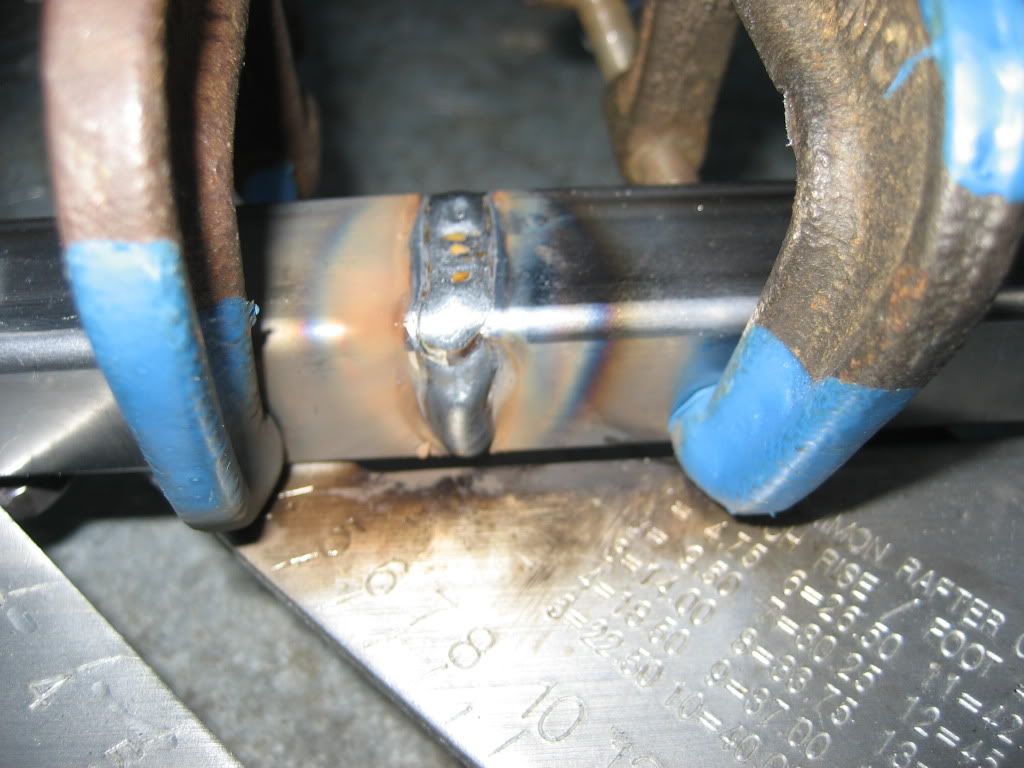
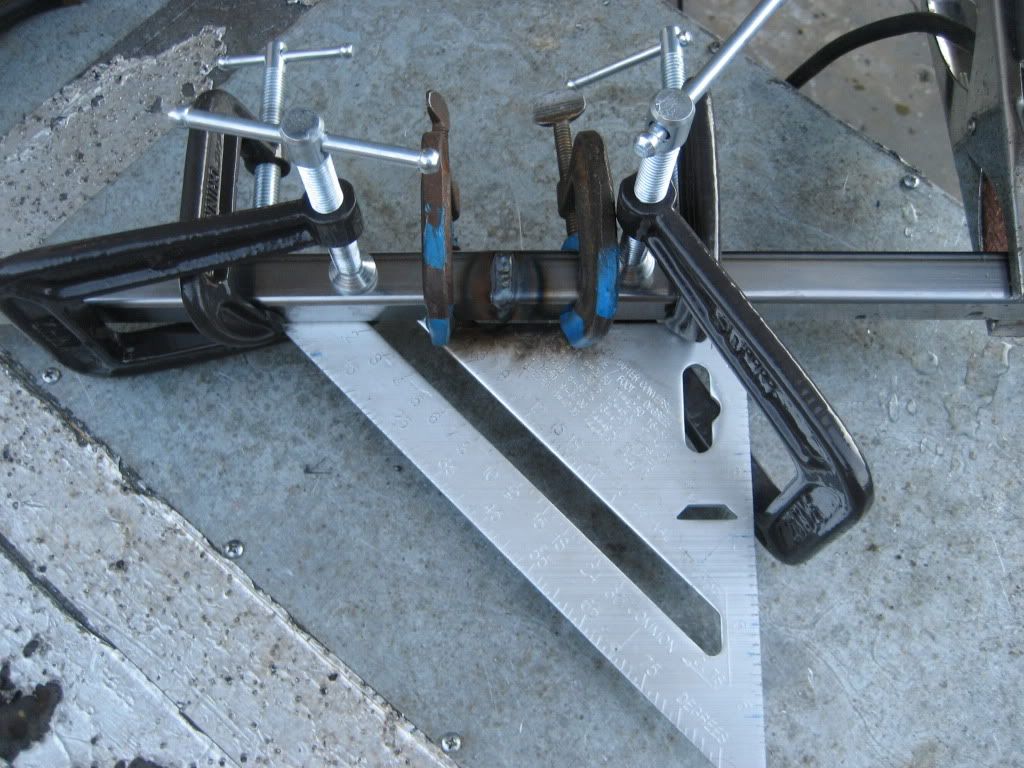
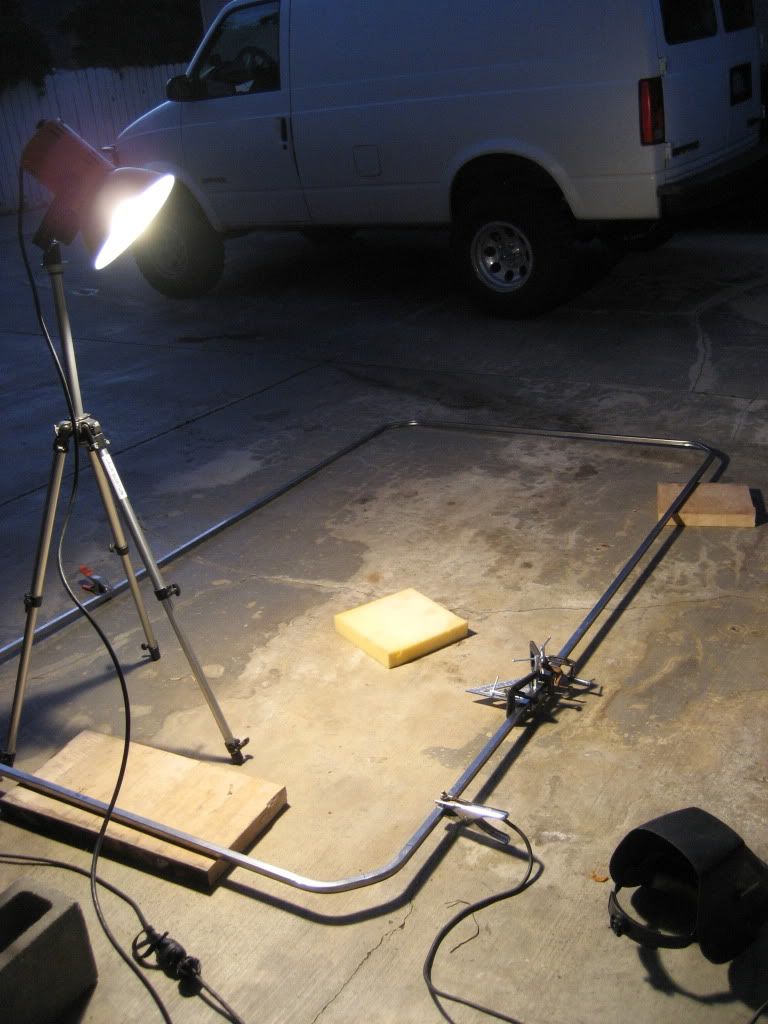
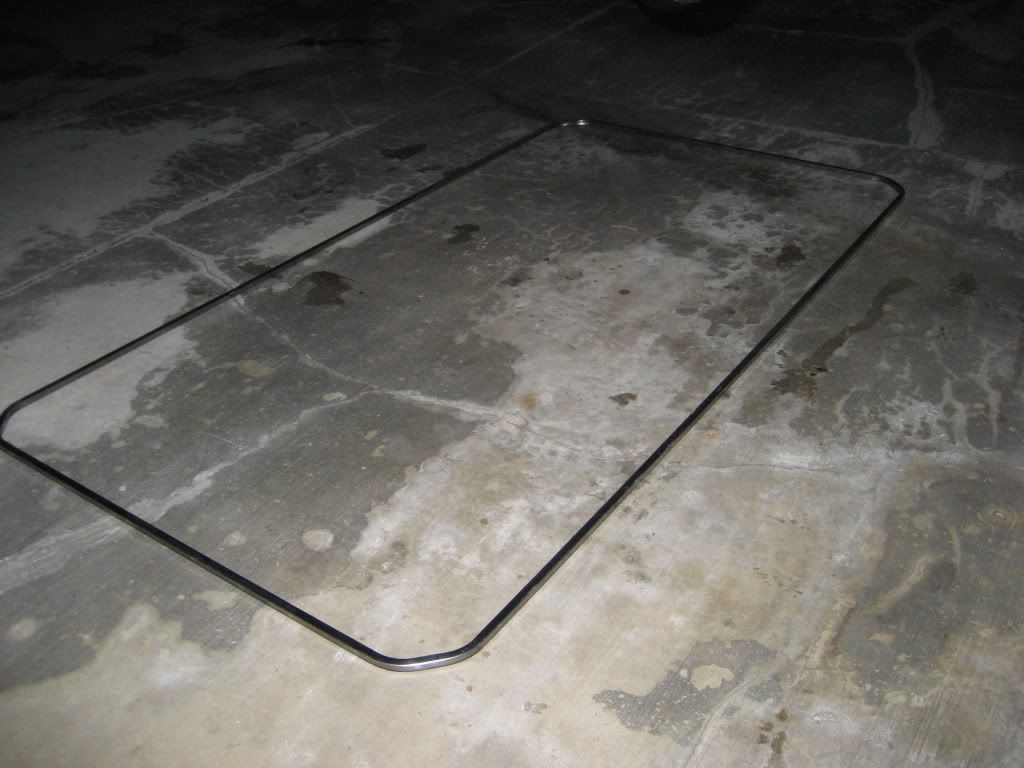
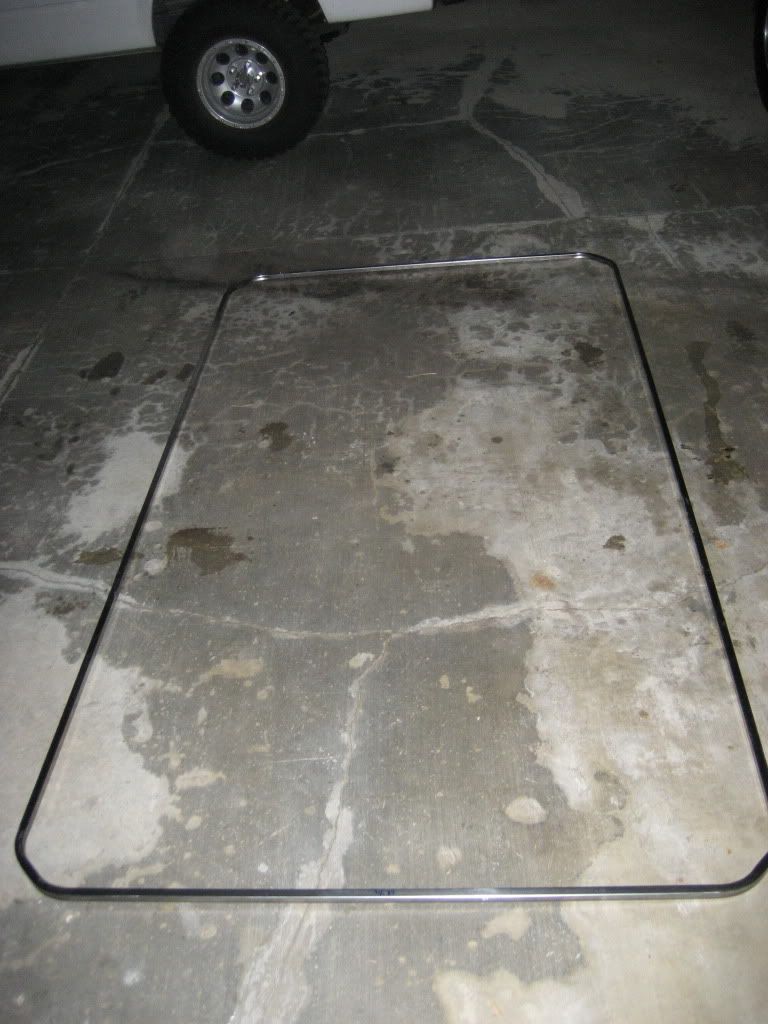
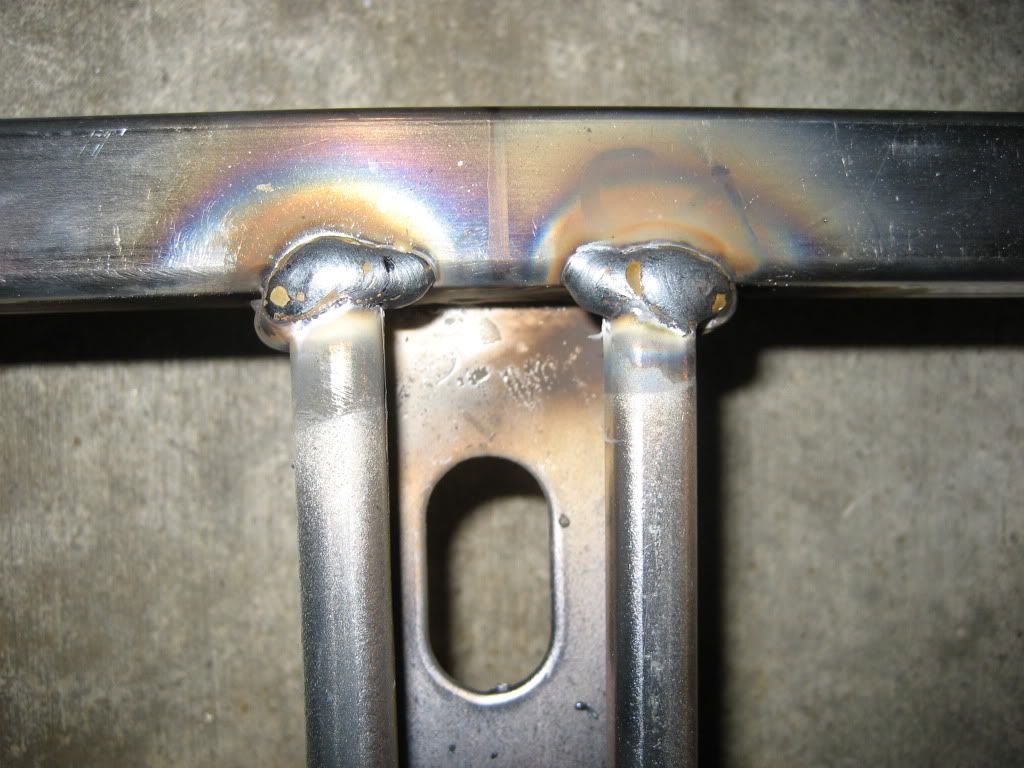
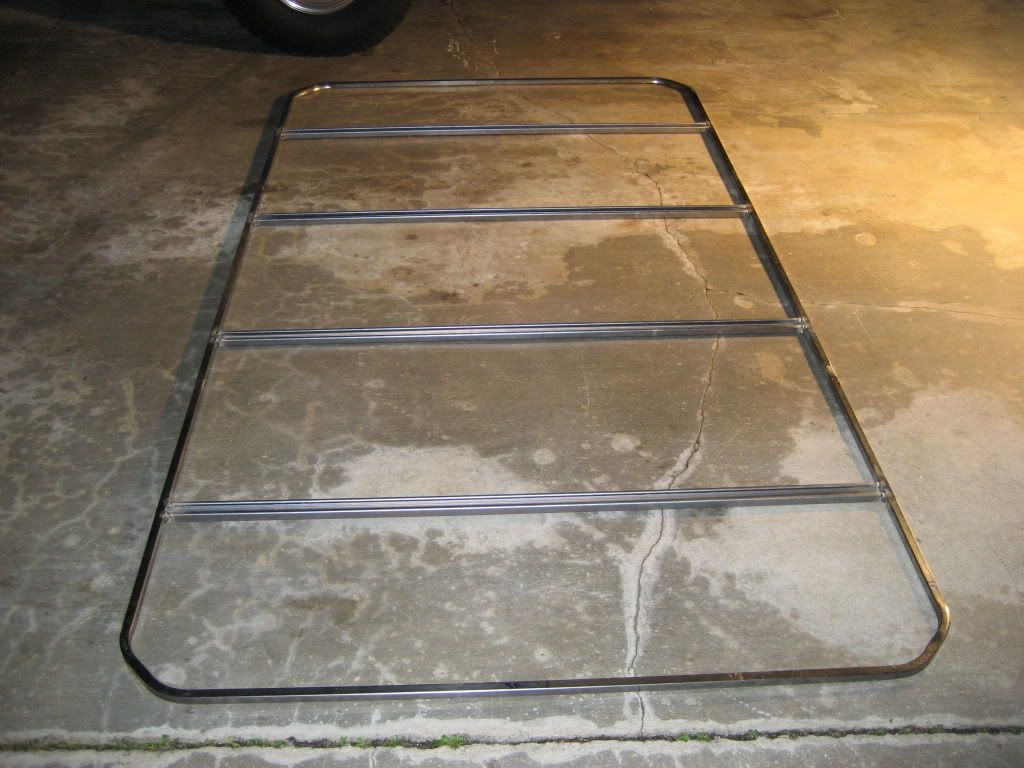
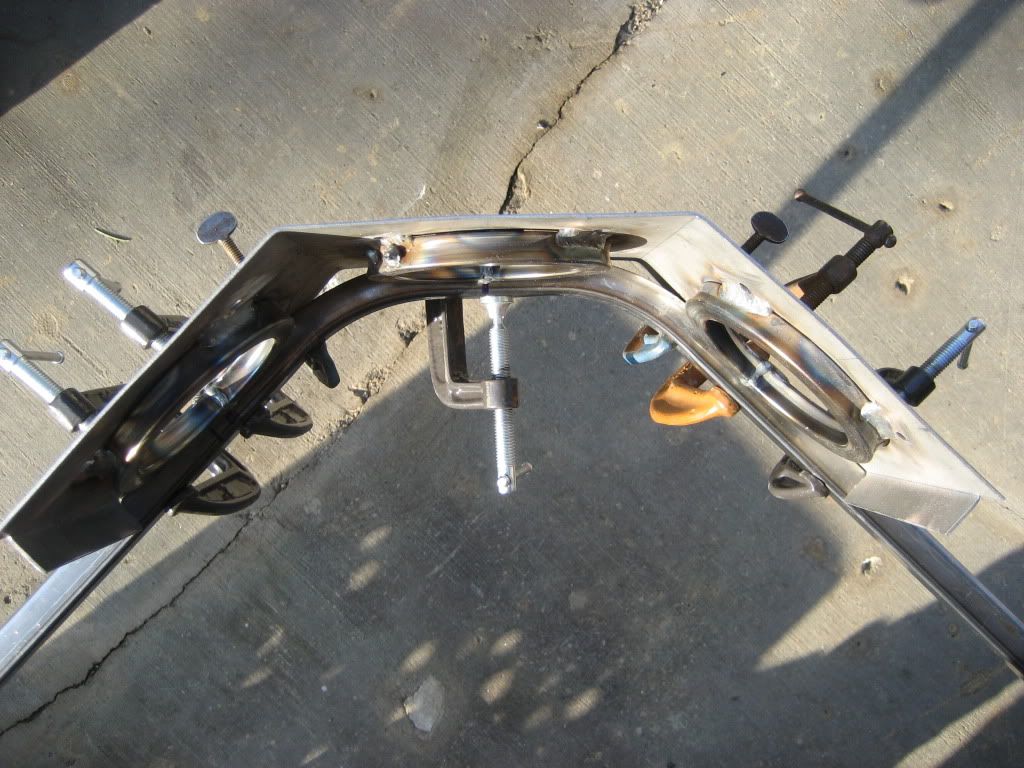
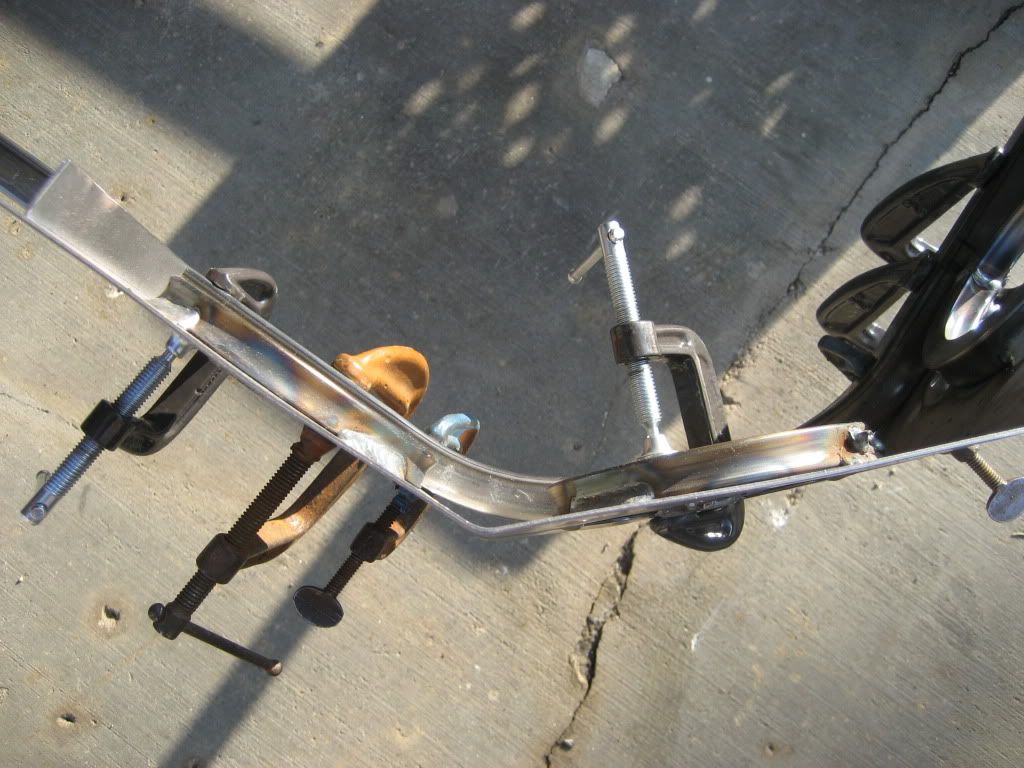
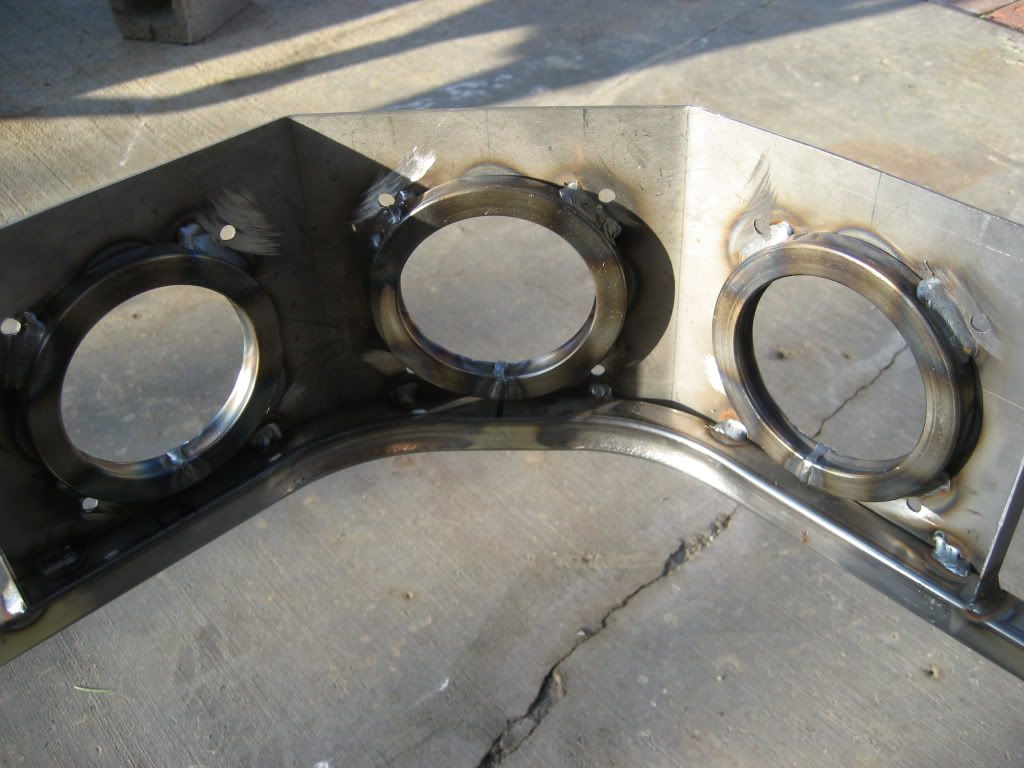
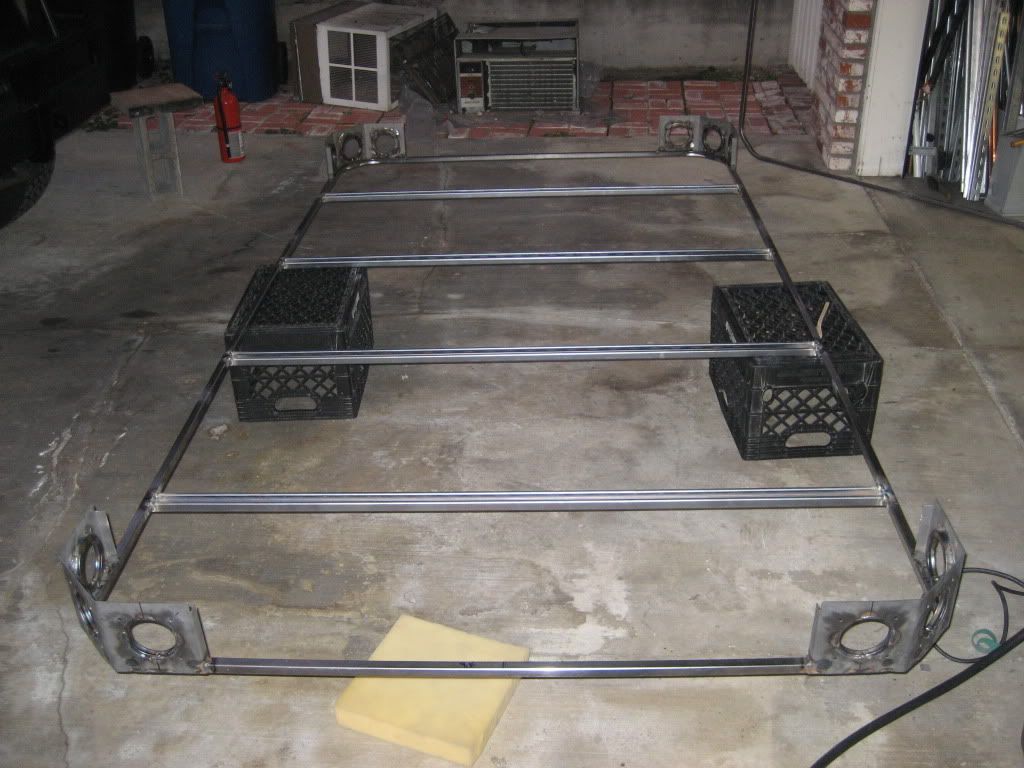
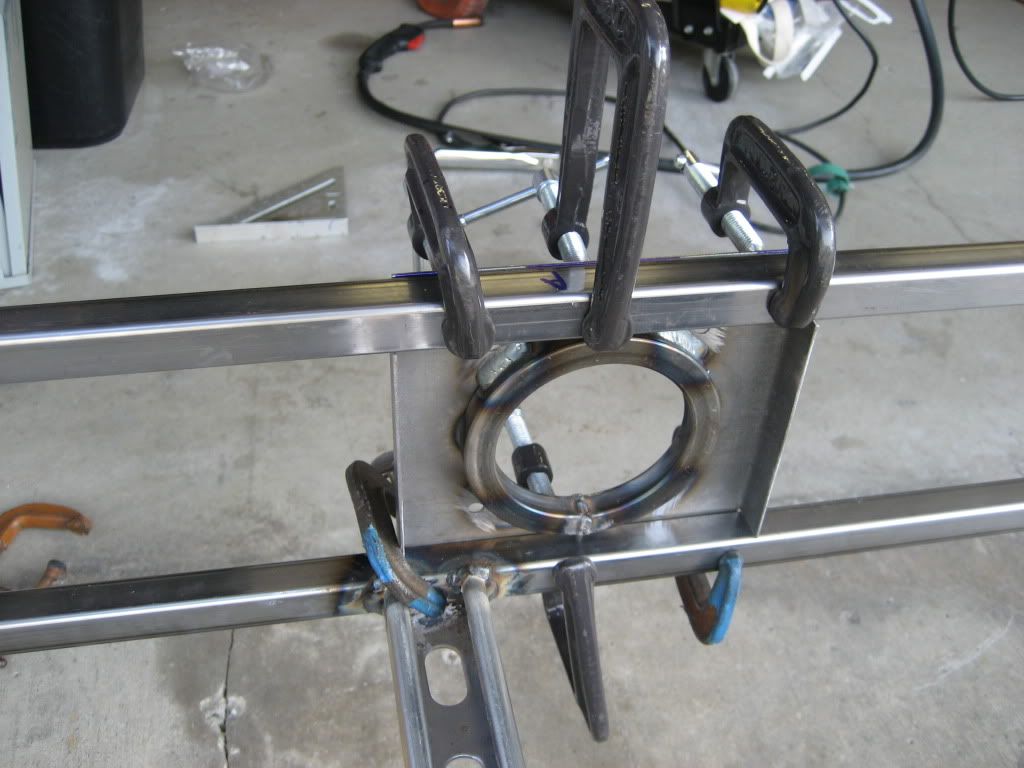
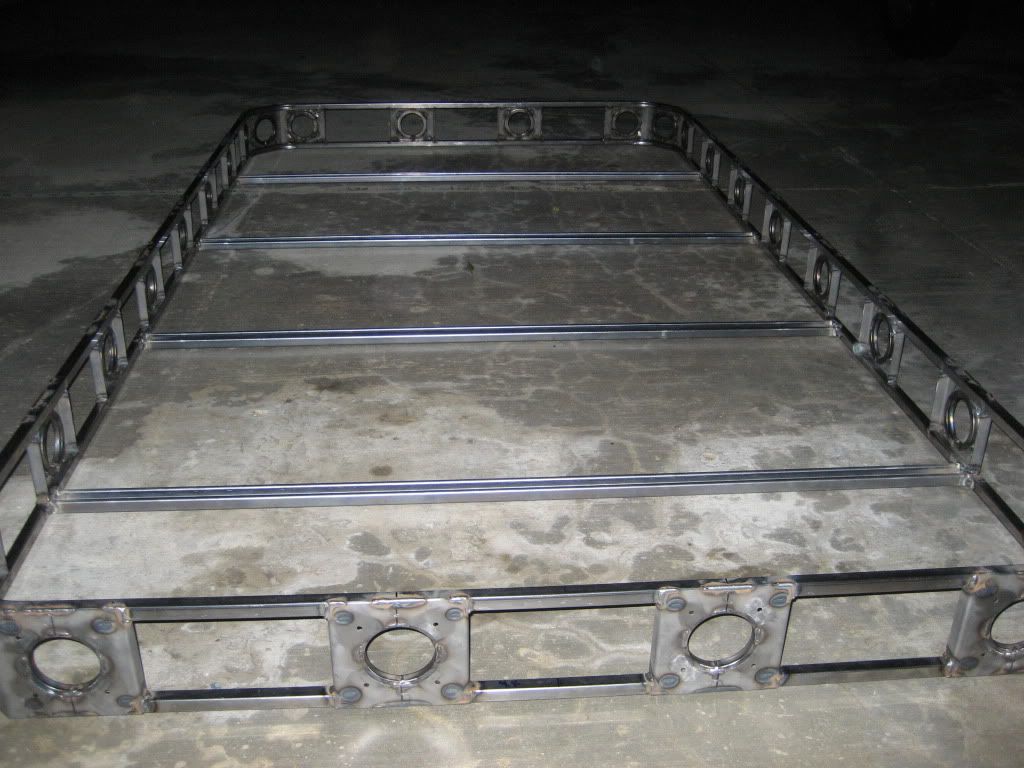
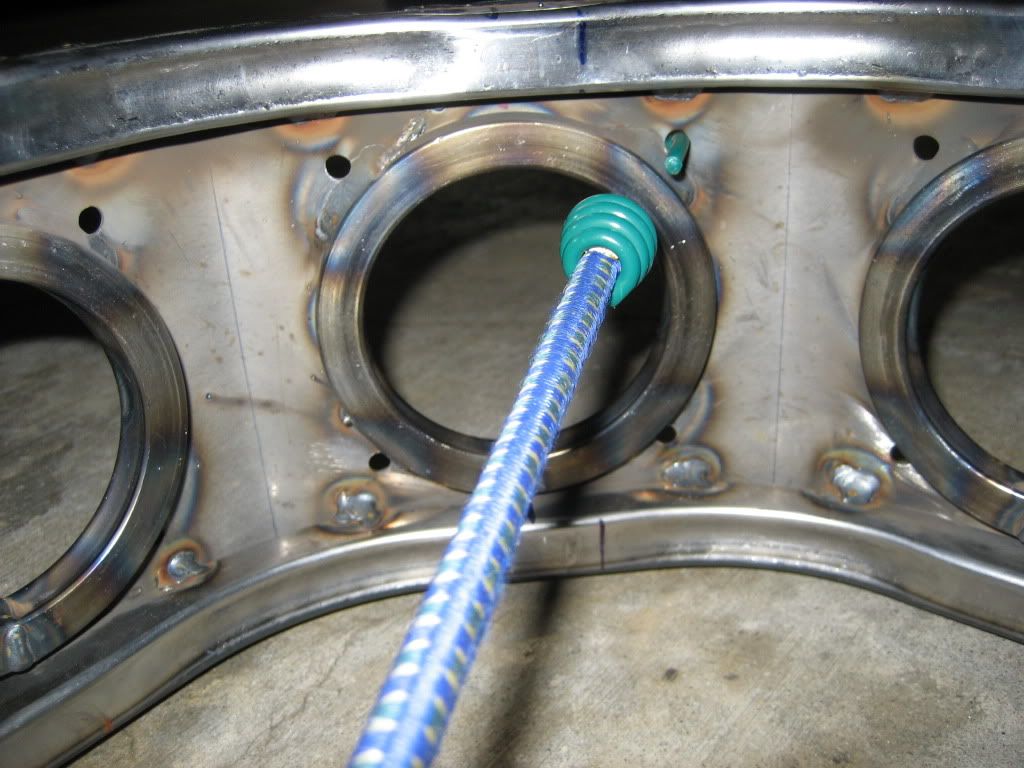
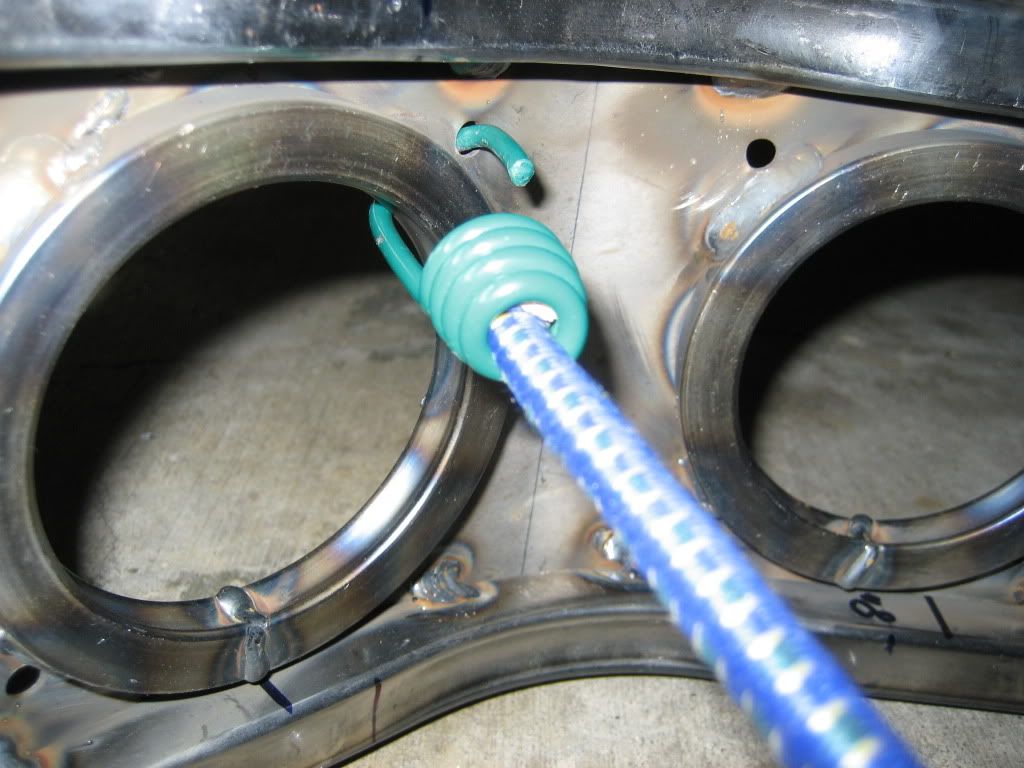
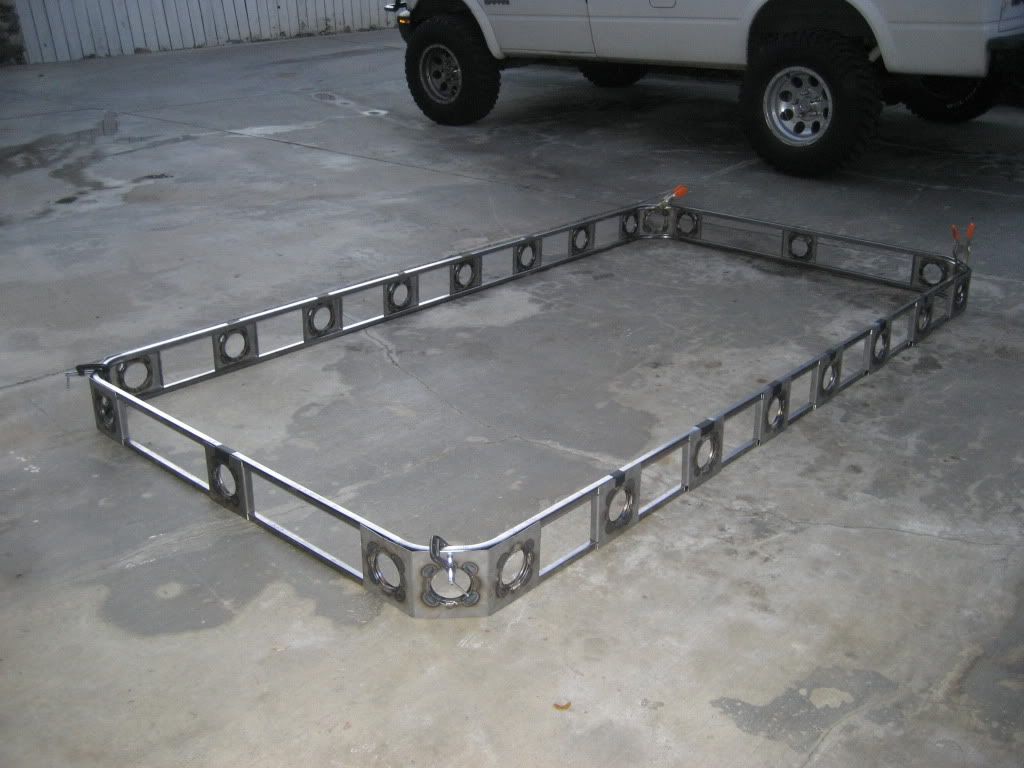
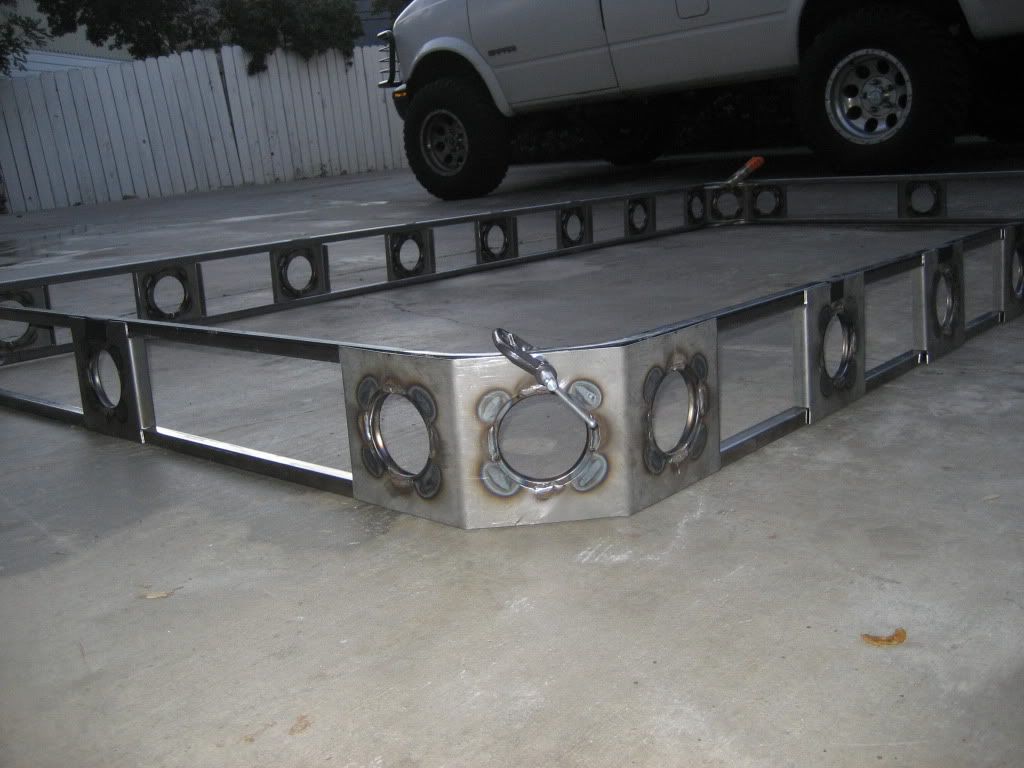
Tonight I finished welding the second ring. The next step is to drill the bungee cord holes in the porthole plates then weld in the strut channel on the bottom ring.

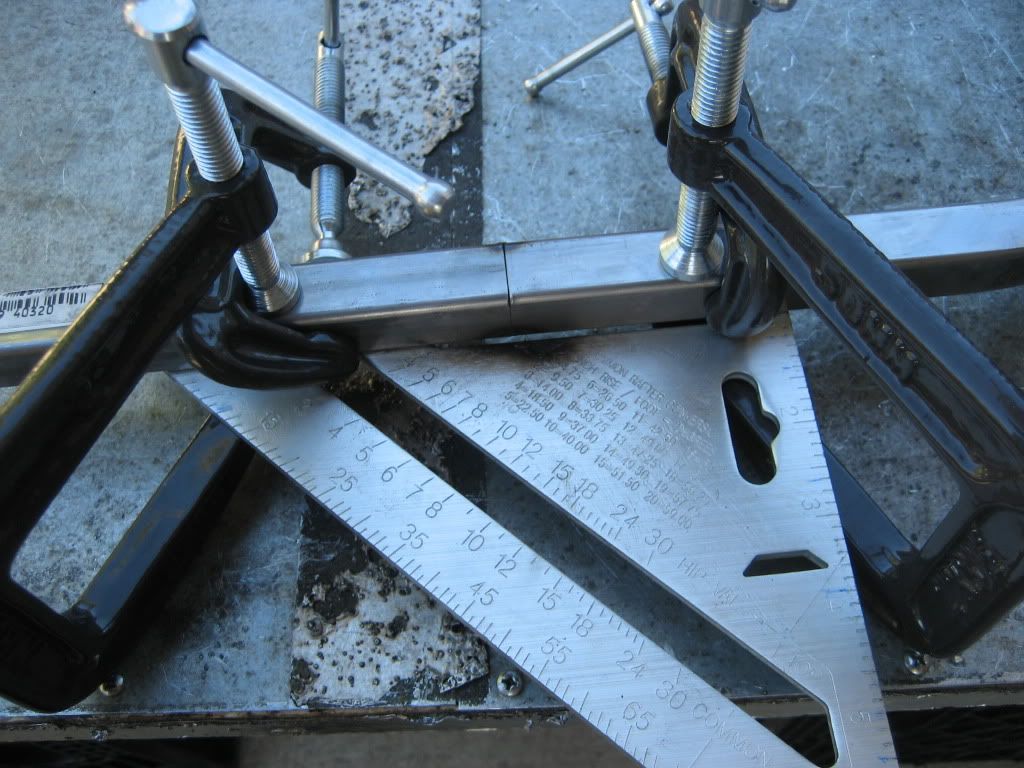
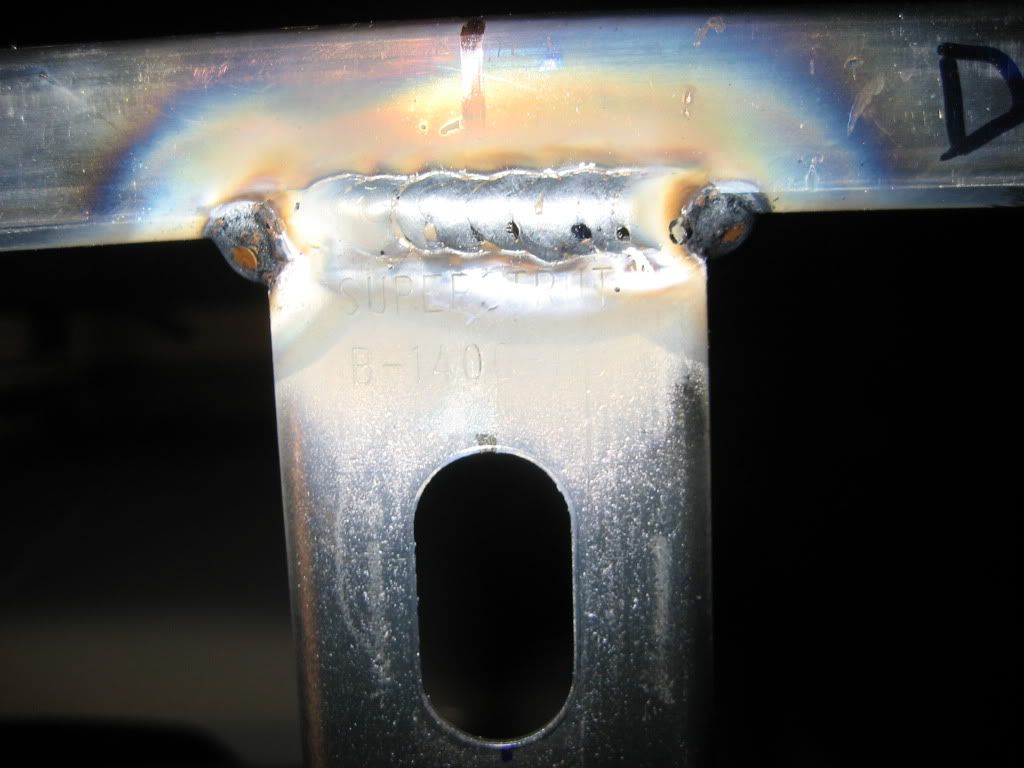
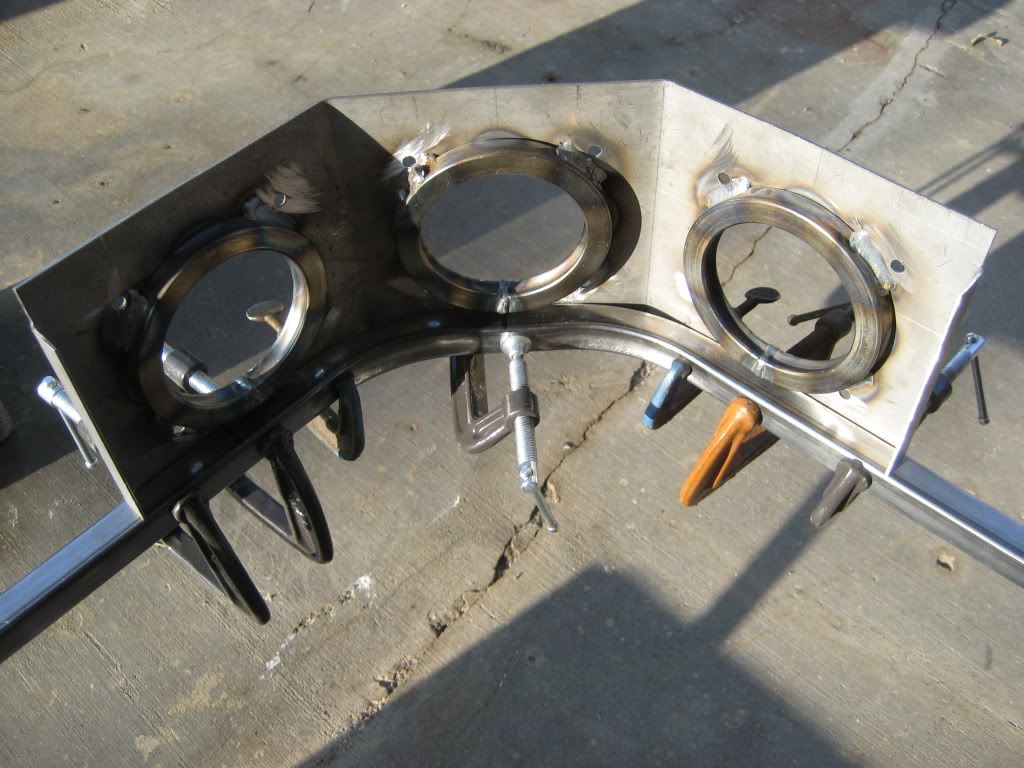
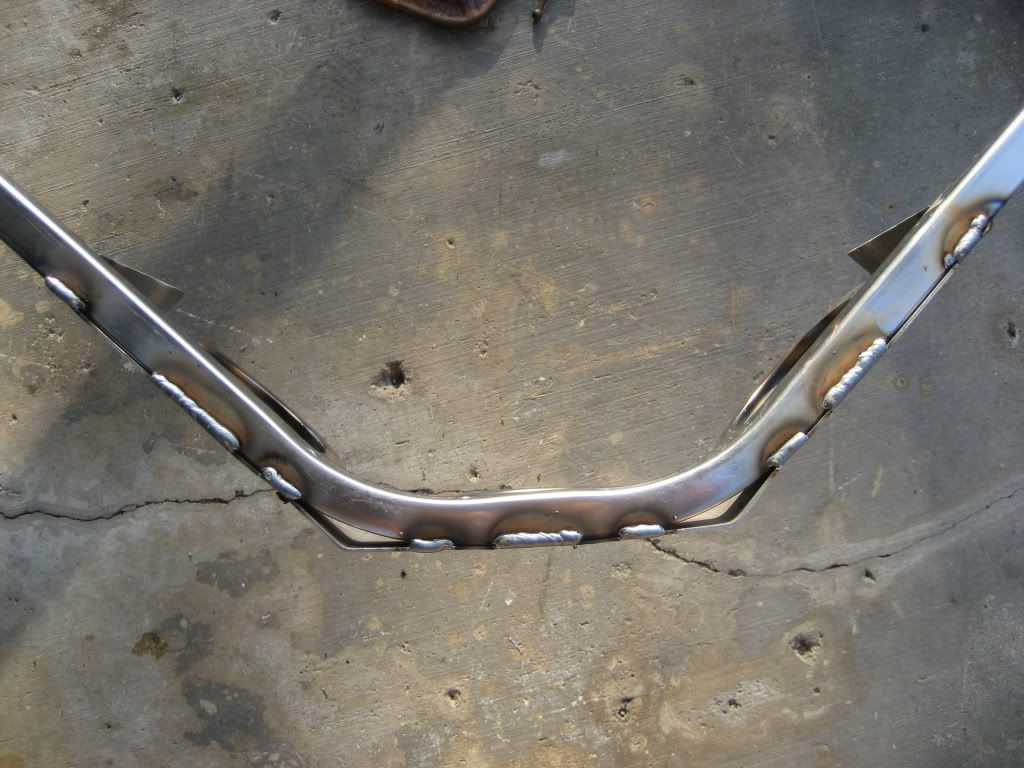
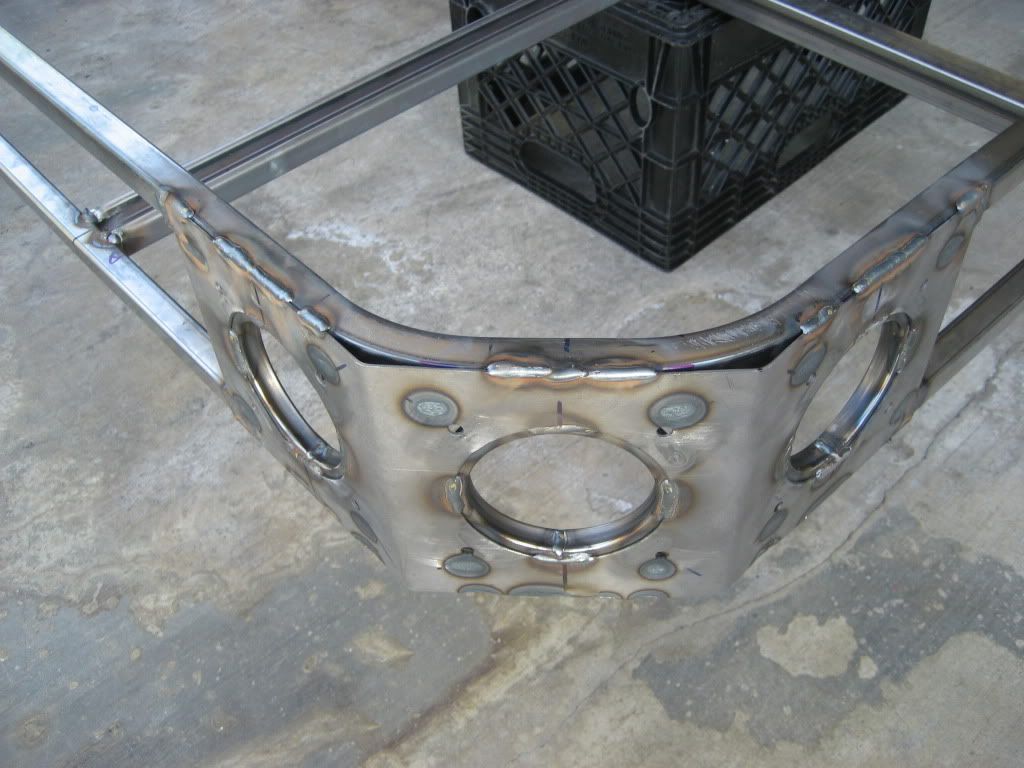
I want to stick as close to the Con-Ferr assembly method as possible. They welded their porthole plates straddling the tube butt welds. Obviously that helps secure the joint.

Image

They also separate their porthole plates by 9".....or at least they did on the rack I have for my FJ40.

Image

On my new rack, in order to straddle the butt joints with a porthole plate I need to have a 7.5" separation between the plates. Chalk that up to poor planning. I could have adjusted the lengths of the pipes to have 9" spacing if I had thought of it. I can't do anything about it now.

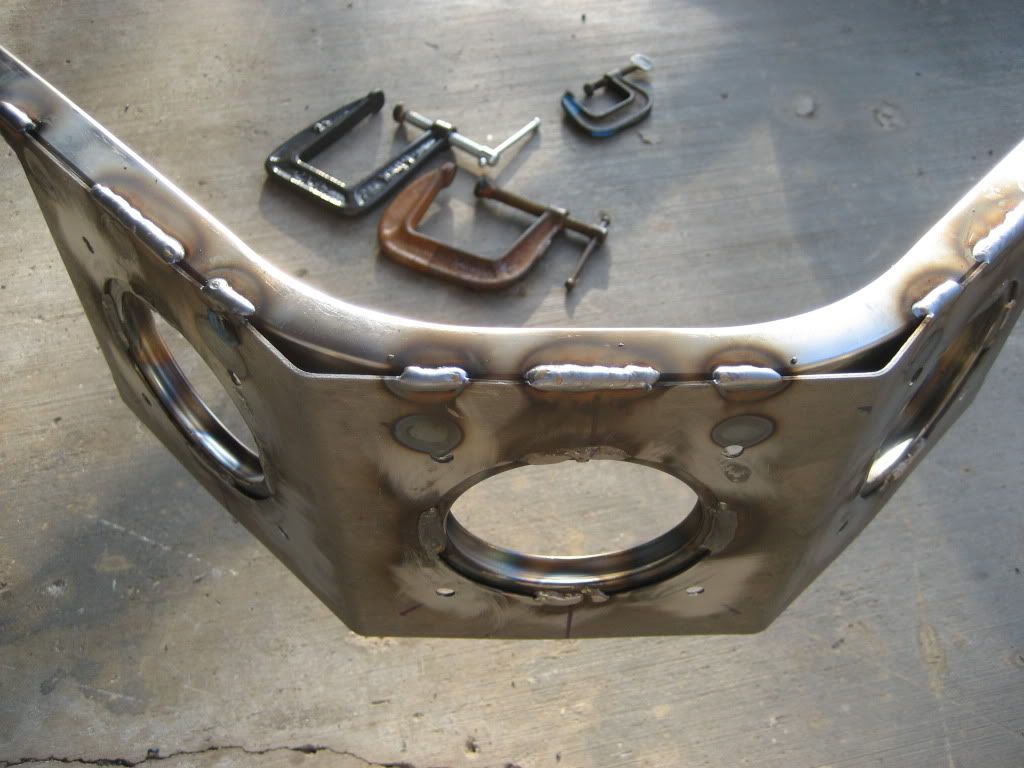
Since I like the equally spaced porthole look I'm sticking with 7.5" spacing on the sides of the rack. Not including the corners that makes 6 single porthole plates per side, then two more with the corners. I just need to decide whether or not I want one single porthole plate in the front and rear of the rack or two. One leaves a lot of airflow space while the other does not. I'm not sure I should be too concerned with airflow since I'm going to have 4 PIAA's across the front anyway, there will essentially be no airflow through the rack. This is why I need a fairing.

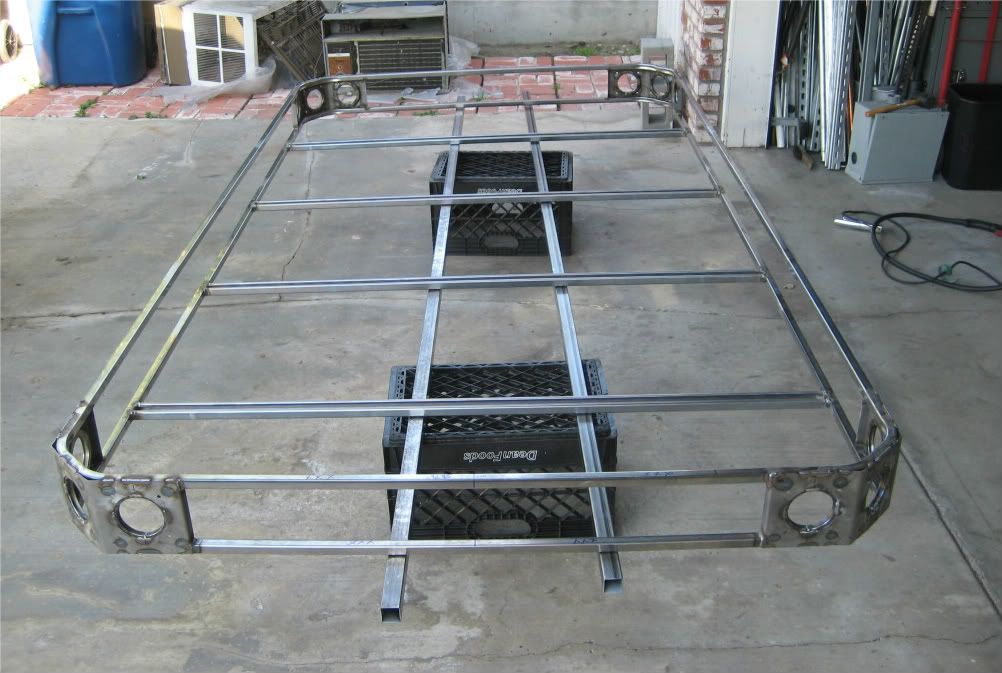
One single porthole in the center (my original Con-Ferr rack only has one in front):

Image

Image

Image

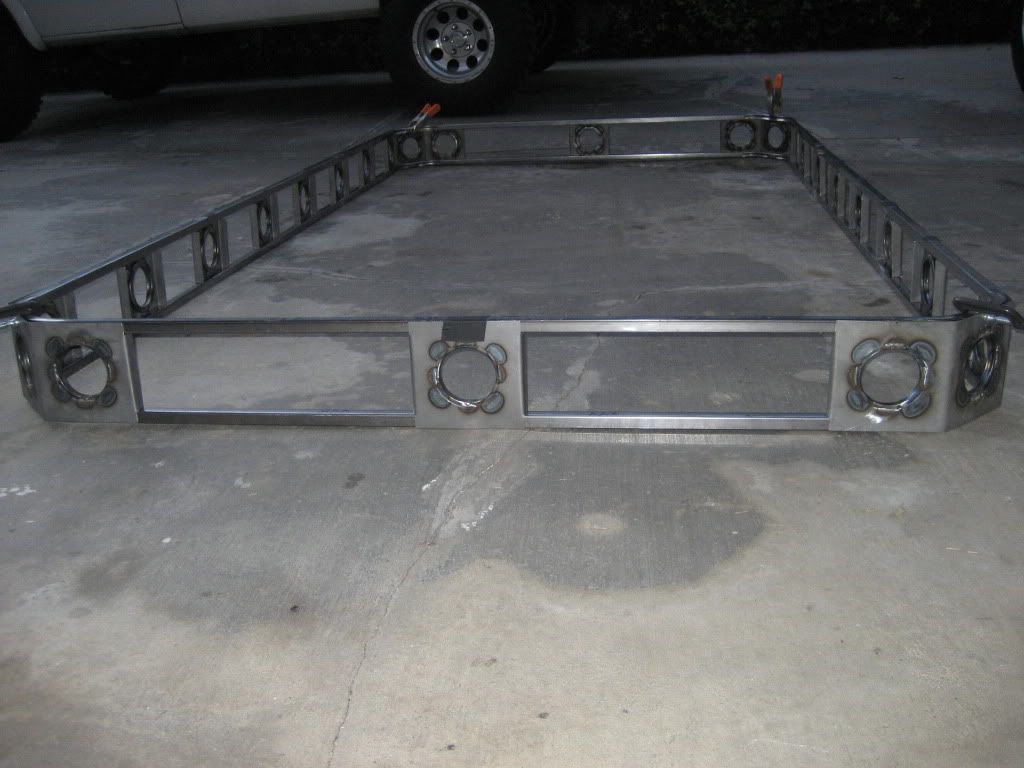
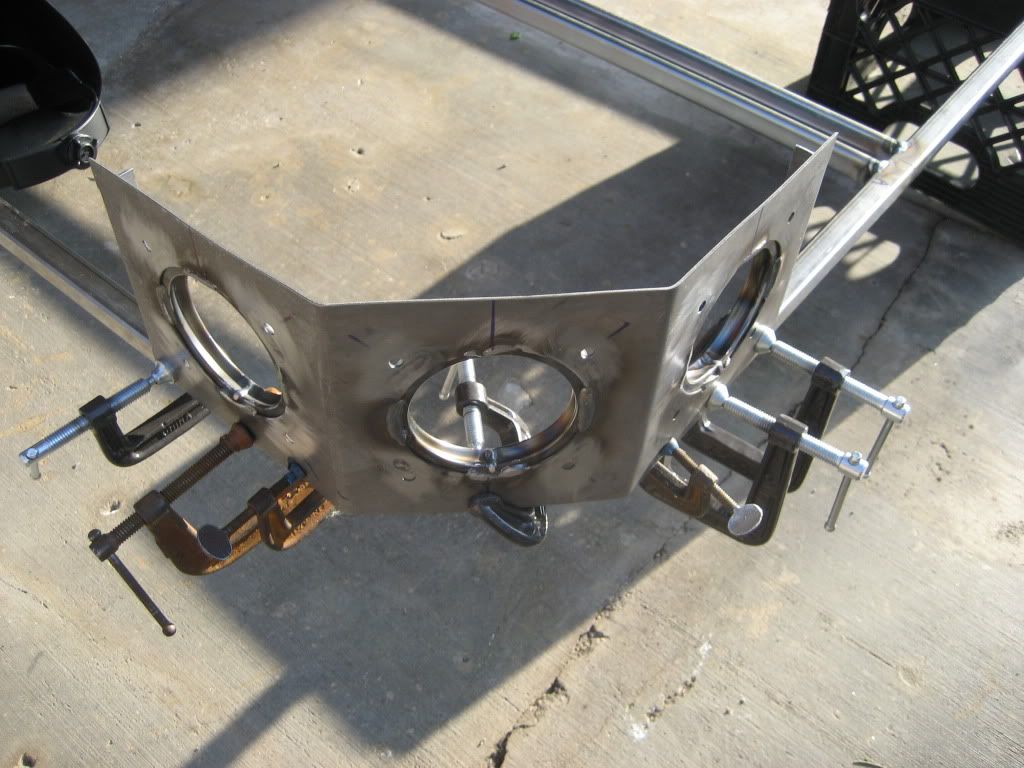
Two portholes in the center:

Image

Image

Image

Image

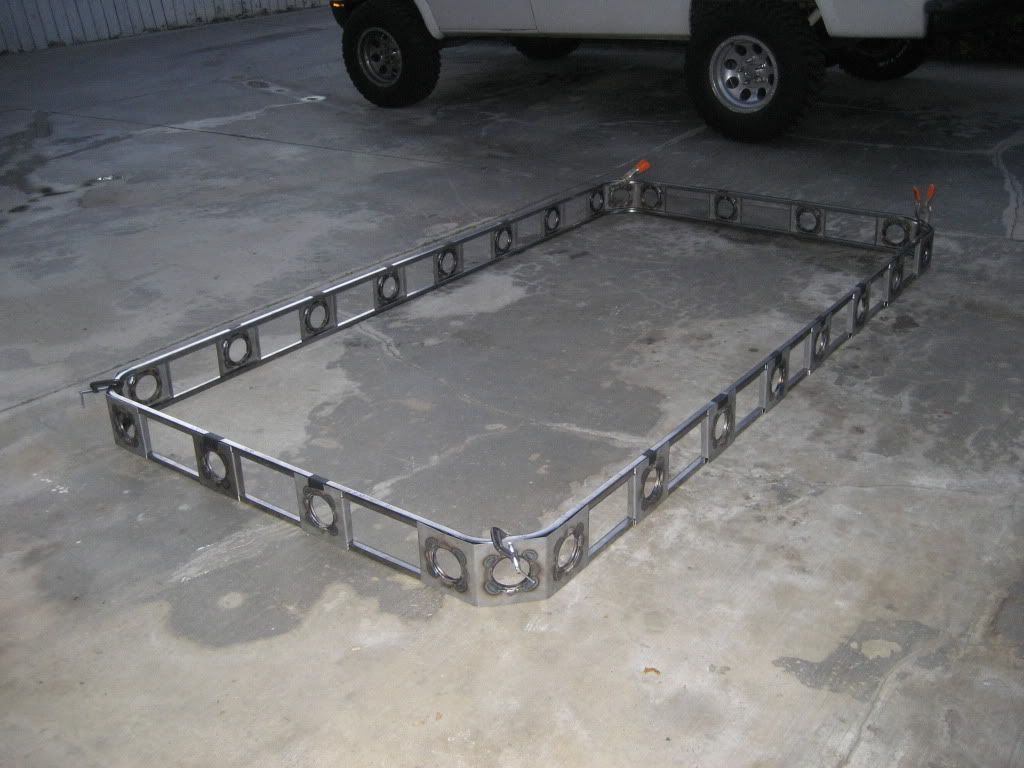
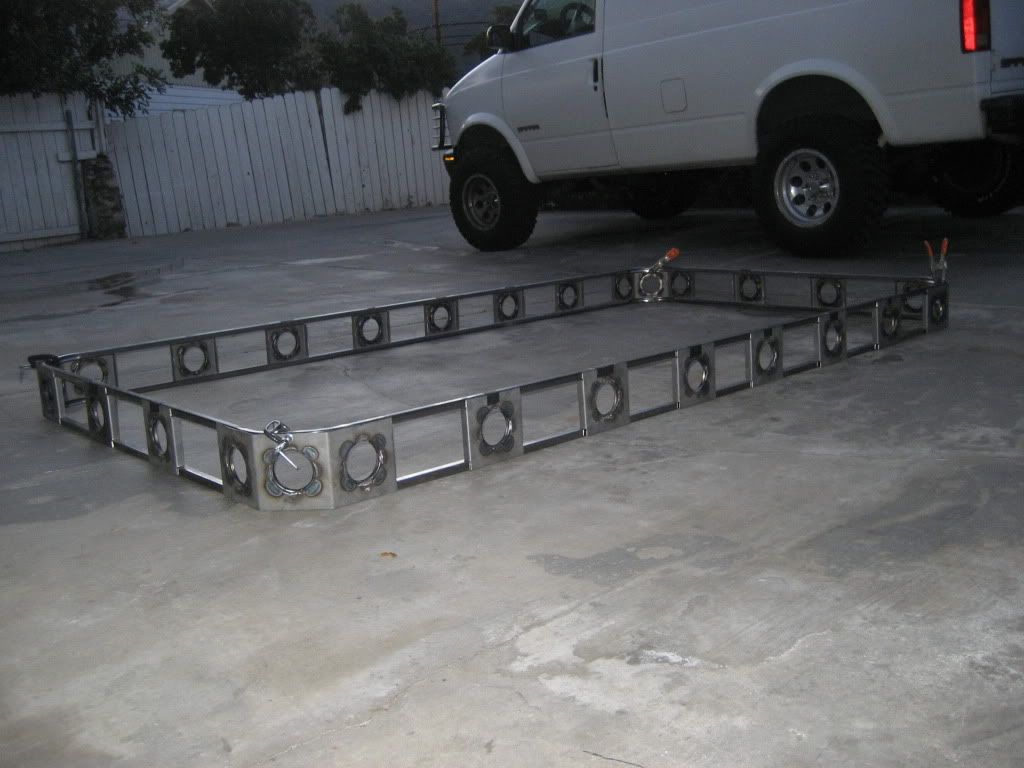
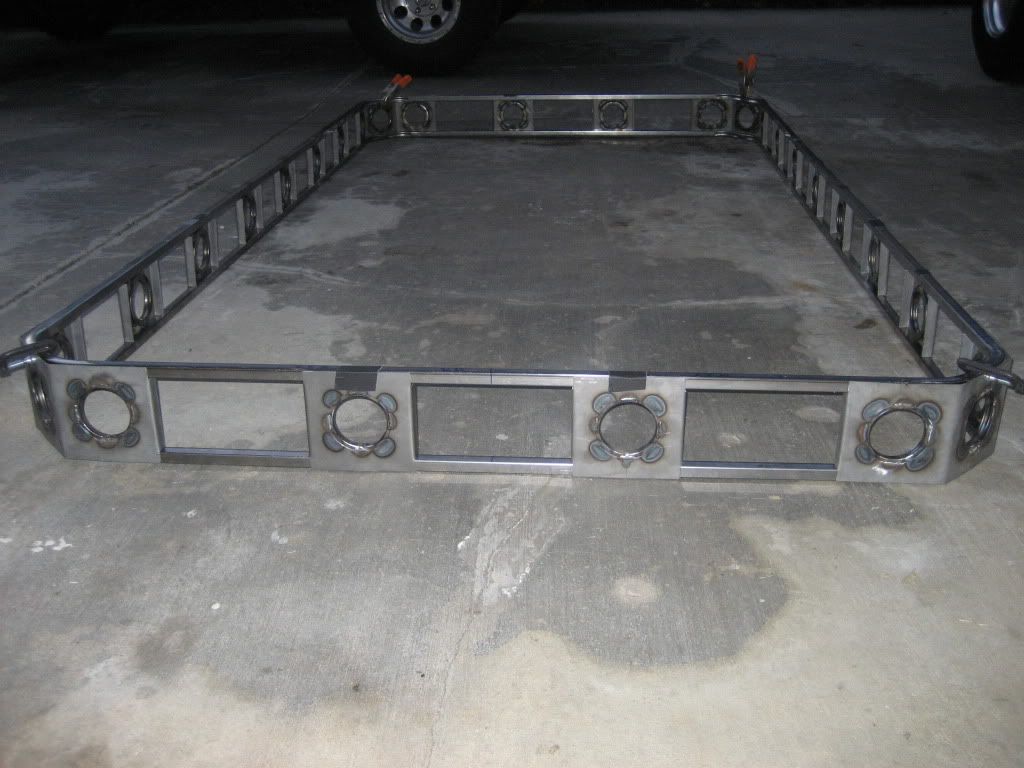
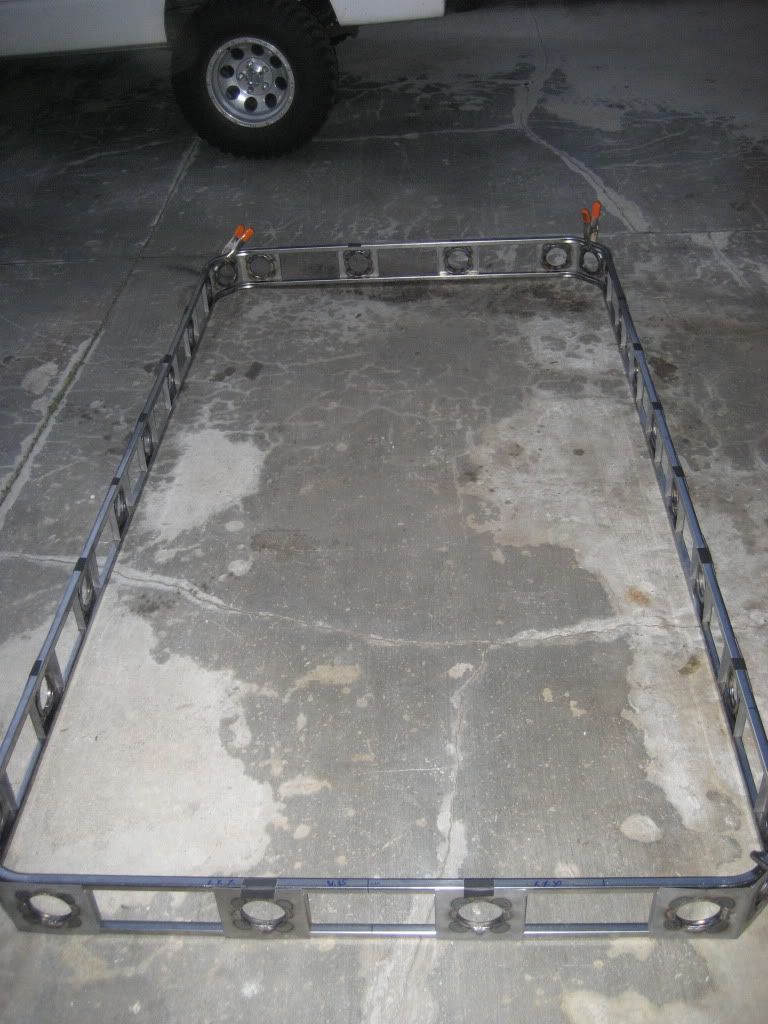
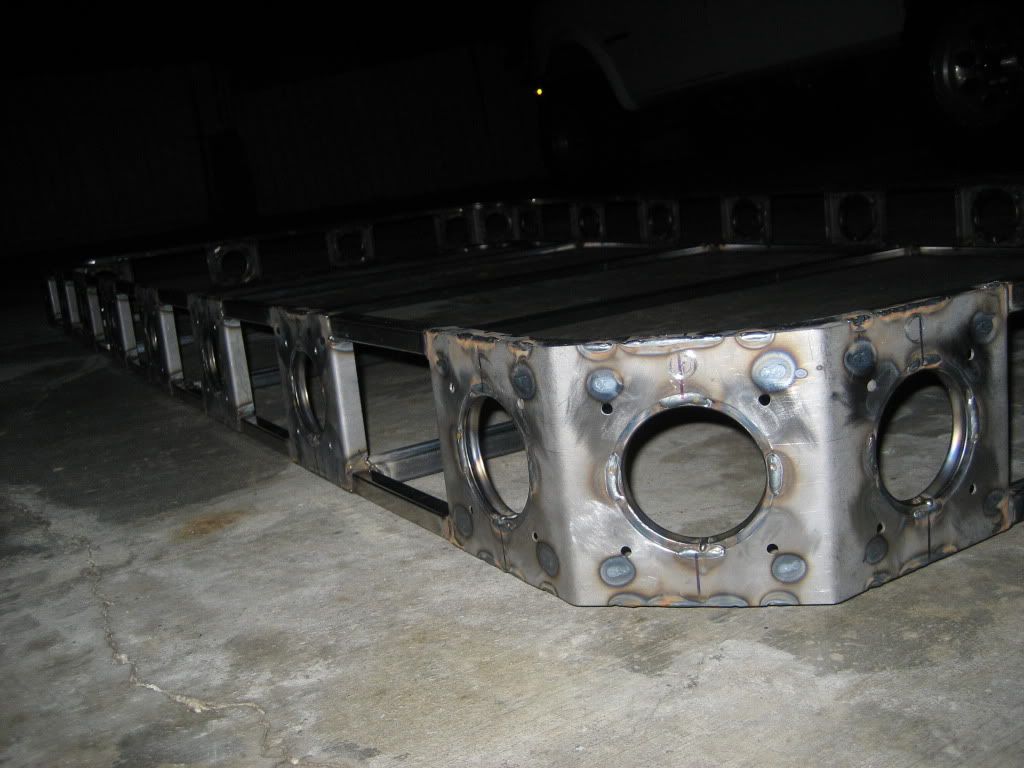
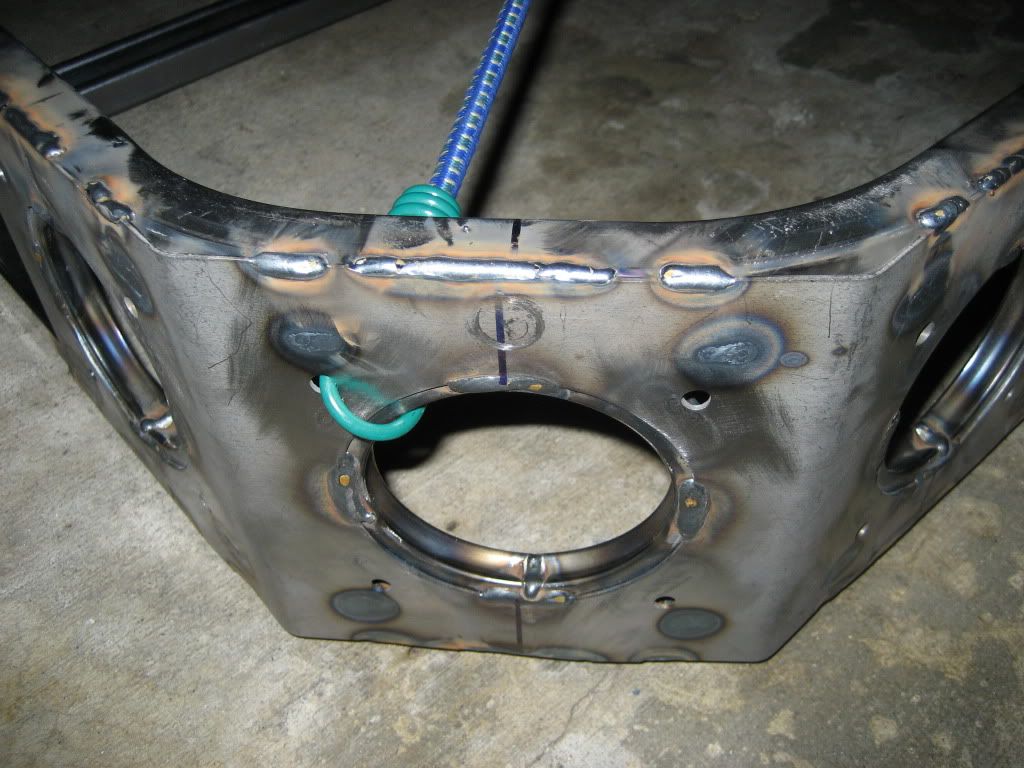
The single porthole design leaves the possibility of the rails getting dented on either side of it. The double porthole virtually eliminates that possibility and gives the rack an overall indestructable look. I live in earthquake country...you never know when you might need to remove your rack and use it to cross a large fissure in the ground! I think I'm leaning towards the double porthole. I made 17 individual porthole plates, the rack will use 16 in this case (not including the corners).

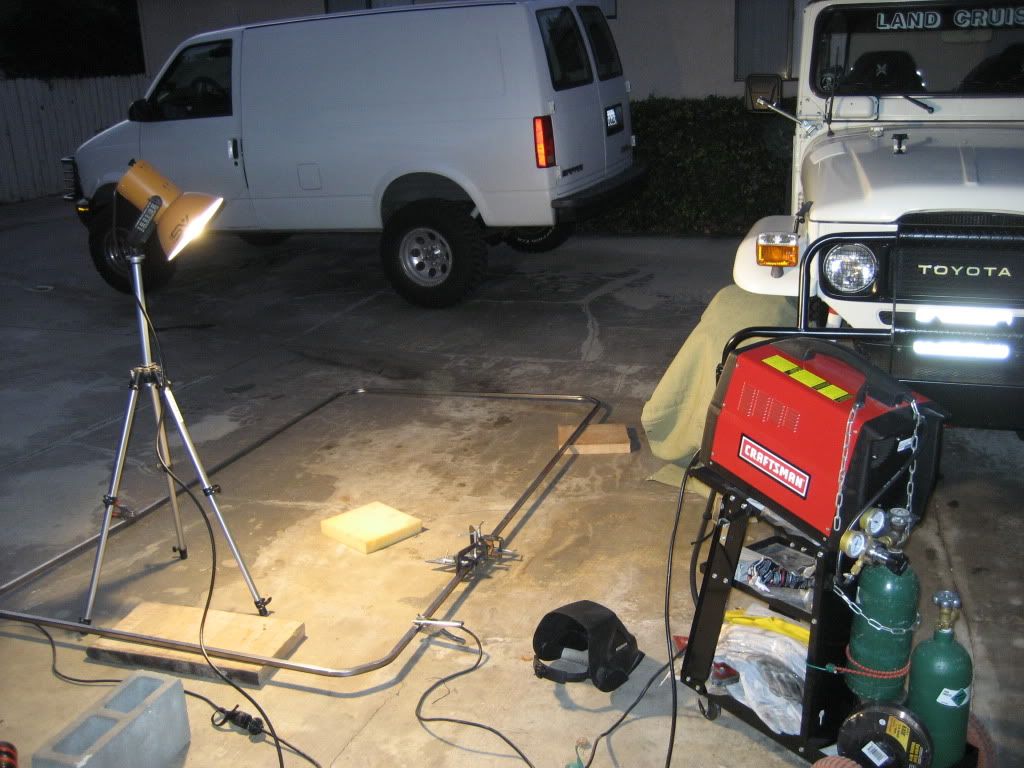
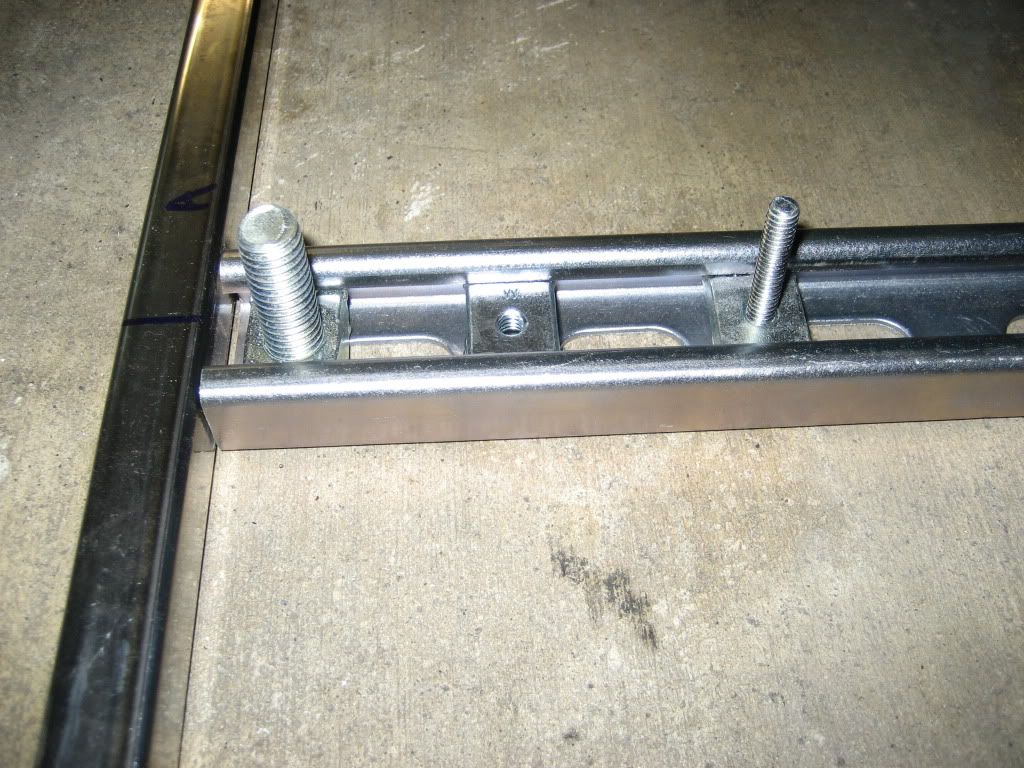
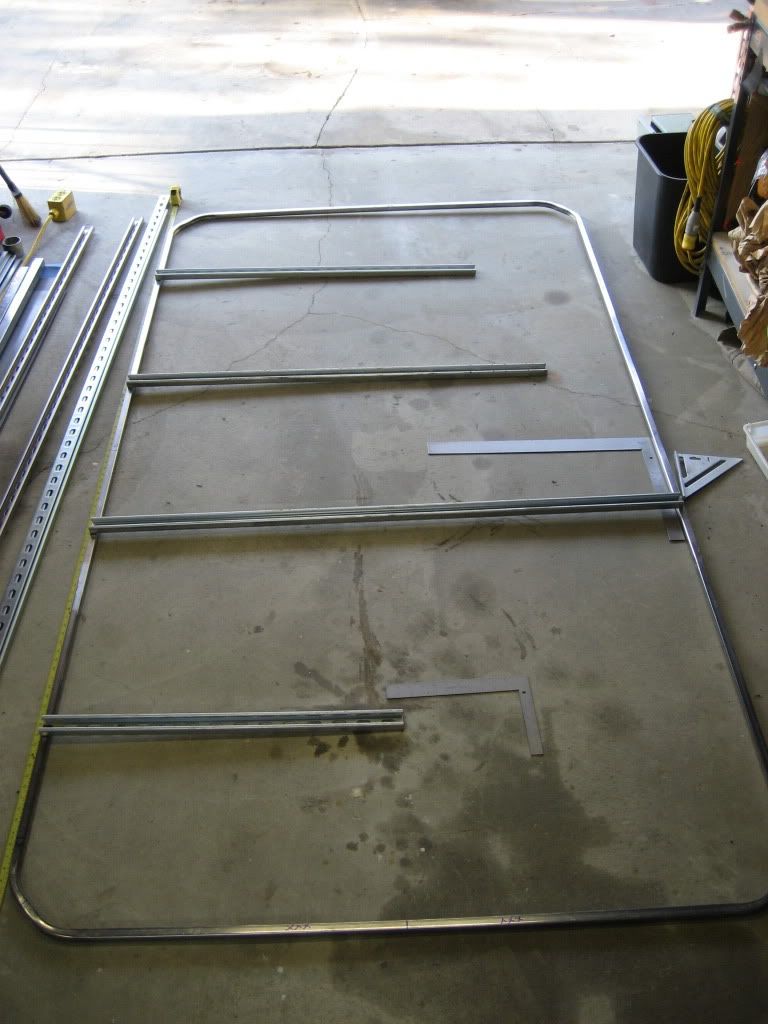
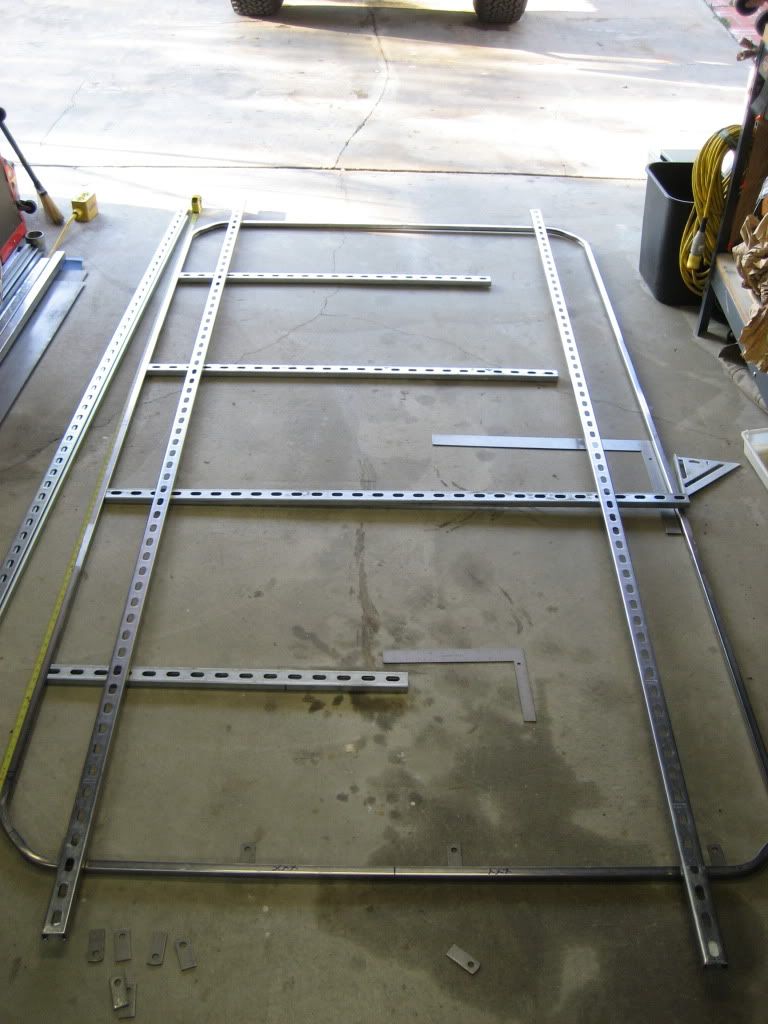
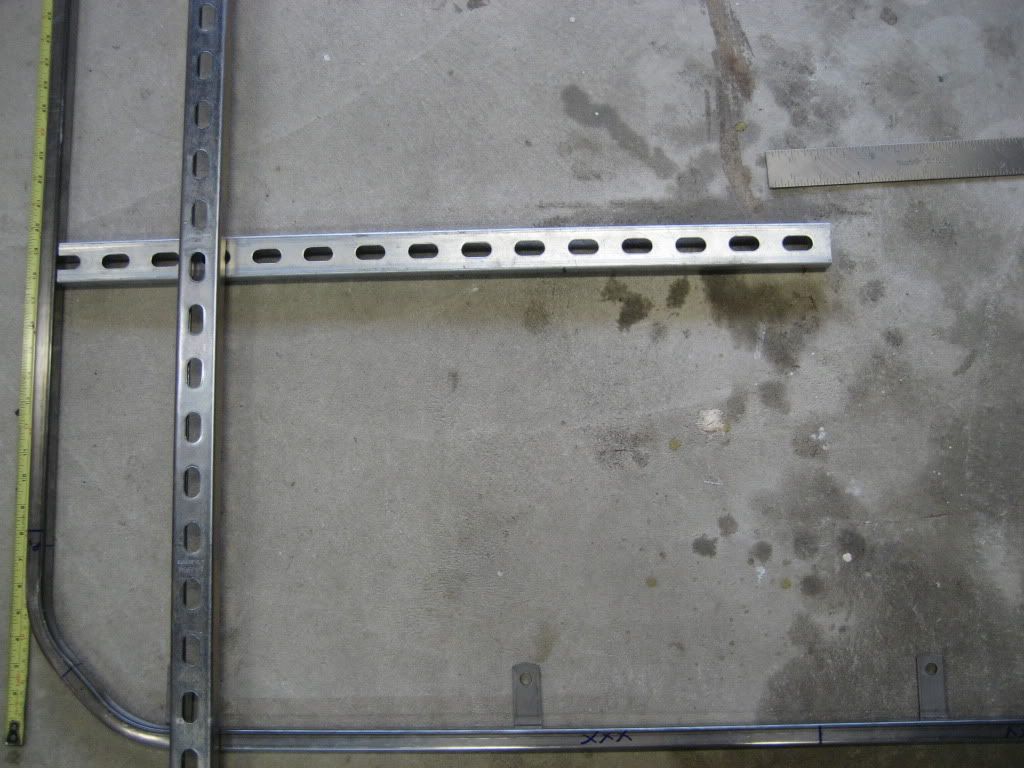
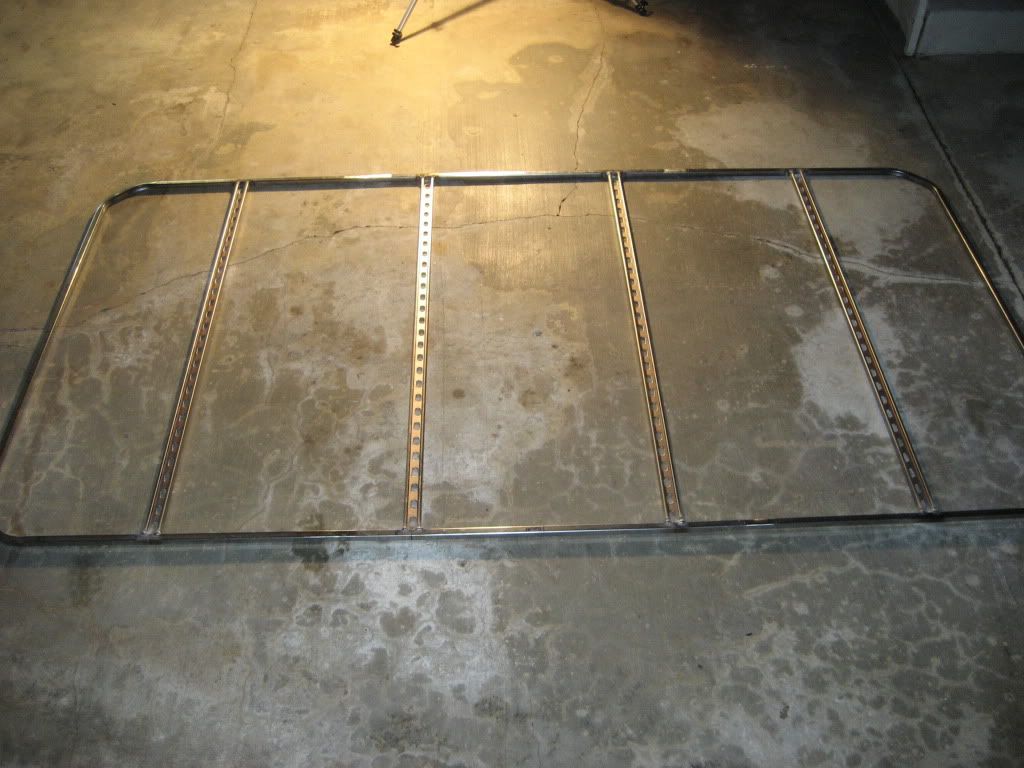
Tomorrow I'm going to stop by Home Depot and pick up 4 10' sticks of electrical strut channel. I'm figuring I will use 25' but I'm not sure yet. I think the channel weighs about 1lb. per foot so the less I use the better. I'm not planning on spacing the channel according to the beam pattern in the vans roof. I want to be able to use this rack on other vehicles in the future so I'm just going to space them equally. I will add in additional supports to match up to the roof beams, something that's adjustable.

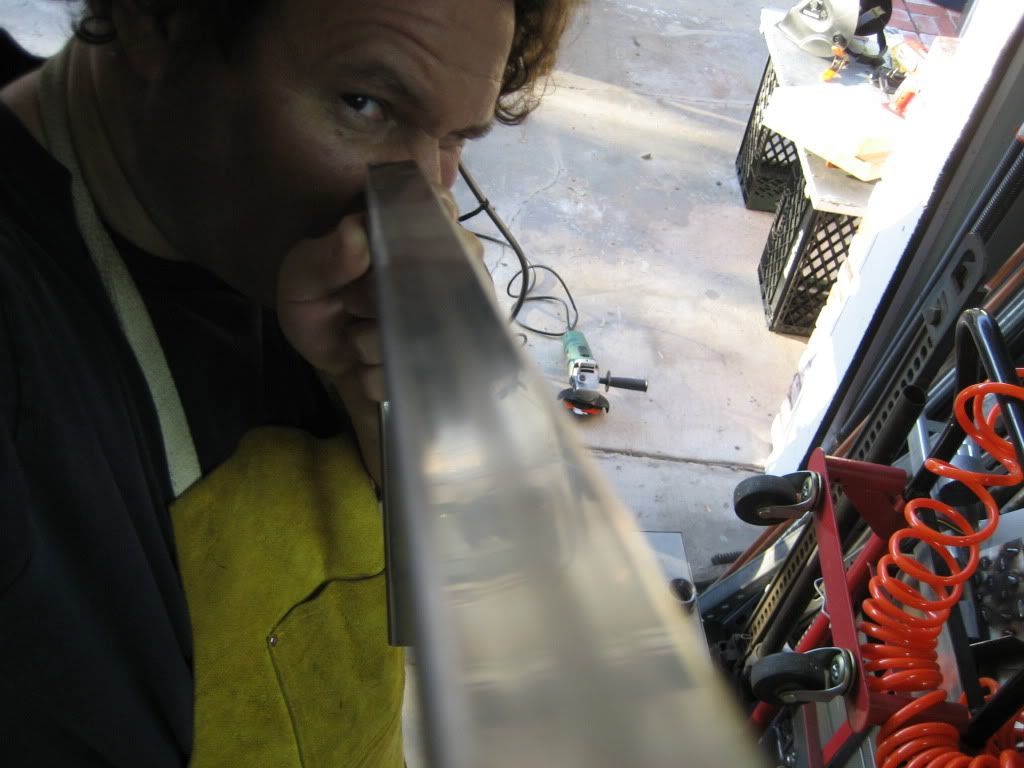
I might wait until next weekend to assemble the final product. At this stage I don't want to screw up. Welding after work puts me welding in the dark and in a hurry to finish before dinnertime.
1997 SAFARI 2WD CARGO
Image
"I do not think there is any thrill that can go through the human heart like that felt by the inventor as he sees some creation of the brain unfolding to success... Such emotions make a man forget food, sleep, friends, love, everything." Nikola Tesla

LiftedAWDAstro
I have my van tatooed on my cheeks
Posts: 4379
Joined: Sat Sep 09, 2006 3:35 pm
Location: New Haven, NY

Re: Homebrew Con-Ferr Style Porthole Roof Rack Build

Post by LiftedAWDAstro »

I like it better with 2 portholes in the ends. =D>
Current rides:
2013 Toyota Tundra DC 4x4
2008 Dodge Nitro 4x4
2005 Nissan Sentra 1.8S Special Edition

Mileage spreadsheet

Vans owned:
1986 Safari 2.5L 4 speed manual - scrapped
1995 Astro 2WD conversion 4.11 posi, shift kit, DHC rock rails - sold to Skippy
1998 Astro 4x4 D44, D60, NP231, full hydraulic system with 9k# Milemarker winch and snow plow - sold to Lockdoc
2003 Astro AWD all stock - traded for a 3/4 ton truck
2005 AWD, 4.10's - sold to skippy
User avatar

doyoulikeithere
ASV Supporter
ASV Supporter
Posts: 2060
Joined: Tue Nov 17, 2009 8:27 pm
Location: Misty Mountains of Cowichan BC.

Re: Homebrew Con-Ferr Style Porthole Roof Rack Build

Post by doyoulikeithere »

It looks like nice work.
I've often wanted to do something very similar, in aluminum.
Need a good welder though.
2021 Yamaha Tenere 700 - Blue.
2016 Yamaha XSR900 - Silver.
1990 Astro - AWD - Brown.
1987 Astro - With 5 Speed & 4wd - Silver & Blue.

Topic author
97CargoCrawler
I sleep in my van
Posts: 754
Joined: Thu Jan 24, 2008 11:50 pm
Location: Near Los Angeles, CA
Contact:

Re: Homebrew Con-Ferr Style Porthole Roof Rack Build

Post by 97CargoCrawler »

Today I cut and welded in the electrical strut bottom cross-members.

I chose electrical strut for its strength and versatility. The strut system is basically like a super heavy duty Erector set. The possibilities are just about endless. With all the accessories readily available at Home Depot you simply can't go wrong. Anything can be quickly attached to it using strut nuts. It's 14 gauge and weighs in at slightly less than 1lb. per foot.

Here is an example of a few types of strut nuts/bolts than can be used:

Image

I still have not decided on a flooring material. I'm debating between 1/8" thick aluminum tread plate and kennel/chicken coop tile. I needed to figure out the spacing for the braces to accommodate both. The kennel/chicken coop tiles measure 24" across so I spaced the strut centers at 24" intervals. The rack is 9ft. long so I started with a 24" section on the center and worked out from there. The front and back ends only have 18" spacing so any tiles that go there will need to be cut down to size. I am going to weld tabs facing inward for attachment points there.

Here's a brainstorming photo taken while I was trying to figure out the spacing. I used scrap strut:

Image

I want the rack to be universal, i.e. the mounting points are not going to be spaced to match the van's roof cross-members. I might want to use this rack on another vehicle someday so the attachment points need to be generic and adjustable. With that in mind the rack will bolt to two strut rails. These two strut rails will have feet welded to them that match up to the cross-members in the vans roof. These two rails will be very similar to the factory style rack, albeit much more heavy duty. They alone can be used for securing items to the roof and will allow for quick attachment of crossbars too if necessary.

The nature of the strut allows nuts to be slid along it to match up to the holes in the racks cross-members. This is not a great photo, but its what I used to come up with this idea. You're looking at it upside down, the long rails will be beneath the rack and of course a little shorter. This system will allow me to make slight forward and aft adjustments and allow me to remove the rack with only having to undo 8 bolts. The long rails can remain attached to the van and avoids having exposed holes in the roof.

Image

Image

The strut channel I bought was zinc galvanized. This is the most common type found in hardware stores. I like the galvanized coating but paint doesn't stick to it very well. It also gives off toxic fumes when you weld it.

Here is a complete welded joint:

Image

Image

Image

All of the floor cross-members are now welded in place. Note that the channel U is facing upward so strut nuts can be inserted and slid to their desired position for mounting just about anything:

Image

Image

Just a quick back of the envelope calculation puts the weight of the entire rack and mounting rails/feet at about 100lbs. minus the flooring material.

Tomorrow I hope to start assembling the rest of the rack. :supz:
1997 SAFARI 2WD CARGO
Image
"I do not think there is any thrill that can go through the human heart like that felt by the inventor as he sees some creation of the brain unfolding to success... Such emotions make a man forget food, sleep, friends, love, everything." Nikola Tesla

LiftedAWDAstro
I have my van tatooed on my cheeks
Posts: 4379
Joined: Sat Sep 09, 2006 3:35 pm
Location: New Haven, NY

Re: Homebrew Con-Ferr Style Porthole Roof Rack Build

Post by LiftedAWDAstro »

Strut is so versatile isn't it? :muhaha: I mounted 2 pieces to the top of my truck cap and use conduit strap halves with enlarged holes to anchor down the canoe on the truck.
Current rides:
2013 Toyota Tundra DC 4x4
2008 Dodge Nitro 4x4
2005 Nissan Sentra 1.8S Special Edition

Mileage spreadsheet

Vans owned:
1986 Safari 2.5L 4 speed manual - scrapped
1995 Astro 2WD conversion 4.11 posi, shift kit, DHC rock rails - sold to Skippy
1998 Astro 4x4 D44, D60, NP231, full hydraulic system with 9k# Milemarker winch and snow plow - sold to Lockdoc
2003 Astro AWD all stock - traded for a 3/4 ton truck
2005 AWD, 4.10's - sold to skippy

Topic author
97CargoCrawler
I sleep in my van
Posts: 754
Joined: Thu Jan 24, 2008 11:50 pm
Location: Near Los Angeles, CA
Contact:

Re: Homebrew Con-Ferr Style Porthole Roof Rack Build

Post by 97CargoCrawler »

My last two neighbors have been electricians! They one guy who already moved still brings me truckloads of job-site scrap and full pieces of strut and conduit. I have made some pretty awesome things come to life with strut! I only wish the aluminum and fiberglass strut was cheaper and more readily available.

Today I welded the corners to the bottom rings and I'm halfway done welding the corners to the top ring. After this comes the individual porthole plates.

So far I have been able to do all of my clamping with 7 C-clamps. The plates warped quite a bit from welding the rings to the backside so the clamps were necessary to straighten things back out before welding the corners:


Image

Image

Image

Image

As soon as I was happy with the alignment I went for it:

Image

Image

Image

Image

Image

I forgot to snap a photo with the top ring welded on. Tomorrow I should have all of the portholes welded.
1997 SAFARI 2WD CARGO
Image
"I do not think there is any thrill that can go through the human heart like that felt by the inventor as he sees some creation of the brain unfolding to success... Such emotions make a man forget food, sleep, friends, love, everything." Nikola Tesla

photo_van
I sleep in my van
Posts: 592
Joined: Wed May 18, 2011 4:38 pm
Location: 7000' in the Mountains of California
Been thanked: 3 times

Re: Homebrew Con-Ferr Style Porthole Roof Rack Build

Post by photo_van »

=D>
1998 AWD/4WD
4" lift, 31x10.50's, NP 242j/c hybrid, 4.10 gears, S10 front disconnect, rack & pinion steering, trans cooler, rock sliders, ARB fridge, house battery and 100w solar, swing out rear rack with foldout camp table, bed and passenger swivel chair
dirt bag camping rig
1981 Toyota 4x4 pu
1974 John Deere 710

Topic author
97CargoCrawler
I sleep in my van
Posts: 754
Joined: Thu Jan 24, 2008 11:50 pm
Location: Near Los Angeles, CA
Contact:

Re: Homebrew Con-Ferr Style Porthole Roof Rack Build

Post by 97CargoCrawler »

I ditched work again Friday and I have been welding ever since. I have not left the house in three days. I made a total of 688 welds!

Here goes....

Top ring and corners welded in place:

Image

Image

The porthole plates warped quite a bit previously so they needed to be clamped pretty good to straighten them out:

Image

Image

About 500 welds in I stopped to admire my work and myself:

Image

All of the porthole plates are now fully welded in place!

Image

Image

Image

Here's some pix of the bungee cord retainers. Just one more thing to distinguish my rack:

Image

Image

Image

90% in I finished of a 2lb. spool of wire, then loaded up a new 10lb. I wish I had bought another tank of gas too:

Image

I still have a really long way to go. I need to weld in tabs for the flooring and front/rear lights as well as some additional cross-members. I am going to add some strut lengthwise spaced 24" apart. That will add about 18lbs. With the flooring, feet, roof rails and lights I fully expect this rack system to hit the 200lb. mark. As it sits right now I can easily lift it. When it's all finished I'm going to build a rigging system under my balcony in the driveway to raise it up so I can drive under it. That's a few weeks off still.

When I was all finished up tonight I set the rack on top of the pile of extra tubes and sheets. I'm actually quite proud that I was able to turn those simple shapes into something so awesome. Granted, it has been a hell of a lot of work spanning like 6 weeks or so but still I am very pleased. I have definitely learned a lot about steel and welding during this build. :supz:
1997 SAFARI 2WD CARGO
Image
"I do not think there is any thrill that can go through the human heart like that felt by the inventor as he sees some creation of the brain unfolding to success... Such emotions make a man forget food, sleep, friends, love, everything." Nikola Tesla

astroturf
ASV Supporter
ASV Supporter
Posts: 1658
Joined: Wed Sep 09, 2009 6:25 pm

Re: Homebrew Con-Ferr Style Porthole Roof Rack Build

Post by astroturf »

Thanks for the update.

Congrats
User avatar

the beast
I am merely driving my van
Posts: 17
Joined: Thu Dec 08, 2011 3:53 pm

Re: Homebrew Con-Ferr Style Porthole Roof Rack Build

Post by the beast »

what a fantastic job you've made of this, one to be really proud of and which will probably last a lifetime.

a great thread and photos, enjoyed reading it, keep at it, looking forward to the finished job sitting on top of your astro.

pete.
Image
the beast
Post Reply