Homebrew Con-Ferr Style Porthole Roof Rack Build

FROM BUFFING YOUR PAINT, TO REPLACING CRINKLED FENDERS TO SWAPPING A NEWER FRONT END ON, TO SHAVING DOOR HANDLES. TO REPLACING DOOR HANDLES OR INSTALLING CUSTOM TAIL LIGHTS, POST THEM HERE.
Post Reply

fishesfromtupperware
I am merely driving my van
Posts: 12
Joined: Fri Jan 22, 2010 7:15 am

Re: Homebrew Con-Ferr Style Porthole Roof Rack Build

Post by fishesfromtupperware »

97CargoCrawler wrote:One main reason why I am still siding with Rustoleum is for future repairs and add-ons. If I decide I want to weld on a new bracket, etc. all I need to due is sand a clean spot, weld and then sand the burned paint around it down and spray a new layer that will even out pretty well.
Now with powder coat, that stuff smokes like crazy when your welding near it and often starts on fire.
Good point. Because powder coat is so tough, it's a pain to get it off and I don't even want to think about trying to weld any wear near it.

Although I have painted a fair amount of metal, I don't think I've done any galvanized. That said, I think I'd use scotchbrite instead of steel wool. Hot water and Dawn first is great idea too.

In any event, I'm looking forward to your results! You got me motivated!

Thanks!

Topic author
97CargoCrawler
I sleep in my van
Posts: 754
Joined: Thu Jan 24, 2008 11:50 pm
Location: Near Los Angeles, CA
Contact:

Re: Homebrew Con-Ferr Style Porthole Roof Rack Build

Post by 97CargoCrawler »

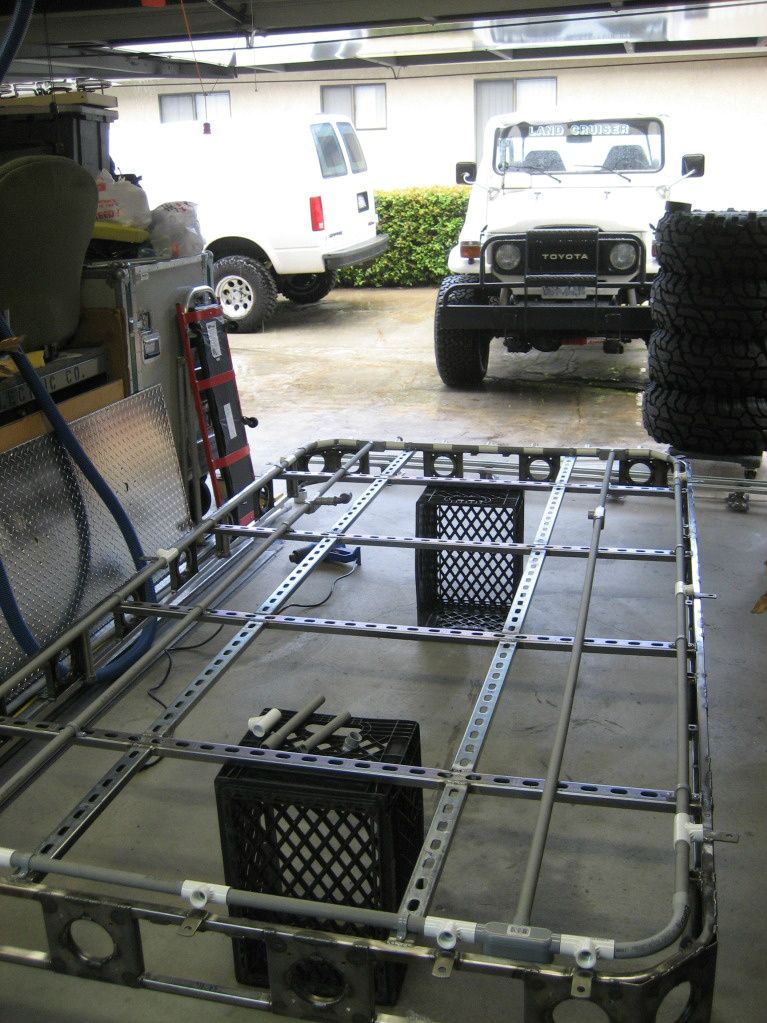
I had wanted to build a rack for quite some time and had planned on starting it this summer. Then photo_van had his rip out from the roof which got me thinking about mine. I also felt I needed to put a few A-Holes on this forum back in there place after they said I had no skills, couldn't do anything without a manual to guide me and that I could only handle bolt on accessories. One of these days a large sinkhole is gonna swallow up a small insignificant tranny shop and nobody is gonna miss it.

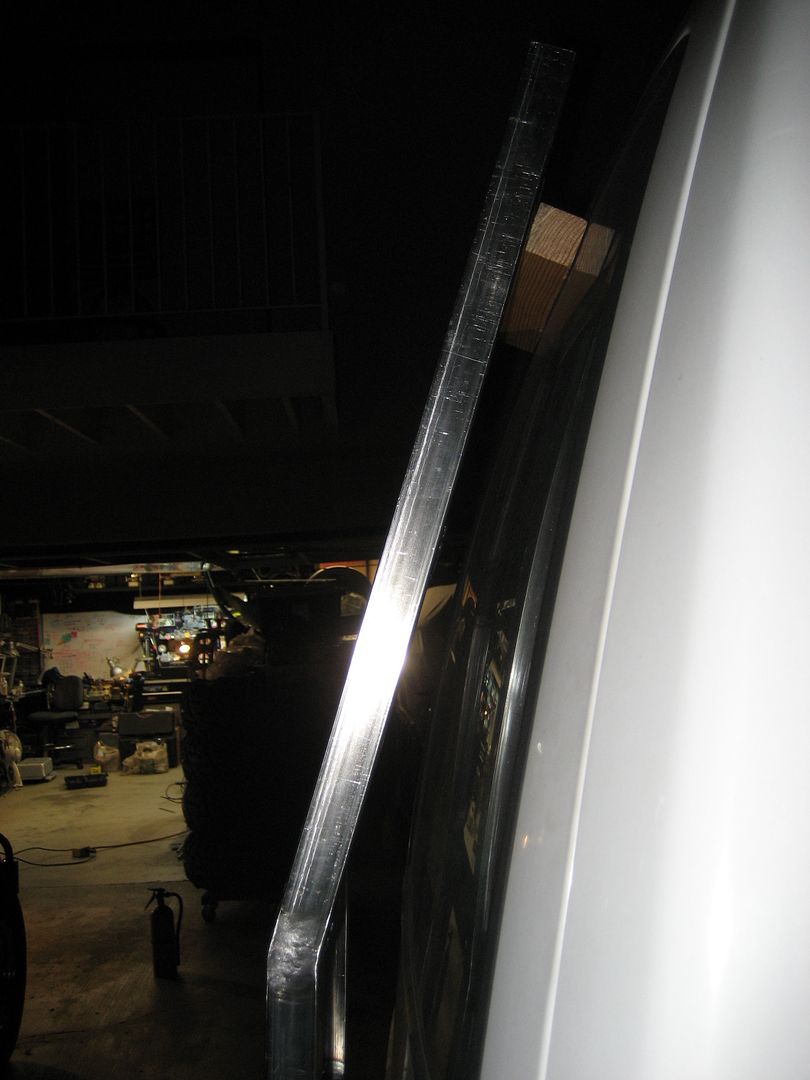
Anyhoo, lets gets back to it. I was going to start painting today and skip finalizing my tent design. But then last night I had an idea about how I wanted to secure the poles when I was puttin' around Home Depot. I love that place.

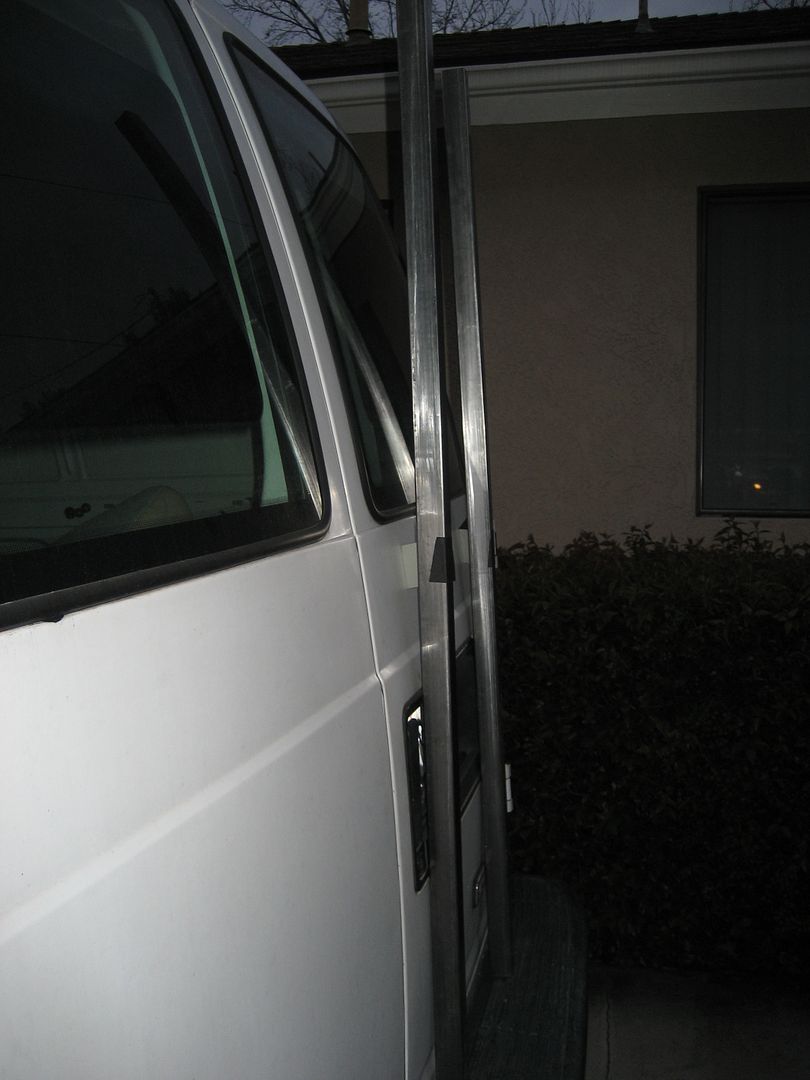
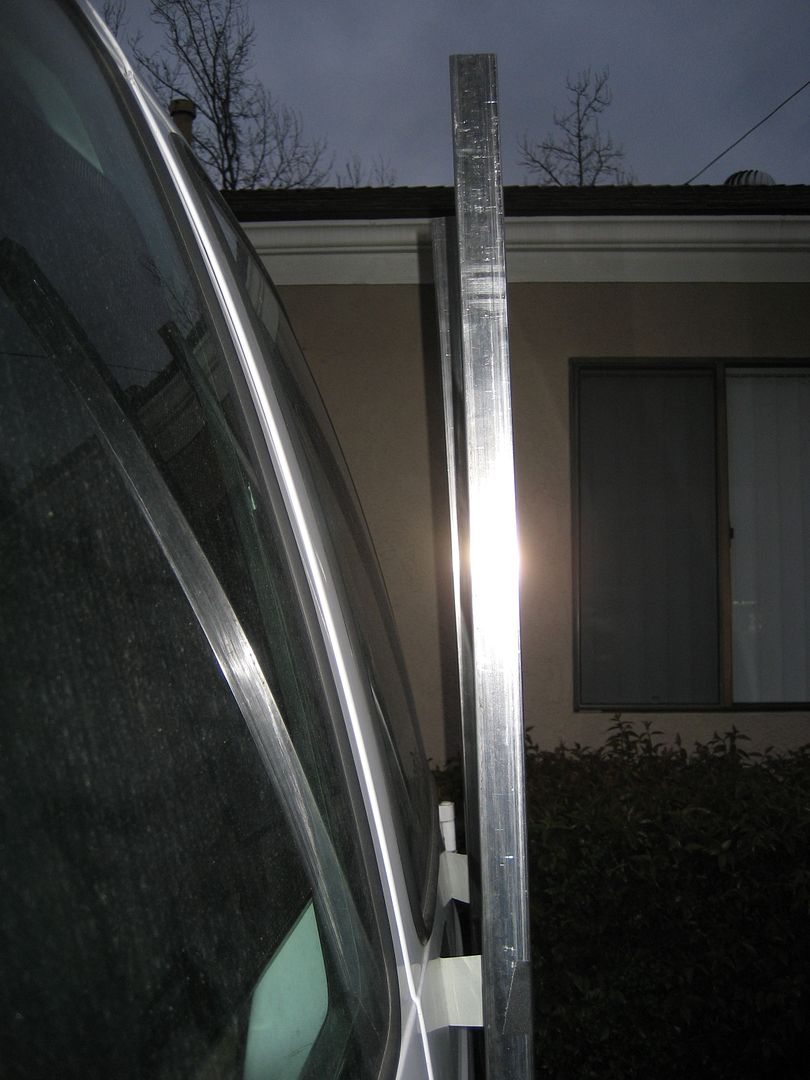
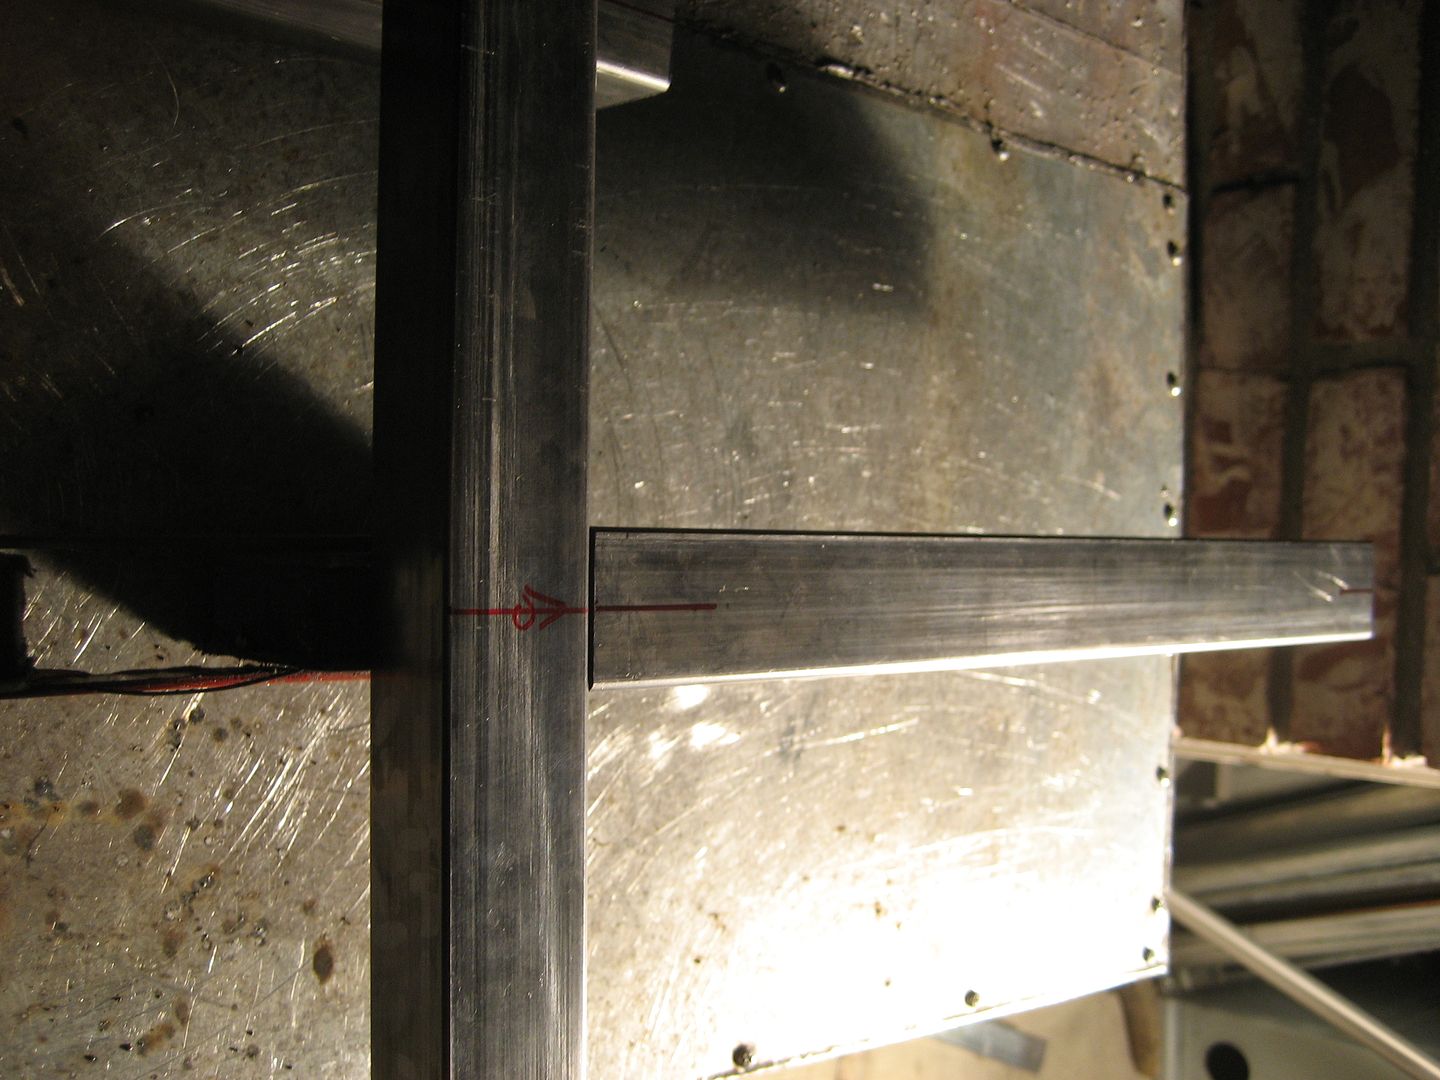
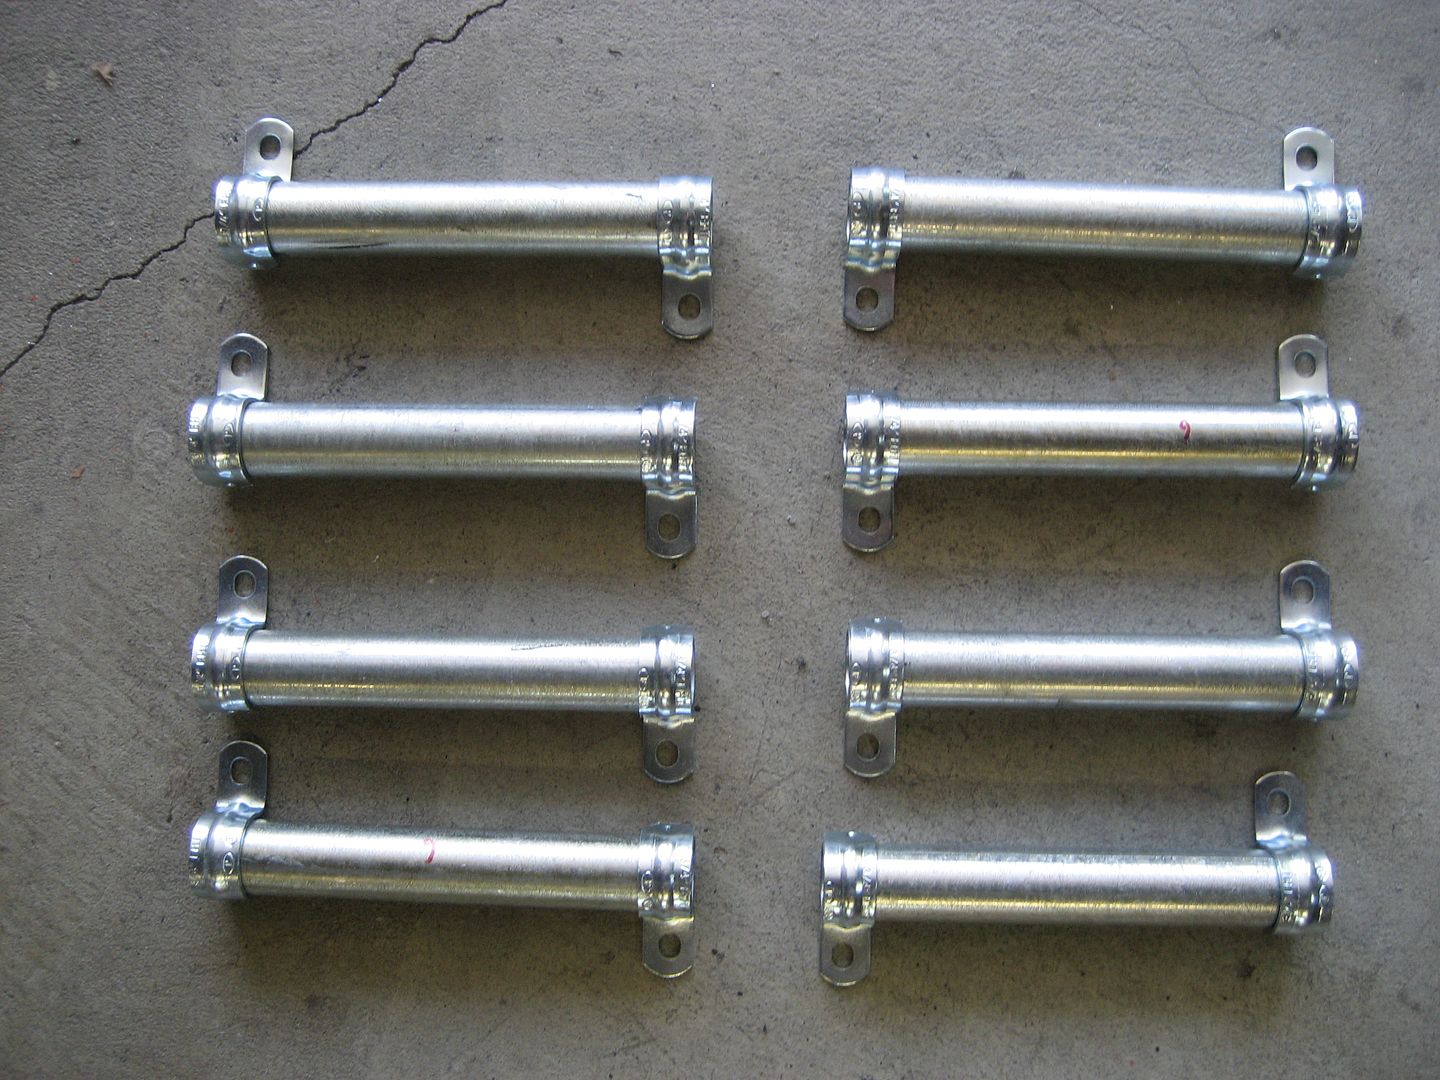
I came up with this idea: Use 1/2" EMT conduit couplings cut slightly off center, jam them inside of a 3/4" piece of EMT conduit, weld the two concentric pipes in place and then weld two 3/4" conduit straps on the outside to give me an easy way to secure it to the rack. Huh? Yeah, just look at the pix.

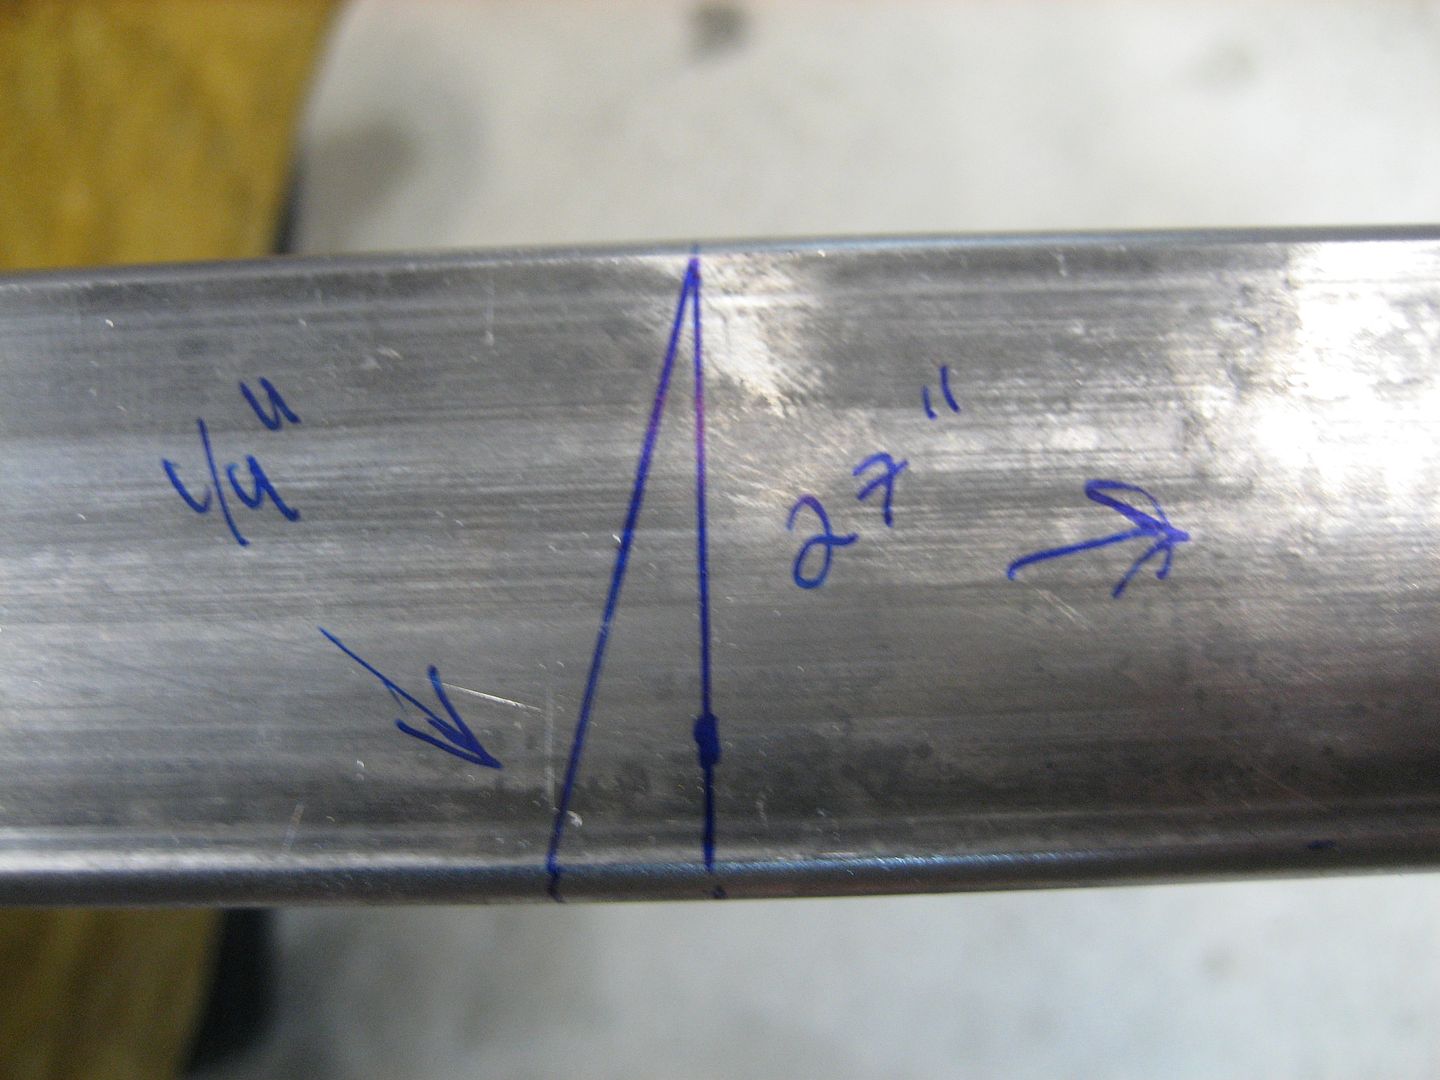
I cut the coupling off center because the center is cinched in to prevent the pipe from sliding all the way through. That is exactly what I need on the bottom of a tent pole holder to keep it from going too far. The other end of the coupling provides a nice pass thru sleeve.

Image

Image

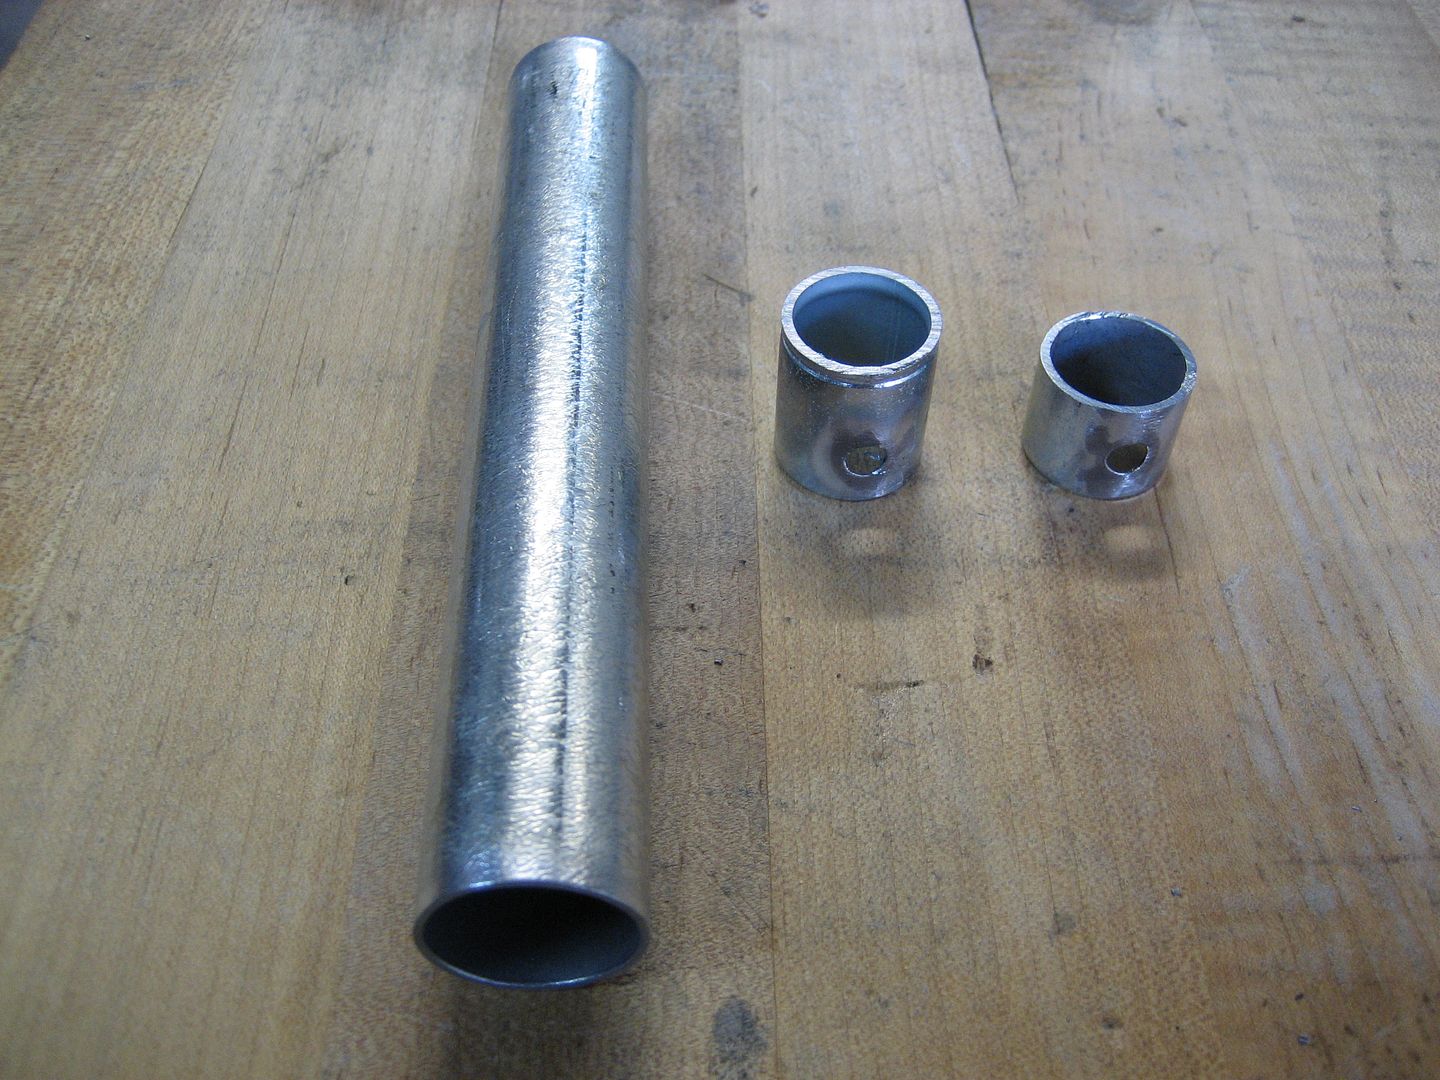
I cut a 3/4" piece of pipe with 6" length to match the height of the rack. The coupling comes with two screws in it so I removed them and ground down the part they thread into. I then tapped the sleeved into the pipe. They fit nice and snug inside:

Image

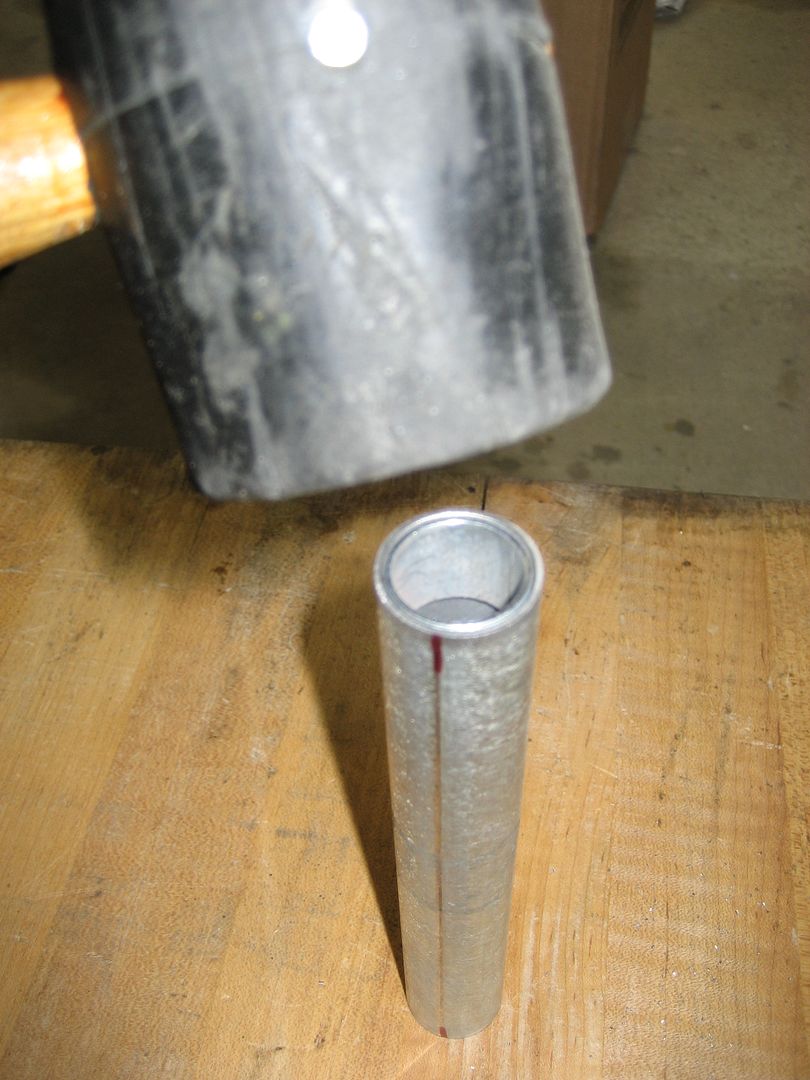
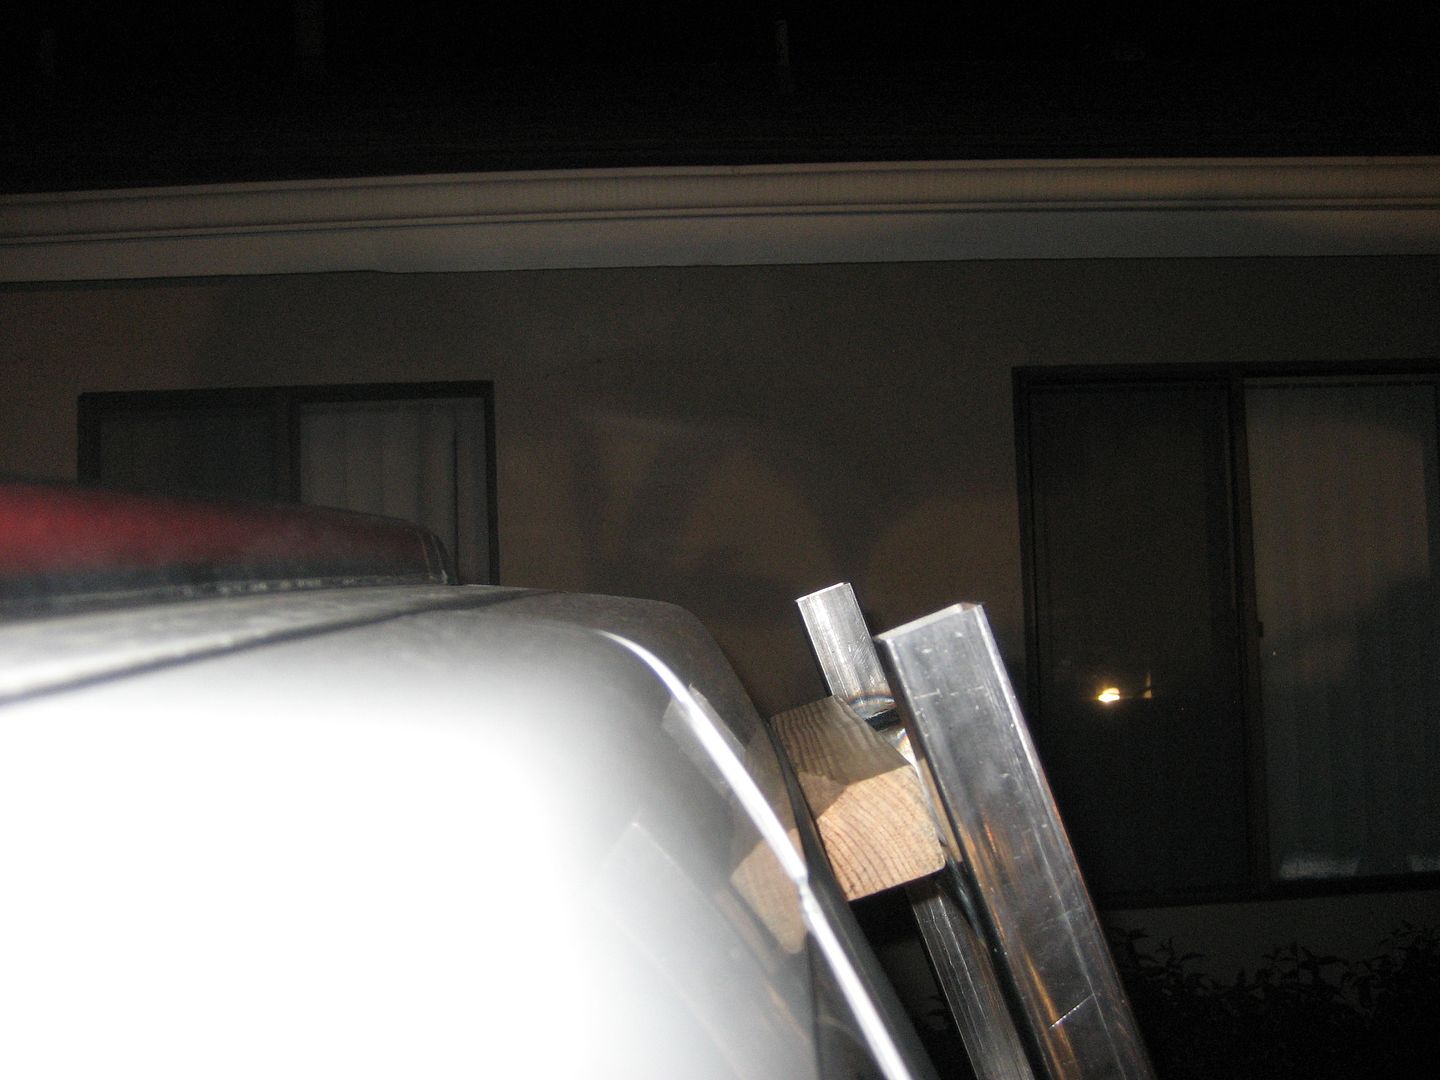
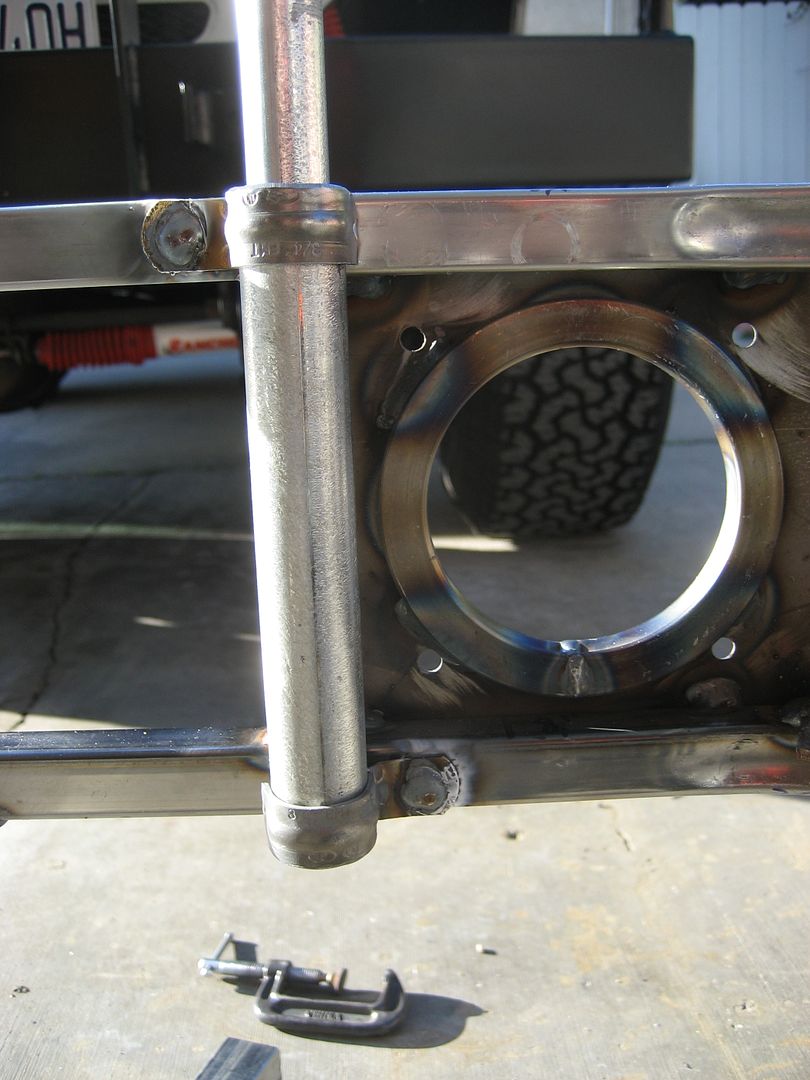
This is the bottom end. You can see the lip inside the pipe that acts as a stopper.

Image

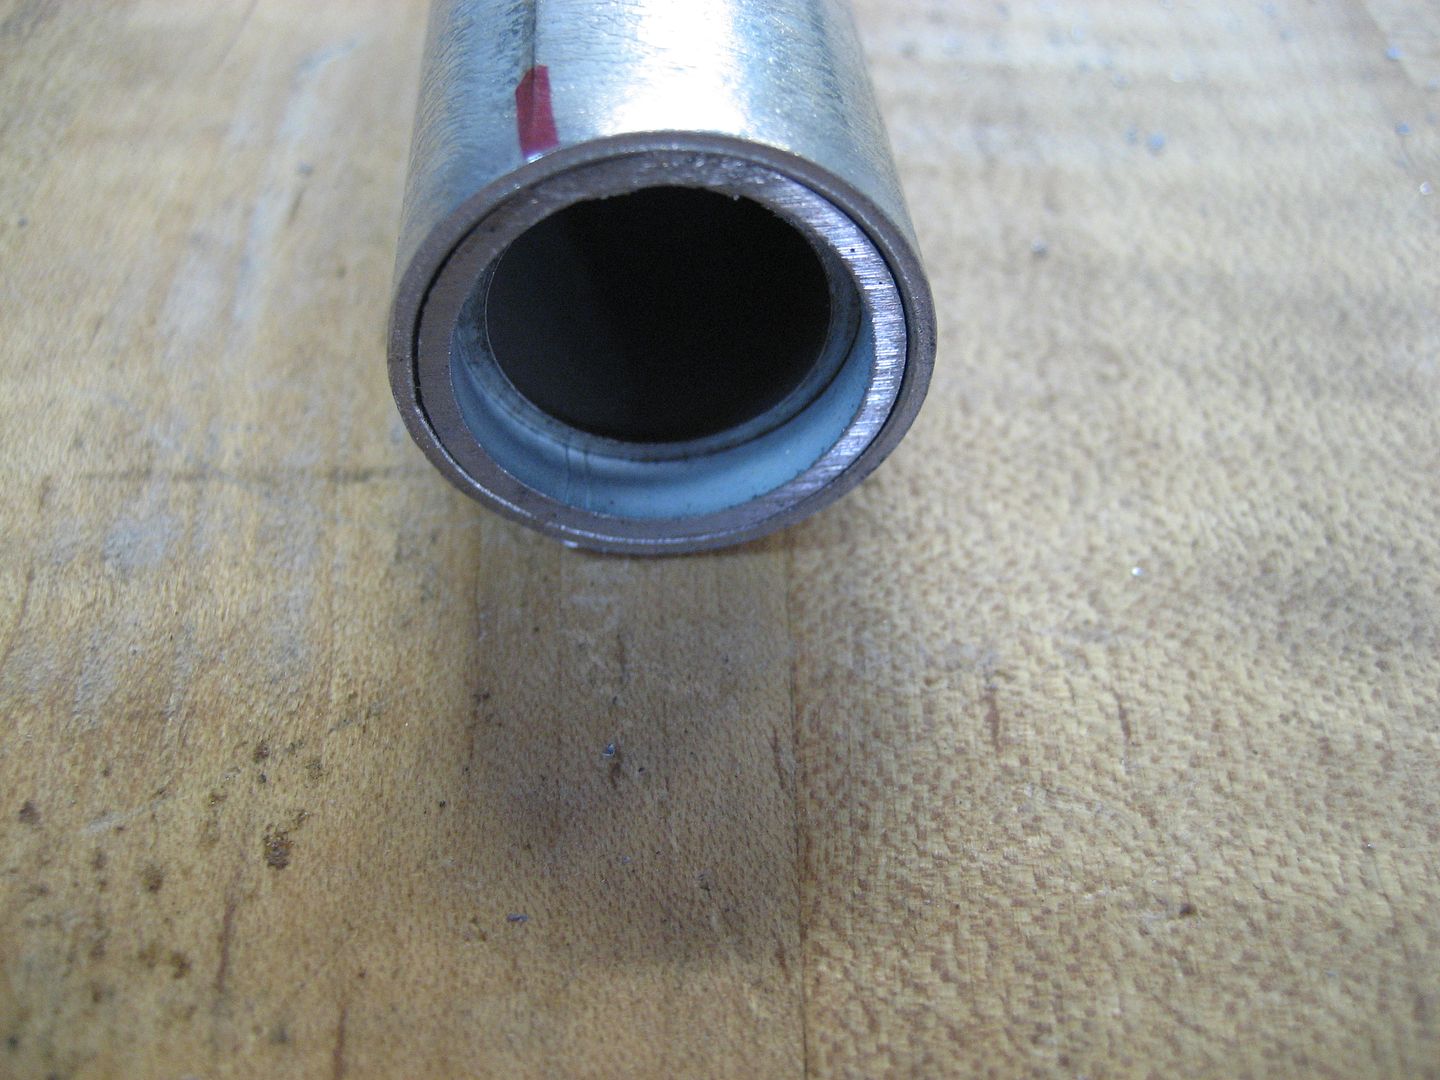
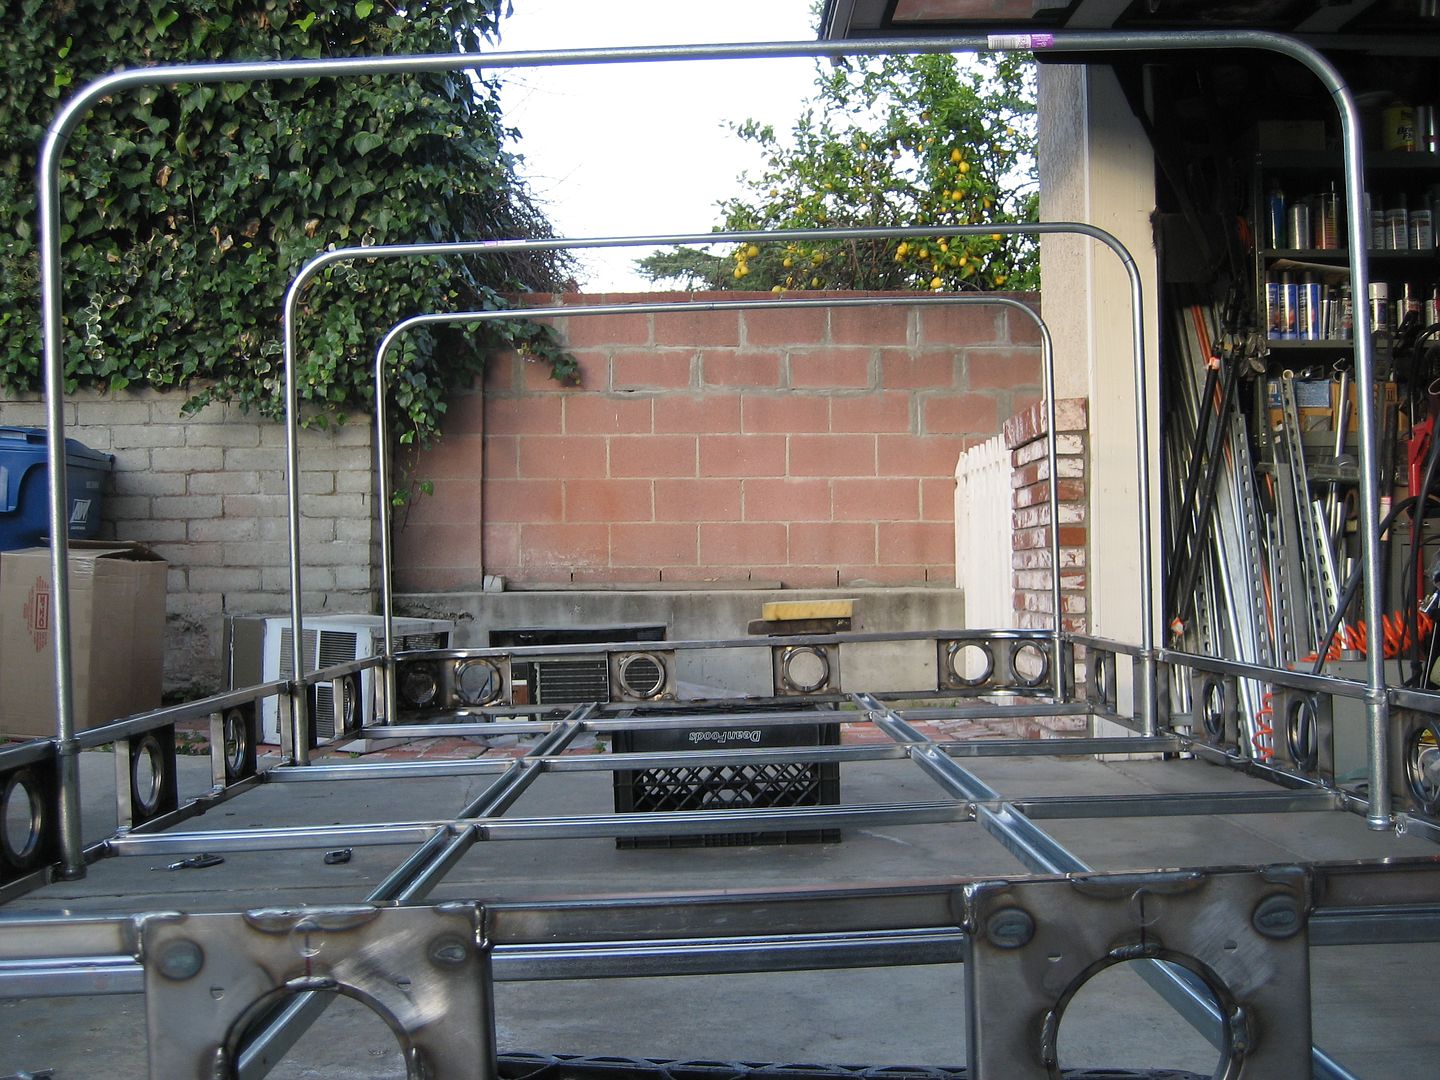
The tent pole slides in:

Image

And the bottom lip stops the pole from going all the way through:

Image

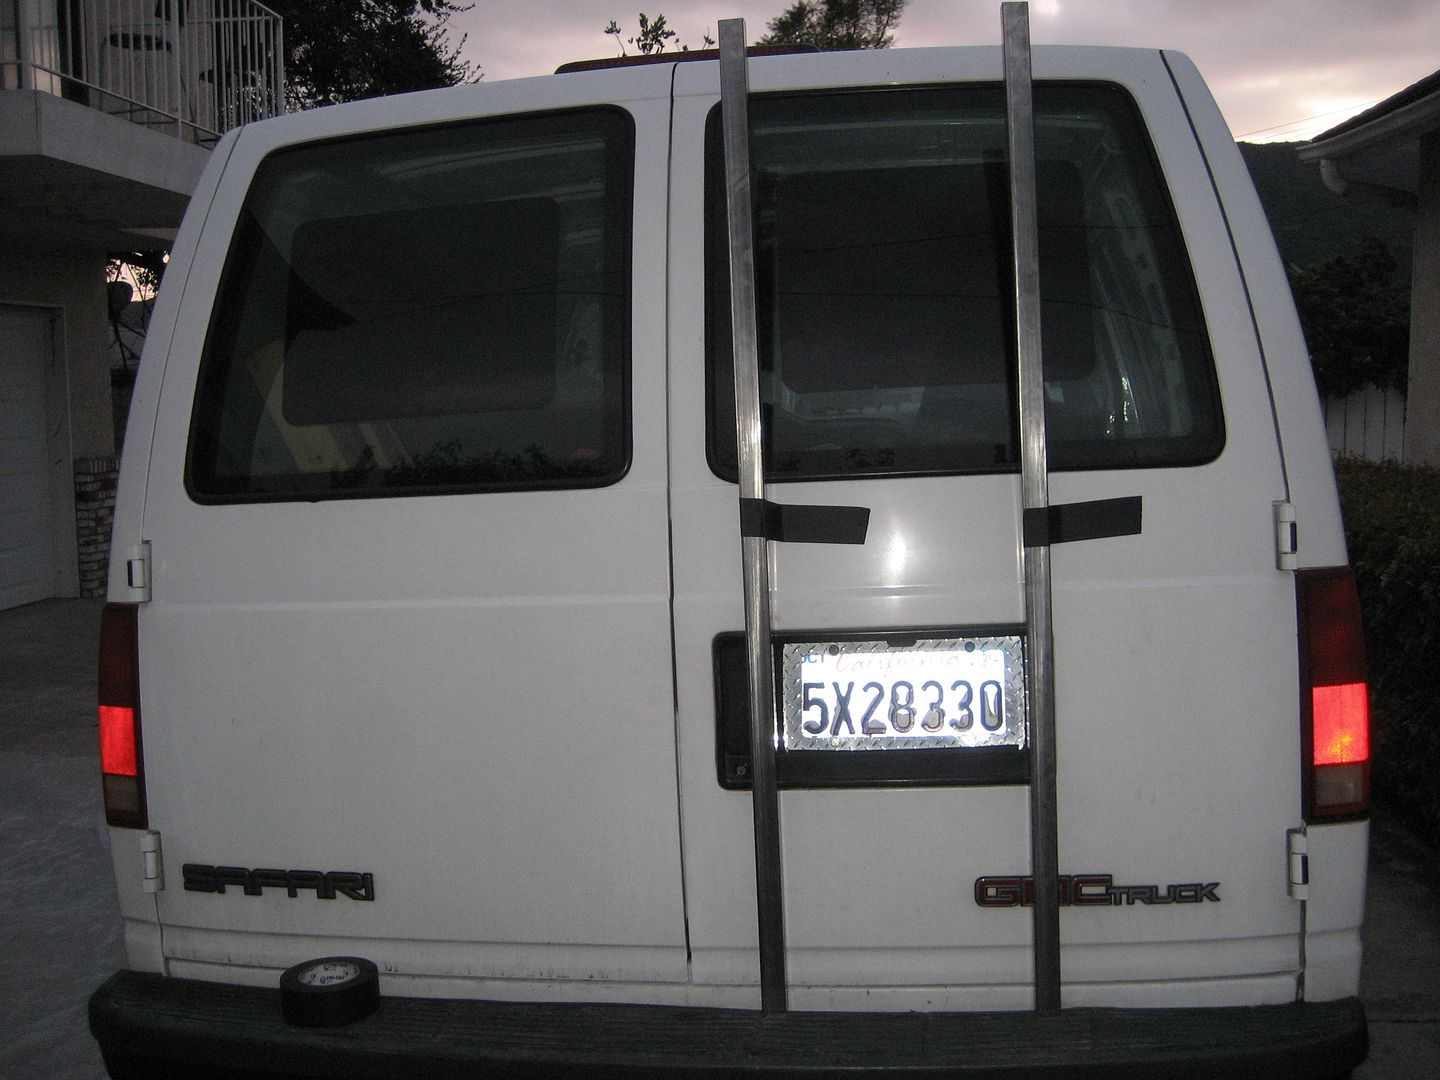
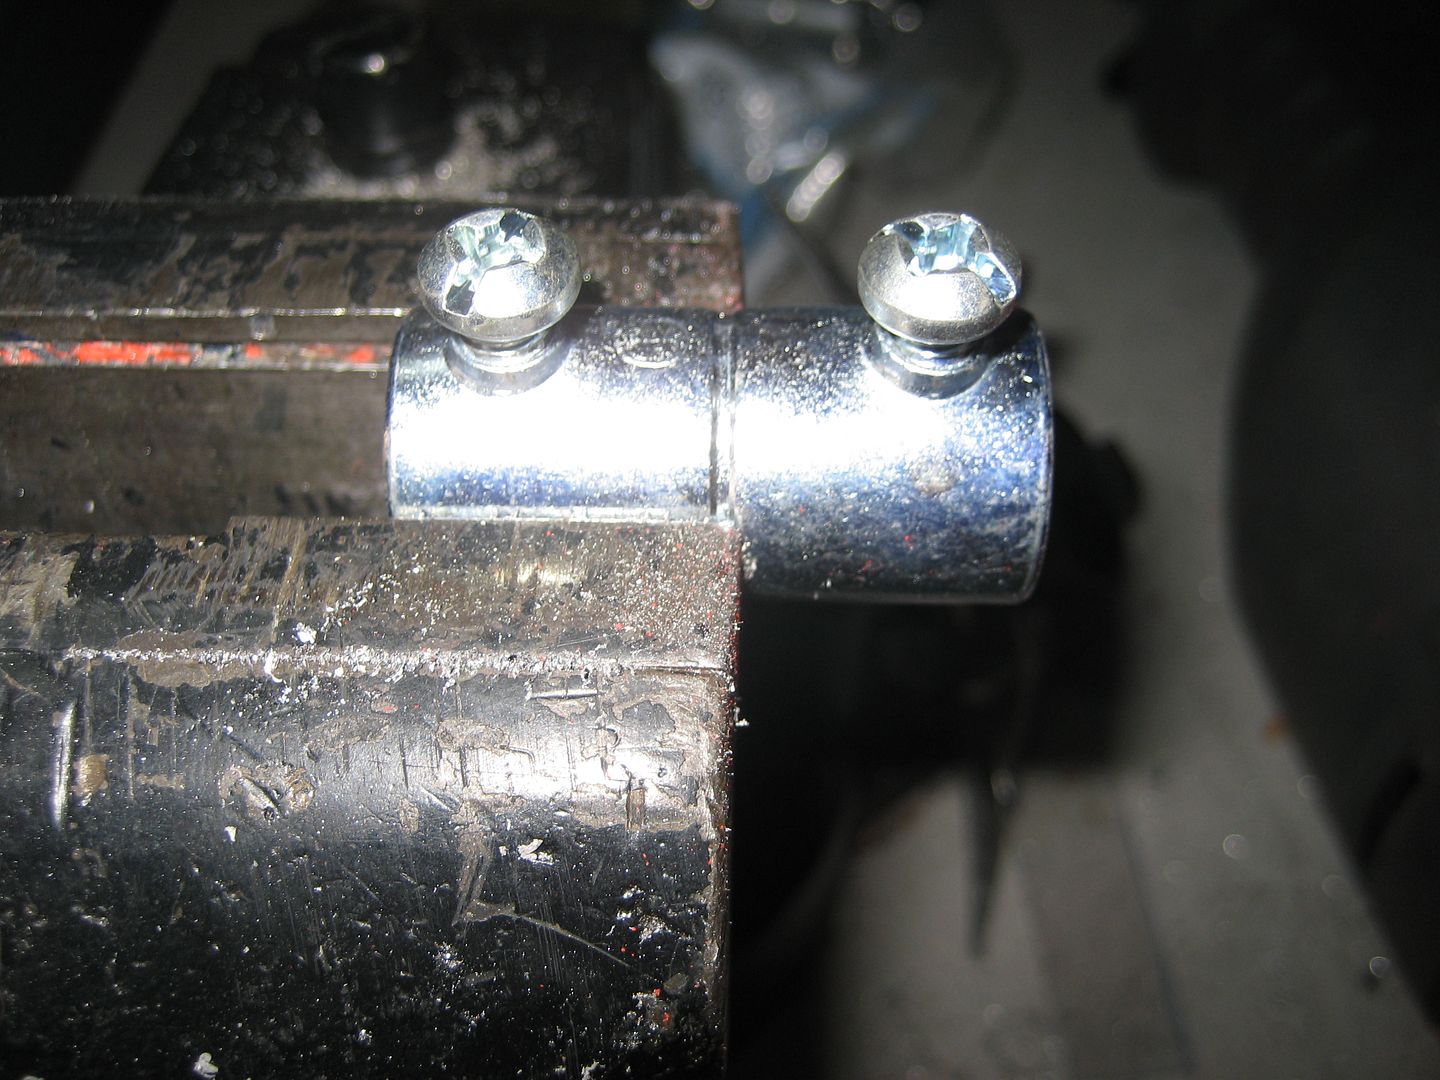
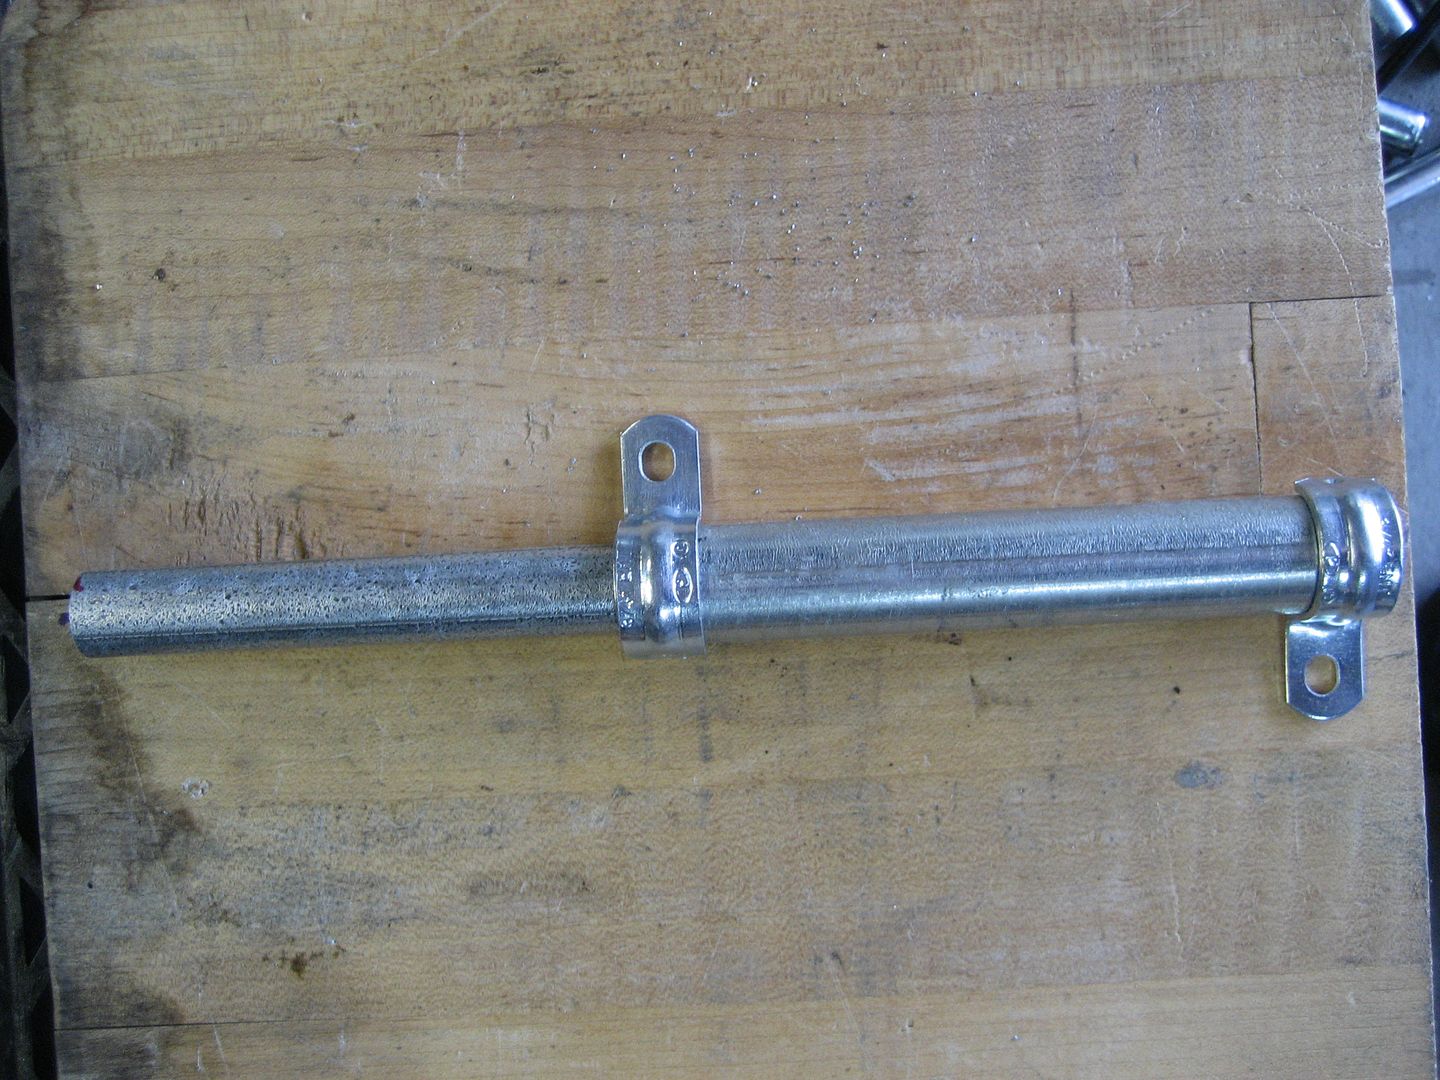
Straps on the outside:

Image

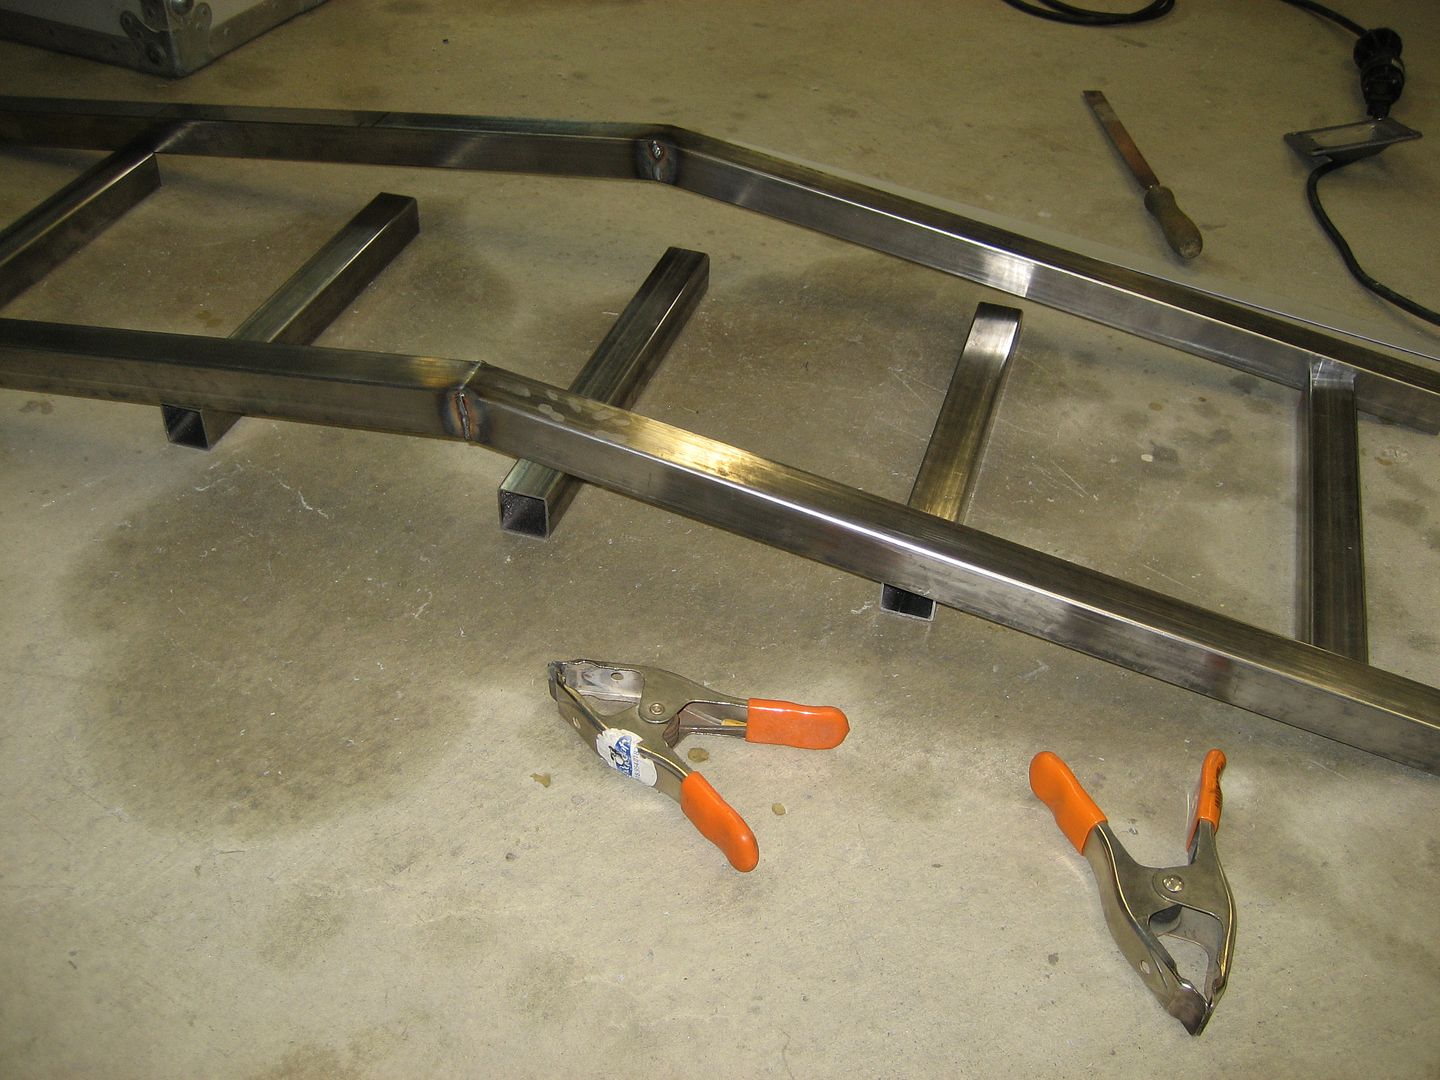
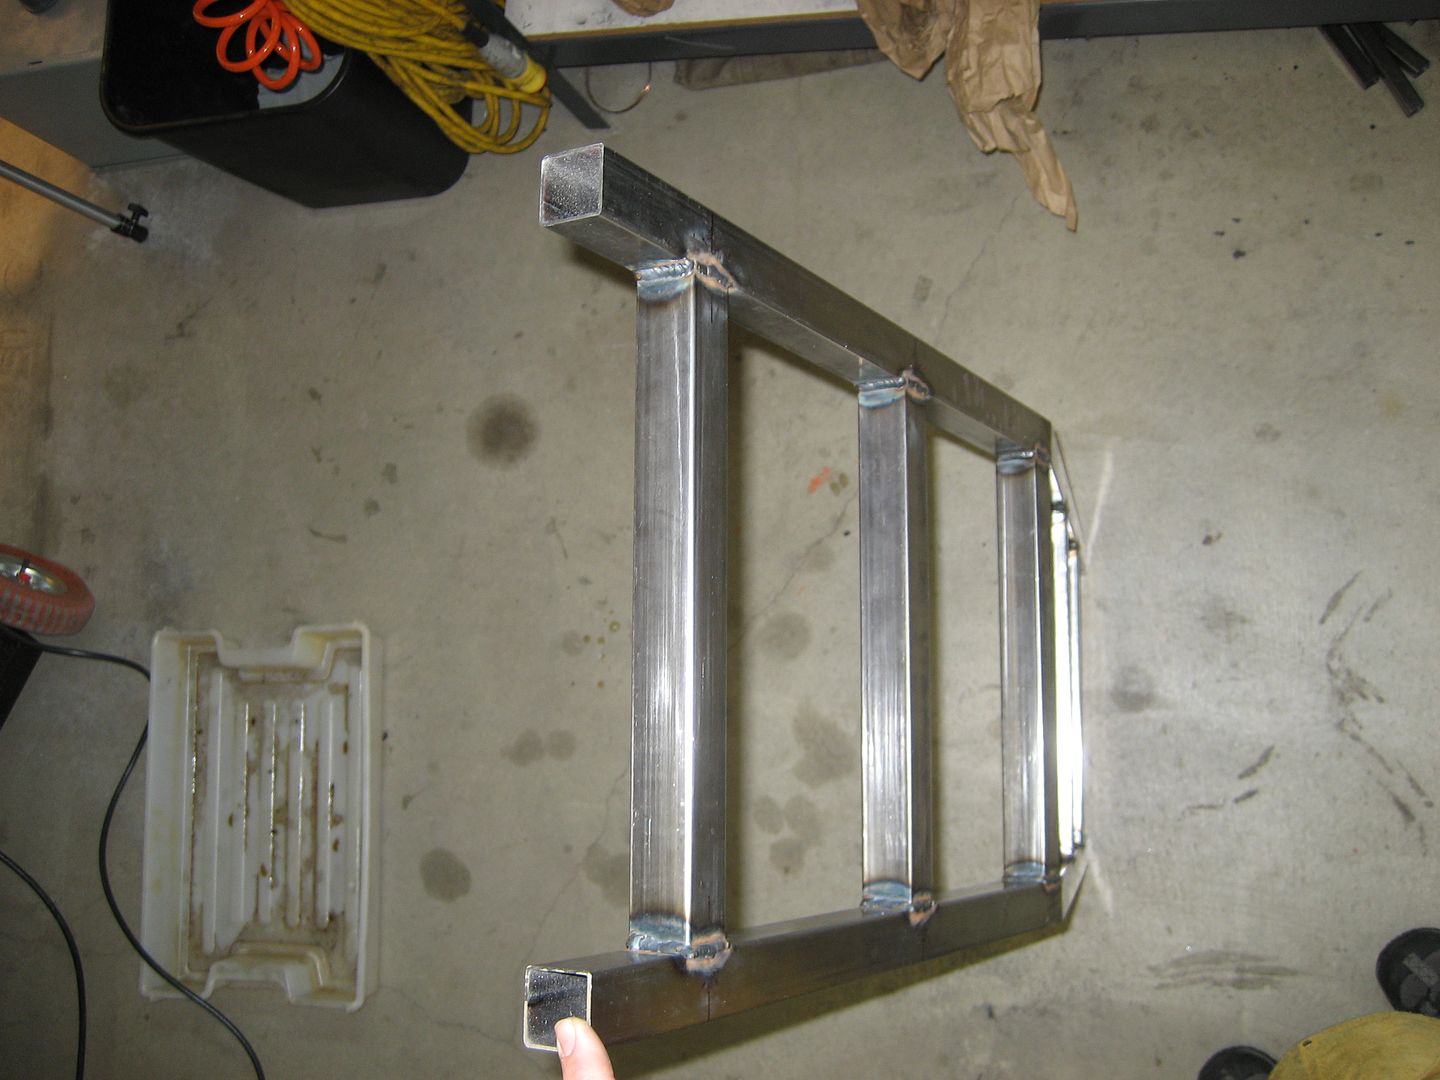
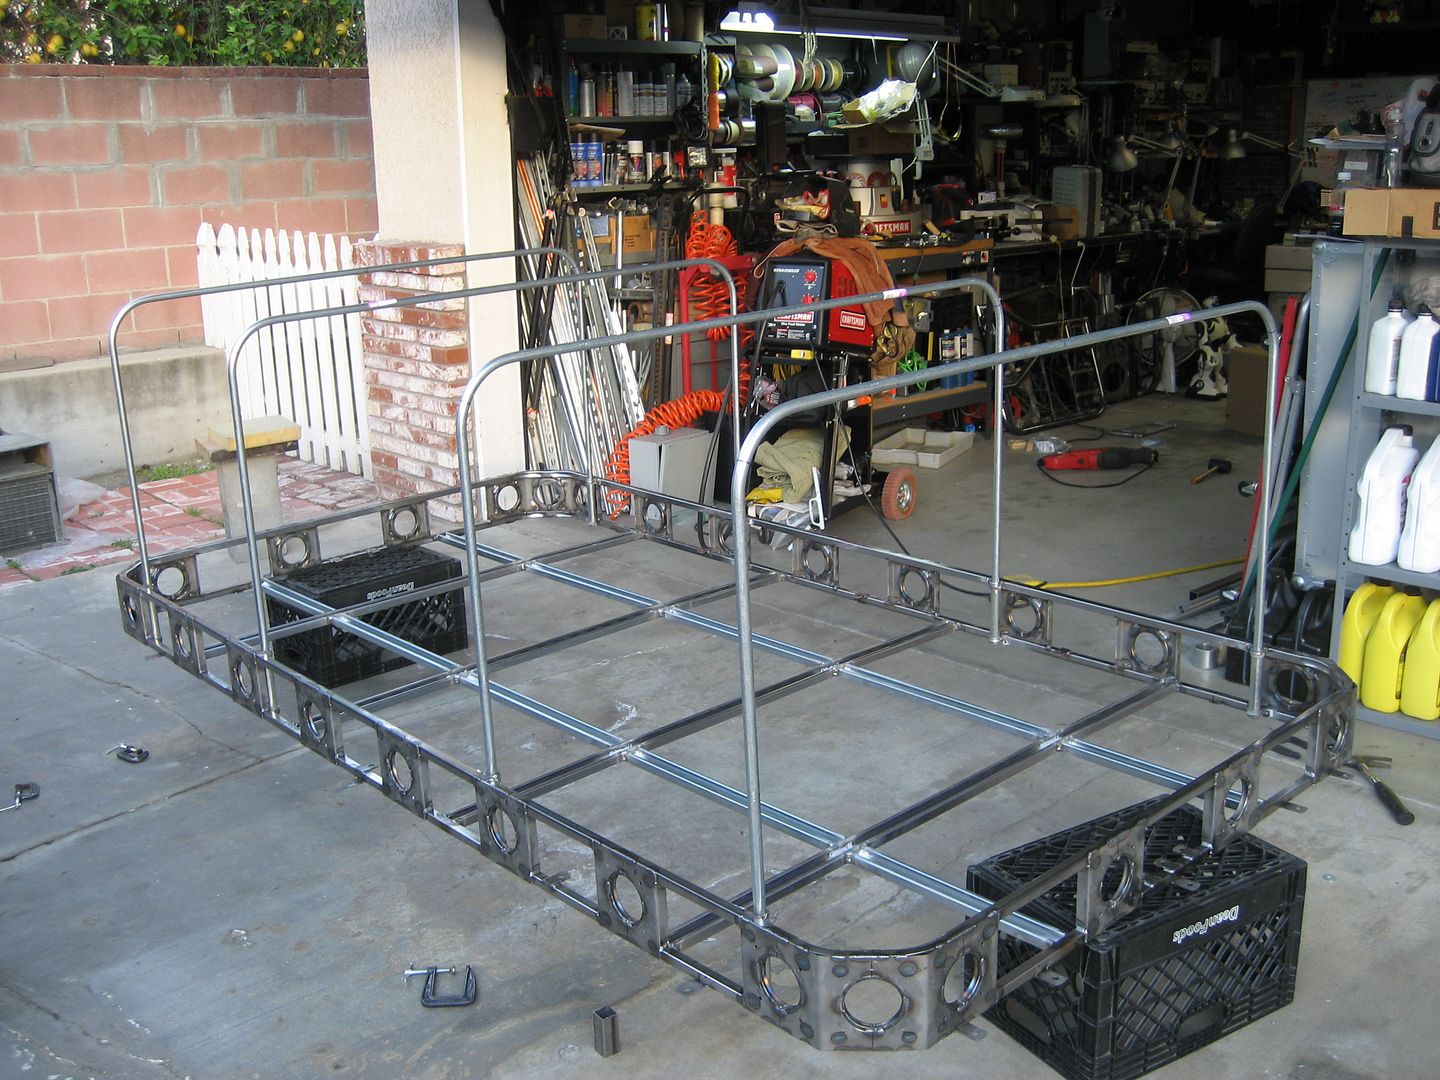
8 units ready to be welded:

Image

The first two welded onto the rack:

Image

Image

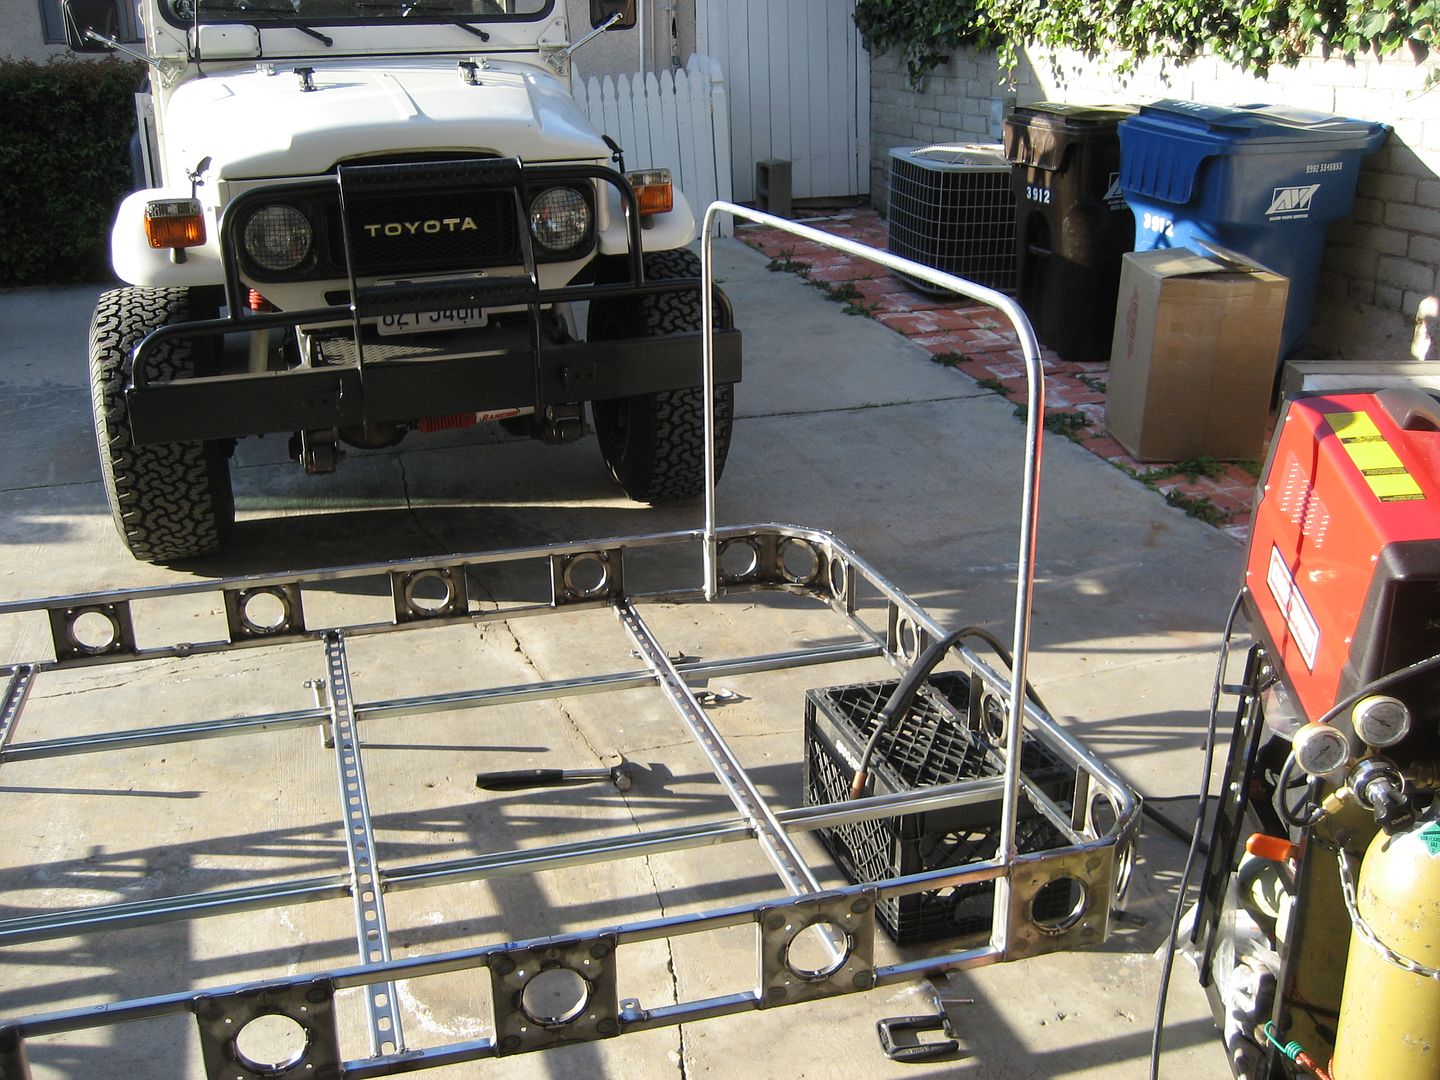
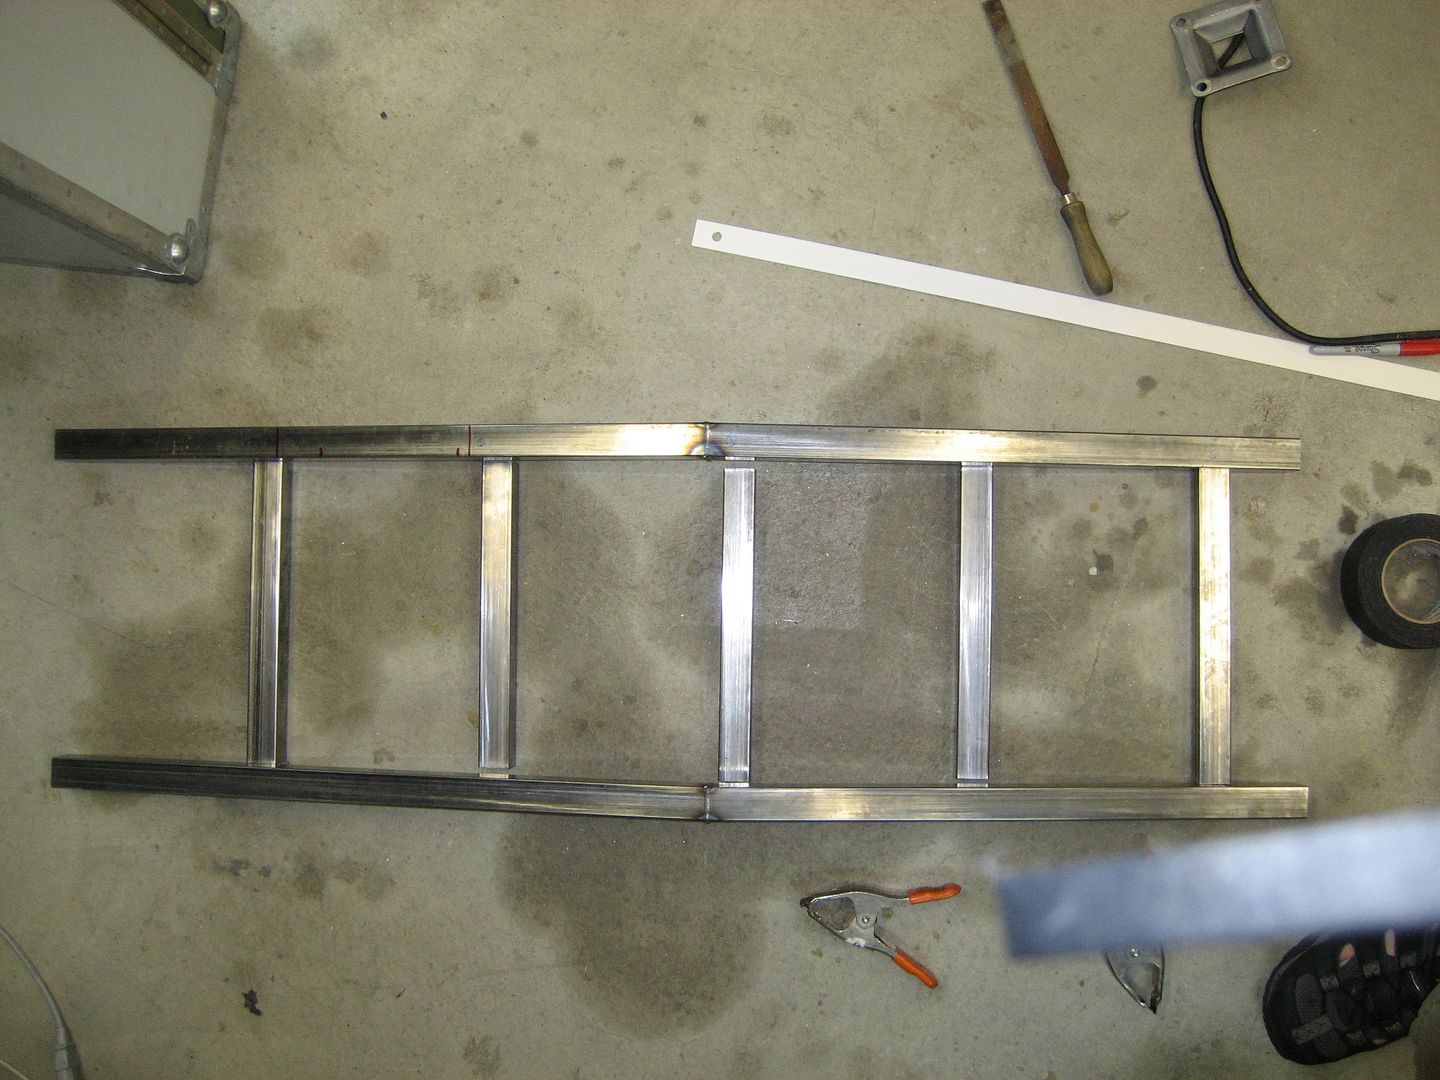
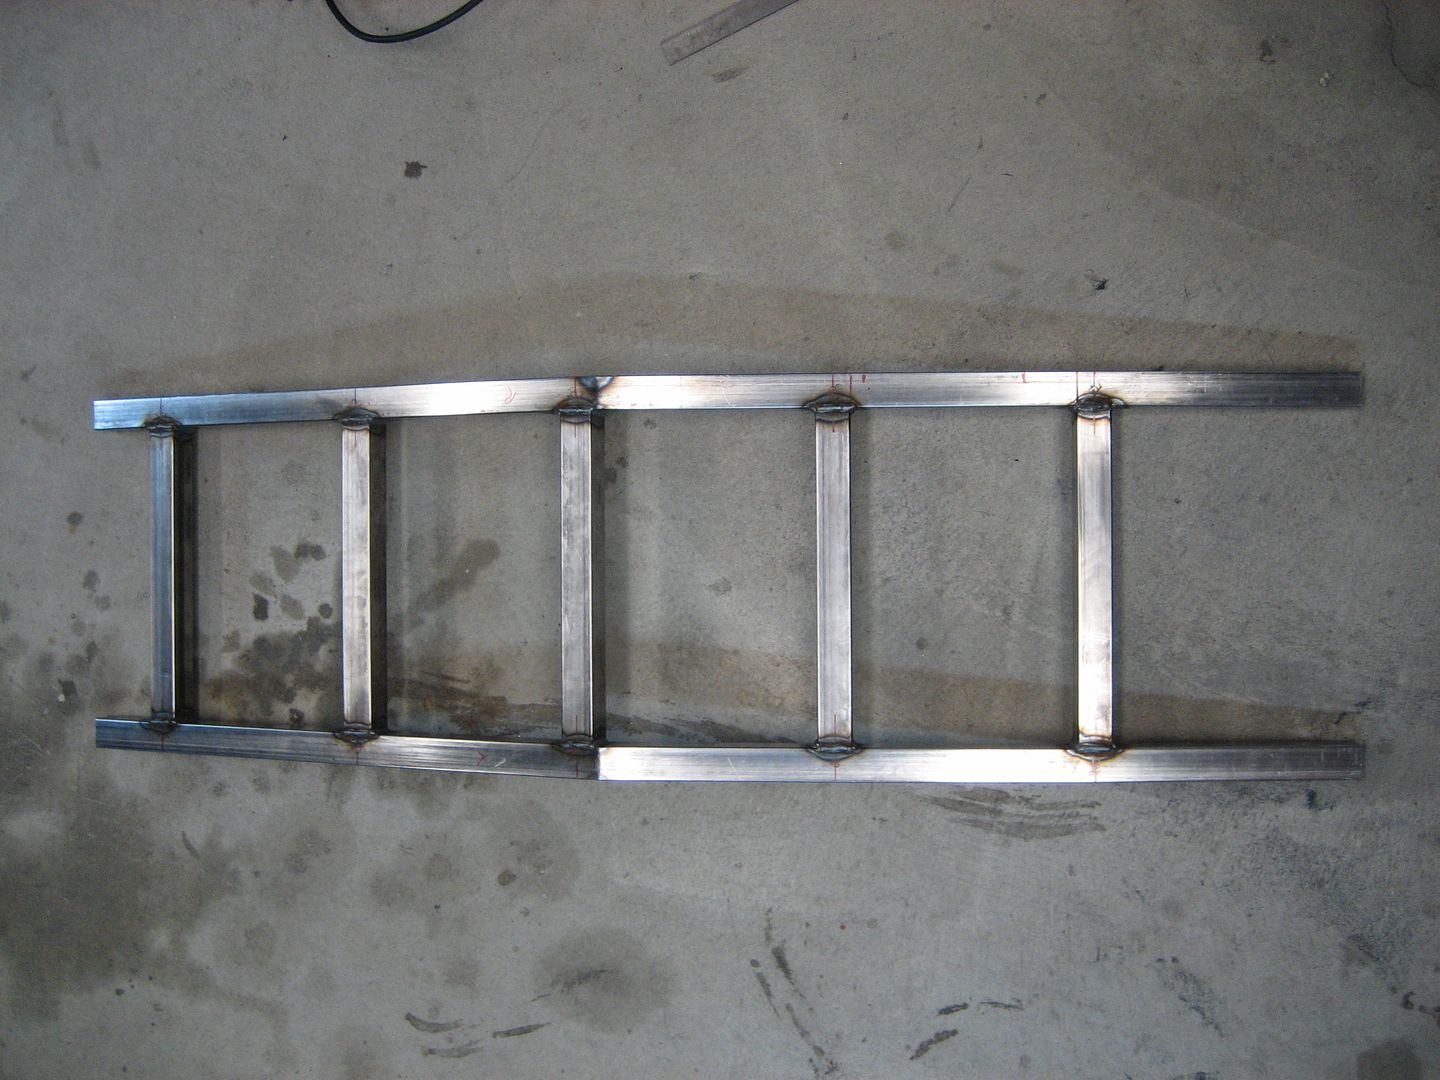
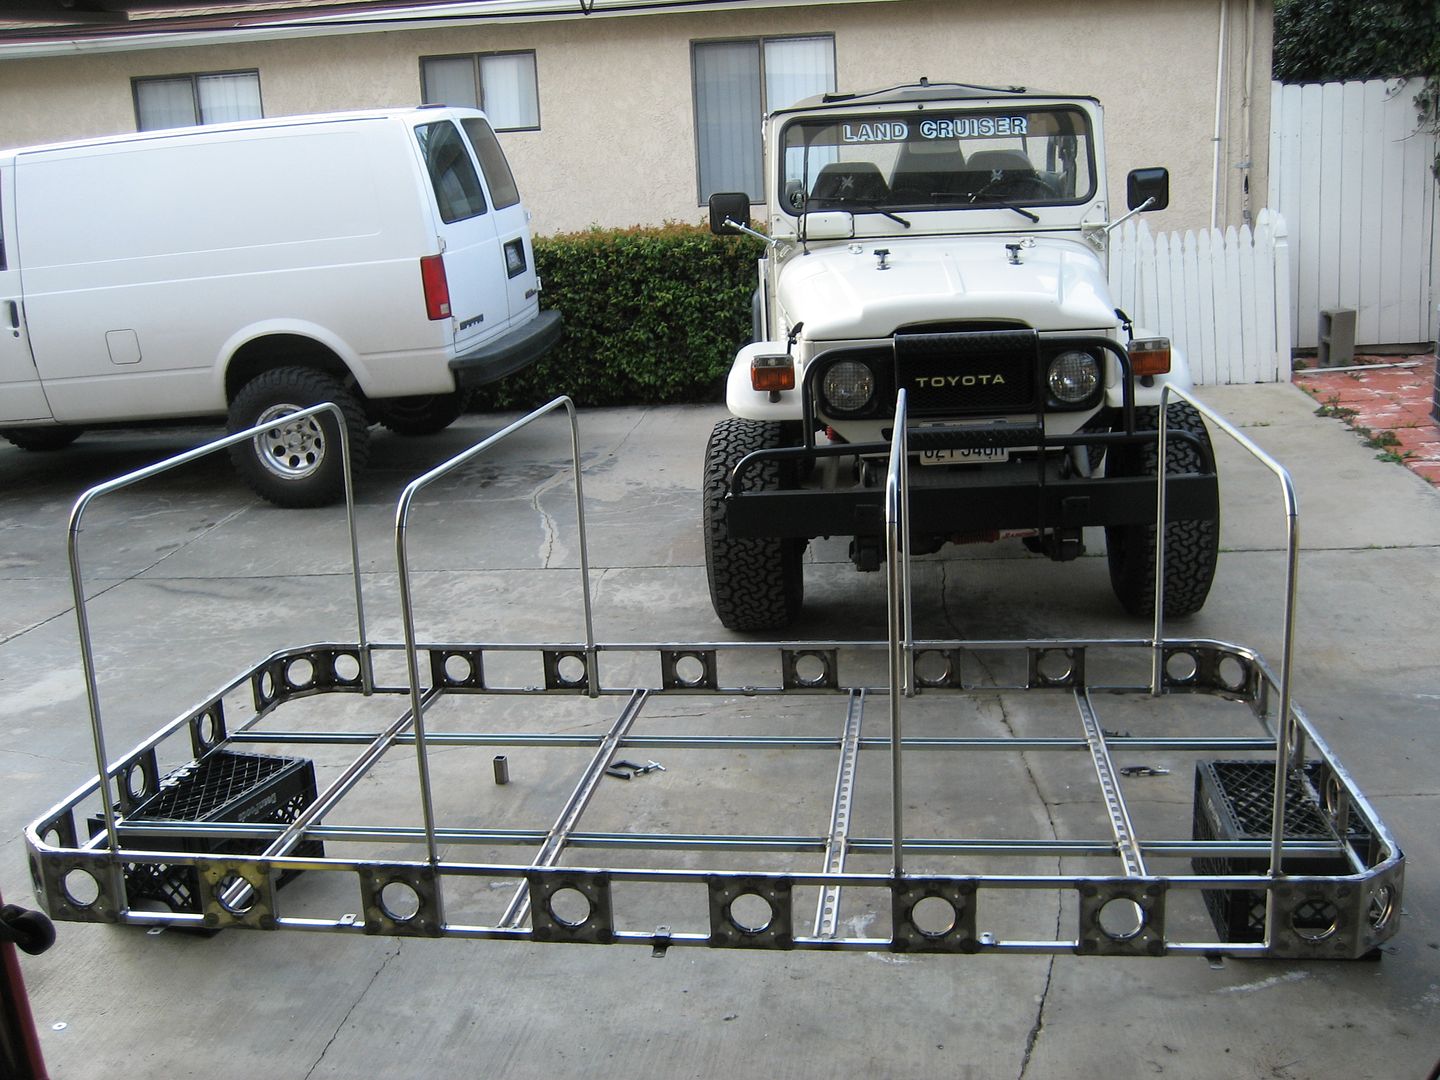
And all the rest too:

Image

Image

Image

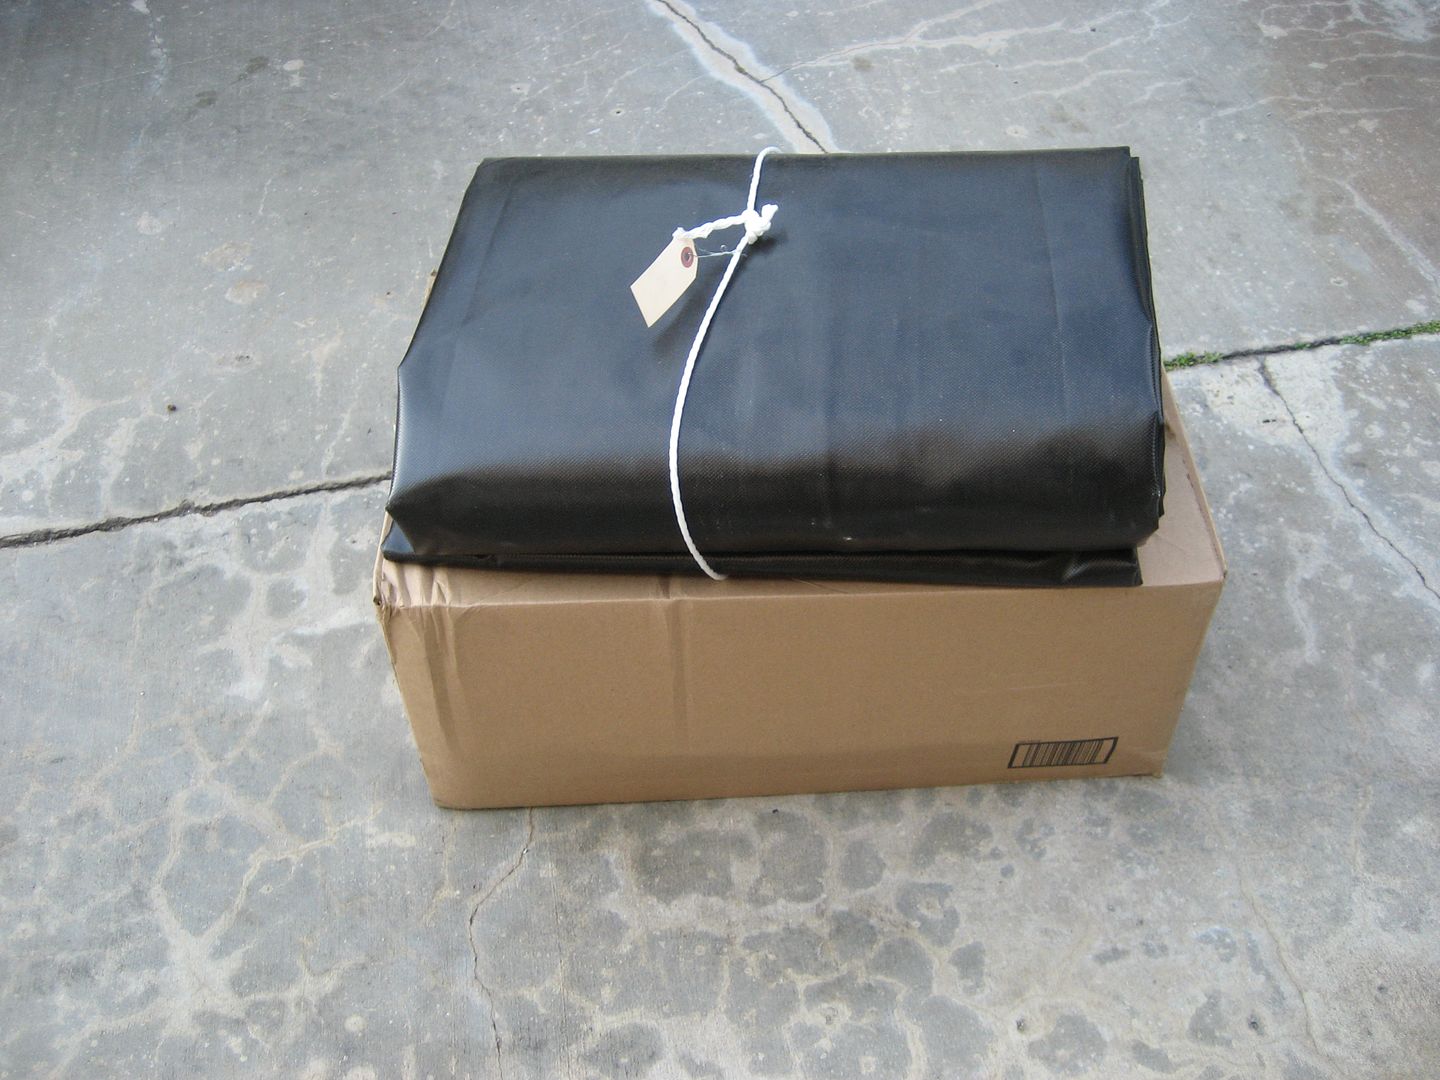
A very expensive tarp to go on top:

Image

Side to side is just the right length but i need to tailor it a bit lengthwise:

Image

Image

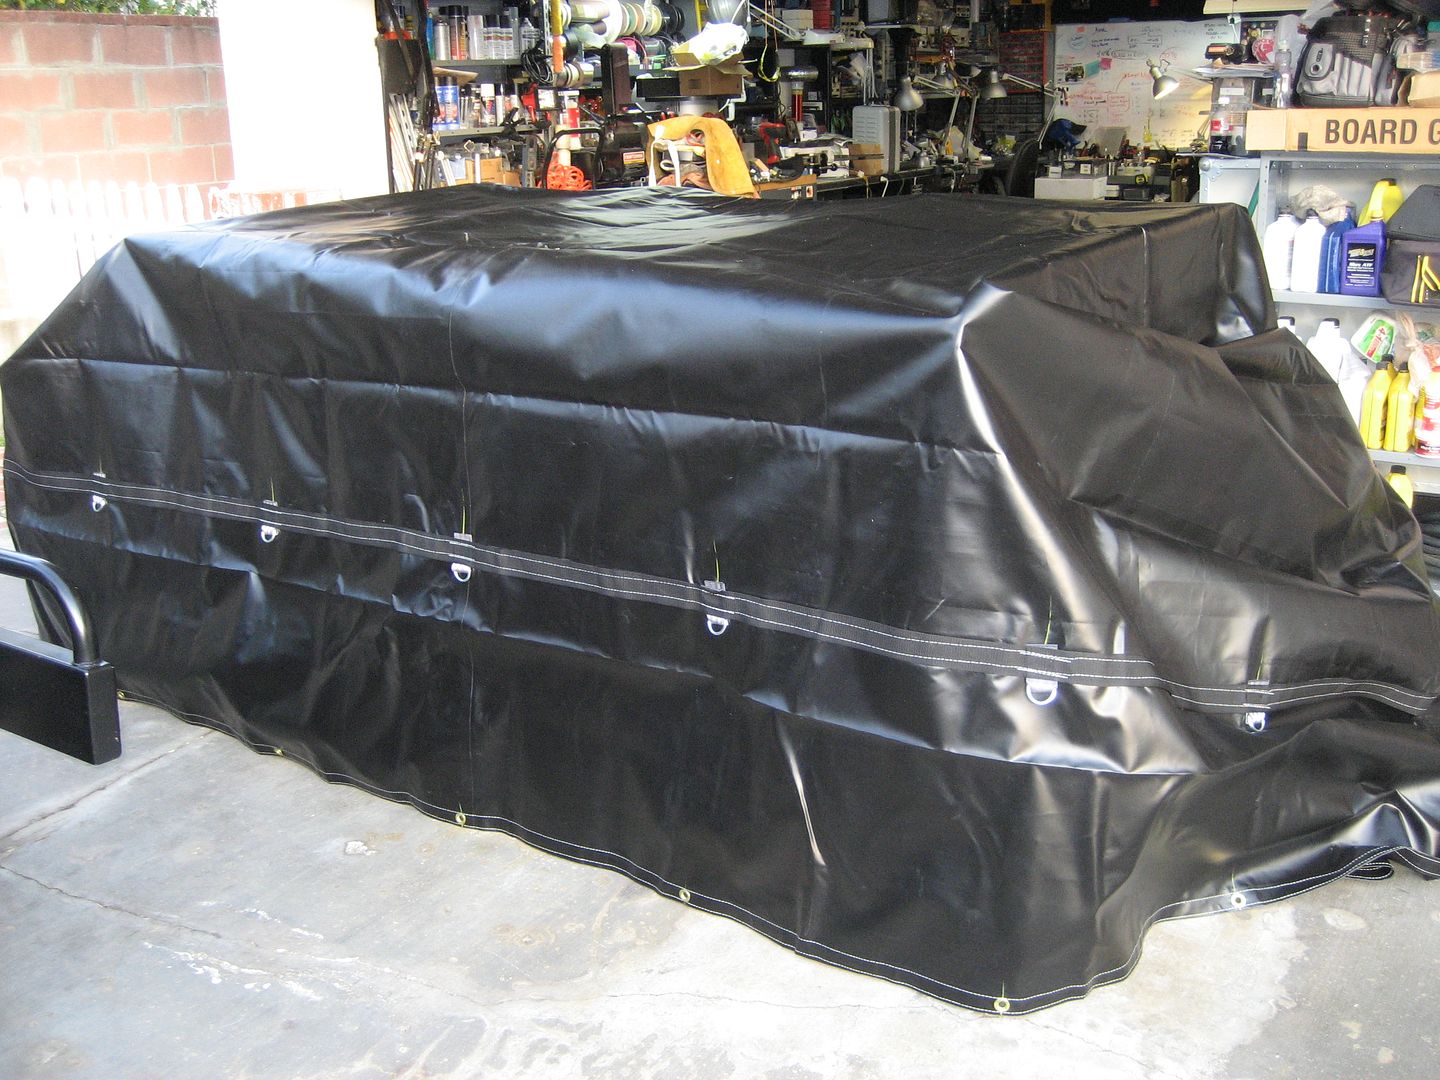
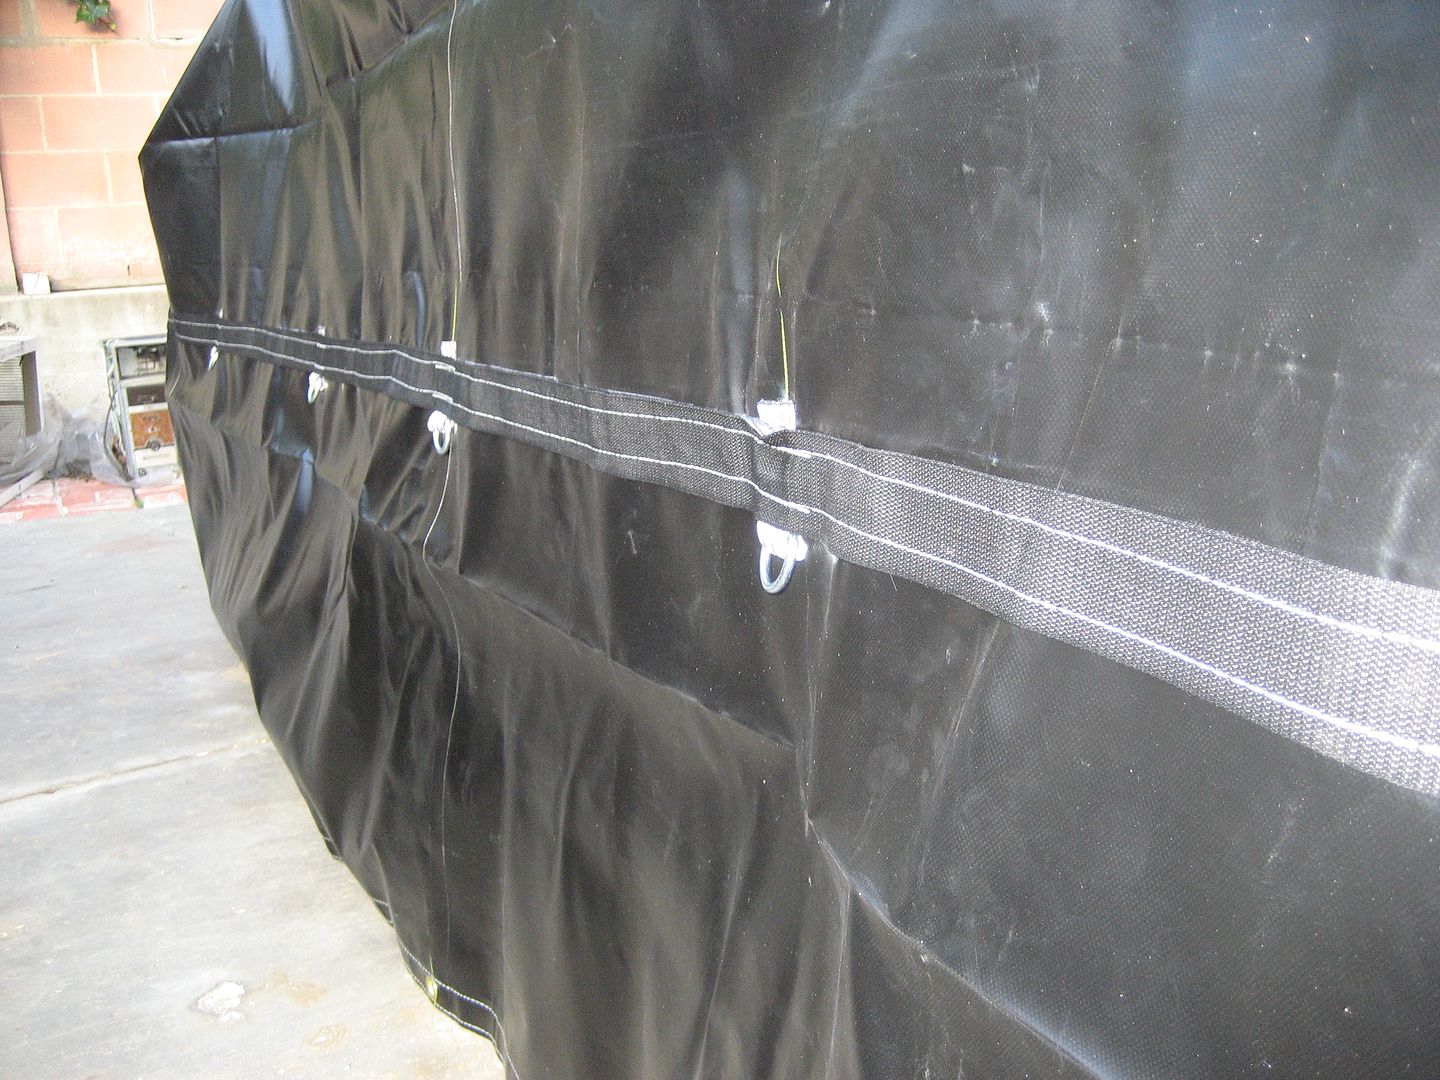
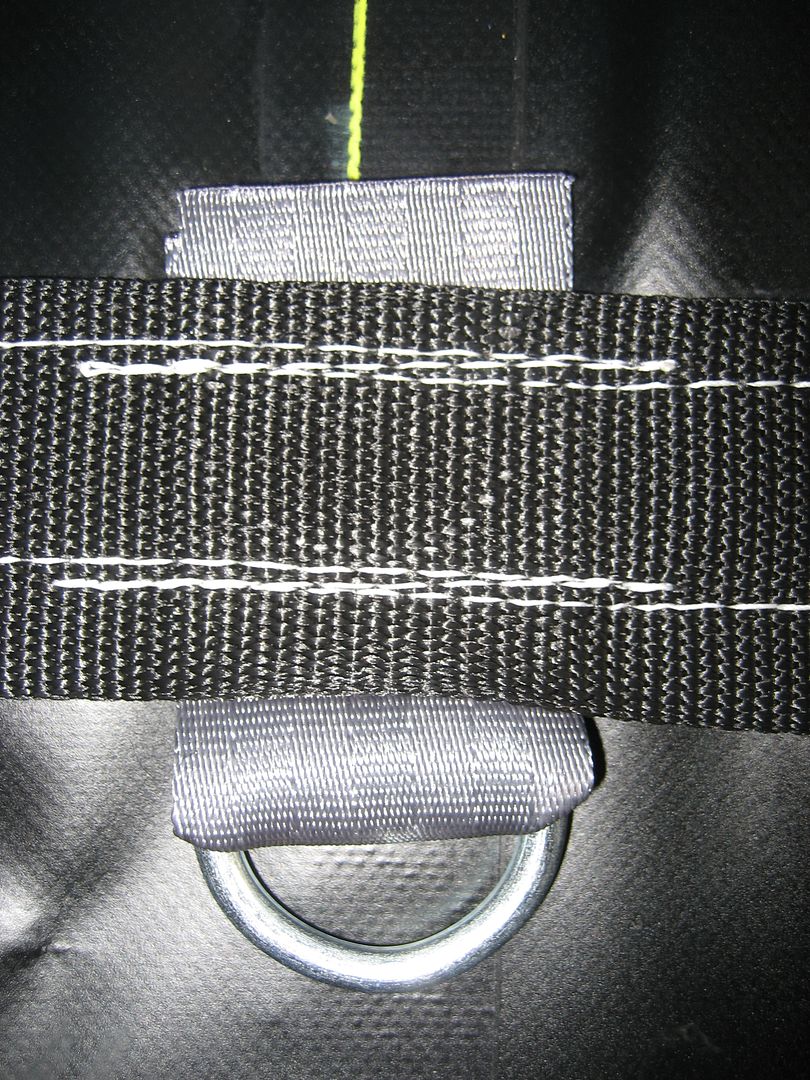
It has D-rings down the sides to secure it, but I will also be using the twist tabs pictured at the beginning on this thread:

Image

Image

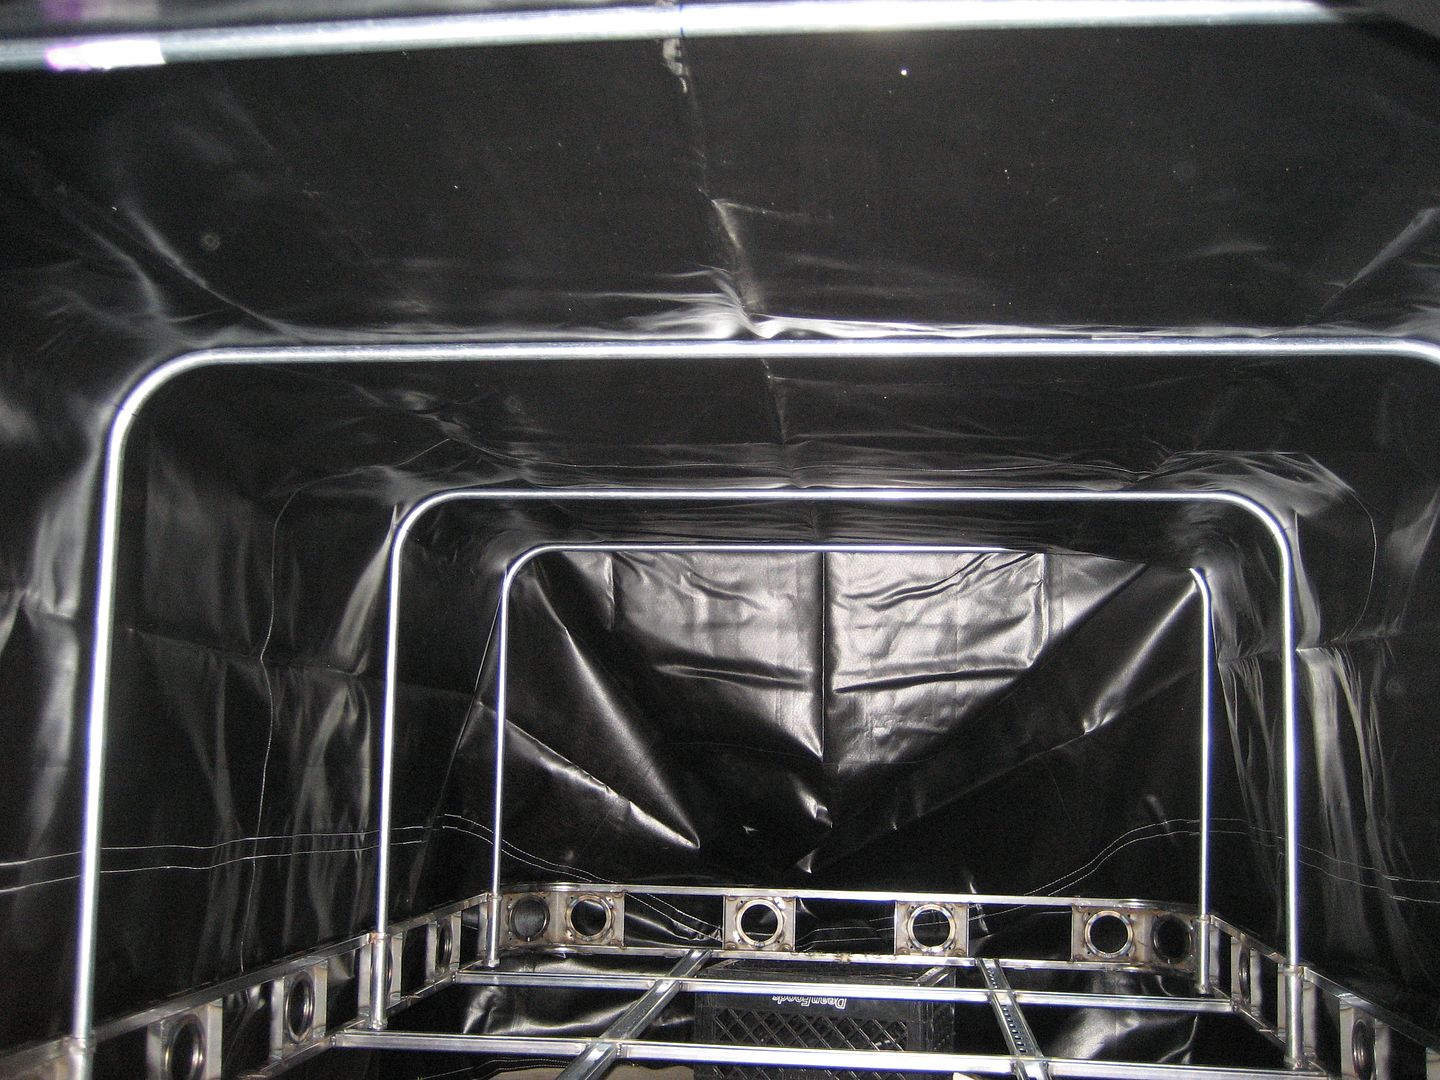
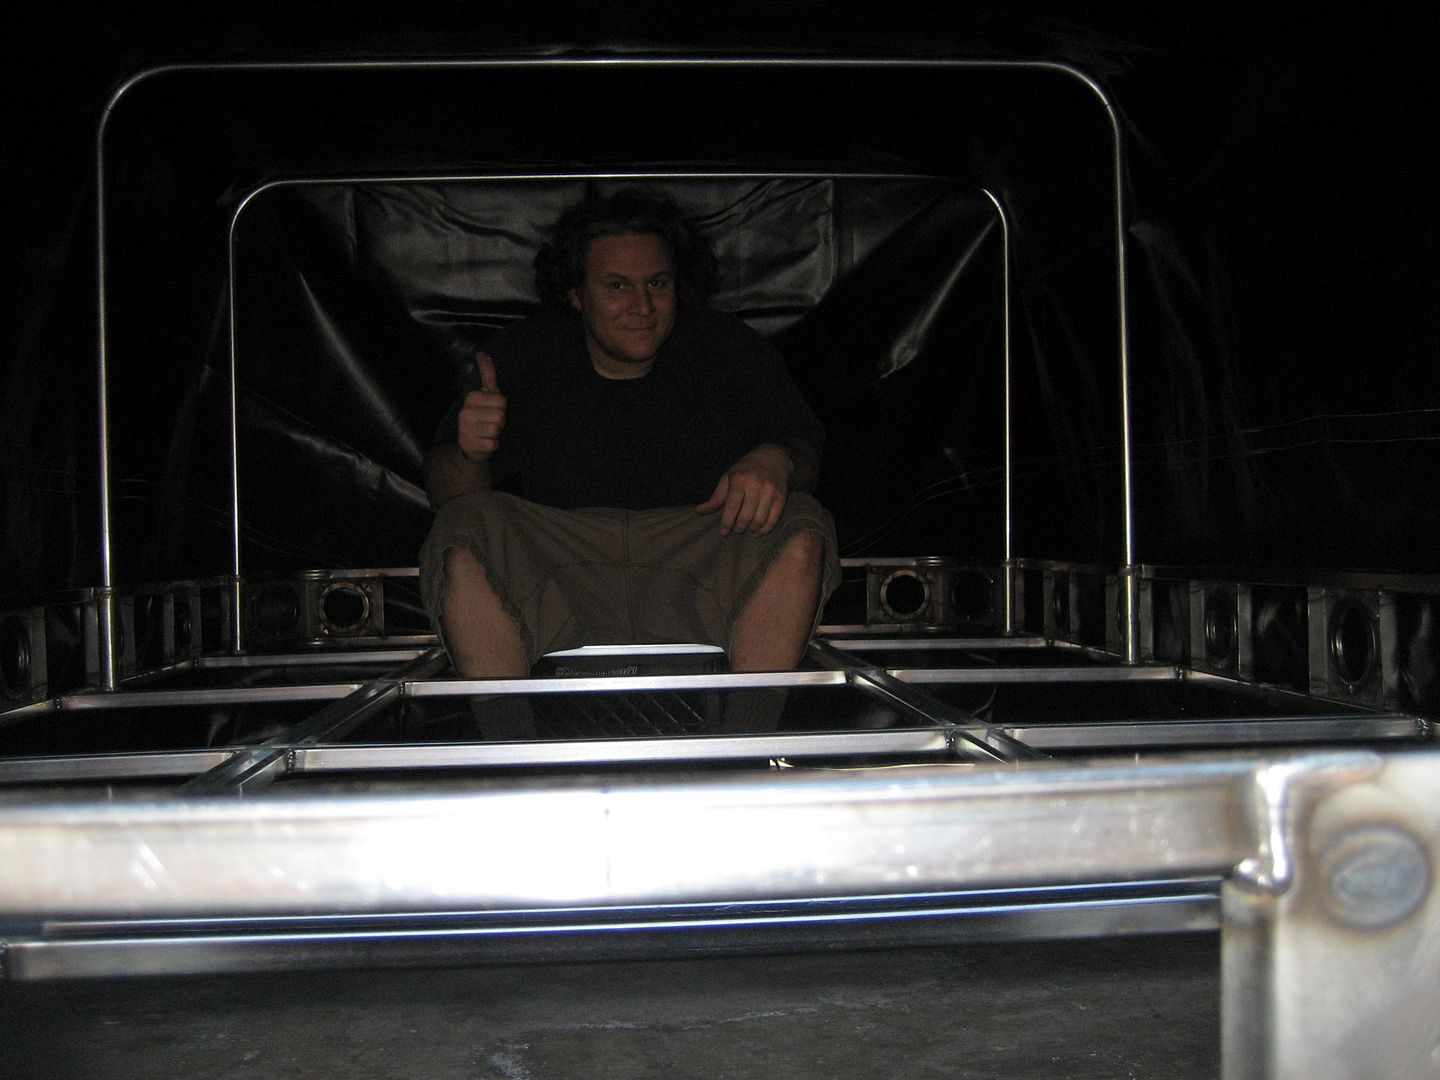
There's just enough room for me to sit up in there, and note that I have a really long torso:

Image

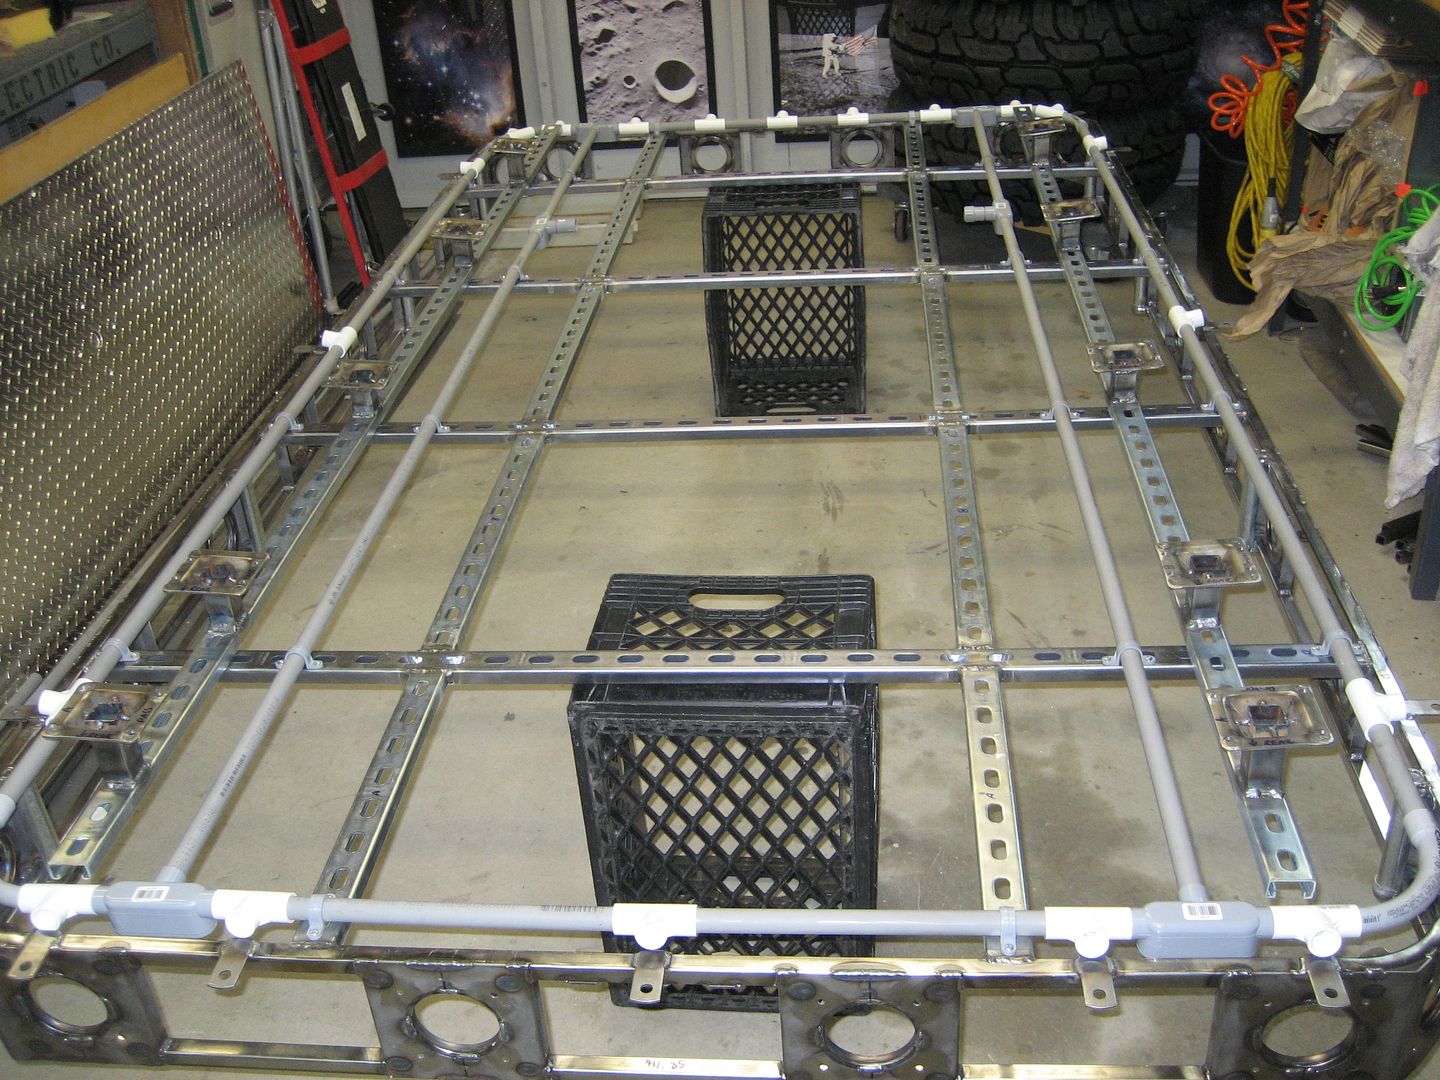
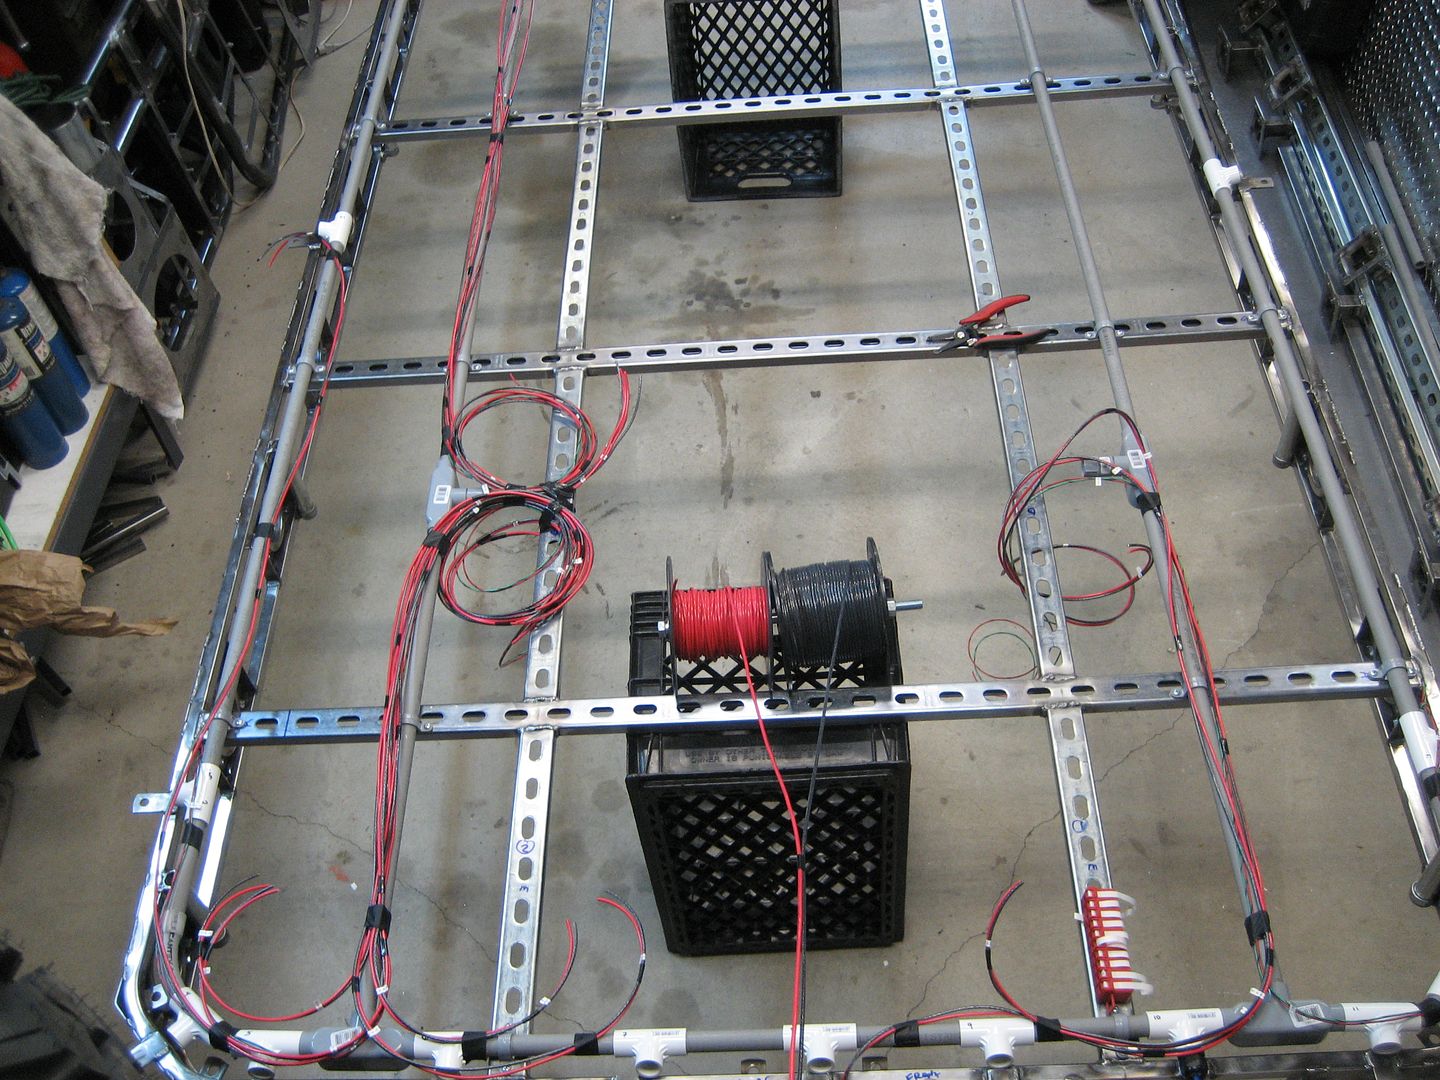
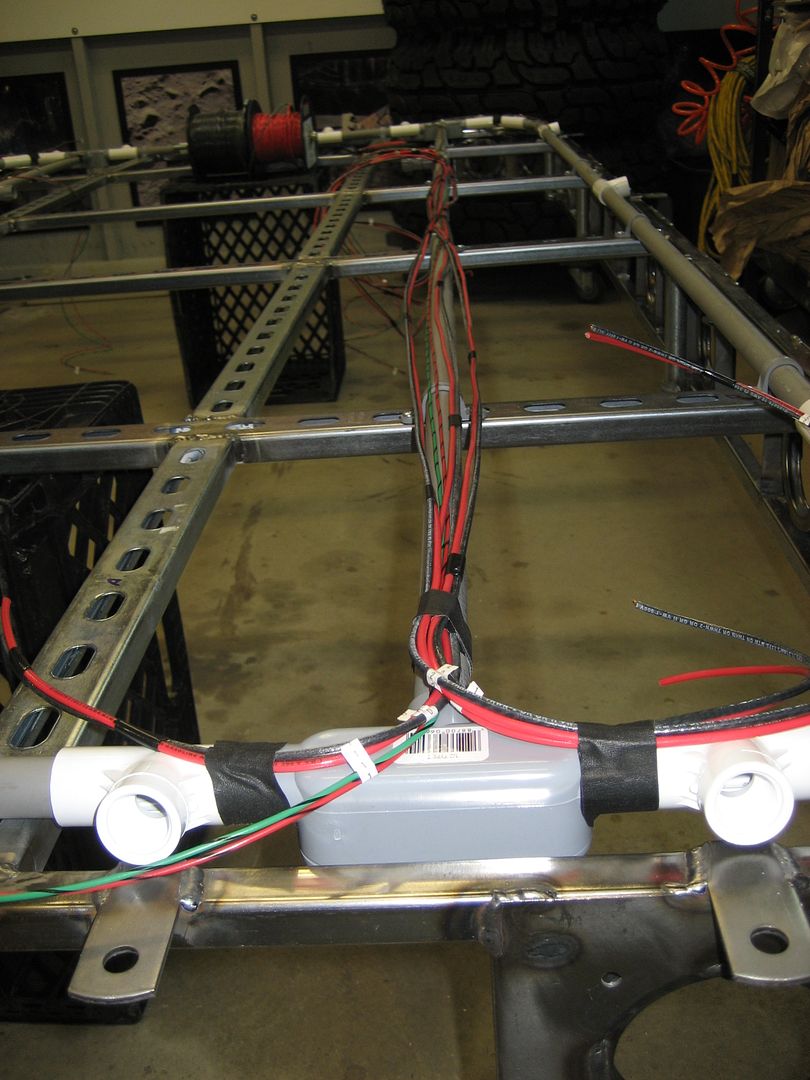
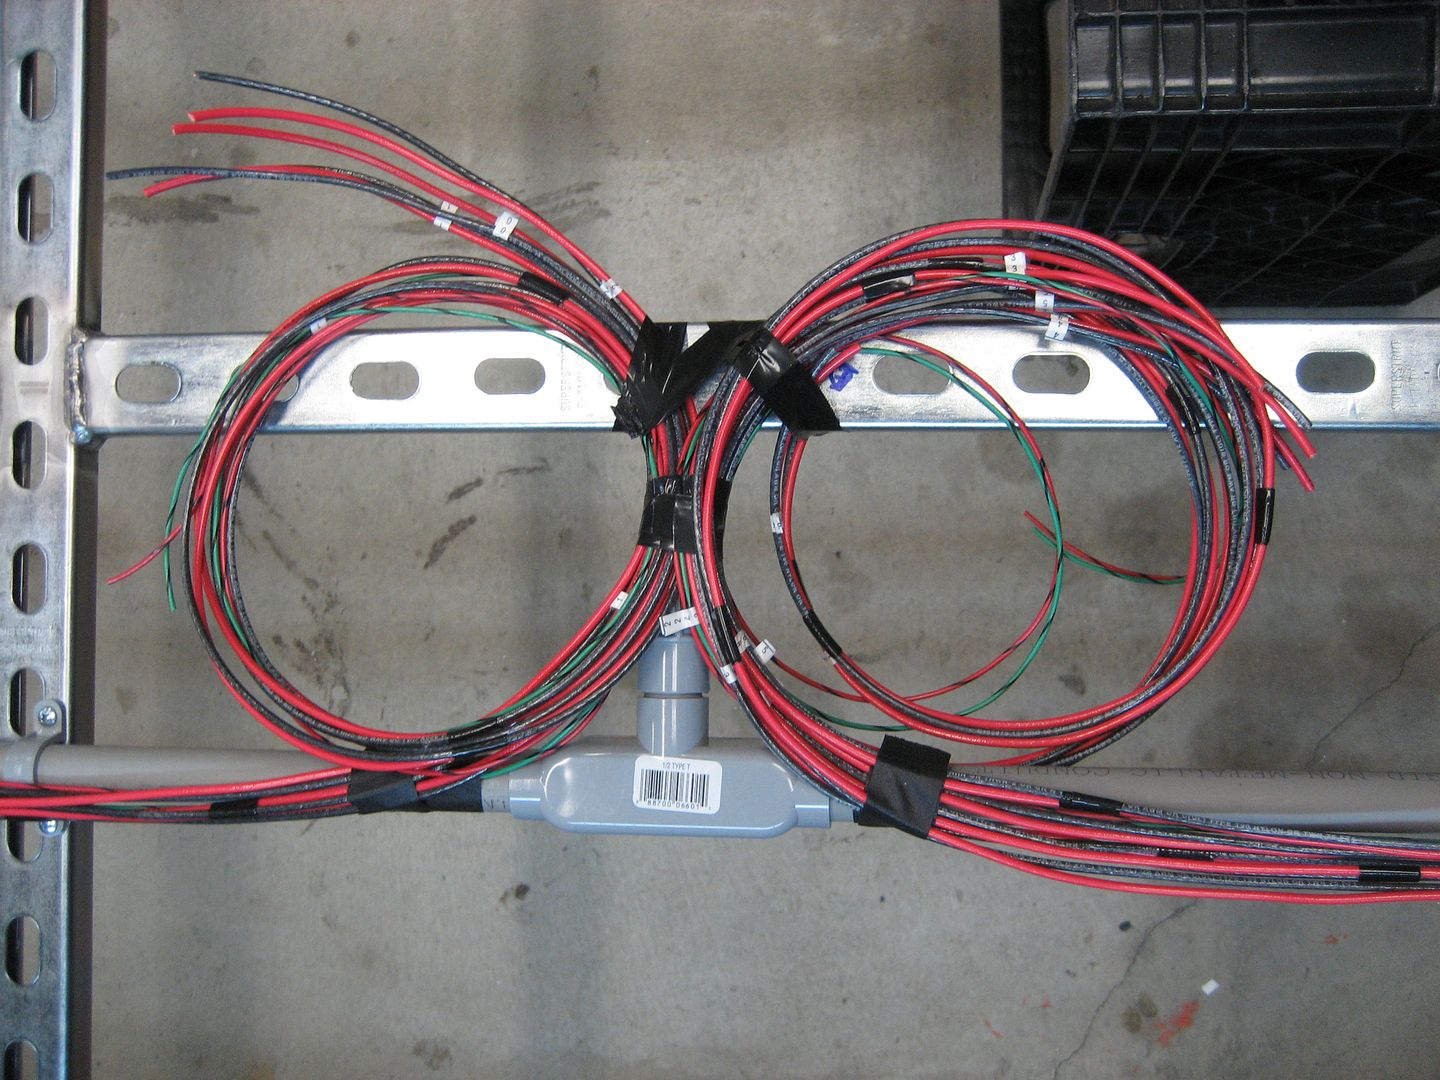
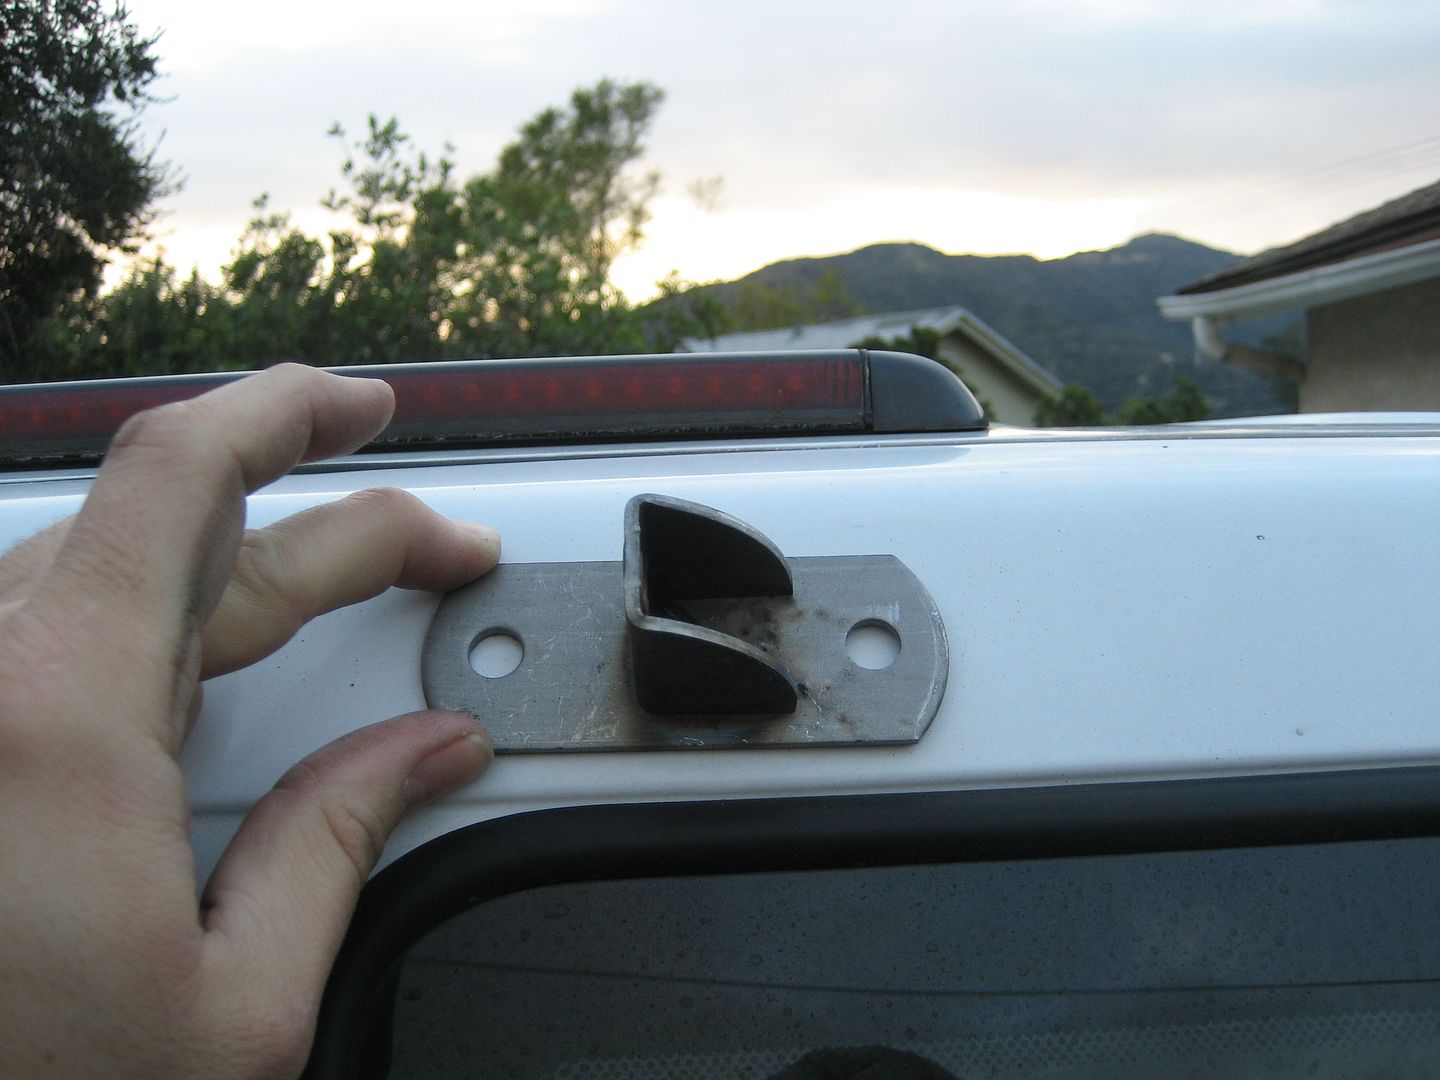
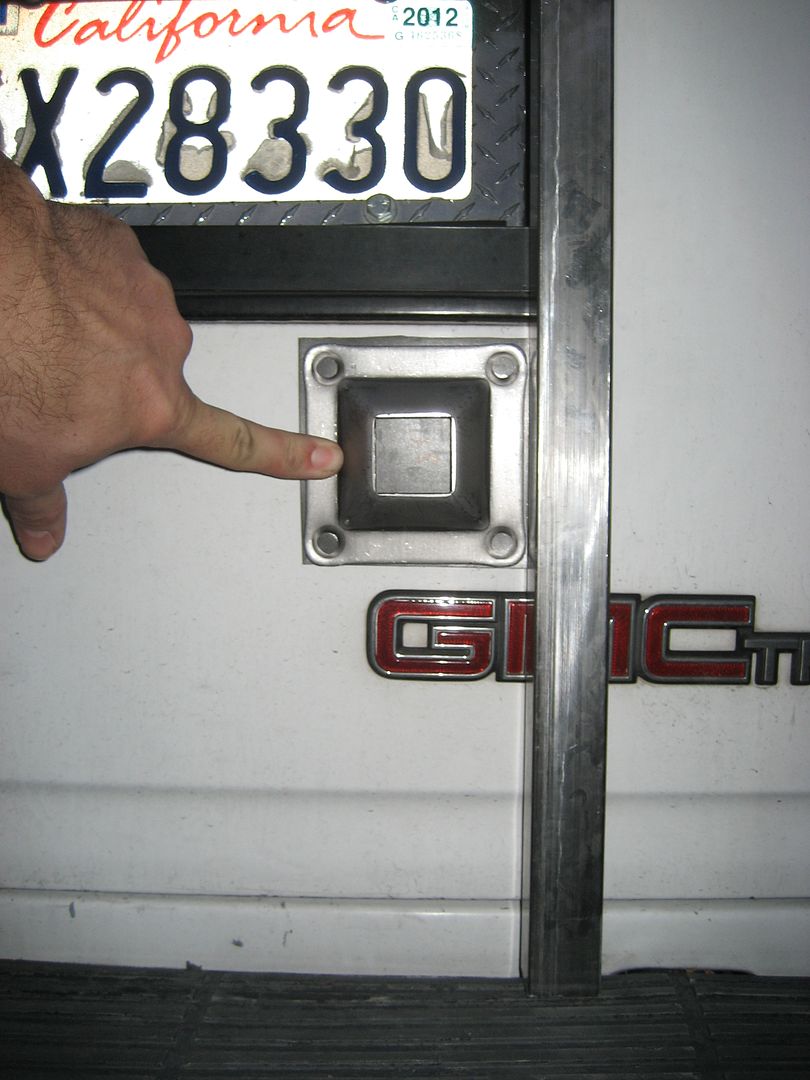
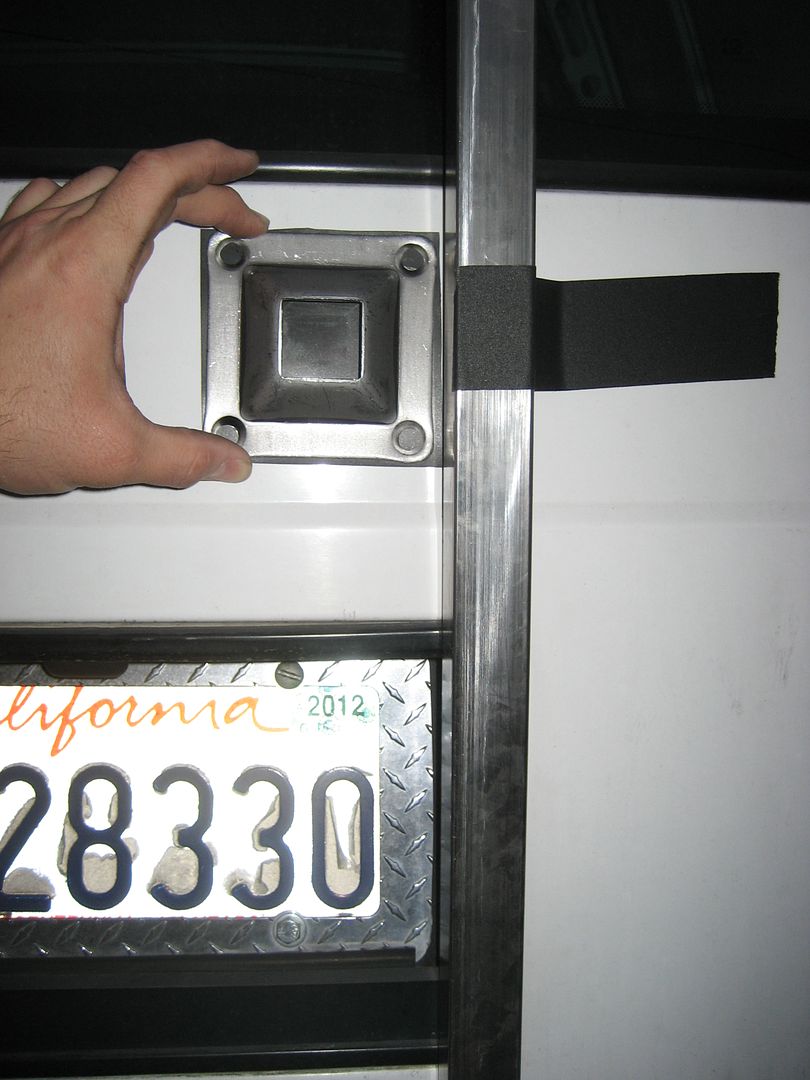
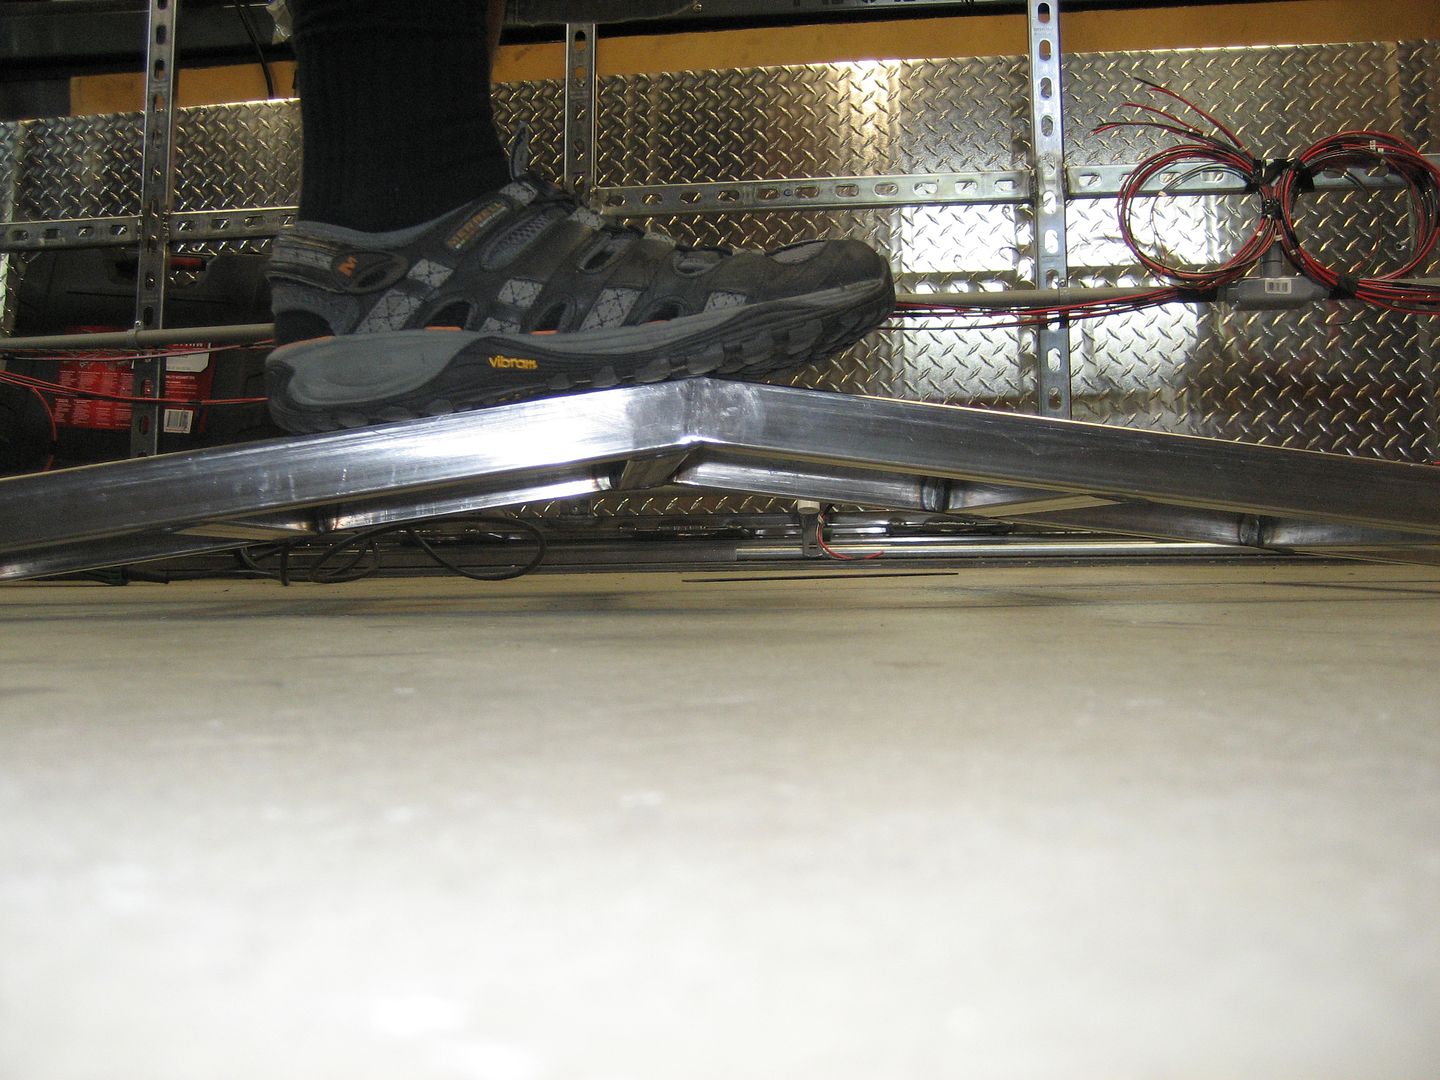
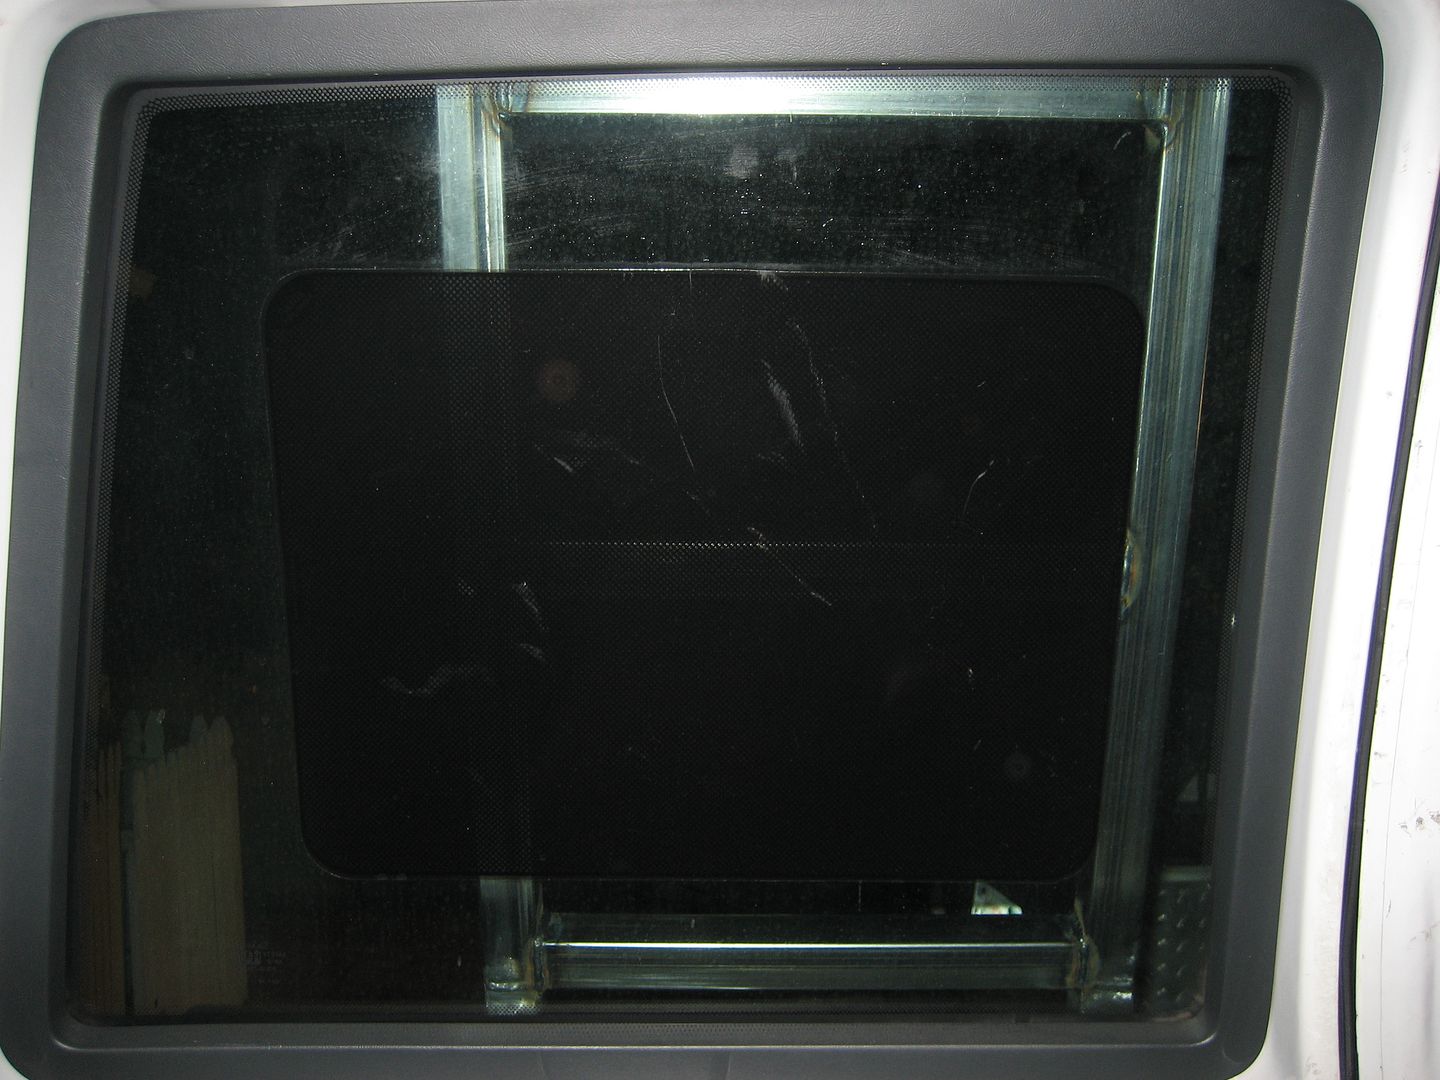
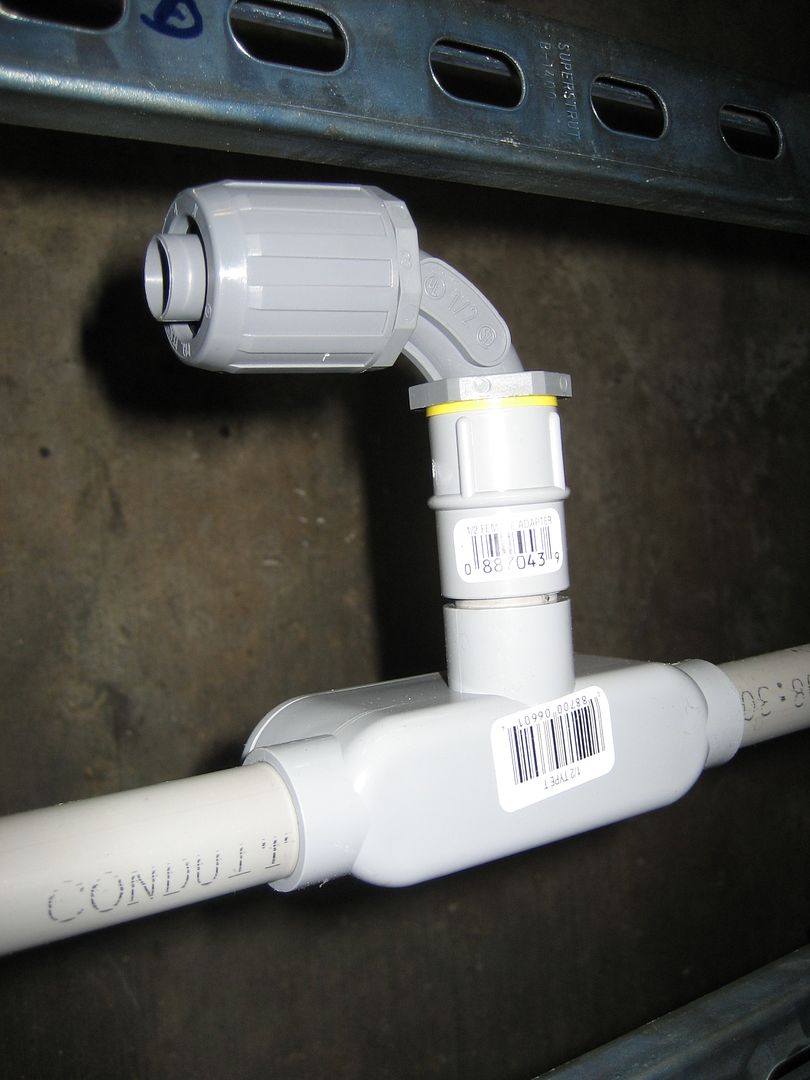
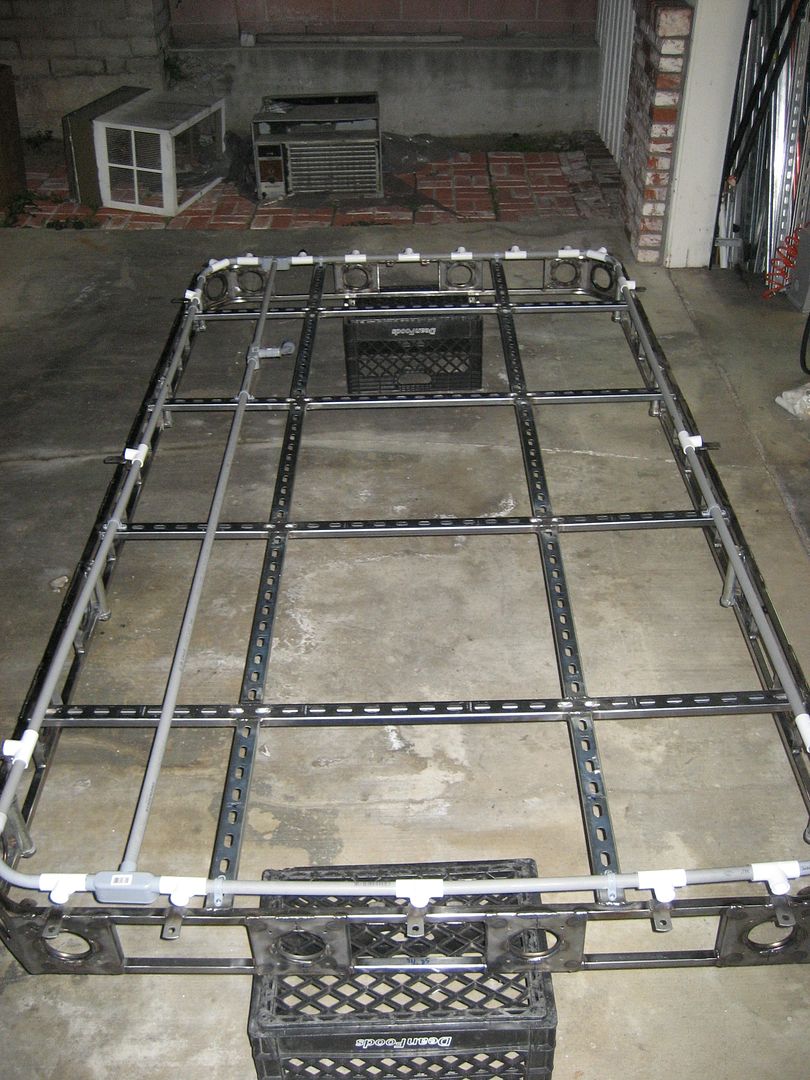
I also worked on the electrical piping:

Image

Image

Image

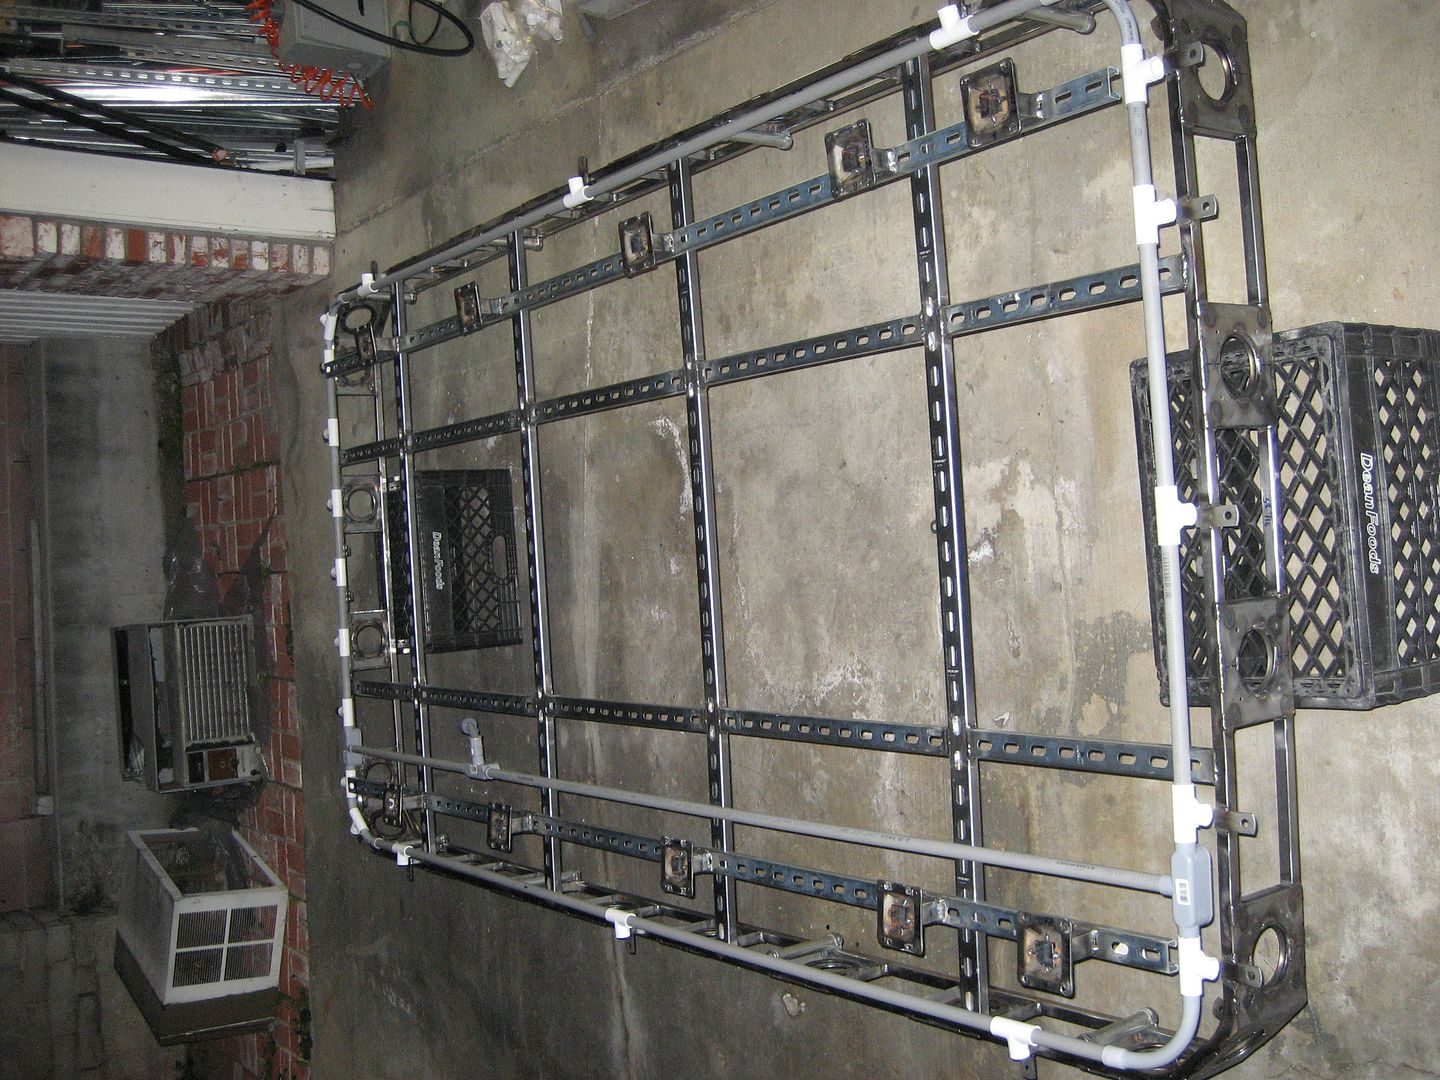
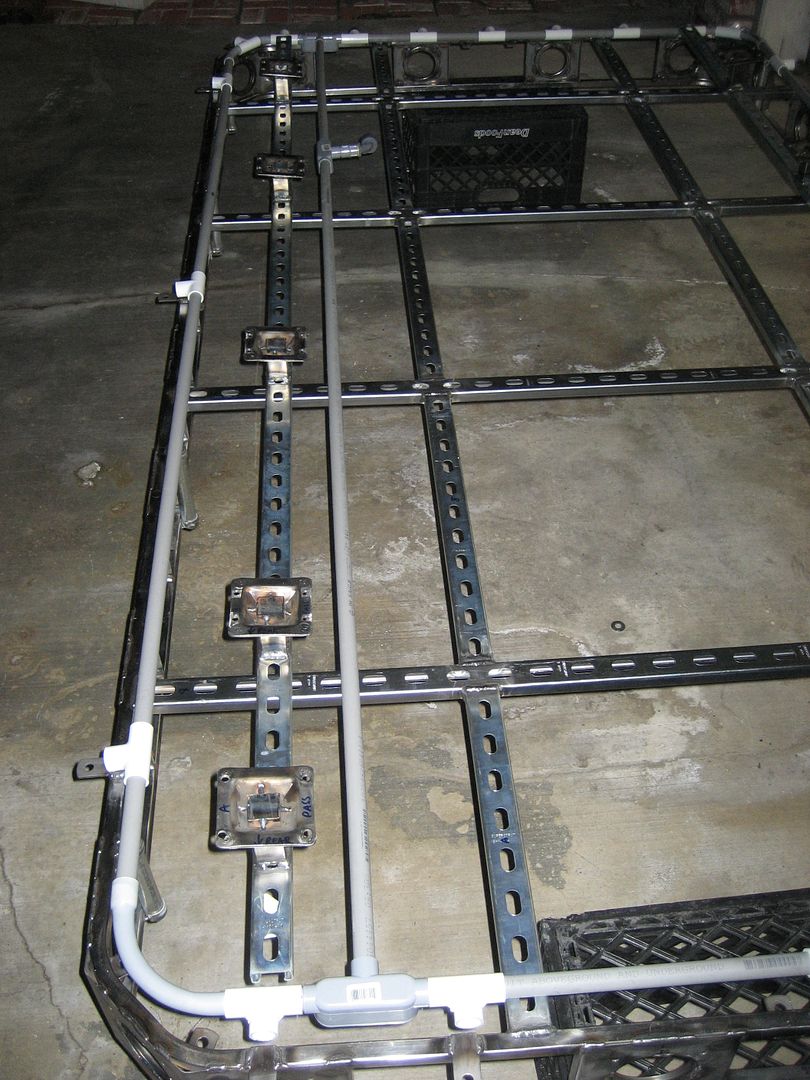
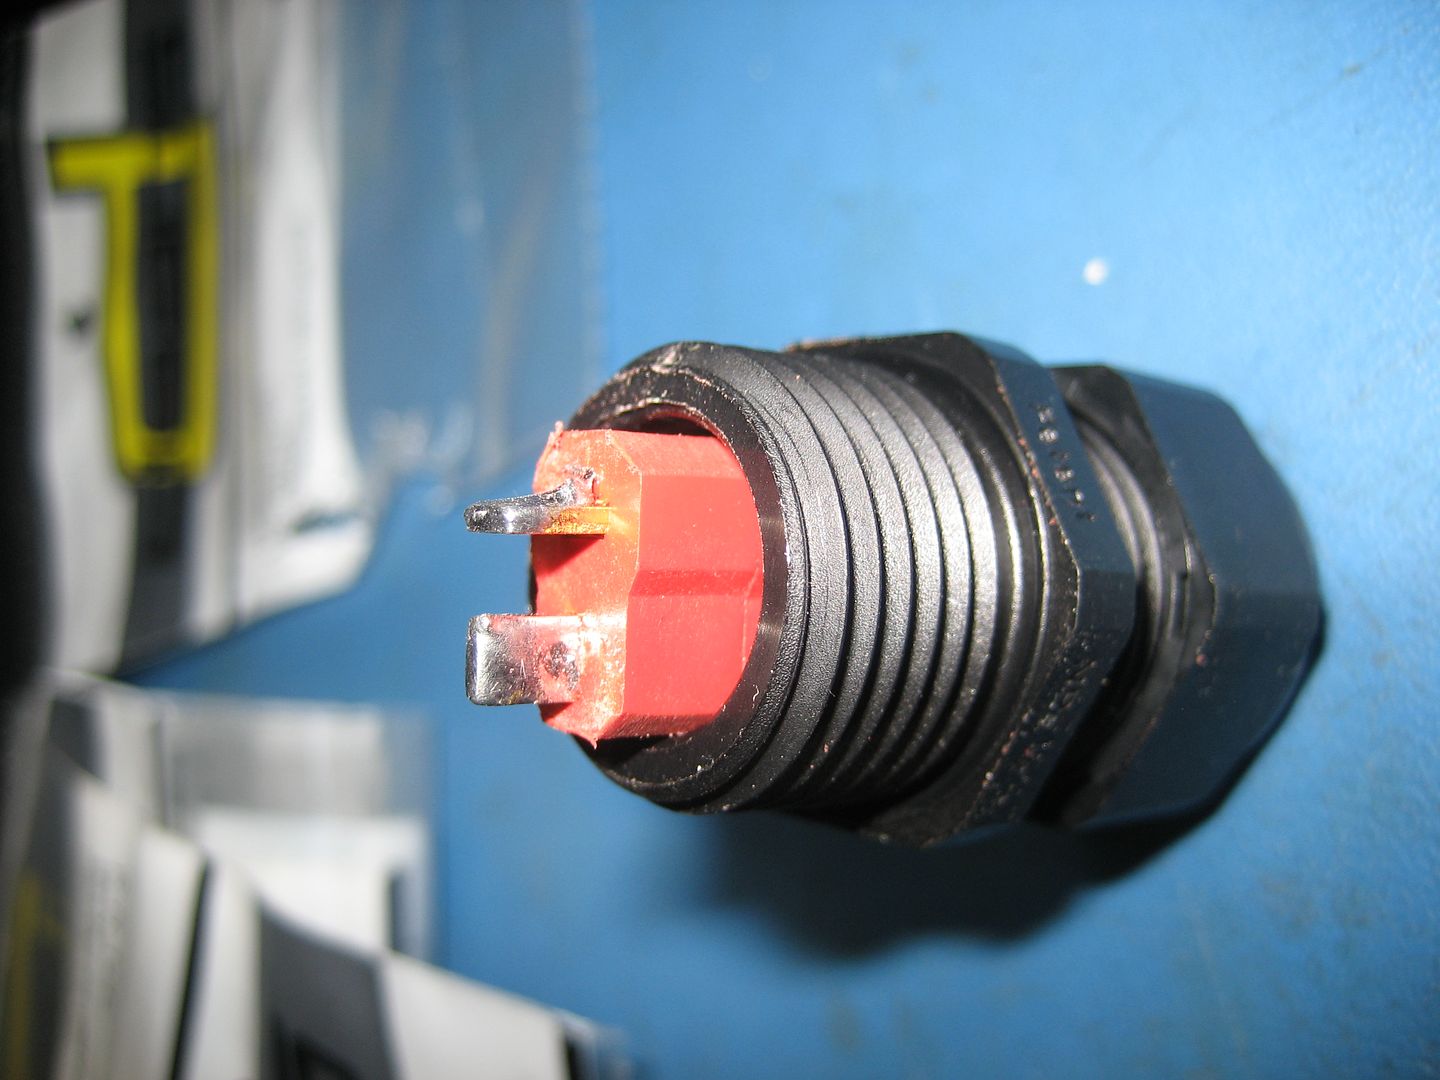
All the wiring for the rack will exit here, go through a rubber hose and enter the roof through a similar style connector:

Image

I still have a ways to go before this is finalized:

Image

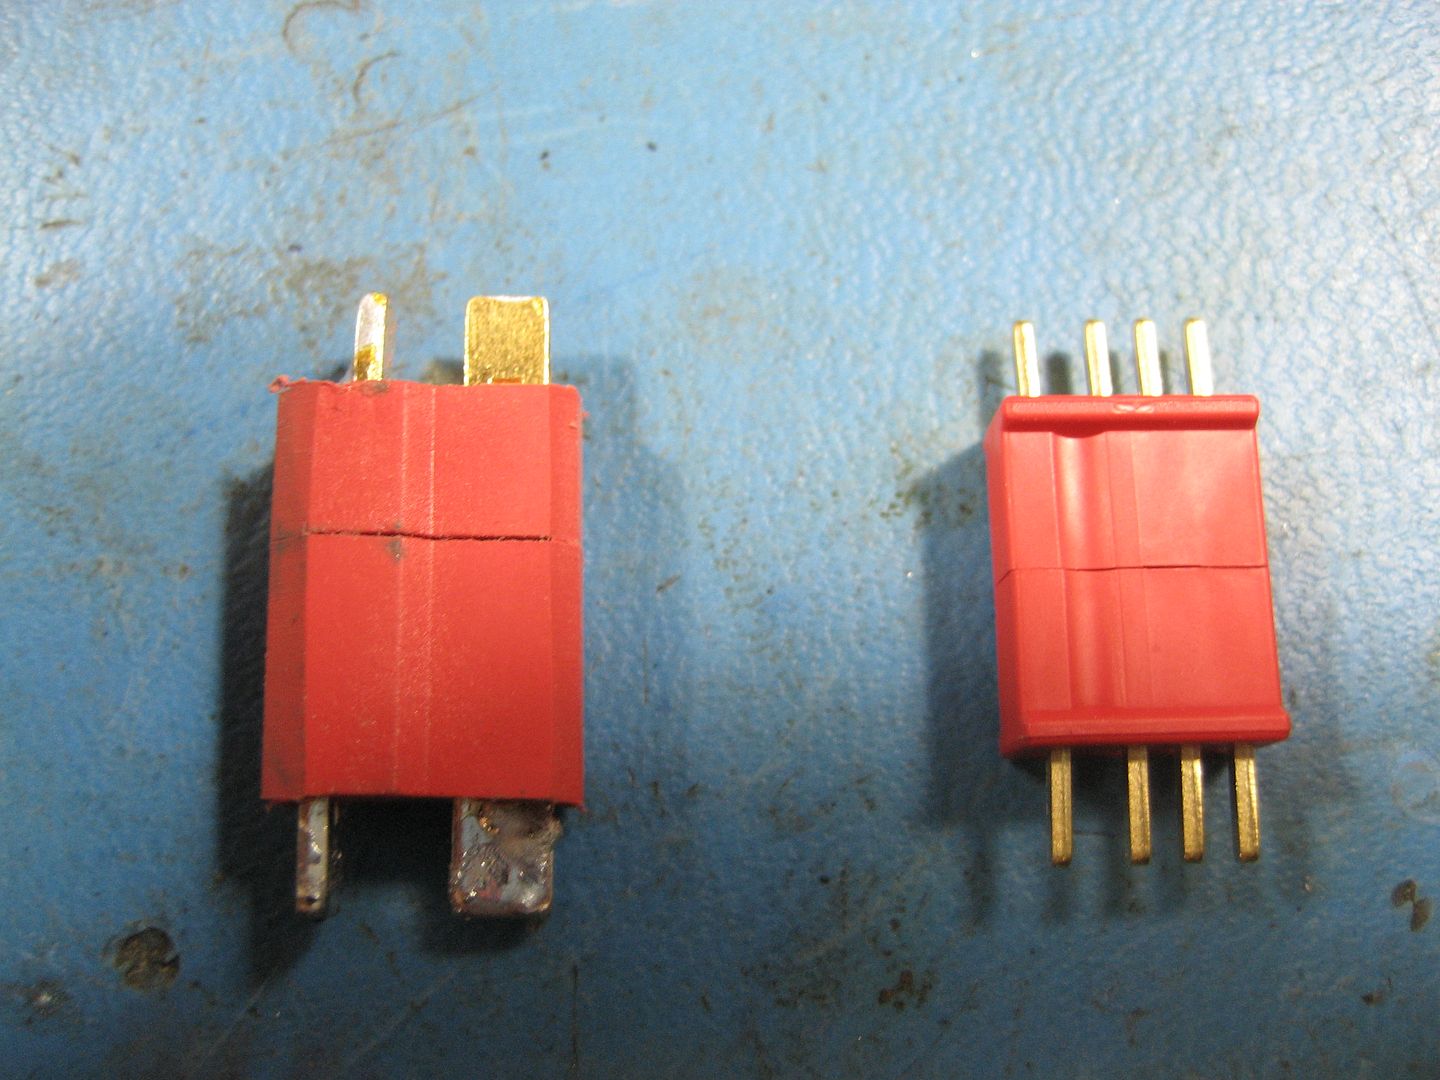
Mostly I need to figure out what type and how many wires I need to run.

I didn't get to painting this weekend since this occupied most of the day. Hopefully I will be ready to paint by next weekend.
1997 SAFARI 2WD CARGO
Image
"I do not think there is any thrill that can go through the human heart like that felt by the inventor as he sees some creation of the brain unfolding to success... Such emotions make a man forget food, sleep, friends, love, everything." Nikola Tesla
User avatar

MountainManJoe
I have my van tatooed on my cheeks
Posts: 3144
Joined: Fri Aug 08, 2008 12:55 pm
Location: The Pacific North Wet
Has thanked: 48 times
Been thanked: 25 times

Re: Homebrew Con-Ferr Style Porthole Roof Rack Build

Post by MountainManJoe »

Nice rack :muhaha:

The drama ... not so interesting.

Topic author
97CargoCrawler
I sleep in my van
Posts: 754
Joined: Thu Jan 24, 2008 11:50 pm
Location: Near Los Angeles, CA
Contact:

Re: Homebrew Con-Ferr Style Porthole Roof Rack Build

Post by 97CargoCrawler »

Back to it.

I was going to paint last weekend but the weather was crap. So then I was going to paint this weekend and well....

Image

The weather was crap. It's hard to see but it is raining out there. This is CA...WTF? It's supposed to be all sun and babes in bikinis! :D

I decided I needed to add another pipe to the system. The 12ga. stranded wire I'm using is very beefy. I'm running wires for 17 lights and 3 cameras (one back-up and two sides). The lights need two power wires and the cameras need two power wires and a coax cable. I'm using 18ga wire and Belden micro coax cable for the cameras. That's a whole lot of wire to feed thru 1/2 conduit. I added an extra pipe to spread out the volume of wire. With this I'm also having to add in another entrance into the roof. There will be two wire feeds coming into the roof right behind the roof cross member above the front seats. I'm probably going to swap in 3/4" boxes for those feeds just for more room. Each of the other junctions will have 1/2" boxes.

Image

Image

Today I ran all the power wires on the outside of the conduit to get the lengths right. I'm going to have to run the wire through the conduit and cement the pieces together as I go. It will be too difficult to pull it through after the pipe is cemented together.

Image

Each wire will pass through multiple junction boxes on its way to the feed. The wires will have ID tags visible in each box. This will make for easy pulling and repairs if needed in the future. The system is so bullet proof I doubt it will ever be necessary in my lifetime.

Image

Each 1/2 pipe can carry enough wire for 7 lamps (14 12ga wires) and a few 18ga. strands. The last junction box on one side will have wire from 9 lamps and the other will have from 8 lamps. Plus one of those will have power wires from the cameras and the coax for the video. So you can see why I will need to go with a 3/4" box where they all come together:

Image

I'm going to be using "DEANS" brand high amperage connectors for the lamps and lower amp connectors for the video cameras. The lamp connectors have two blade style pins (+ and - power) and the cameras get a 4 pin connector (+ and - for power, video ground and signal):

Image

I chose these connectors because of their compact size and current carrying capability. With little modification they will fit within the confines of the liquid tight cord grip:

Image

Image

The larger connector needs to have the corners shaved a bit to slide in. I will be able to solder the wiring to the backside of these connectors and seat them in the TEE's. The cord grips will then screw down over the top of them. The cord grips have a cap on the end that unscrews and a rubber plug that pulls out. I will be able to mate the two connectors through that side. Sorry I don't have a photo of that yet. Basically I will be able to unscrew a fitting and pull the connectors apart for easy installation and removal of the lamps and cameras. This way it's easy to swap stuff around. I will have wiring in place for 17 lamps. Right now I only intend to install 8. If I want to add additional lights in the future the wiring and plugs will already be in place and ready to plug and play.

Tomorrow I hope to get the connectors soldered on. I won't be able to run the wiring through the conduit yet because I still need to acquire the micro sized coax cable. I should have that on Monday. If all goes as planned I will finish running the wires this week and get all the PVC cemented and water tight. If weather permits maybe I can finally paint this monster next weekend.

:guitar: :supz:
1997 SAFARI 2WD CARGO
Image
"I do not think there is any thrill that can go through the human heart like that felt by the inventor as he sees some creation of the brain unfolding to success... Such emotions make a man forget food, sleep, friends, love, everything." Nikola Tesla

astroturf
ASV Supporter
ASV Supporter
Posts: 1658
Joined: Wed Sep 09, 2009 6:25 pm

Re: Homebrew Con-Ferr Style Porthole Roof Rack Build

Post by astroturf »

As Always... AWESOME!

Topic author
97CargoCrawler
I sleep in my van
Posts: 754
Joined: Thu Jan 24, 2008 11:50 pm
Location: Near Los Angeles, CA
Contact:

Re: Homebrew Con-Ferr Style Porthole Roof Rack Build

Post by 97CargoCrawler »

I got late a start today but I did make decent progress on my ladder for the rack. It will use the same foot and leg mount that the rack uses. The purpose of that combination is to distribute the force over a larger surface area since the sheet metal is pretty thin and by design also allows for curvature compensation.

I started by doing the usual mock-ups and photo ops. I use these to look at and get ideas:

Image

Image

Image

Image

Image

Image

Image

I don't know yet how far the ladder will stick out from the door. I want there to be enough room to get a good sturdy foot hold, at least to the middle of my boot.

I will have backing plates on the inside of the door. I plan to have four feet on the bottom half of the door and two smaller ones on top. After these are bolted in place I will attempt to weld in a X brace between all four bottom mounts to further distribute and reinforce.

Image

The next order of business was to figure out the length and where to bend and at what angle.

Image

Image

Image

I have settled on a 12" spacing. That basically frames the license plate perfectly and leaves enough room to access the door handle.

Image

I calculated a bend angle of about 15 degrees 27" up the the tubing to match the curvature of the door.

Image

I cut out the angle with a saws-all and bent the tube:

Image

Image

Image

Welded. I need to smooth it a bit with a grinder:

Image

Image

12" ladder rung tubes:

Image

They're not welded in yet but here's the idea, 8" (license plate height) in between the rungs:

Image

Image

I still need to weld in the rungs, cut and weld in tubing end caps, cut and weld the legs to the tubing and feet. It only took me about two hours to get this far on the ladder.
1997 SAFARI 2WD CARGO
Image
"I do not think there is any thrill that can go through the human heart like that felt by the inventor as he sees some creation of the brain unfolding to success... Such emotions make a man forget food, sleep, friends, love, everything." Nikola Tesla
User avatar

doyoulikeithere
ASV Supporter
ASV Supporter
Posts: 2060
Joined: Tue Nov 17, 2009 8:27 pm
Location: Misty Mountains of Cowichan BC.

Re: Homebrew Con-Ferr Style Porthole Roof Rack Build

Post by doyoulikeithere »

That looks good. You posses some good fabrication skills.
What kinda surface will you put on the rung tops?
Is there enough distance to keep your steel toe boots from going thru the glass?
Just wondring...
2021 Yamaha Tenere 700 - Blue.
2016 Yamaha XSR900 - Silver.
1990 Astro - AWD - Brown.
1987 Astro - With 5 Speed & 4wd - Silver & Blue.

Topic author
97CargoCrawler
I sleep in my van
Posts: 754
Joined: Thu Jan 24, 2008 11:50 pm
Location: Near Los Angeles, CA
Contact:

Re: Homebrew Con-Ferr Style Porthole Roof Rack Build

Post by 97CargoCrawler »

Thank you. That is certainly unexpected.

I was thinking about the boot going through the window a bit ago. I think it would be less likely to happen if I could angle the square tubing so that it remained parallel to the ground all the way up the ladder (i.e. over the window section). However since all the tubing is the same size it would leave open pockets and probably look funny even if I filled them. One option would be to weld on some steel tread plate at an angle on top of the rungs. That may add a lot more weight though.

The further I get away from the door the more torque and stress I put on the sheet metal. I would like to have it far enough away where my boot heel will be able to hook and stop my foot from sliding forward. But that's probably 7 or 8" away from the glass. I'm thinking I might get away with like 4" before I run into trouble. I'm just going to have to be careful. I will coat those steps with some sort of gritty material.

I am making this ladder heavy duty because I want to be able to stand on it and not worry. I weigh 220lbs and I would imagine I might be hefting some large items up there while standing on the ladder. I don't want to be worrying if it's gonna hold. I did size up some 3/4" tubing to the door and it looked way too wimpy. Most ladders I see on vans look pretty under rated for adult weight and they usually have 3/4" round pipe ladders.

:cheers:

Topic author
97CargoCrawler
I sleep in my van
Posts: 754
Joined: Thu Jan 24, 2008 11:50 pm
Location: Near Los Angeles, CA
Contact:

Re: Homebrew Con-Ferr Style Porthole Roof Rack Build

Post by 97CargoCrawler »

I'm waiting on some coax wire for my video cameras and radio gear so tonight I worked a little more on the ladder.

Ready to weld:

Image

All welded up:

Image

Image

Image

Image

Socks and sandals...what can I say, it was cold. Hard to tell but I'm standing on the ladder. Pretty sturdy in this direction:

Image

Image

Image

Image

Image

Image

Image

Image

Not much to say about it, it's just a ladder. I still need to weld on the end caps and feet. I'm not sure how far away from the door it will be yet, but definitely not more than 4". I was worried that having the top ladder rungs inclined forward would be awkward to stand on but in fact it is actually better. While standing on the top you tend to want to rest your knees against the bars and the slight incline of the rung makes you feel more secure while doing that. I ordered some grip tape for the rungs too. I will slap that on before I paint the ladder.
1997 SAFARI 2WD CARGO
Image
"I do not think there is any thrill that can go through the human heart like that felt by the inventor as he sees some creation of the brain unfolding to success... Such emotions make a man forget food, sleep, friends, love, everything." Nikola Tesla

astroturf
ASV Supporter
ASV Supporter
Posts: 1658
Joined: Wed Sep 09, 2009 6:25 pm

Re: Homebrew Con-Ferr Style Porthole Roof Rack Build

Post by astroturf »

Crawler,

Before you go any further with your ladder may I suggest something like this:

It would give you the flexibility to place it anywhere on that vast rack of yours, and be removable for sleeping security.

Just a thought, Jim
possible Crawler ladder.jpg

Topic author
97CargoCrawler
I sleep in my van
Posts: 754
Joined: Thu Jan 24, 2008 11:50 pm
Location: Near Los Angeles, CA
Contact:

Re: Homebrew Con-Ferr Style Porthole Roof Rack Build

Post by 97CargoCrawler »

That is an awesome idea. I have thought about a few different ladders. One that lifts up and slides under the rack, one that bolts to the side of the van and one that is detachable like the one pictured. I love everything about the detachable ladder except that I need to find someplace to store it. Something that slid in under the rack but that's also completely removable would be ideal. If it had large enough padded feet it could hook on anywhere on the side of the rack and rest comfortably on the side of the van and distribute force over a large surface area.

The drawbacks are that such a ladder would have to be much longer than what I'm building. With 33" tires and a few more inches of lift I will have a hard time getting into the drivers seat let alone trying to get my short little legs up onto the bumper. So imagine a ladder would ideally extend lower than the bumper and have to be long enough to hook onto the top of the rack. That's probably a 6' ladder! Such a ladder would have to fold in half for me to store it anywhere. Remember, I will have a roof hatch in the center of the roof too.

My Land Cruiser has a 33" tire mounted to a swing out carrier on the back. I always used it to climb up on and then onto the rack. Even if I had no ladder someone could get up top that way once I have my tire mounted on the carrier I'm going to build.

If anyone surprises me while I'm sleeping up top I'll just slither down into the cab through the roof hatch and jettison the tent and uninvited occupant with a shotgun. Unless you're a hot chick, best stay off my ladder!

I could make a thinner and lighter aluminum version of the moveable ladder though. It could double as an emergency rescue basket. Hmmm....

astroturf
ASV Supporter
ASV Supporter
Posts: 1658
Joined: Wed Sep 09, 2009 6:25 pm

Re: Homebrew Con-Ferr Style Porthole Roof Rack Build

Post by astroturf »

Then just build a bigger rack...
racked astro.jpg

Topic author
97CargoCrawler
I sleep in my van
Posts: 754
Joined: Thu Jan 24, 2008 11:50 pm
Location: Near Los Angeles, CA
Contact:

Re: Homebrew Con-Ferr Style Porthole Roof Rack Build

Post by 97CargoCrawler »

Hehehe....

That could have been cool if the supports didn't stick out so far.

I considered that too. At one time my van was going to be a mobile observatory housing a 14" RCX telescope. I was going to do that so I could have a viewing platform to sit on. I still have the option of doing that by making a separate basket that attaches underneath to the electrical strut in the floor of my rack. All I need are some bumper brackets in place. Somewhere at the beginning of this thread I think I made reference to that.

So for me, what you have pictured there is well within my consideration! All the space above the hood is just wasted, don't you think? I think I calculated the rack would be something like 13' or 14' long. You could sleep like 8 adults on top. Or maybe 16 of your REALLY good friends. :yawinkle:

astroturf
ASV Supporter
ASV Supporter
Posts: 1658
Joined: Wed Sep 09, 2009 6:25 pm

Re: Homebrew Con-Ferr Style Porthole Roof Rack Build

Post by astroturf »

I too think that the strength with which you are building your rack adds worlds of mods to its versatility.

I will sit back down and watch.

Thanks, Jim

Topic author
97CargoCrawler
I sleep in my van
Posts: 754
Joined: Thu Jan 24, 2008 11:50 pm
Location: Near Los Angeles, CA
Contact:

Re: Homebrew Con-Ferr Style Porthole Roof Rack Build

Post by 97CargoCrawler »

I like suggestions, keep 'em coming.

I know it's just a toy, but I really did build my 1:10 scale RC StroFari to help explore some of my ideas for the real van. I was able to see how certain things could work and how others were not practical.

It also works in reverse though. Like the model has a giant tire bolted to the door....not gonna happen. I would have to reinforce the door with so much steel it would be approach the strength of an armored car. Also, the gas can...probably not gonna happen. I don't think there is enough room for the door to swing. It will have to bolt to the outside of the tire on the carrier. Unless I can find a skinny gas can. Or make one.

I'm really just wingin' this project, making chit up as I go. So any suggestions are welcome and will be considered. I have an idea of what I want, but I won't refuse help getting there. Especially from folks who have a lot more experience and insight.

:cheers:
Post Reply