Page 1 of 7
THIS WEEKEND. Things to do when lifting.
Posted: Fri Nov 14, 2008 10:36 am
by MountainManJoe
I finally have a free weekend and an extra pair of hands to help me install an overland 4" lift tomorrow. (rear springs, subframe spacer blocks, torsion bar crank, front&rear shocks, fan shroud cutting, bumper relocation, ball joint relocation)
What I'd like to know is, is there any maintenance on these vans that is normally a major pain, which will be easier to do while I'm in there and taking these things apart?
As soon as I'm done, I'm going to get my new 30" tires installed and then get everything alligned. (Hopefully the shop won't have a problem with this!)
Re: THIS WEEKEND. Things to do when lifting.
Posted: Fri Nov 14, 2008 11:12 am
by LastCat
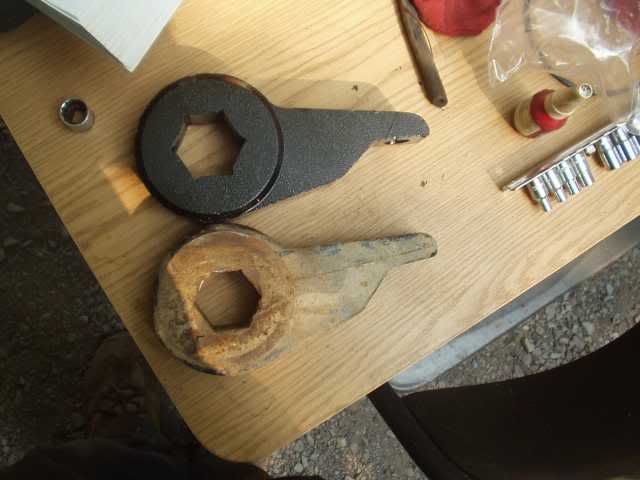
I just added the 2" Spacer blocks up front. I haven't raised the rear yet. But, I did notice a few things on the front. When raising the front, using the torsion bars. I found it much easier to use a large C clamp. I removed the anvil at the end of the C clamp. There is a nice round end of the threaded shaft of the C clamp that fits nicely into the pocket of the Torsion Bar Keys. I was using the adjuster bolts, but found it took a lot of force to get them to move. Also, I found small metal shavings while doing this.
So, get a large C clamp, and raise the Key this way, then the adjusting bolt with have no pressure on it, itself. Much easier. Also, if you ever have to remove the torsion bars, the C clamp makes it easier to hold the Key up, then you can remove the adjusters.
If you have A/C, then there where lines that were attached to the heater housing. Just inside the engine compartment. The housing is where the heater fan is mounted to. There were 2 hoses that are connected to this housing, using a metal bracket. After raising the front, the area around the housing, that the bracket was attached to, broke the housing. I used permatex to fix this crack. Watch this area. You could just disconnect the bracket that holds the 2 A/C hoses. Then fight to get it back on.
Also, if you have oil and tranny cooler lines connected to your radiator, they are going to stretch, kink, bind, as soon as you raise the front. Watch these lines closely. I actually had my radiator out at the time, and when it was time to reconnect both lines, it took some bending and stretching to get things back in order.
I actually went from front to back. I lowered the front end, then supported the body, at the lower radiator support. Then lowered the back sub frame, and installed the spacers. But, Dan suggest doing one side at a time.
Disconnect the parking brake hanger. When finished, then reattach using Dan's hanger.
Hope this helps.
Cheers
Lastcat
Re: THIS WEEKEND. Things to do when lifting.
Posted: Fri Nov 14, 2008 11:54 am
by MountainManJoe
Wow. Thanks for the tips LastCat! That is going to save me some frustrations tomorrow.
Sounds like this lift is going to put stress on all kinds of things there...
Re: THIS WEEKEND. Things to do when lifting.
Posted: Fri Nov 14, 2008 1:52 pm
by snapple
Good luck with your Lift! Any problems post up,someone will answer usually pretty quick.

Re: THIS WEEKEND. Things to do when lifting.
Posted: Sat Nov 15, 2008 9:43 am
by MountainManJoe
I have one question which may become clearer as the job progresses, but Dan included a torsion key and I thought that on my van I just needed to tighten the one that's already there. Do I have to replace it?
Re: THIS WEEKEND. Things to do when lifting.
Posted: Sat Nov 15, 2008 11:35 am
by LiftedAWDAstro
Keep the stock ones in there unless you need the extra lift. Check this after you are done.
I didn't use the C-clamp on my keys as I tightened them with the weight off the front wheels. Keep an eye on the oil cooler lines for sure.
Do as Dan says, do the front subframe spacer one side at a time. The oil cooler lines will not kink or bind this way. You just have to check them once the lift is done. Loosen all 6 subframe mounting bolts and then remove one side at a time and jack up that side of the van evenly. The body will separate from the frame pretty easily.
Loosen the e-brake cable bracket first thing!
HELP!
Posted: Sat Nov 15, 2008 12:17 pm
by MountainManJoe
I'm stuck on the front driver side subframe to body bolt. It's just spinning. I was able to get a look inside the body where the bolt goes, and the sleeve or nut or whatever is all rusty and spinning with the bolt. It looks impossible to get in there. What do I do????
I'll stay logged into the chat in case anyone is online.
Re: THIS WEEKEND. Things to do when lifting.
Posted: Sat Nov 15, 2008 12:28 pm
by 97CargoCrawler
"I'm stuck on the front driver side subframe to body bolt. It's just spinning. I was able to get a look inside the body where the bolt goes, and the sleeve or nut or whatever is all rusty and spinning with the bolt. It looks impossible to get in there. What do I do????"
Check earlier posts. I recall someone needed to cut a big round hole in the body to get to the other side of that bolt.
I suggest new ball joints if they have not been replaced in a while.
Also, if you're installing those 4" HD leaf springs in the rear, watch the rubber brake line that feeds the rear axle. It will stretch too! I have the 4" leafs plus shackles and it stretched the hose to its limit, and I didn't notice until months later. Yours won't stretch as much with only 4" lift, but if that hose is brittle watch out!
Good thing you have a helper. Trying to align the rear axle with the new springs and get the bolts in at the same time is slightly difficult to do by yourself.
Not sure if you'll have this problem, but I had to cut about 1/2" off the inside bottom of Overland's bumper bracket to get it to clear the front crossmember.
Good luck! Take LOTS of photos if you can.
Re: THIS WEEKEND. Things to do when lifting.
Posted: Sat Nov 15, 2008 12:38 pm
by 97CargoCrawler
I think it was this thread that describes the method to get to the nut:
viewtopic.php?f=12&t=2523
Re: THIS WEEKEND. Things to do when lifting.
Posted: Sat Nov 15, 2008 5:16 pm
by MountainManJoe
Still working on this lift and probably won't finish today ...
So the front frame bolts go into this tubelike structure at the front of the body in front of the rad. Inside of this tube there is a retainer that holds a diamond shaped plate with a nut piece, which the bolt threads into. Well the bolt threads are rusted out, so the nut started to turn with it and broked right out of the retainer (which is made of flimsy metal) and that's why it was just spinning. This happened with both front frame bolts. Why they didn't just build threads into the body I don't know! Anyways, so I hacksawed the bolts off. Then there is a small opening in the side of the tube, but you have to snap off a small metal tab that the quarterpanel screws into. I went in with a long screwdriver and chiseled the retainer out. Then the nut and bolt come out. Next I glued a new nut to a washer and using a magnet, positioned it carefully in the tube and threaded the bolt into it. Slick! Then there was just enough room to slide a crescent wrench in there to hold the nut while I tighten the bolt, but unfortunately to nowhere near 66 ft-lbs before it started popping off. So that's where I am now. My buddy is off to get lights and a proper wrenches that will fit the nut while I cook dinner.
Re: THIS WEEKEND. Things to do when lifting.
Posted: Sat Nov 15, 2008 5:24 pm
by MountainManJoe
Why did Dan send torsion keys if I use stock ones? We'll see when I'm done I guess.
Is it a big deal to install these?
I didn't seem to have any problems with hoses stretching or anything.
There was also a black L shaped bracket in the box ... not sure what's that for.
If its for the brake cable, does that mean I need to remove the old one, because it seems as though I'd need to disconnect the cable?
Re: THIS WEEKEND. Things to do when lifting.
Posted: Sat Nov 15, 2008 8:13 pm
by 1996astro
Dan sent the keys because they are part of his 4 inch lift kit. 2 inch subframe spacers, and torsion keys another 2-3 inches. The rear gets 4 inch springs and the adjustable shackles.
I just installed my torsion keys today. Not too bad depending on rust conditions.
The L bracket is for the parking brake cable. Should have a hole drilled higher so the cable clears the subframe once the spacers are mounted.
Re: THIS WEEKEND. Things to do when lifting.
Posted: Tue Nov 18, 2008 3:00 pm
by MountainManJoe
I maxed out the stock keys and the front sits a fair bit lower than the back. I want the van more or less level. Maybe slightly higher in the back to accommodate heavy loads.
So how do I install the keys? I did not see this in the instructions Dan provided.
Re: THIS WEEKEND. Things to do when lifting.
Posted: Tue Nov 18, 2008 3:40 pm
by lockdoc
I highly suggest not cranking the bars anymore but if you do so anyway it goes like this:
From memory
1) Raise front of van
2) Back out the bolt and on the adjuster for the torsion key and remove the bolt.
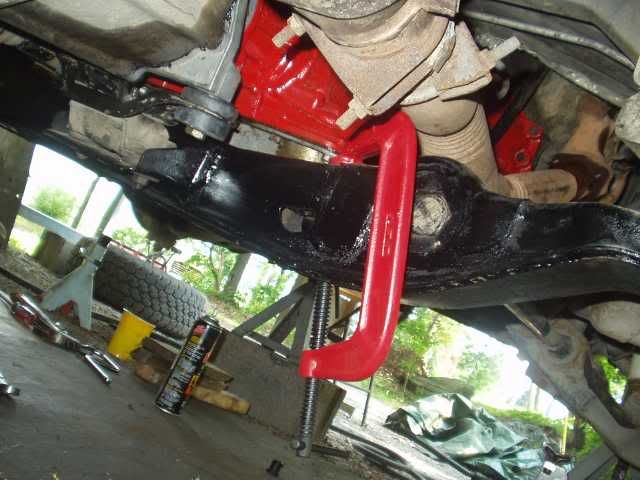
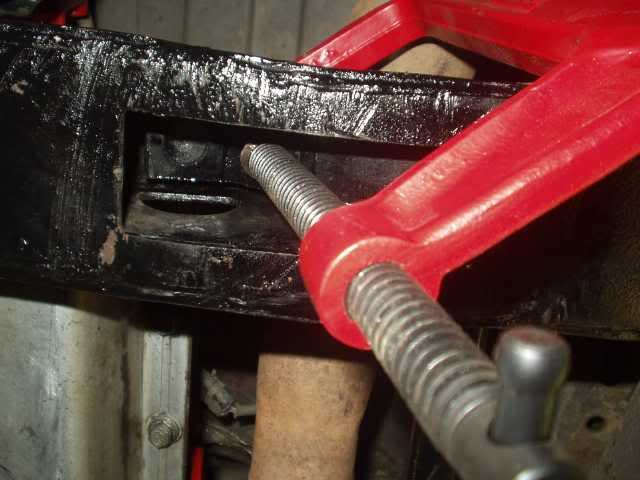
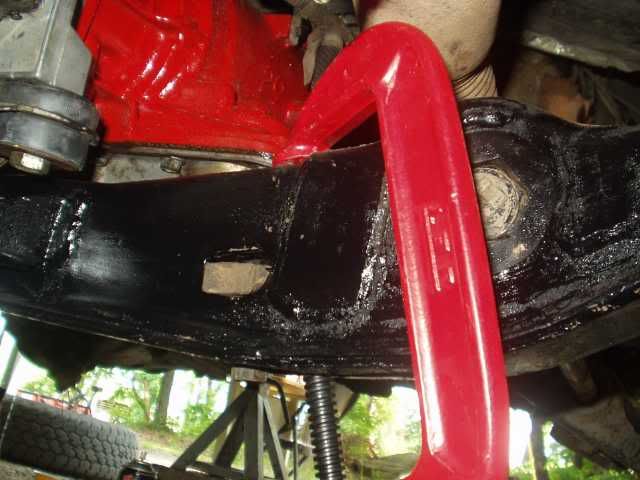
3) Remove tension from torsion key. I used a big C clamp with the flat swivel part on the screw end removed. This left a ball end. Next to where the adjuster bolt pushes on the key you will see a shallow hole in the key. Install the c clamp so the screw end of the clamp fits in that hole and other end is over the crossmember. Crank the c clamp untill you are able to get the square part of the adjuster where the bolt threads into out. Loosen and take off the clamp. You now have released all the tension from the torsion bar.
4) Knock torsion bars towards the front of the van and out of the torsion key.
5) Remove key
6) Install in reverse order
I'll try and find some pics
Re: THIS WEEKEND. Things to do when lifting.
Posted: Tue Nov 18, 2008 3:56 pm
by Jersey John
MAke sure you use some good quality C clamps. When I did the Y pipe on my van I bent three c clamps but they were the cheapies!

I got some pretty heavy duty 6 in at Home Depot

for around $10 a piece.