Page 1 of 2
Help with remove/replace of upper door pin and bushings
Posted: Fri May 18, 2007 7:27 am
by Rileysowner
Today I was hoping to get the two front door pins out and replaced.
On the driver's side the door rubs very noisily when opening and closing. This makes me think that the bushings are worn as the pin is in all the way.
On the passenger side the upper pin was actually starting to fall out. Thankfully I noticed it before it did. When I tapped it back in place that door swings fine, so I don't know if I need to replace the bushing there.
My difficulty is first in supporting the door once the upper pin is out. I an thinking that a jack with some sort of cradle might work, but ideas would be helpful.
Second, how does one get the actual bushing out and the new ones in. The top one looks accessable, but the bottom one looks like it is between the two parts of the door hinge. This is what has stopped me in my tracks at this point.
HELP!!!

Posted: Fri May 18, 2007 8:07 am
by LiftedAWDAstro
Use a floor jack with a block of wood for the bottom support. Cover it in a towel or cloth to prevent any damage to the door.
You will need to remove the heavy spring to be able to separate the door hinges enough to replace the bushings.
Posted: Fri May 18, 2007 8:16 am
by Rileysowner
I would take it that I need a specialized tool to deal with the spring?
Edit:
I found the tool at princess auto, but I won't be able to go purchase it until Monday, so yet another job to wait until later.
Posted: Fri May 18, 2007 5:07 pm
by Water Boy
Use a broom stick and duct tape as a peg leg to hold the door up.
Posted: Fri May 18, 2007 10:36 pm
by astrozam
Water Boy wrote:Use a broom stick and duct tape as a peg leg to hold the door up.
Arrr matey,just like a Pirate,LOL
Don't forget those pics Jim!
Posted: Sat May 19, 2007 6:48 am
by Water Boy
Posted: Sat Jun 02, 2007 9:01 pm
by Water Boy
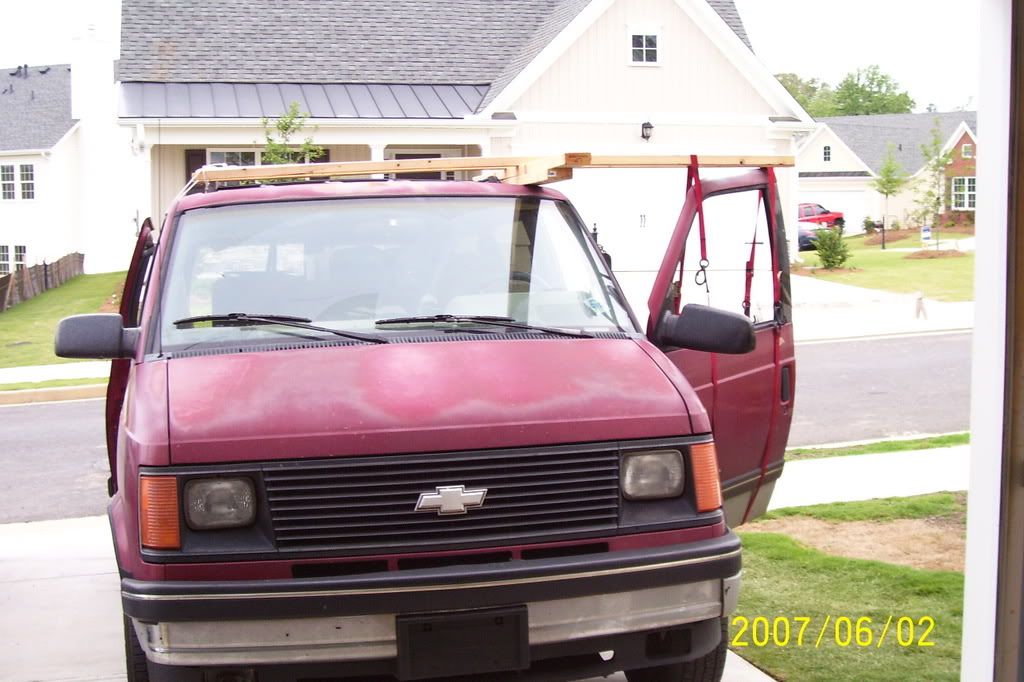
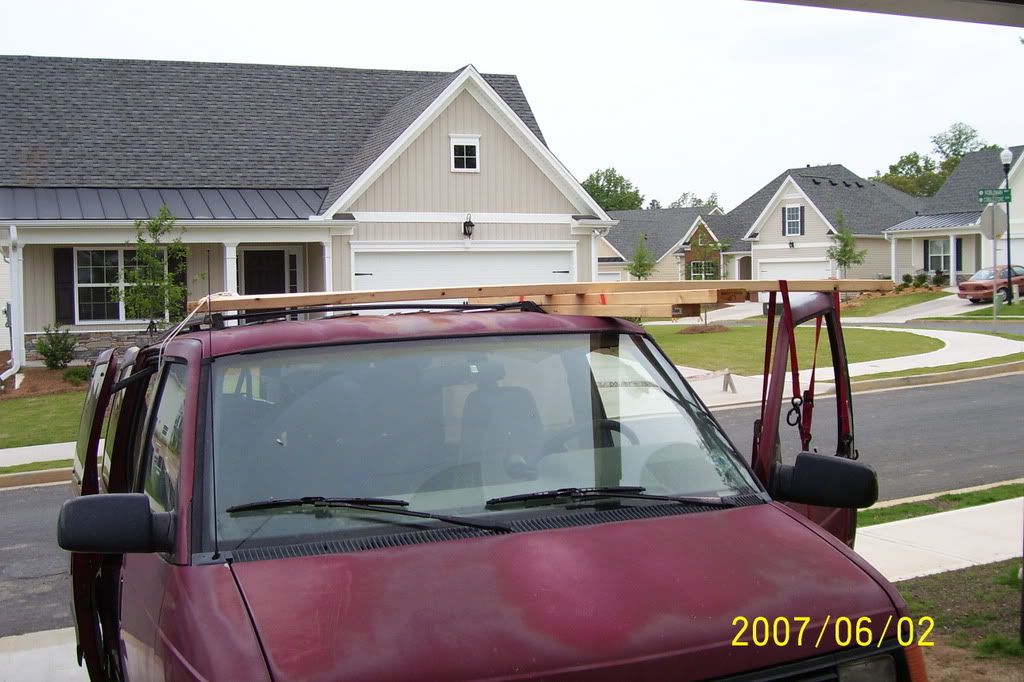
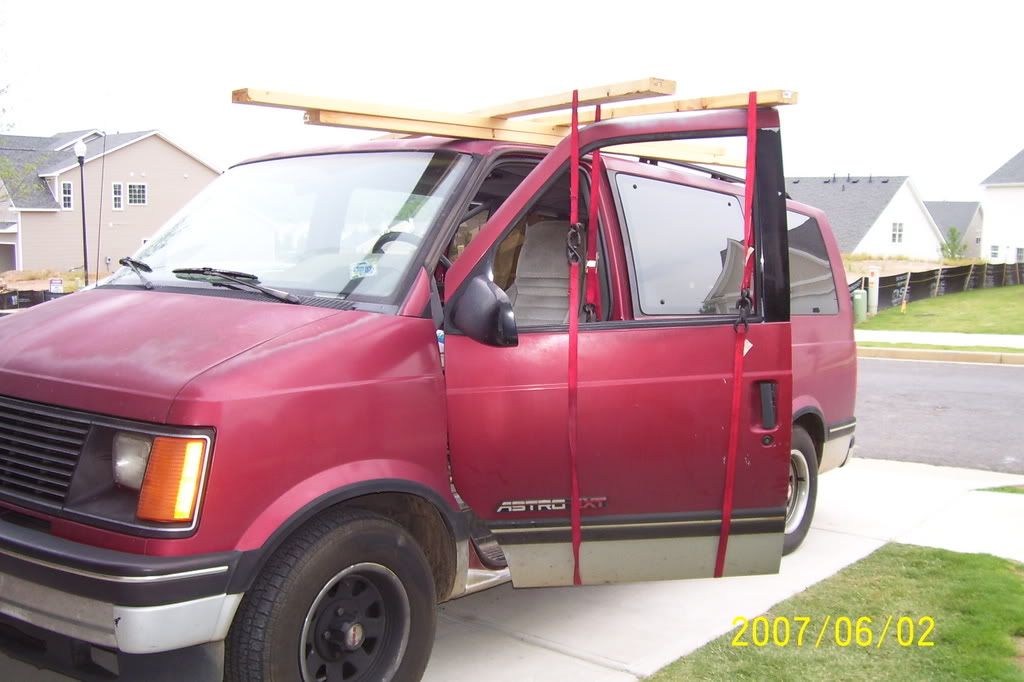
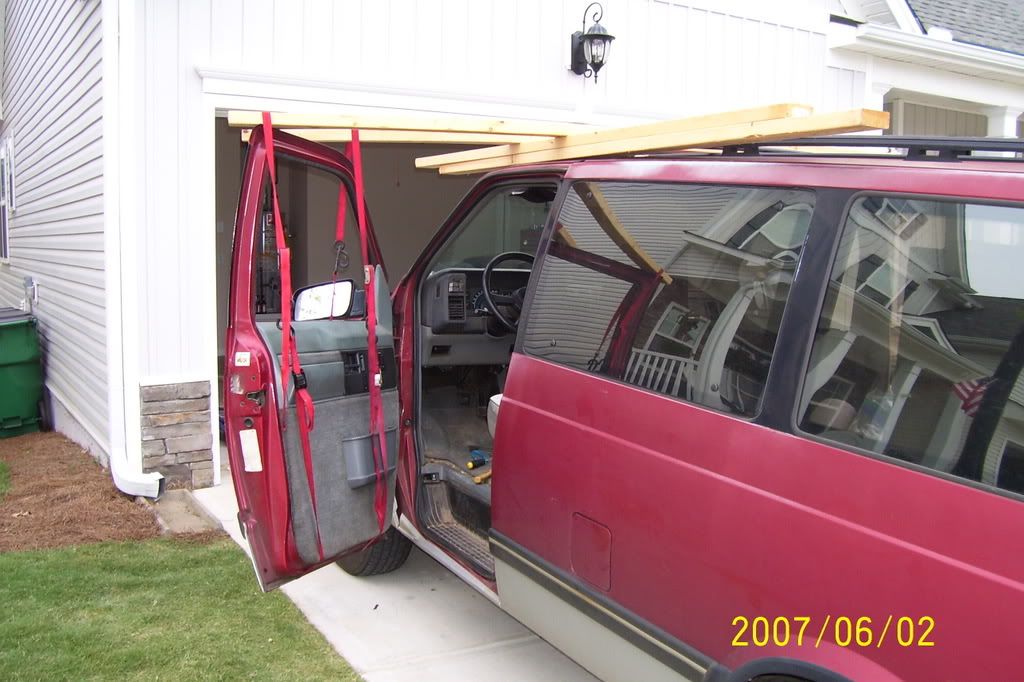
Finally did the pin thing.
I used 2 2x4 on the roof and tied the other end to the passenger side roof rack rail so the working end is fully adjustable. I added the 2 other 2x4's to get the needed lift. I used 4 sets of cam-buckle straps since one was not long enough, so it was 2 per hanger. This set up also made it very adjustable. I did loosen one end of the boot to get it out of the way of the upper pin and to give the needed stretch when the door was free-hanging..
I thought I could do one at a time but the door won't move out of the way enough to remove the bushings.
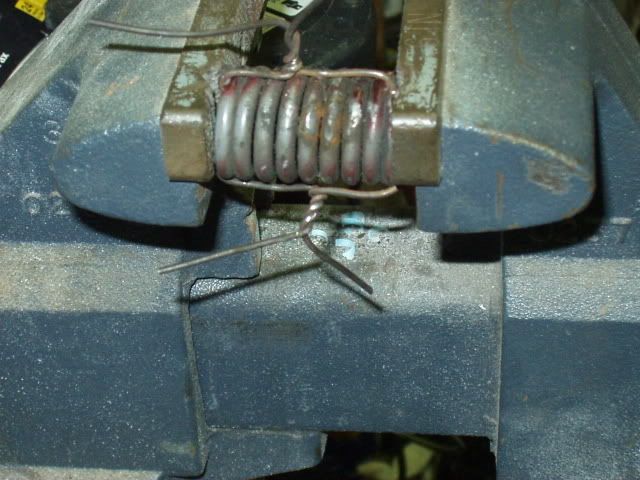
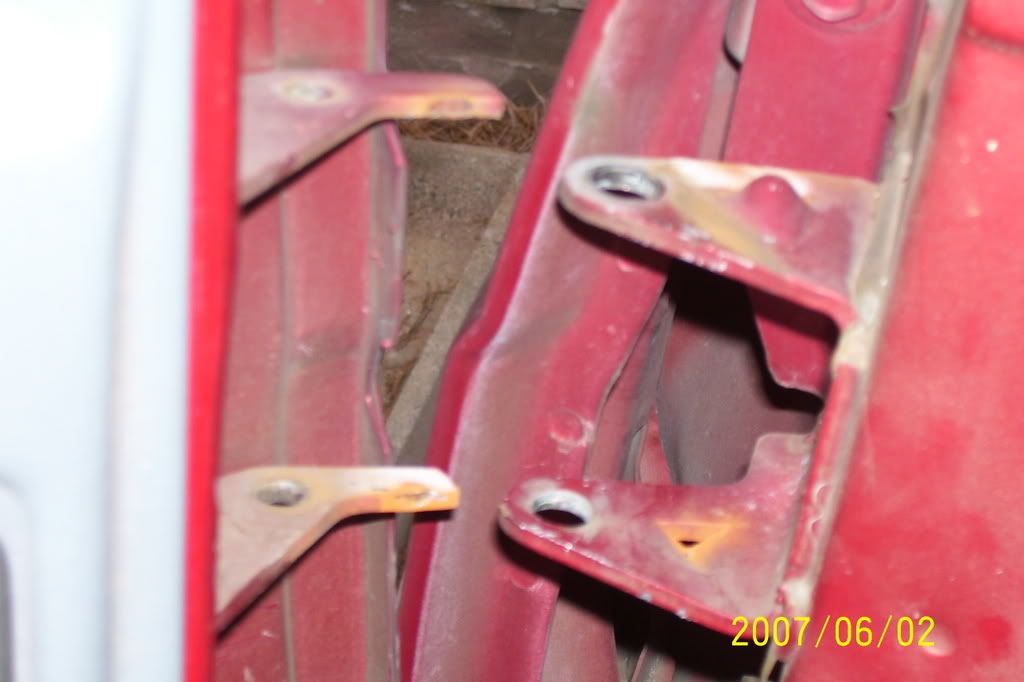
I don't have a fingered spring compressor so I just used a big screwdriver and popped out the spring.
As for the tabbed retainer ring, I just pried it off the pin.
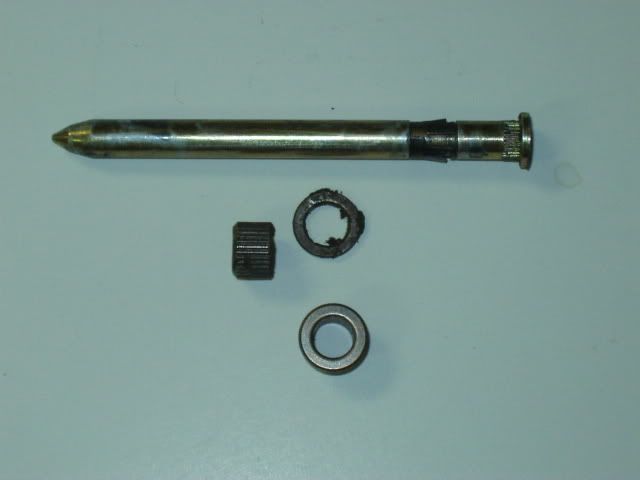
Had to tap the pins out part way. Near the head it is ribbed for fit. After that, I just used my fingers to remove the pins.
I used a screwdriver to punch out the bushings.
http://i27.photobucket.com/albums/c153/ ... 0_0436.jpg
http://i27.photobucket.com/albums/c153/ ... 0_0437.jpg
http://i27.photobucket.com/albums/c153/ ... 0_0438.jpg
http://i27.photobucket.com/albums/c153/ ... 0_0439.jpg
http://i27.photobucket.com/albums/c153/ ... 0_0441.jpg
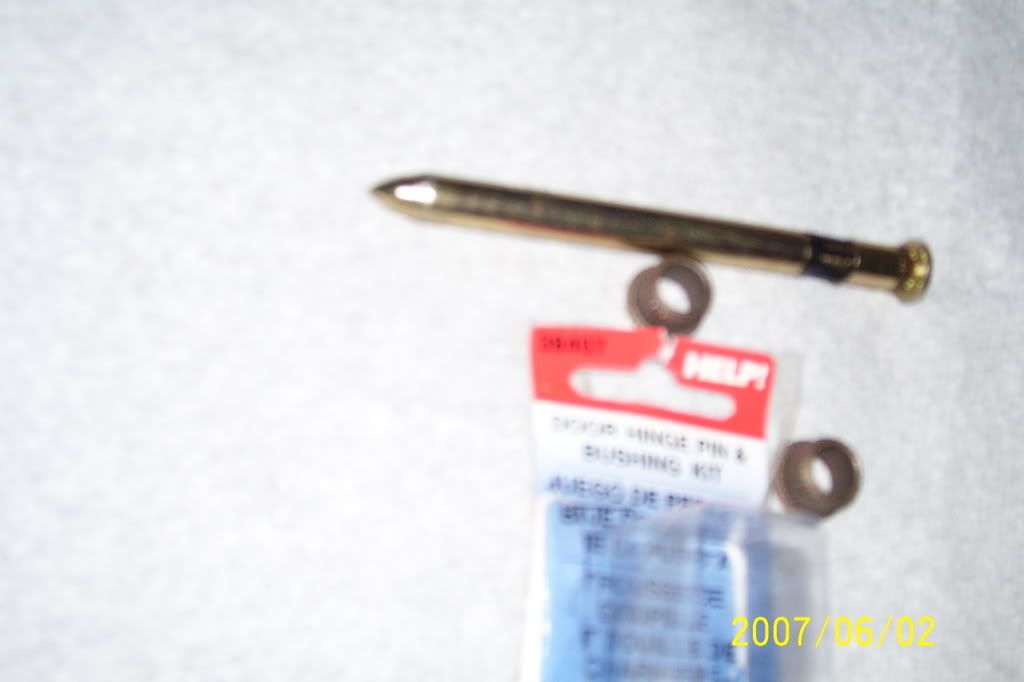
Got the pin kits from Auto Zone. They were located in the HELP section. #38407
http://i27.photobucket.com/albums/c153/ ... 0_0444.jpg
https://www.dormanproducts.com/cgi-bin/ ... 0x003239d7
https://www.dormanproducts.com/cgi-bin/ ... ry_list=:0
As I said, I did not have a spring compressor so used a worm gear clamp to compress the spring to get it back in. I initially tried to just jam/cam it back in but it would not go for me. I don't have vise so I used a bar-clamp to compress the spring.
http://i27.photobucket.com/albums/c153/ ... 0_0448.jpg
The pin kit did exactly what I hoped it would do. The door does not rub the "Nader" bolt anymore.
Posted: Sun Jun 03, 2007 5:24 am
by SafariRob
Any automotive project that uses 2x4 lumber creatively has my undivided attention!
Way to go, WB, looks like you're a master of the adapt-and-overcome school of auto repair.
Posted: Sun Jun 03, 2007 6:54 am
by astrozam
SafariRob wrote:Any automotive project that uses 2x4 lumber creatively has my undivided attention!
Way to go, WB, looks like you're a master of the adapt-and-overcome school of auto repair.
I totally agree,lol McGyver would be proud
Posted: Tue Jun 05, 2007 9:56 am
by BLAZER
I did mine a few weeks ago and have to redo it again. The stupid pin keeps destroying the top bushing as it goes through, can't figure out why, has to be due to that spring clip on there. I luckily have a pipe groove in my vise, compressed the spring, used machinist wire and tied the spring while compressed, then once installed, cut the wire and pulled it out.
Posted: Tue Jun 05, 2007 2:25 pm
by Water Boy
BLAZER wrote:... The stupid pin keeps destroying the top bushing as it goes through, can't figure out why, has to be due to that spring clip on there.
I'm not sure what you are describing....
Hey, at least you had a vice. I used a hand clamp.
Posted: Tue Jun 05, 2007 6:06 pm
by BLAZER
The pins had little spring fingers on them so once you pushed them through bushings, they wouldn't back out, except they would break the top little flange off the upper bushing and desatroy the bushing. I took pics, have to find them sometime and post.
Posted: Tue Jun 05, 2007 6:48 pm
by Water Boy
B~
Are we talking about the same thing?

Posted: Wed Jun 06, 2007 5:25 am
by BLAZER
Not sure, see in your pic....
The little black metal clip by the top has two little springy fingers. They hold the pin in. As mine passes through the new top bushing, it destroys it for some reason when I bang it in there, sometihng must be catching. I'm going to try to use a different pin I have.
Posted: Wed Jun 06, 2007 6:14 pm
by BLAZER
Here's a pic for ya. Notice the one bushing is torn apart, the little clip on the pin would break it apart. Changed pins this evening, went in like butter, no problems.
Here's my spring compressor, just cut hte wires and pull them out once in van.