Homebrew Con-Ferr Style Porthole Roof Rack Build
Re: Homebrew Con-Ferr Style Porthole Roof Rack Build
simply amazing, Im loving this, you do great work with much smart thinking behind it!...im watching!
1989 Astro 4.3 283k. Originally a Zimmer conversion van, now a stripped out cargo.
-
97CargoCrawler
Topic author - I sleep in my van
- Posts: 754
- Joined: Thu Jan 24, 2008 11:50 pm
- Location: Near Los Angeles, CA
- Contact:
Re: Homebrew Con-Ferr Style Porthole Roof Rack Build
Thank you!
More progress...
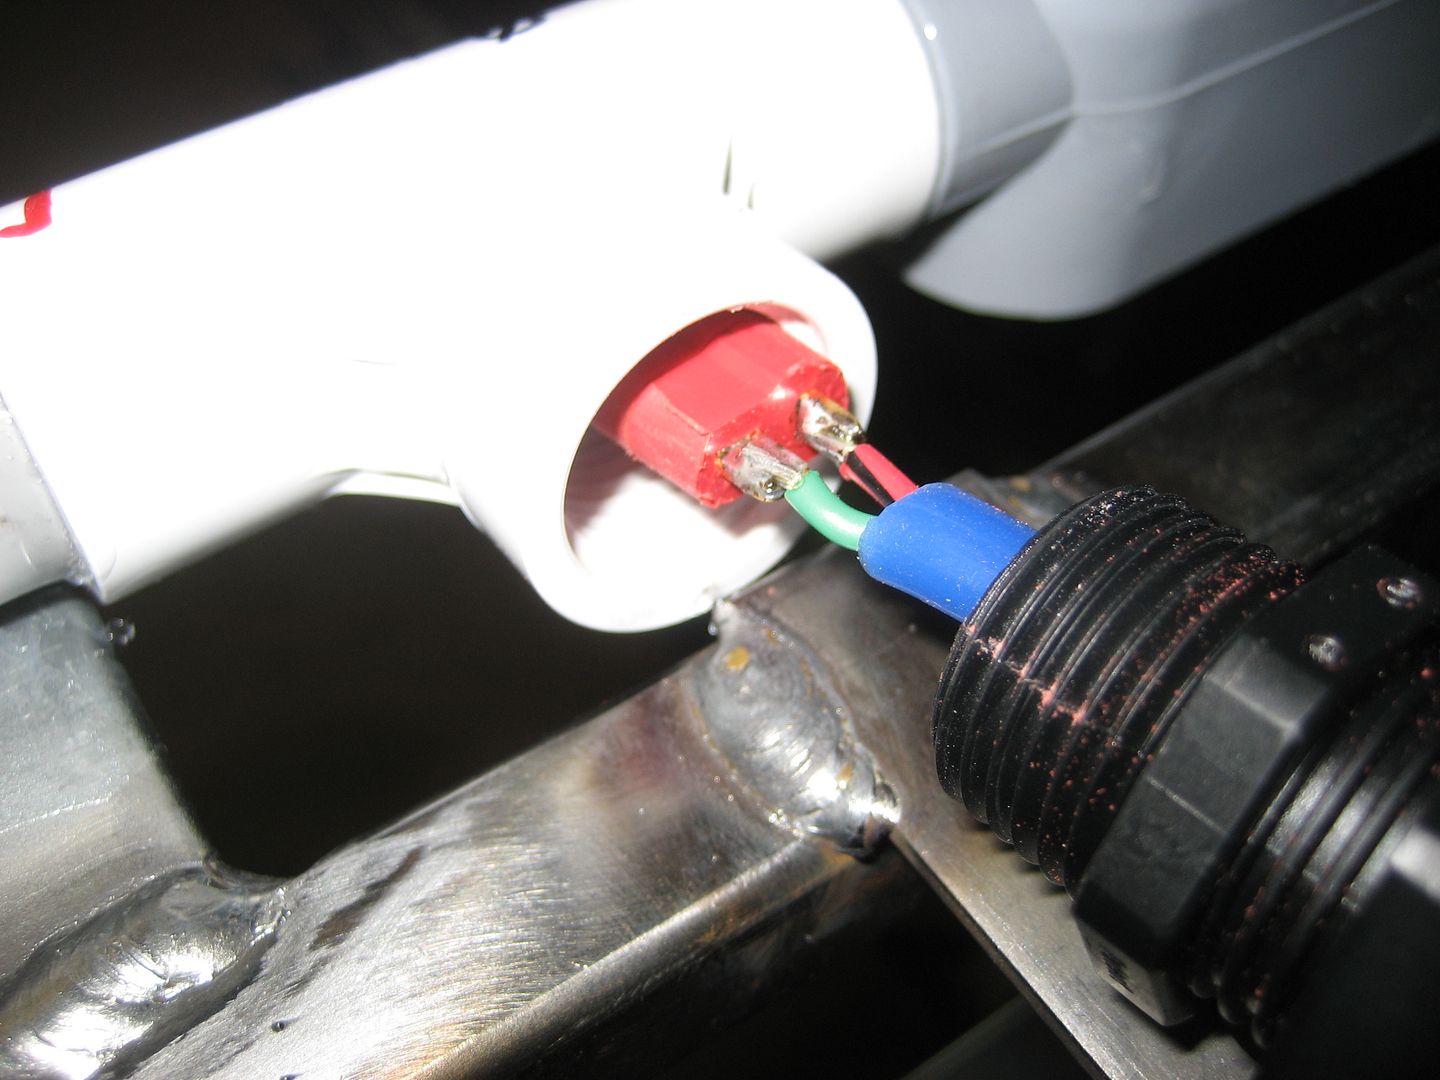
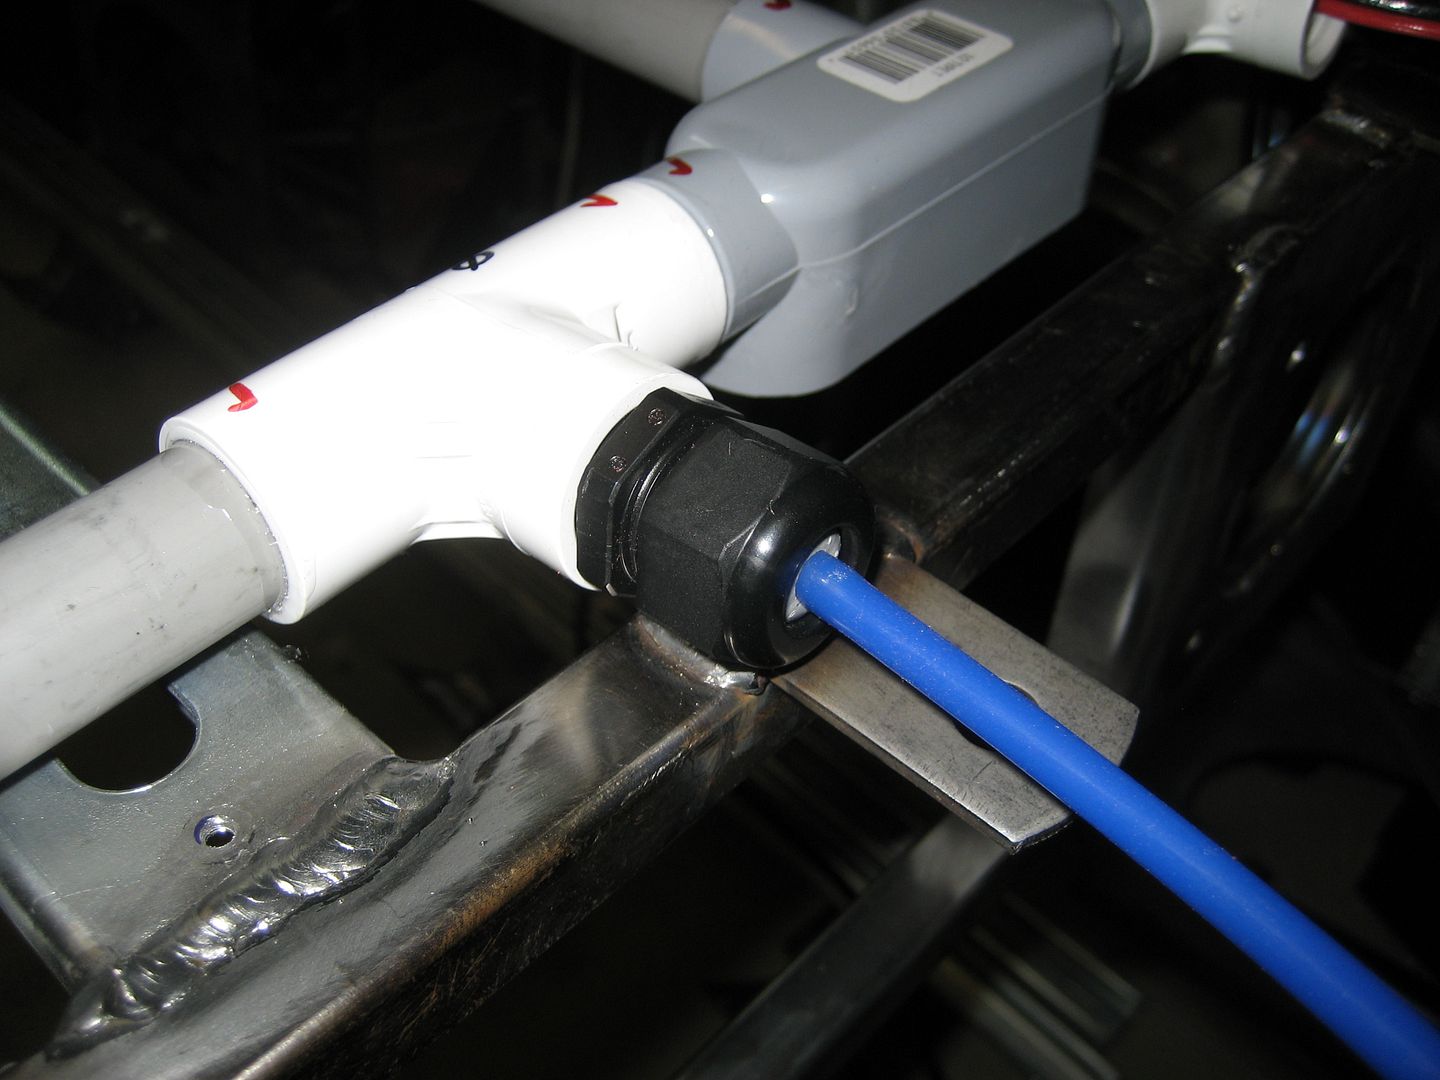
DEANS power connector with the edges sanded down to fit in the cord grip, soldered and heat shrunk:
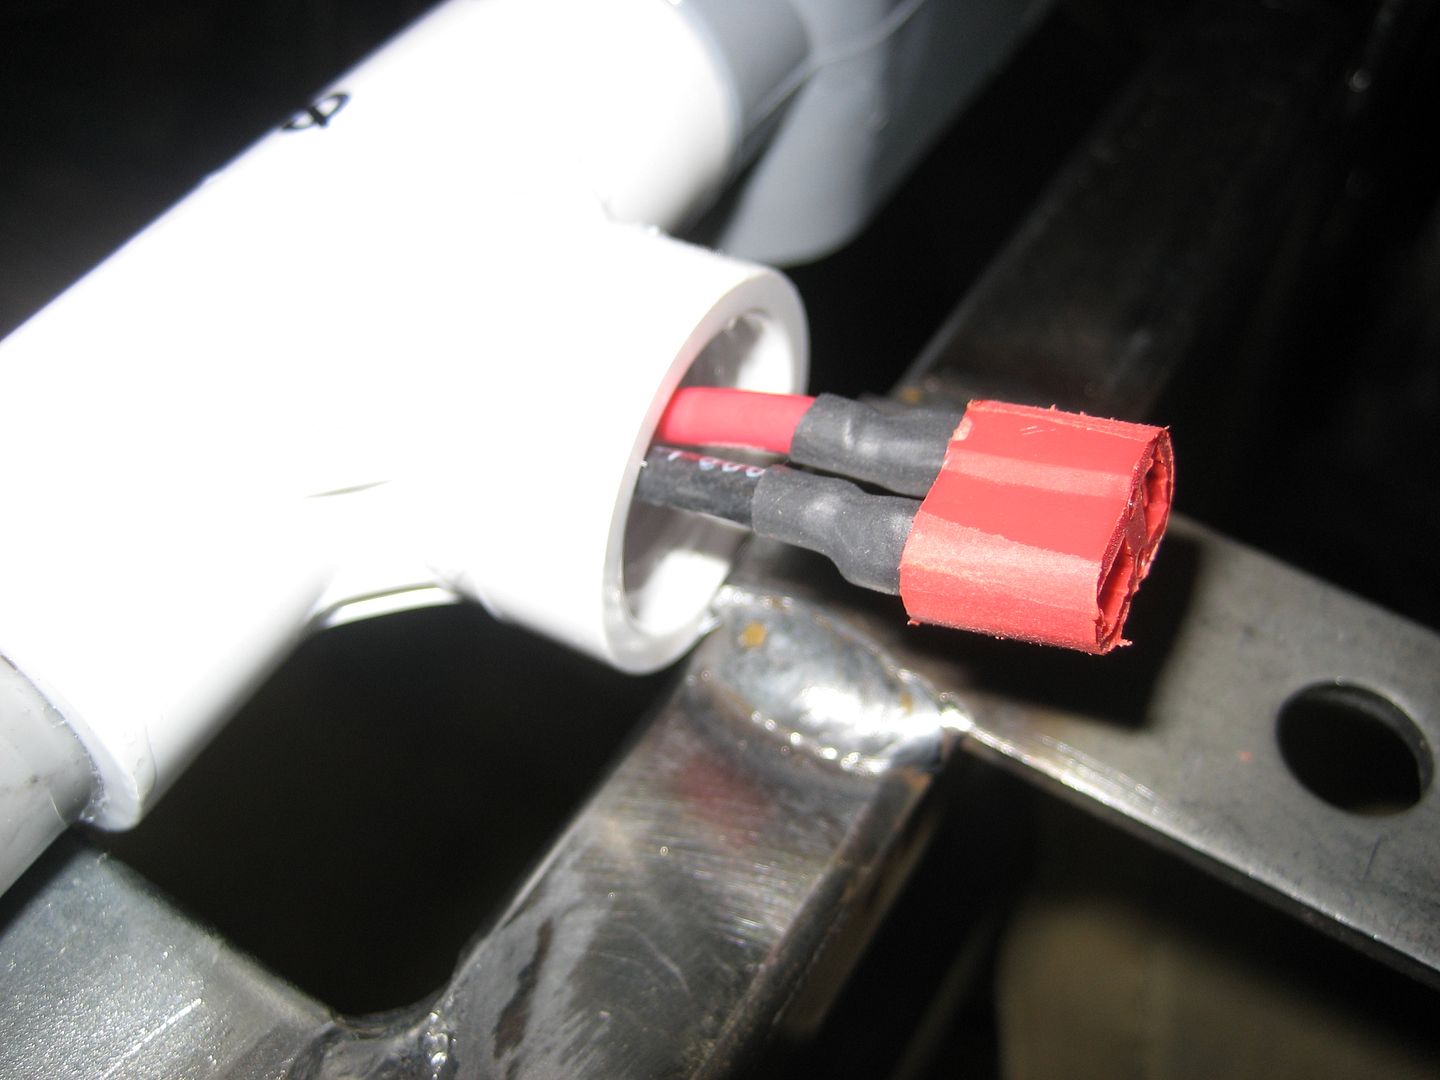
Seated:
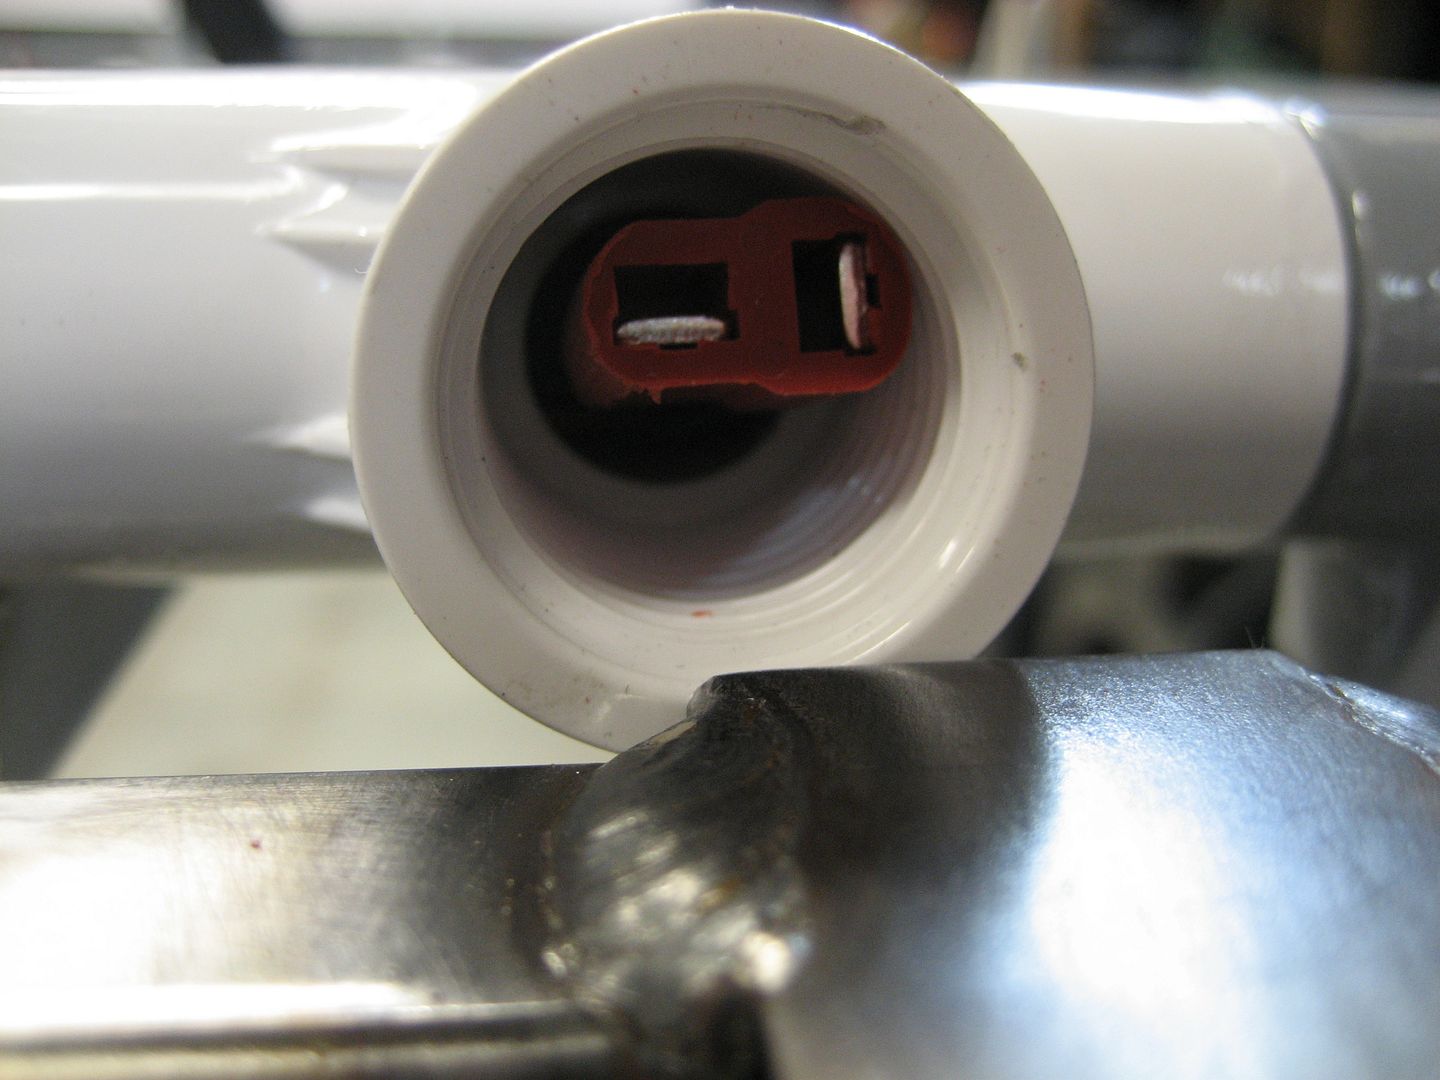
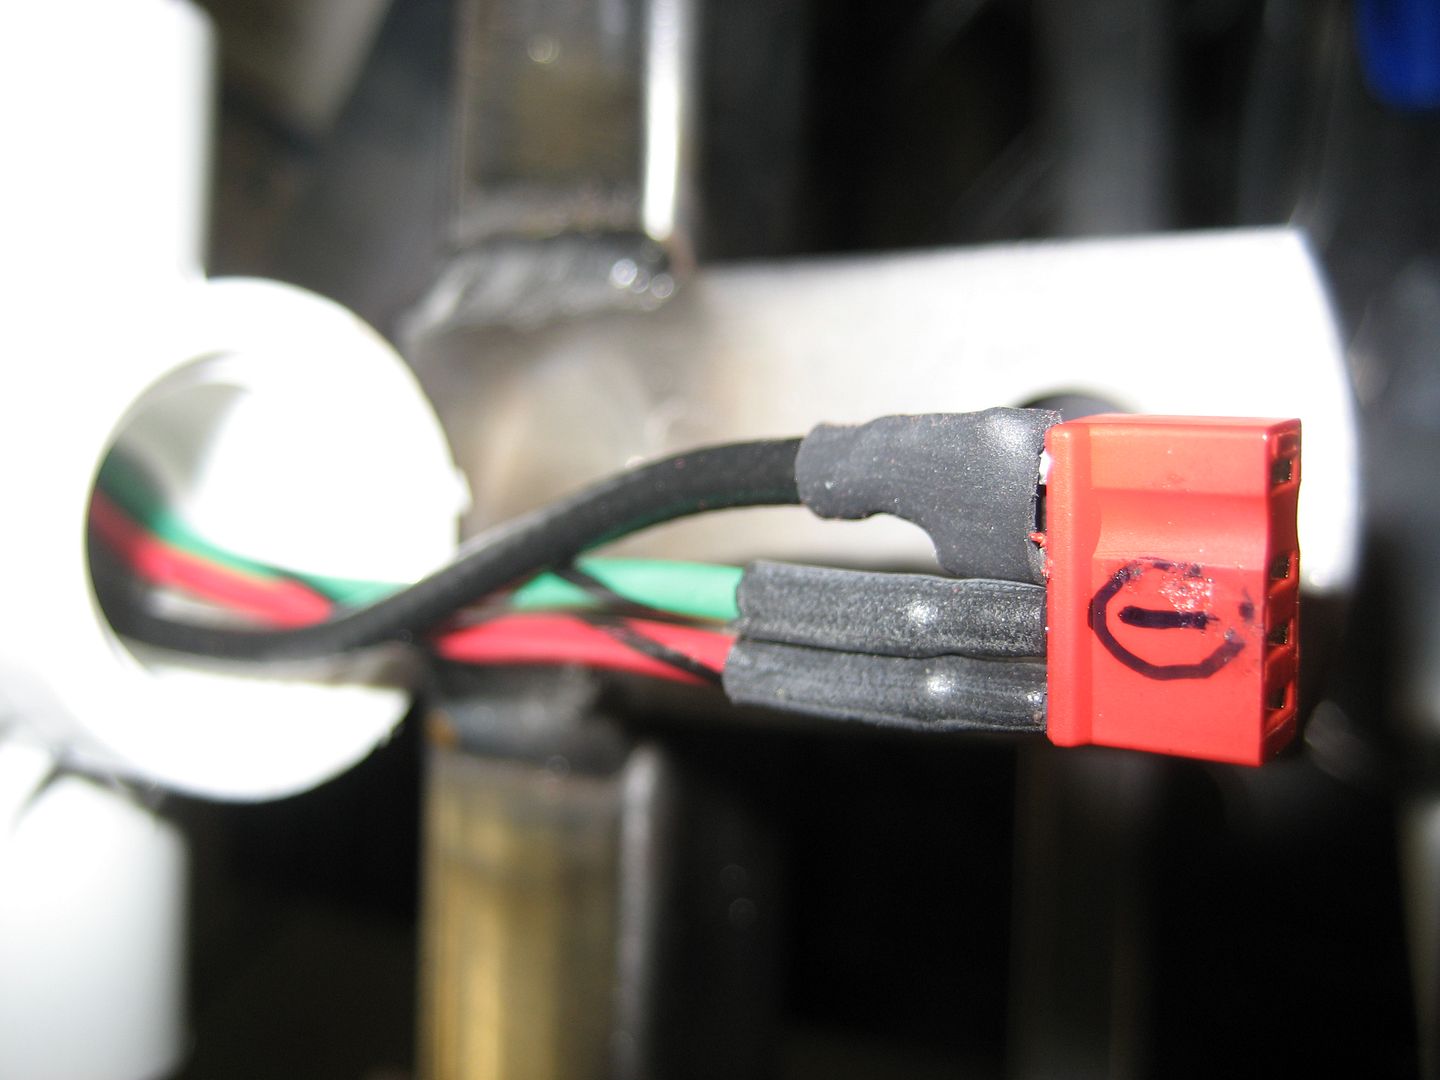
Here the two connectors are mated. You can see how much space they will occupy inside the cord grip:
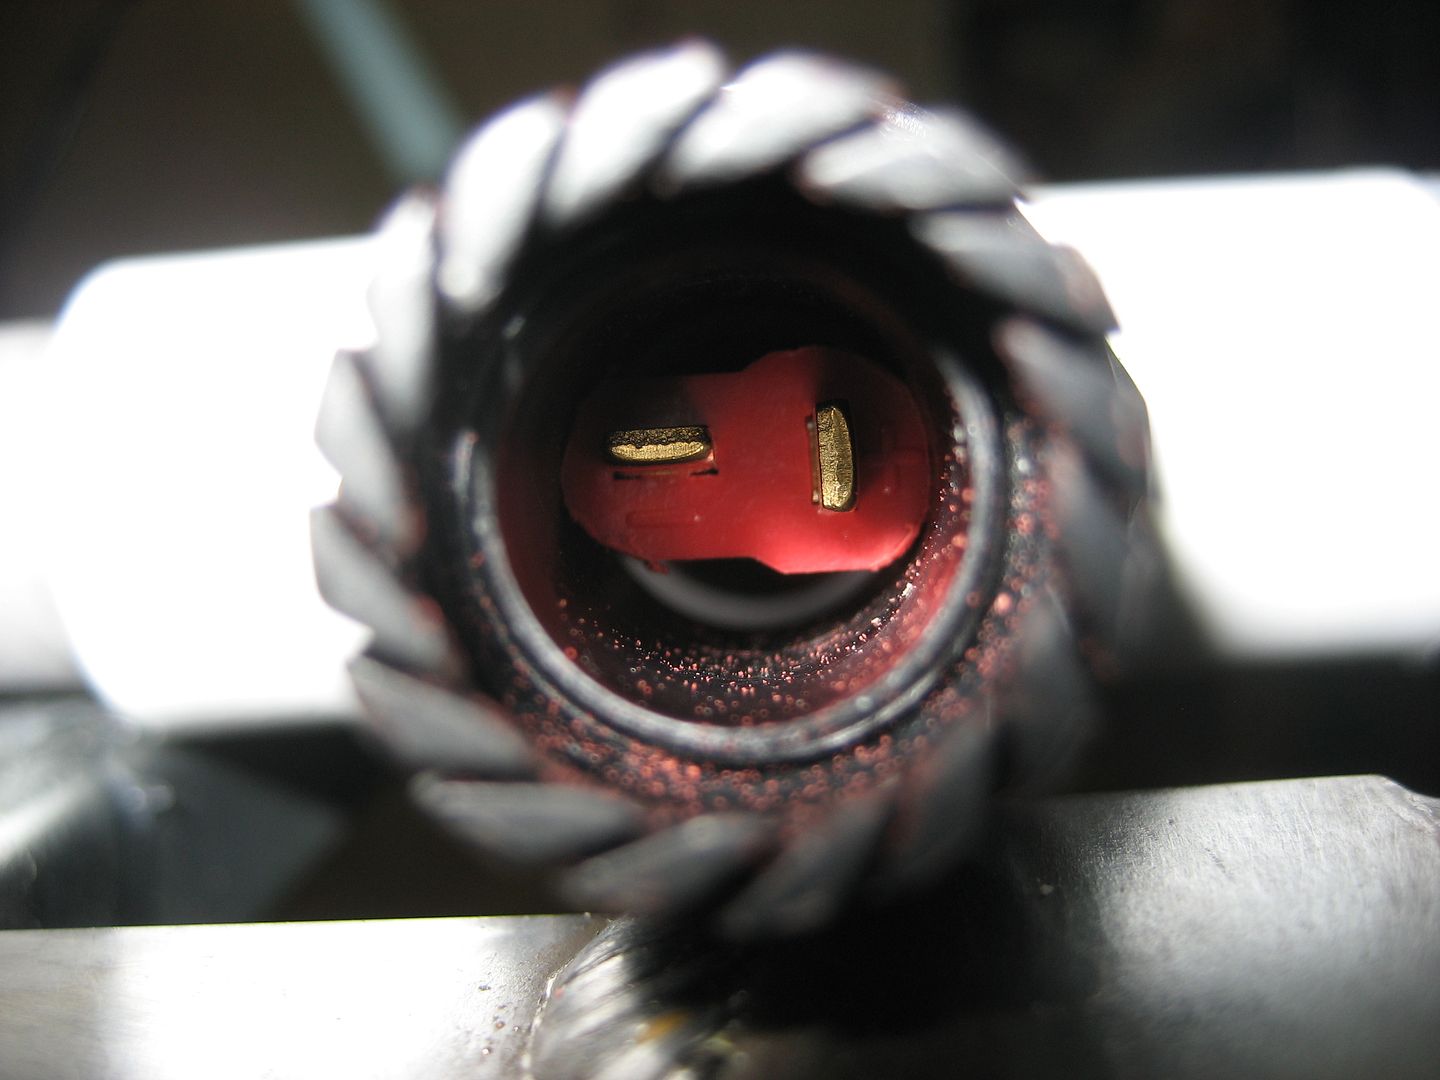
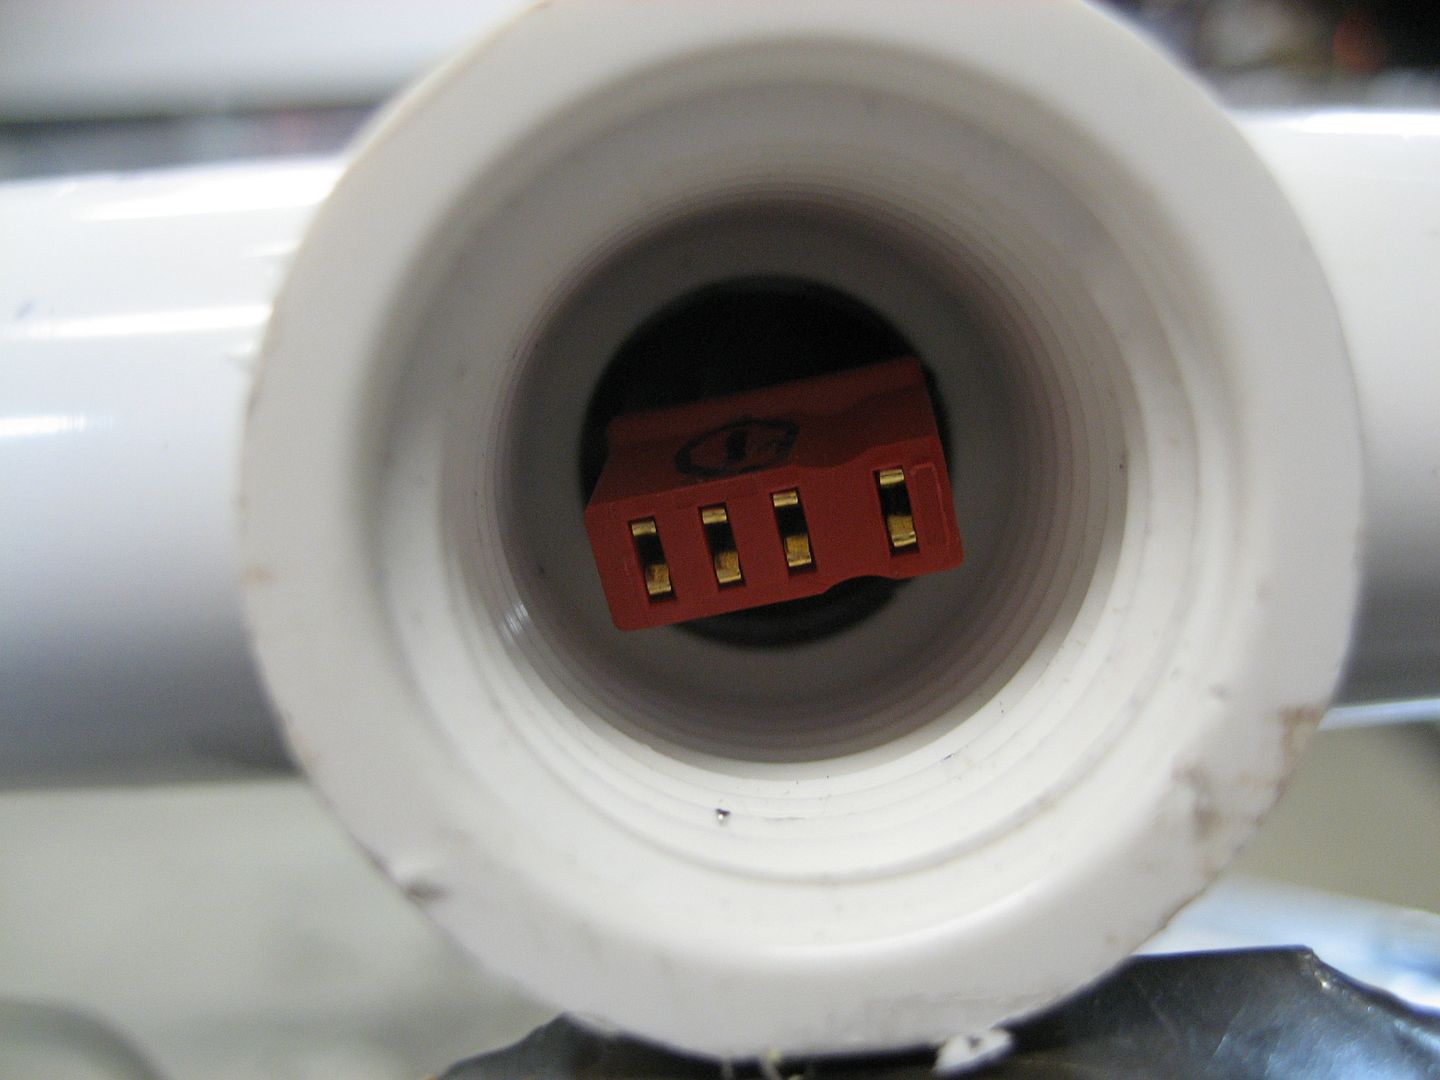
The unit will be assembled like this with the lamp on the other end of the silicone tube. The connector will mate with the one inside the TEE, then the cord grip will screw down on top. The connectors will remain stationary inside while the cord grip screws down around them. The final step is to then screw down the chuck part of the cord grip which cinches the rubber seal around the silicone tubing making it water tight.
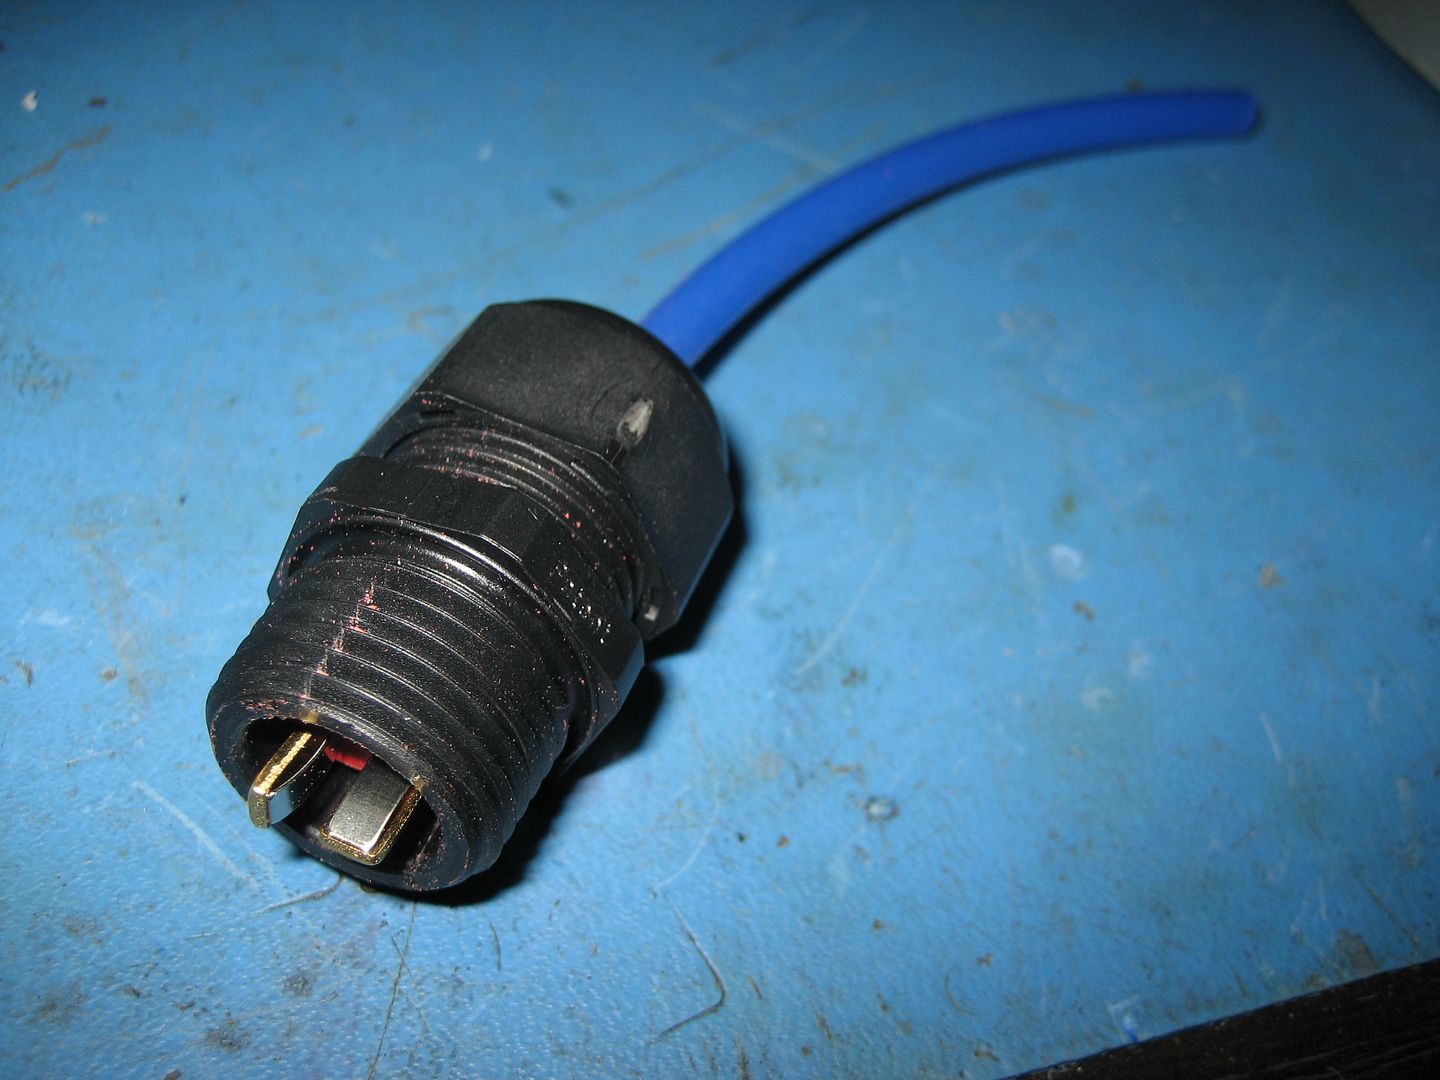
Same process for the video camera connectors:
So far it's working as I had planned! I only have 16 more connectors to solder...
More progress...
DEANS power connector with the edges sanded down to fit in the cord grip, soldered and heat shrunk:

Seated:

Here the two connectors are mated. You can see how much space they will occupy inside the cord grip:

The unit will be assembled like this with the lamp on the other end of the silicone tube. The connector will mate with the one inside the TEE, then the cord grip will screw down on top. The connectors will remain stationary inside while the cord grip screws down around them. The final step is to then screw down the chuck part of the cord grip which cinches the rubber seal around the silicone tubing making it water tight.


Same process for the video camera connectors:


So far it's working as I had planned! I only have 16 more connectors to solder...
1997 SAFARI 2WD CARGO

"I do not think there is any thrill that can go through the human heart like that felt by the inventor as he sees some creation of the brain unfolding to success... Such emotions make a man forget food, sleep, friends, love, everything." Nikola Tesla

"I do not think there is any thrill that can go through the human heart like that felt by the inventor as he sees some creation of the brain unfolding to success... Such emotions make a man forget food, sleep, friends, love, everything." Nikola Tesla
Re: Homebrew Con-Ferr Style Porthole Roof Rack Build
awesome. . . .
I'm watching . . .every episode . . . think I'm addicted
I'm watching . . .every episode . . . think I'm addicted

the beast
-
97CargoCrawler
Topic author - I sleep in my van
- Posts: 754
- Joined: Thu Jan 24, 2008 11:50 pm
- Location: Near Los Angeles, CA
- Contact:
Re: Homebrew Con-Ferr Style Porthole Roof Rack Build
I'm so done with this rack...I just want it on the van already. I can't think of anything else it needs. The weather better be ripe for painting this weekend.
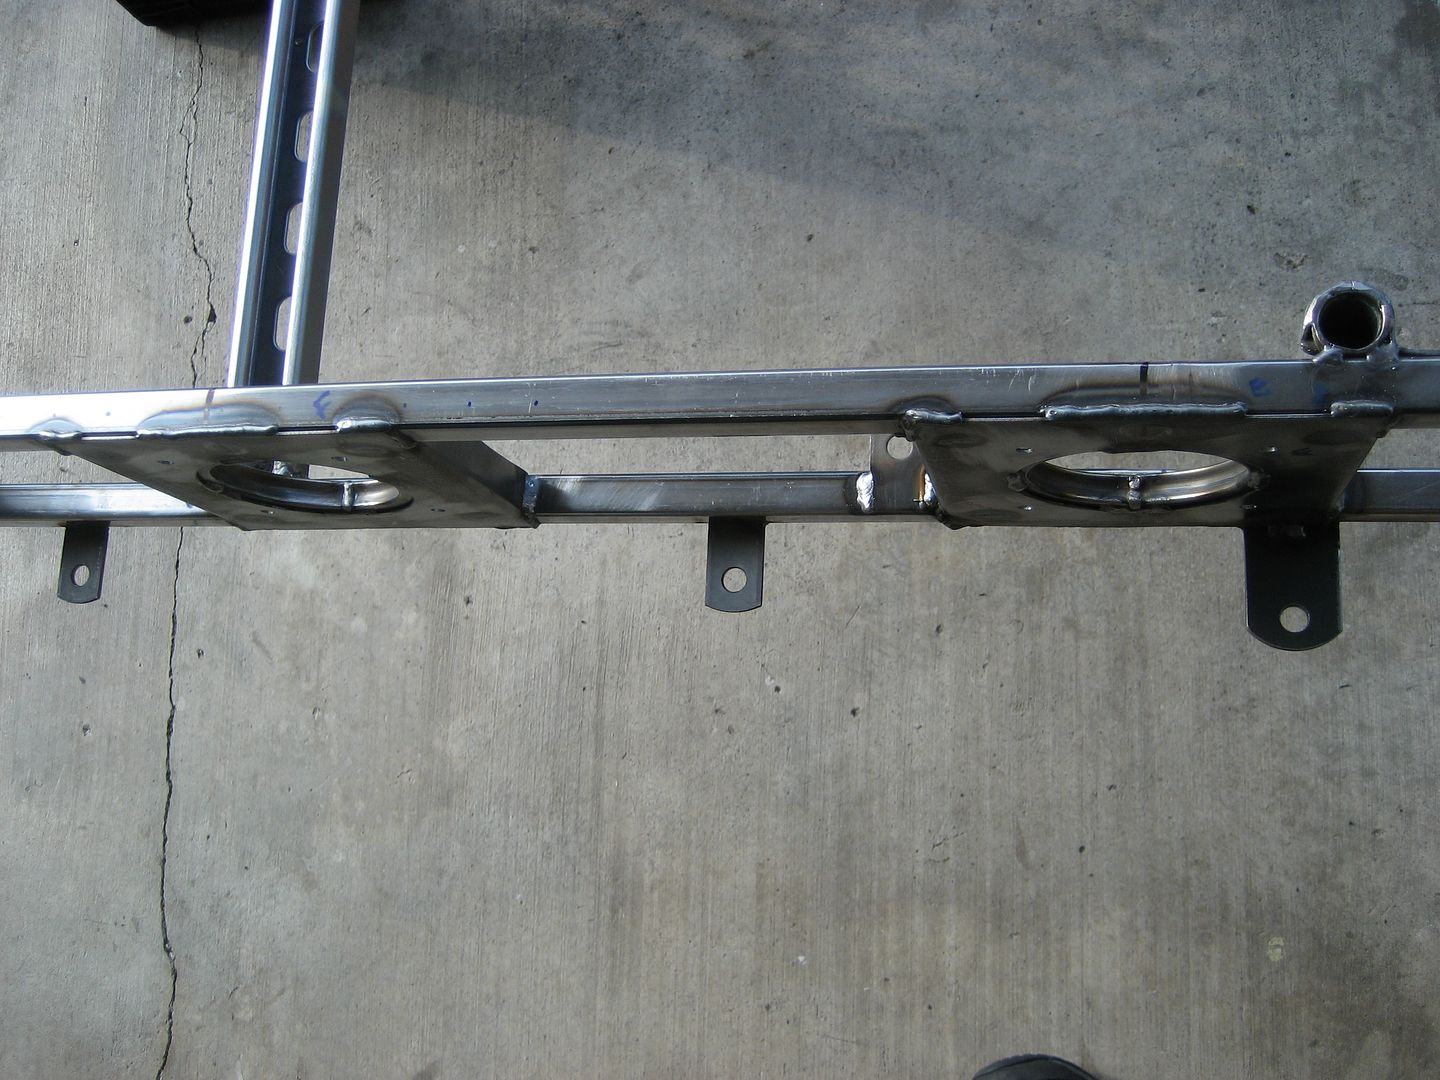
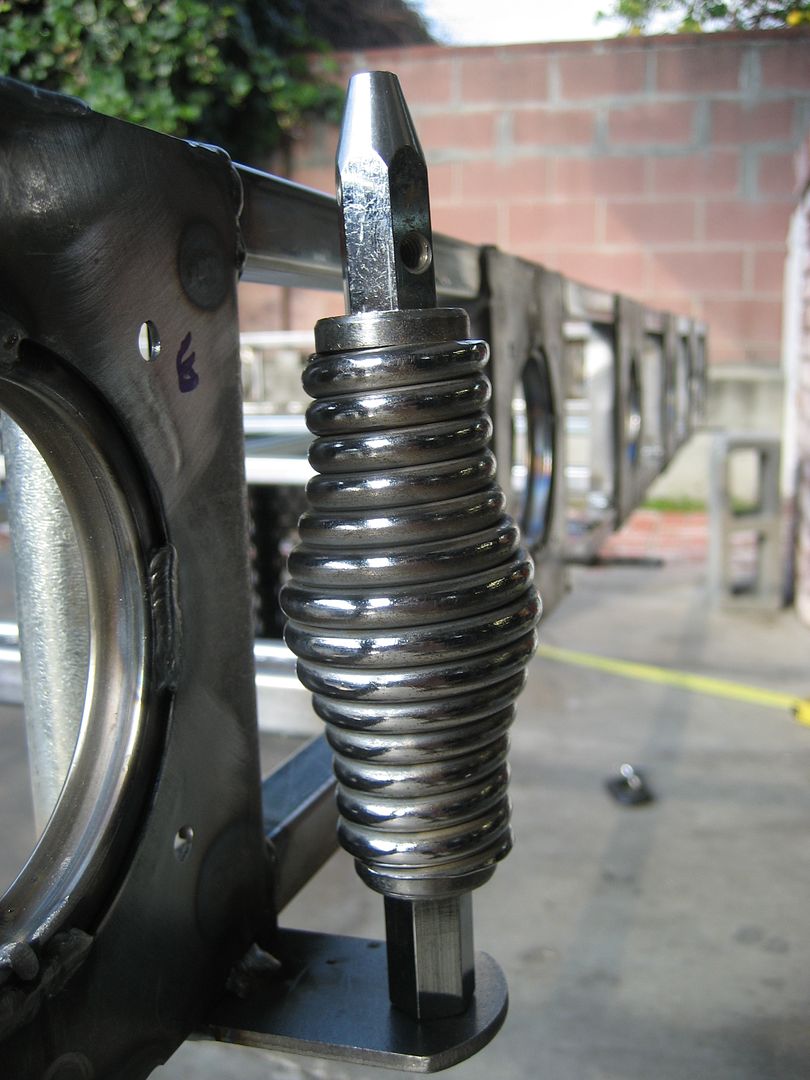
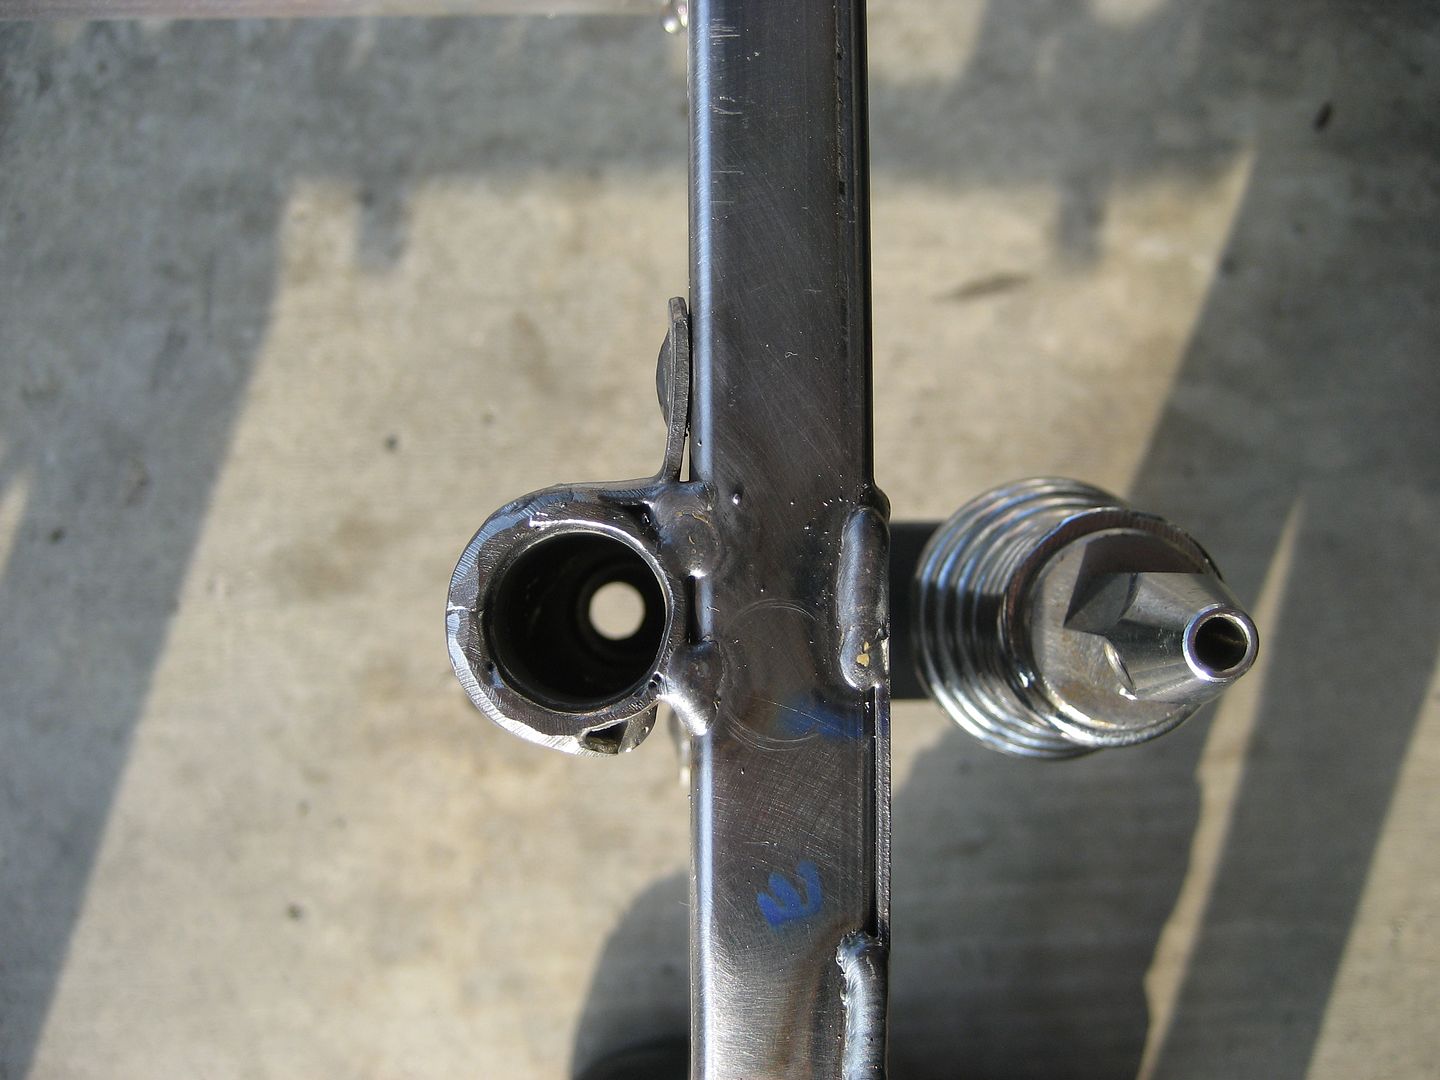
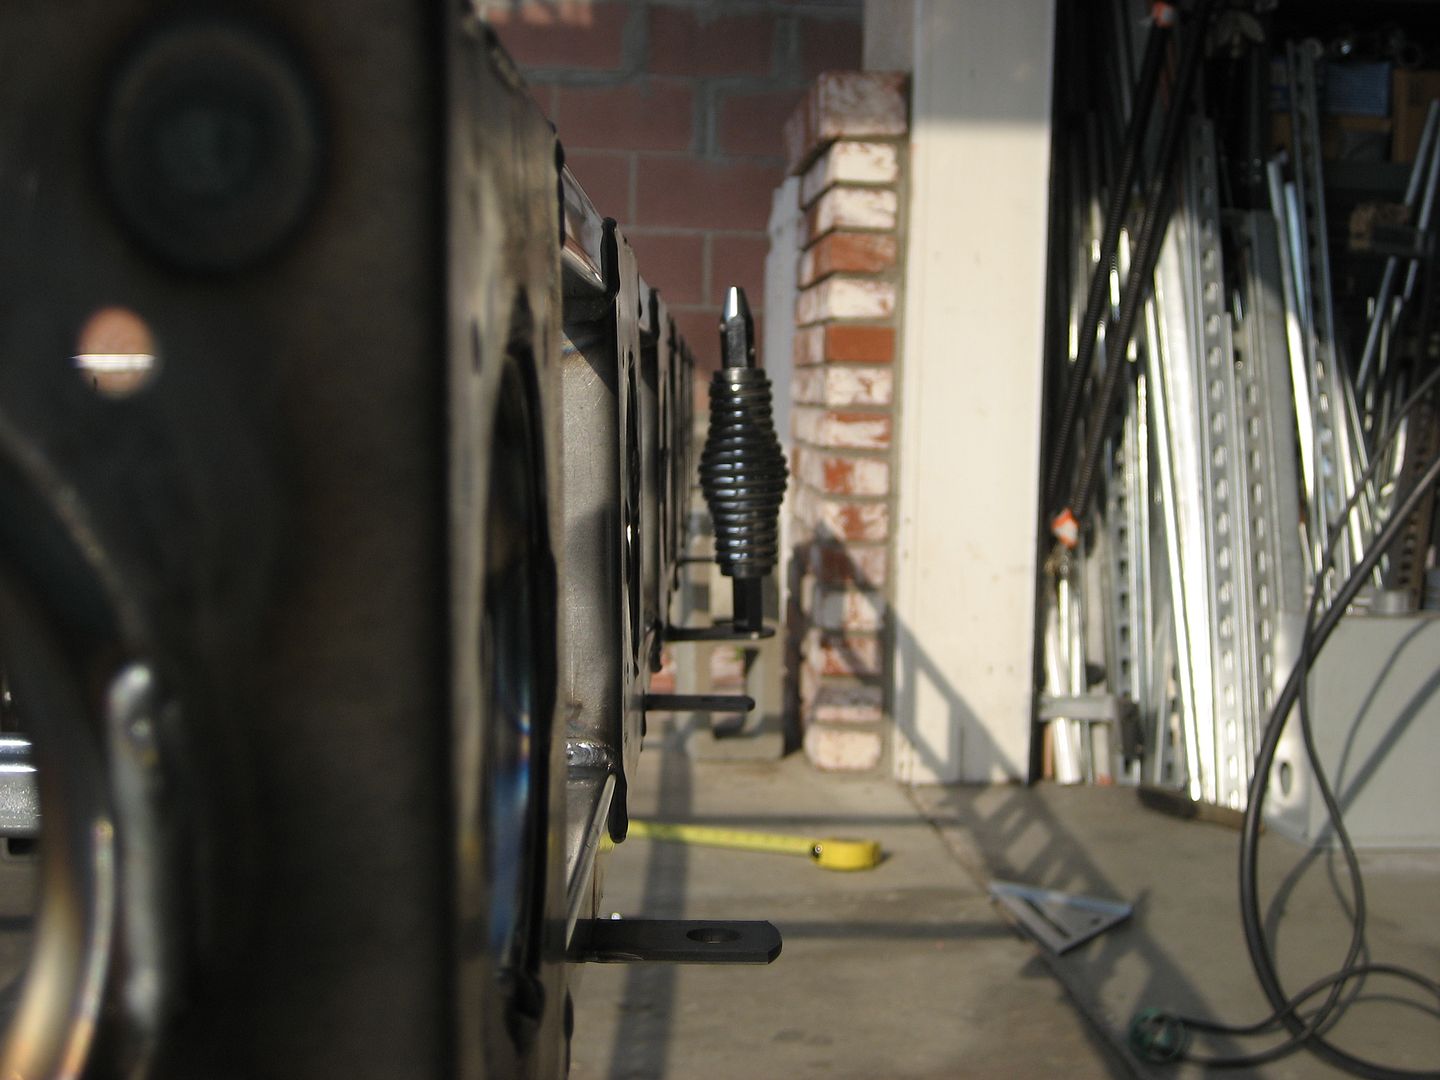
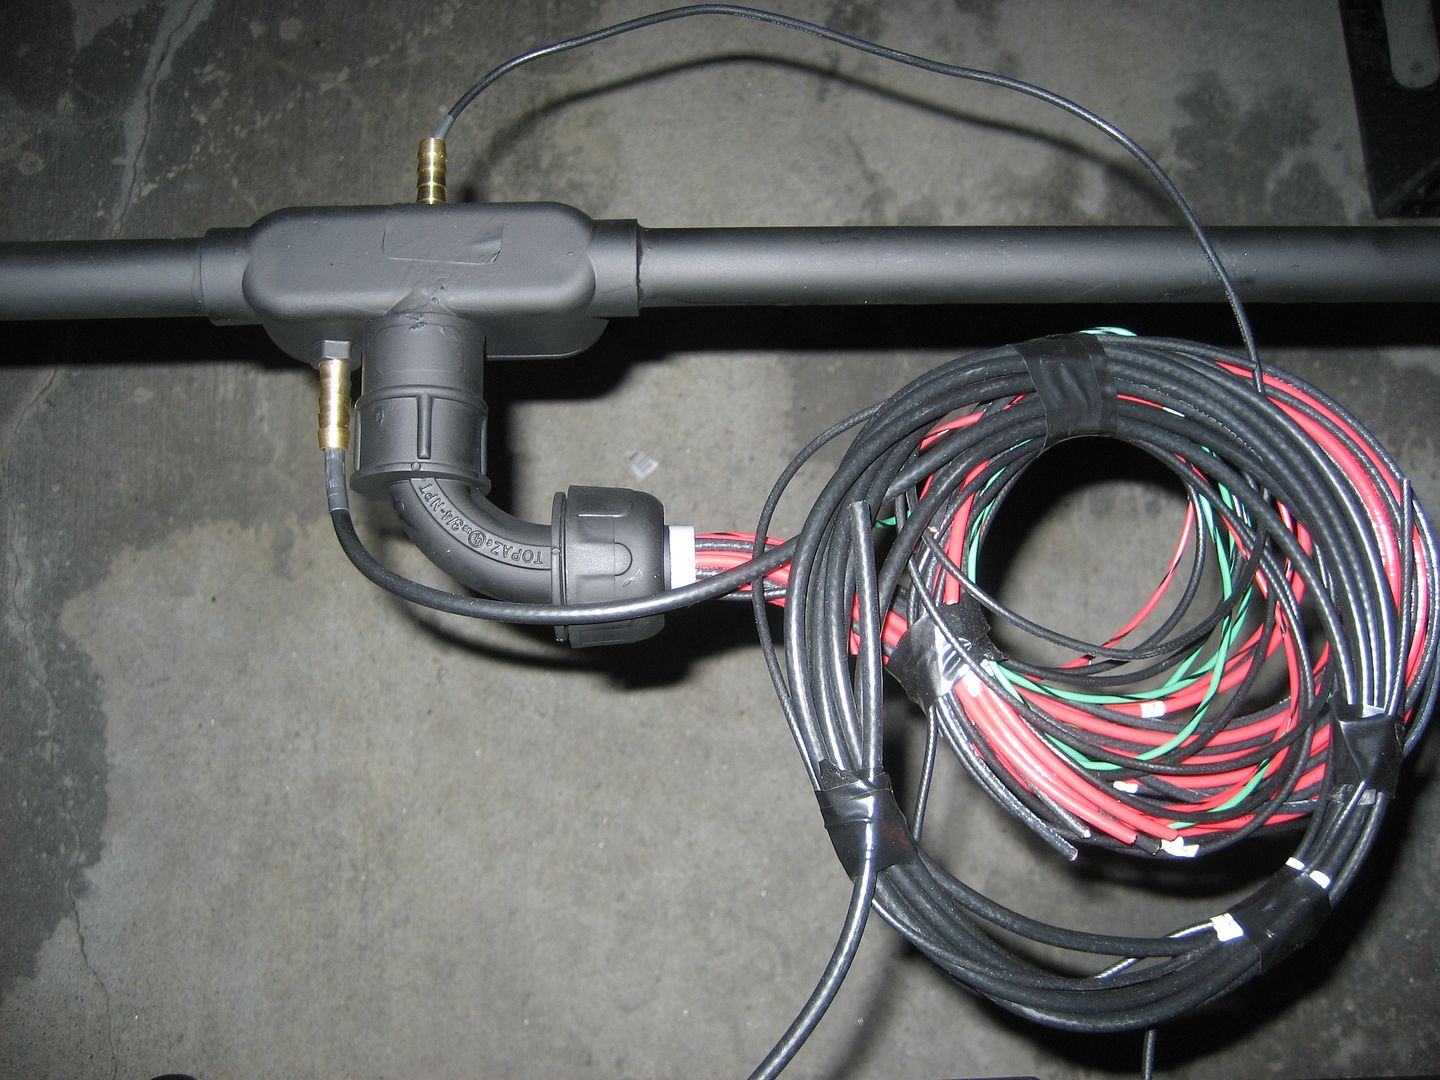
I welded on two tabs this past weekend. A small one for the scanner which will have a Motorola NMO style connector bolted to it and a large one for the spring mount and 102" CB antenna:
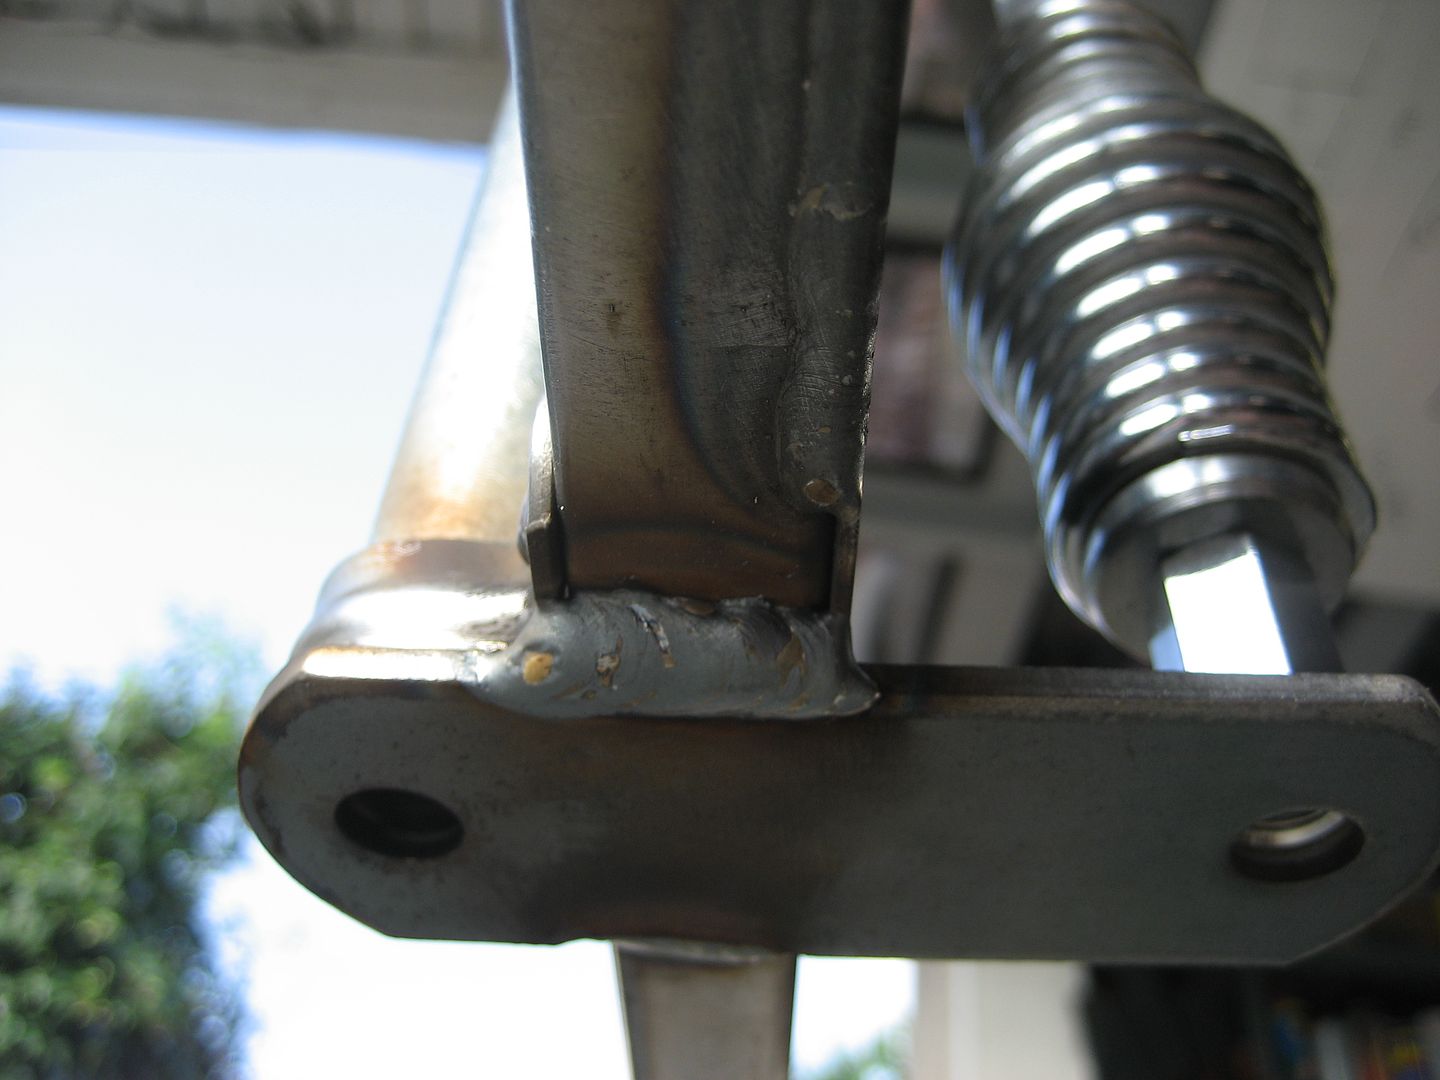
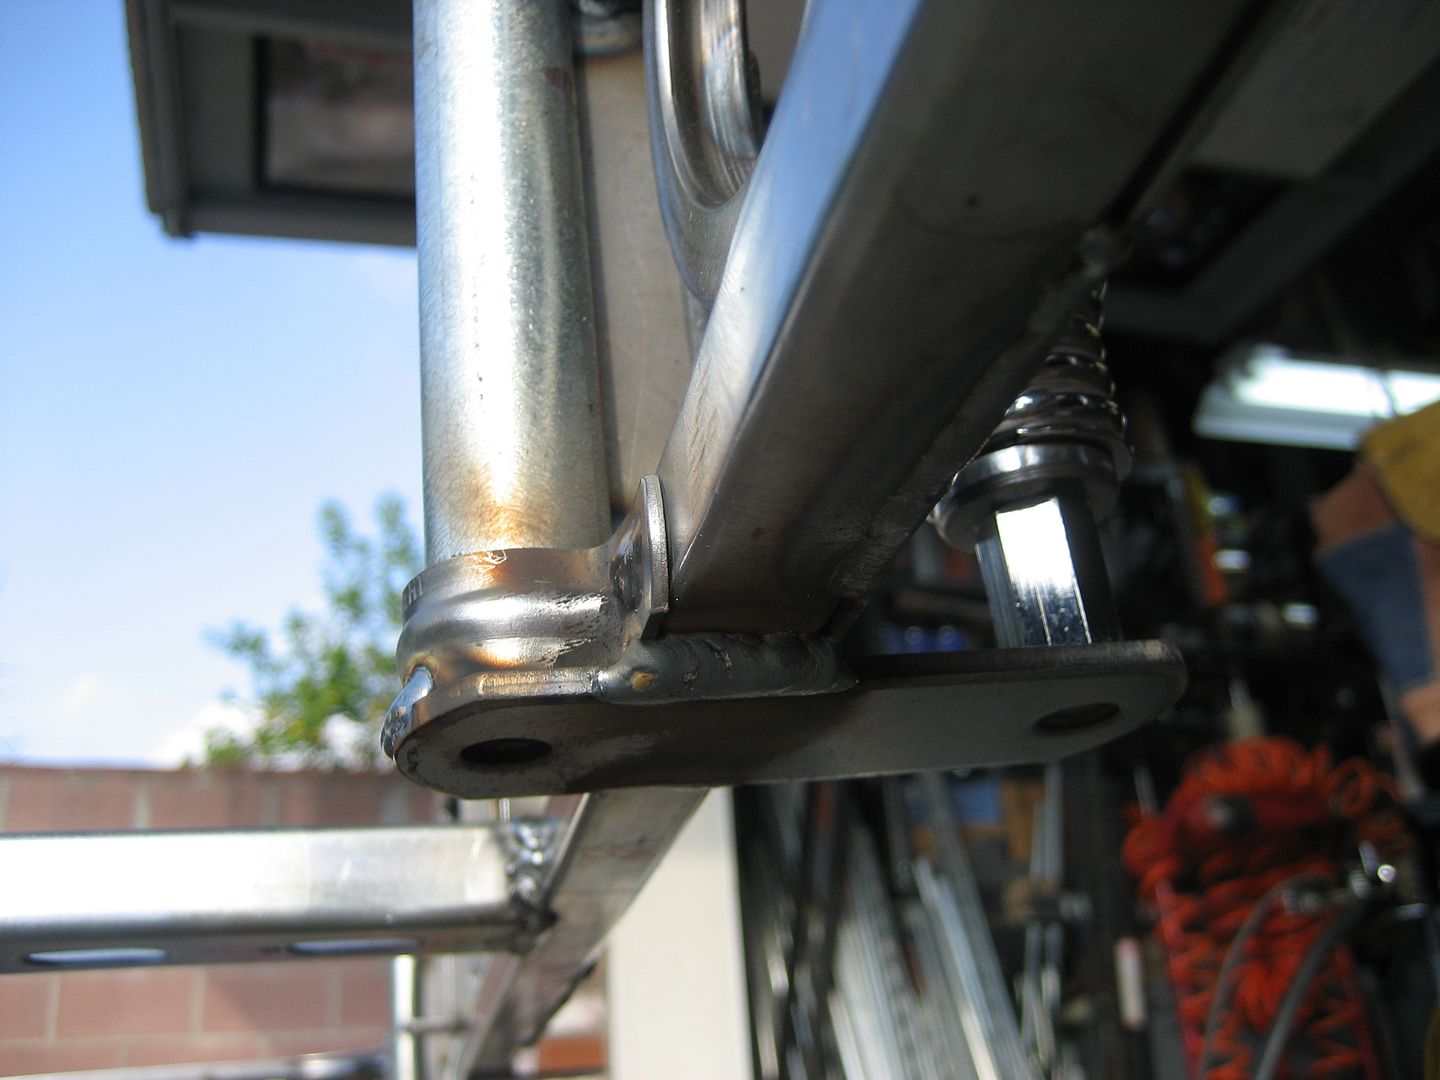
I used a much larger tab for the spring mount since it will have a lot more stress on it. I also welded it to one of the tent pole retainers:
I'm also experimenting with feedthru's for the roof. I have several varieties of liquid tight connectors. The original plan was to weld a metal fitting to a plate and bolt the plate to the roof. I want the plate to help reinforce the area surrounding the connector. I tried to weld one of the connectors to the plate. I don't know what they are made of but they are not steel. They seem a little heavy to be aluminum....I have no idea. The end result is that I cannot weld them to the plate. So I will have to use the nut and washer supplied with the connector. I wanted to weld it so it would be strong and water tight.
I have three varieties of connectors but for whatever reason one of the 3/4" one as a lot more room inside so I think I will use that one. They are deisigned for flexible conduit but they will work equally well wit my silicone hose.
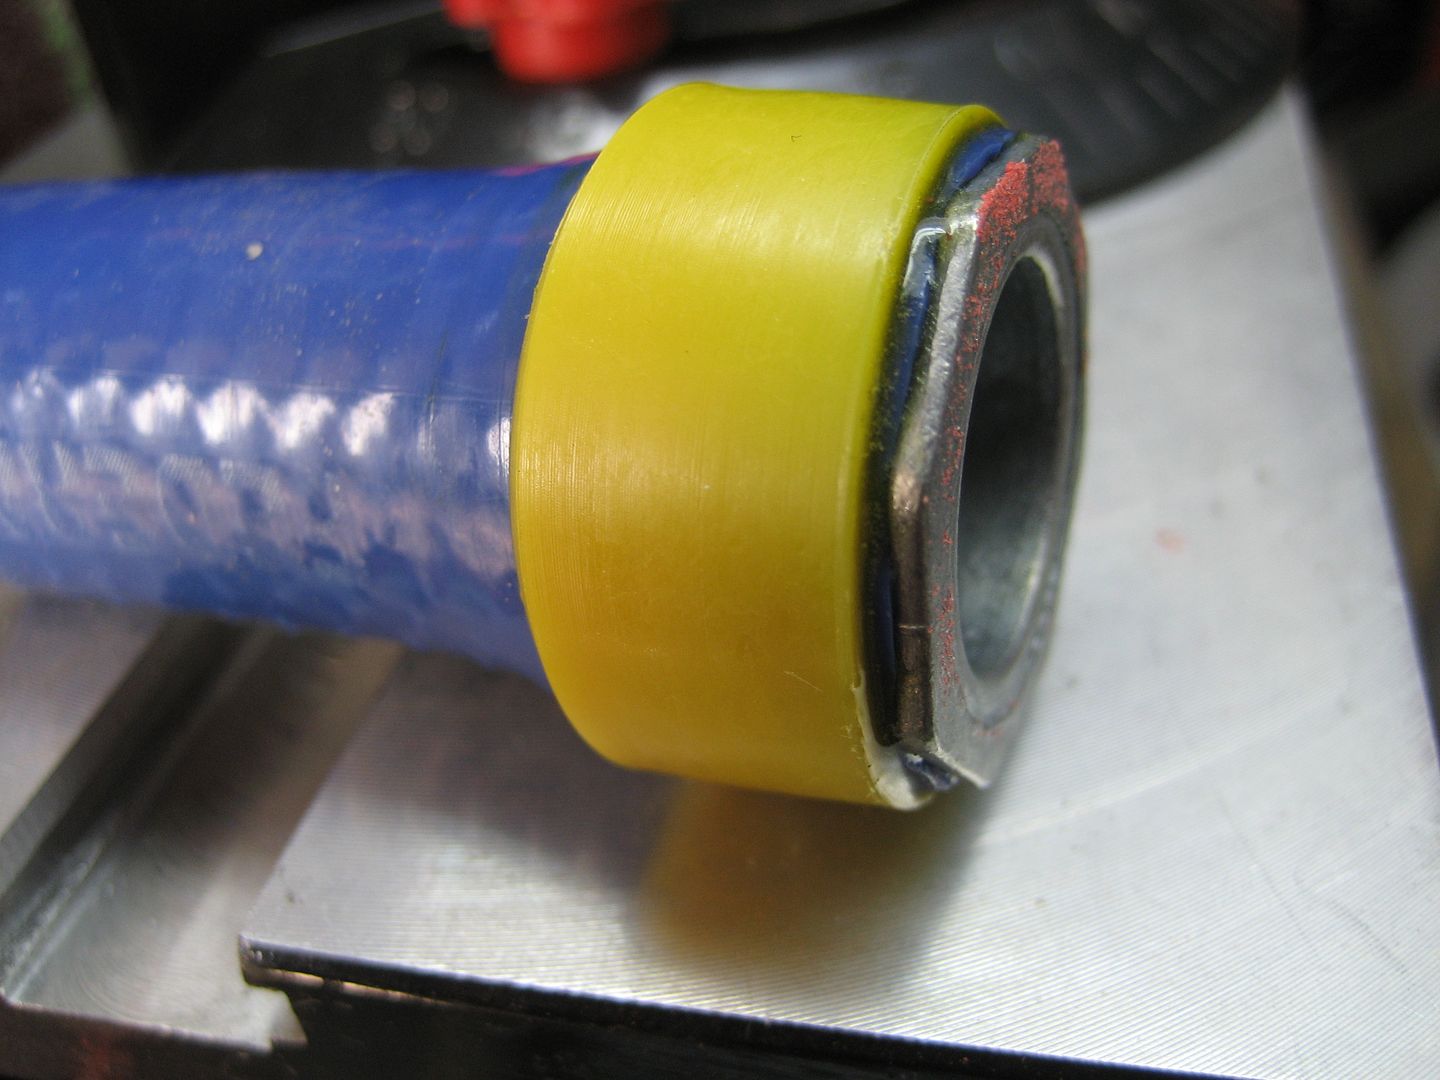
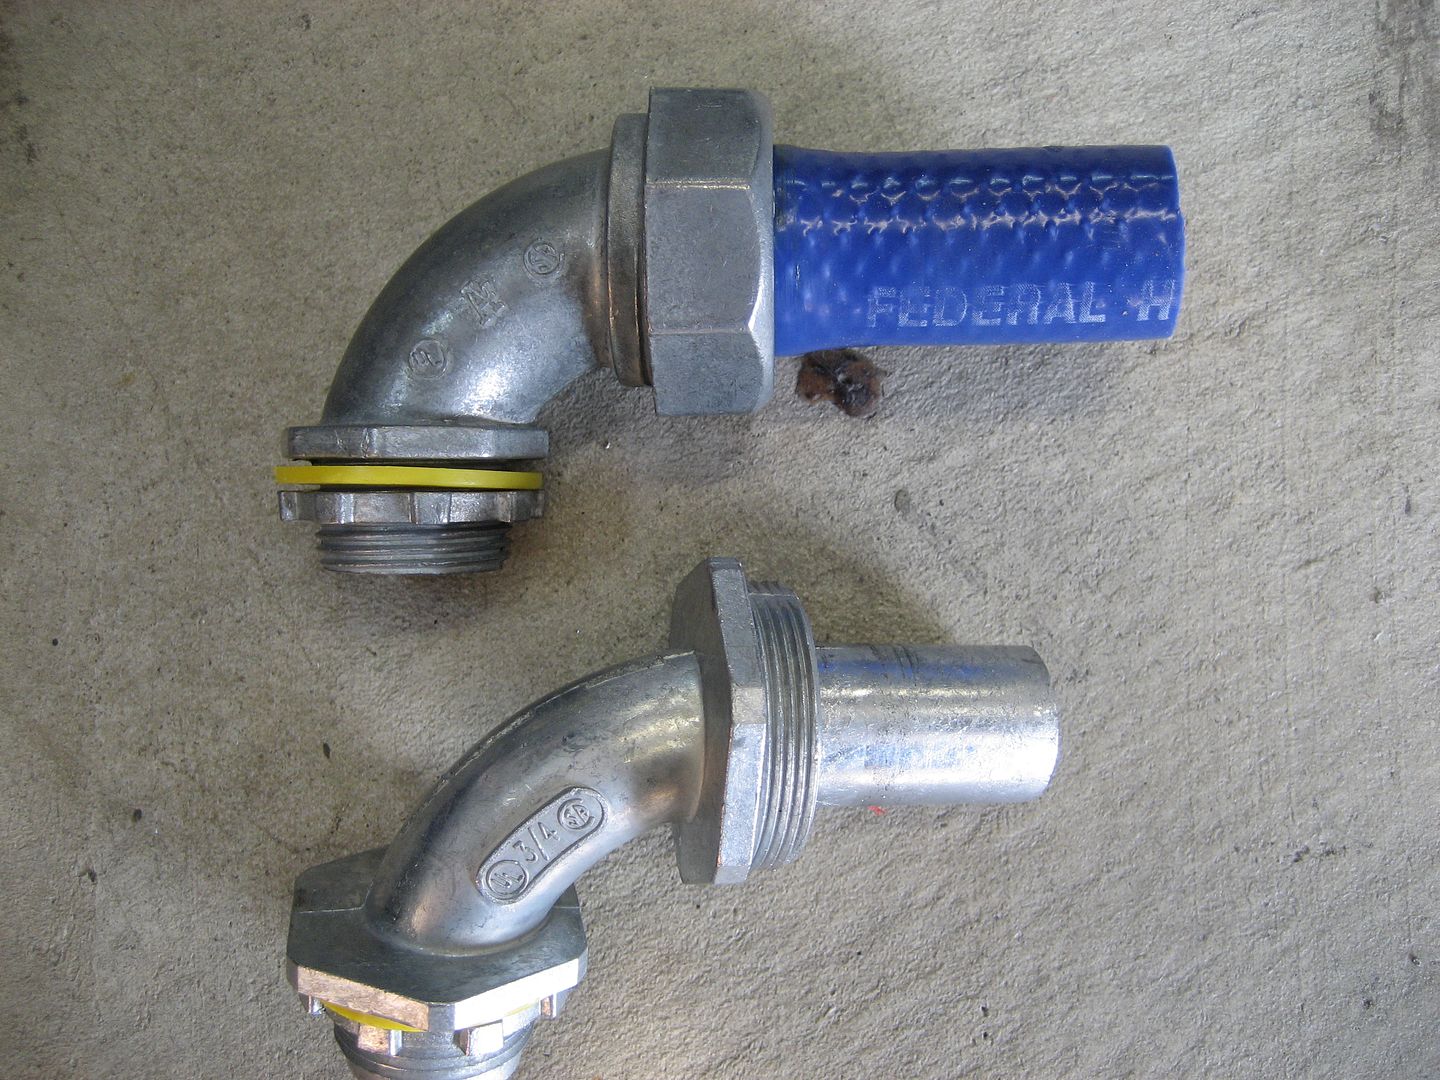
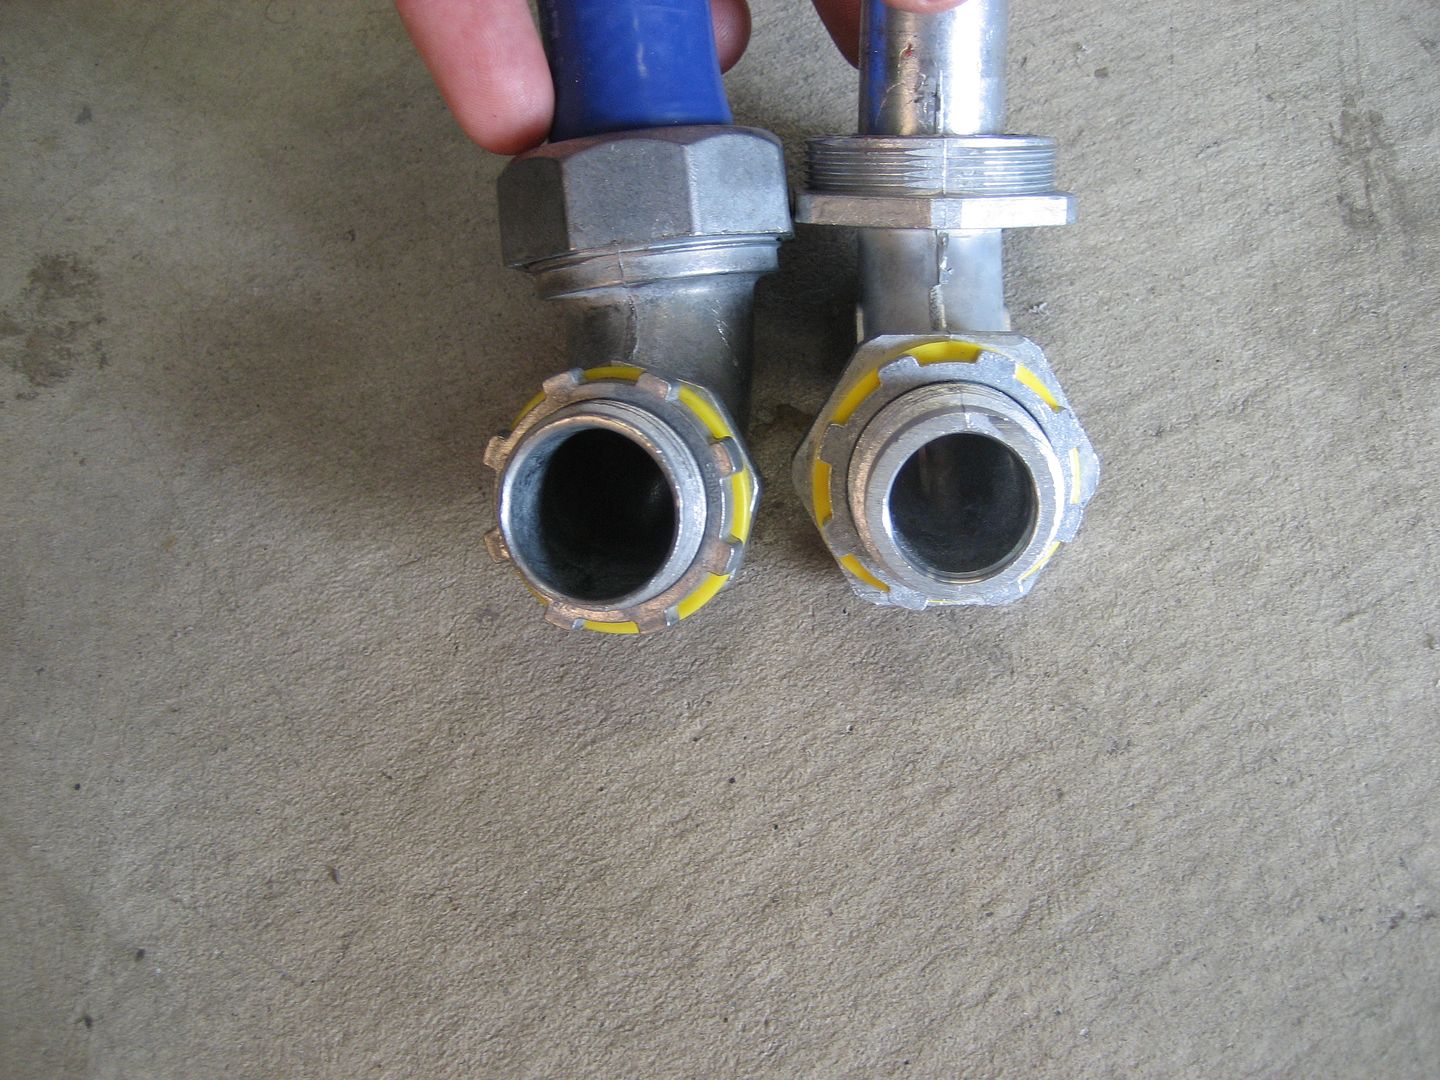
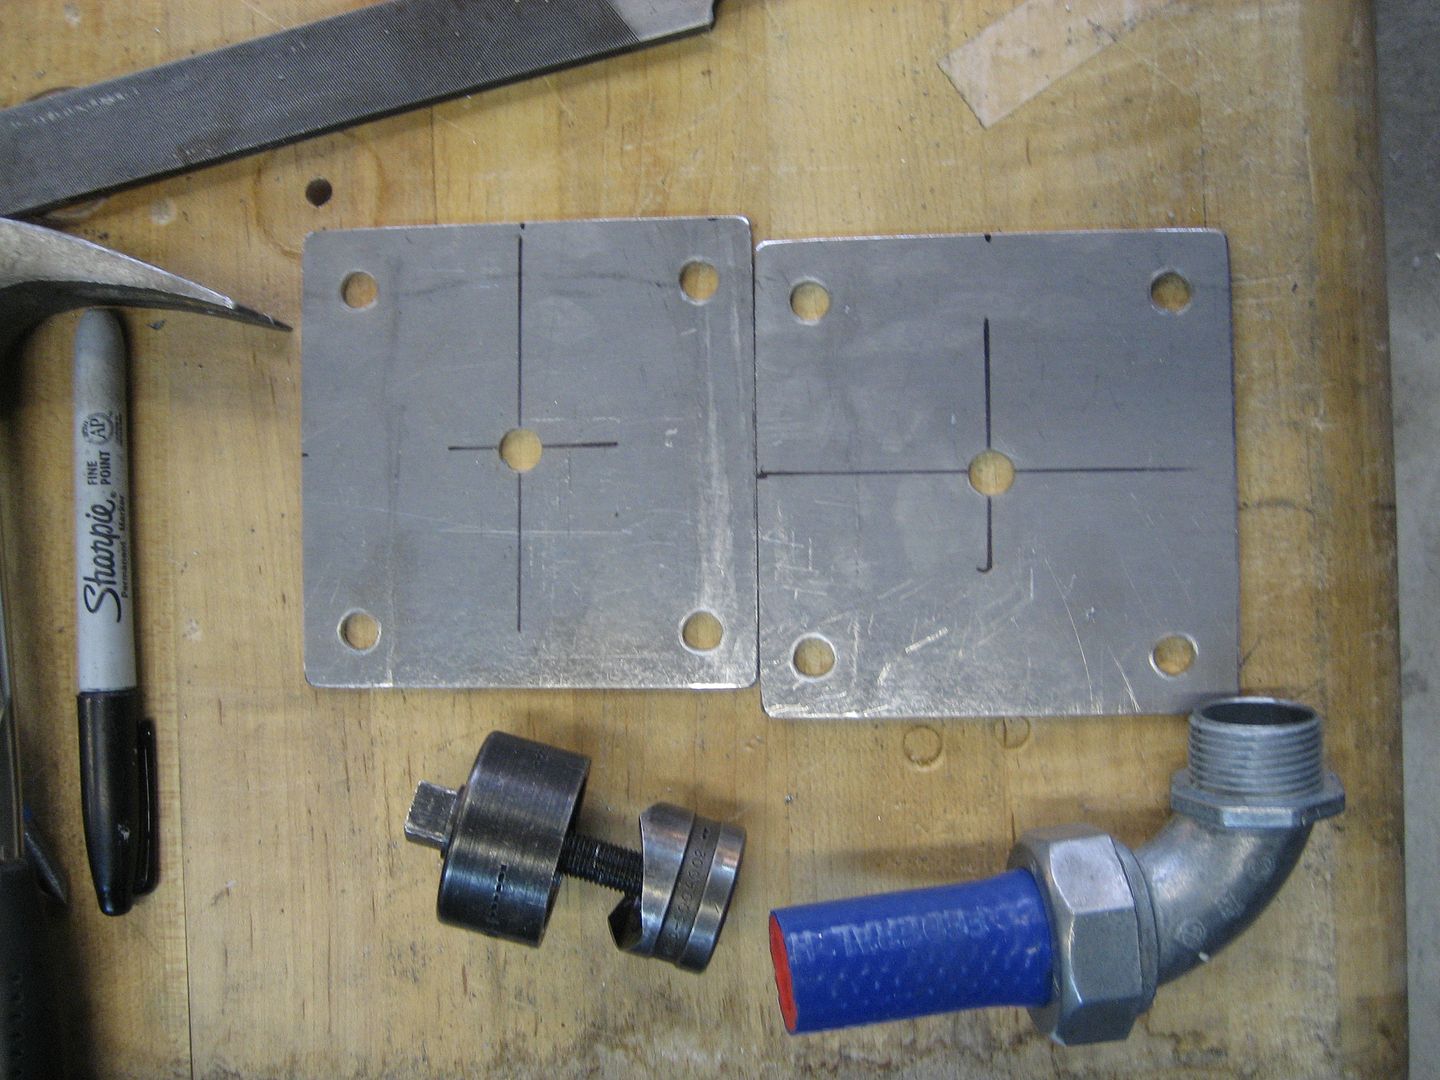
I'm going to punch 3/4" holes in the plates and then bolt the connectors to them. The wires will exit the rack, travel a few inchs throught the silicone hose and then enter the roof through this connector.
I welded on two tabs this past weekend. A small one for the scanner which will have a Motorola NMO style connector bolted to it and a large one for the spring mount and 102" CB antenna:


I used a much larger tab for the spring mount since it will have a lot more stress on it. I also welded it to one of the tent pole retainers:


I'm also experimenting with feedthru's for the roof. I have several varieties of liquid tight connectors. The original plan was to weld a metal fitting to a plate and bolt the plate to the roof. I want the plate to help reinforce the area surrounding the connector. I tried to weld one of the connectors to the plate. I don't know what they are made of but they are not steel. They seem a little heavy to be aluminum....I have no idea. The end result is that I cannot weld them to the plate. So I will have to use the nut and washer supplied with the connector. I wanted to weld it so it would be strong and water tight.
I have three varieties of connectors but for whatever reason one of the 3/4" one as a lot more room inside so I think I will use that one. They are deisigned for flexible conduit but they will work equally well wit my silicone hose.


I'm going to punch 3/4" holes in the plates and then bolt the connectors to them. The wires will exit the rack, travel a few inchs throught the silicone hose and then enter the roof through this connector.
1997 SAFARI 2WD CARGO

"I do not think there is any thrill that can go through the human heart like that felt by the inventor as he sees some creation of the brain unfolding to success... Such emotions make a man forget food, sleep, friends, love, everything." Nikola Tesla

"I do not think there is any thrill that can go through the human heart like that felt by the inventor as he sees some creation of the brain unfolding to success... Such emotions make a man forget food, sleep, friends, love, everything." Nikola Tesla
-
photo_van
- I sleep in my van
- Posts: 592
- Joined: Wed May 18, 2011 4:38 pm
- Location: 7000' in the Mountains of California
Re: Homebrew Con-Ferr Style Porthole Roof Rack Build
wow, haven't been here for a while, this project has grown! Looking good CC.
-
MountainManJoe
- Sheriff
-
I have my van tatooed on my cheeks
- Posts: 3243
- Joined: Fri Aug 08, 2008 12:55 pm
- Location: The Pacific North Wet
Re: Homebrew Con-Ferr Style Porthole Roof Rack Build
This project is very well documented and photographed. It has a lot useful information about metalwork, electrical, general construction etc. I'm sure you don't need us to tell you that this thread will be of great service to people in their future projects.
I'm paying close attention to the various electrical connectors and weatherproofing you are using. It will come in handy when I pull the trigger on my photovoltaic project.
Thank you for taking the time to share here.
I'm paying close attention to the various electrical connectors and weatherproofing you are using. It will come in handy when I pull the trigger on my photovoltaic project.
Thank you for taking the time to share here.
-
97CargoCrawler
Topic author - I sleep in my van
- Posts: 754
- Joined: Thu Jan 24, 2008 11:50 pm
- Location: Near Los Angeles, CA
- Contact:
Re: Homebrew Con-Ferr Style Porthole Roof Rack Build
Well thank you! This project has certainly covered a lot of ground. I have learned quite a bit. It's been a royal pain in the ass too lugging this rack around for the past 2 months and I will be very happy to see it on top of my roof!
In fact, I ditched work today and made some serious progress. I'm anticipating it will be bolted to my roof by this Sunday. I have lots of interesting pix to post later this evening. Today I got to wear the chemist's hat and play with phosphoric acid. It has some primer paint on it now too!
In fact, I ditched work today and made some serious progress. I'm anticipating it will be bolted to my roof by this Sunday. I have lots of interesting pix to post later this evening. Today I got to wear the chemist's hat and play with phosphoric acid.
-
97CargoCrawler
Topic author - I sleep in my van
- Posts: 754
- Joined: Thu Jan 24, 2008 11:50 pm
- Location: Near Los Angeles, CA
- Contact:
Re: Homebrew Con-Ferr Style Porthole Roof Rack Build
I was crack-a-lackin' today. For some reason I would think that would make one move slower...but anyway, I made obvious progress today!
I started my day by waking up at 6:25a.m. and decided I wasn't feelin' well enough to go to work. So I took a mental health day! Then I slept until 11a.m. It looked like prime painting weather outside for the first time in about a month so I got to it.
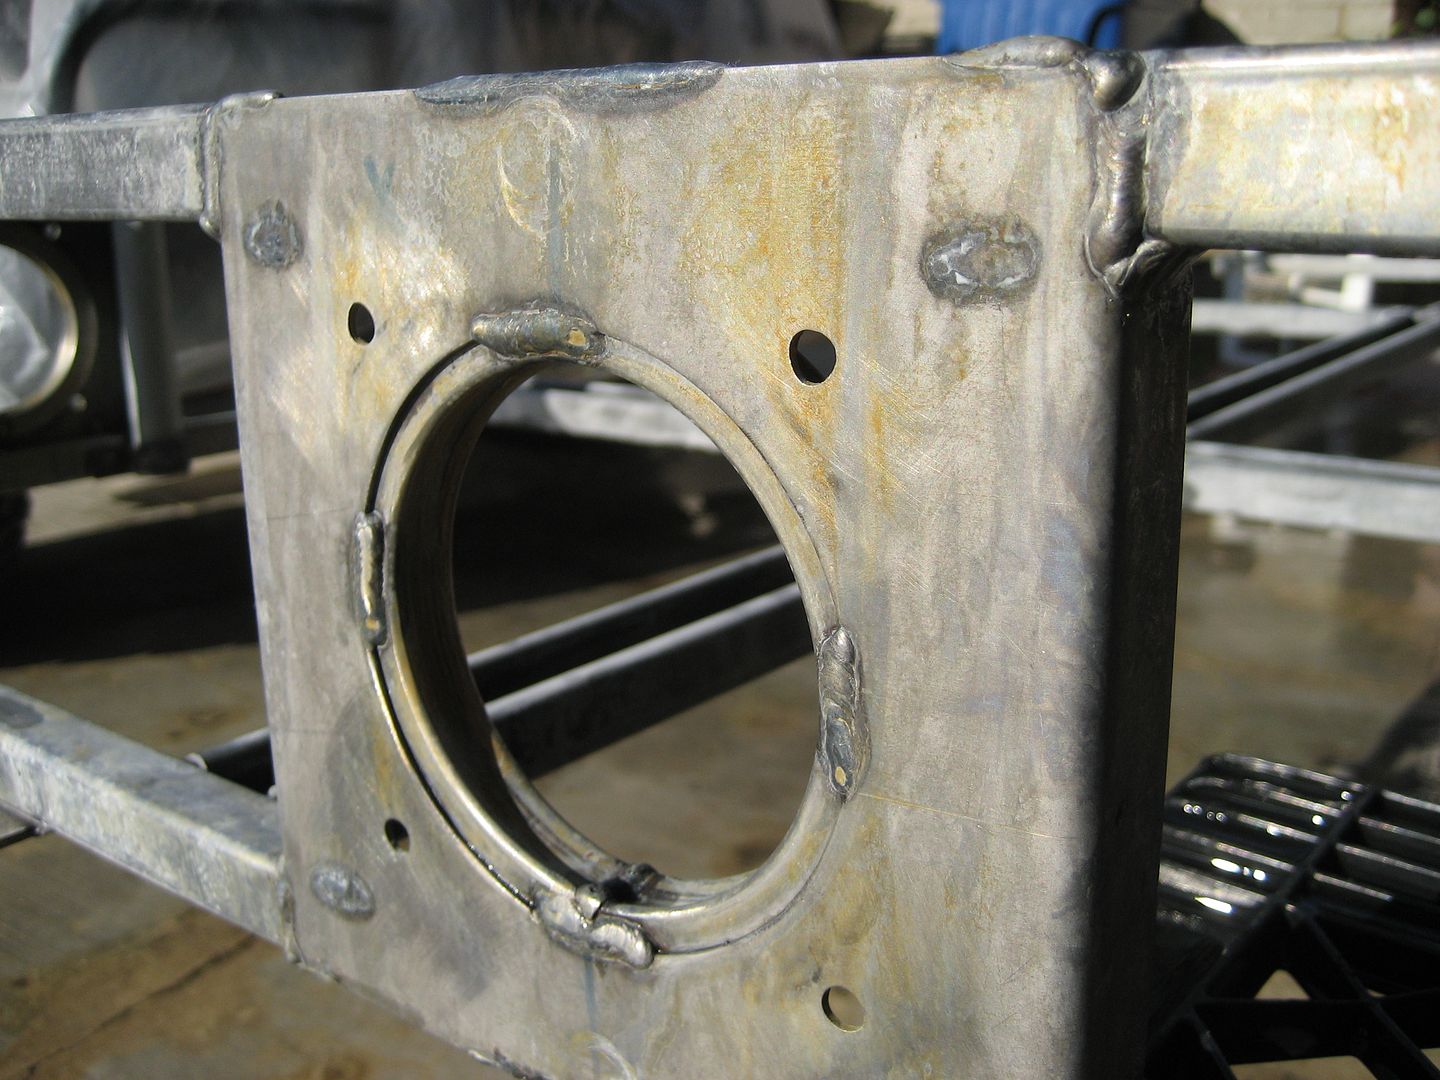
First I scrubbed all of the metal with Dawn dish-washing detergent to get the oil off. Next treatment was the phosphoric acid metal prep and etch treatment. I mixed that up and began spraying the roof rails.
Instantaneously I could see the galvanized steel have a strong reaction with the acid. It turned the nice shiny zinc to a very dull dark gray color:
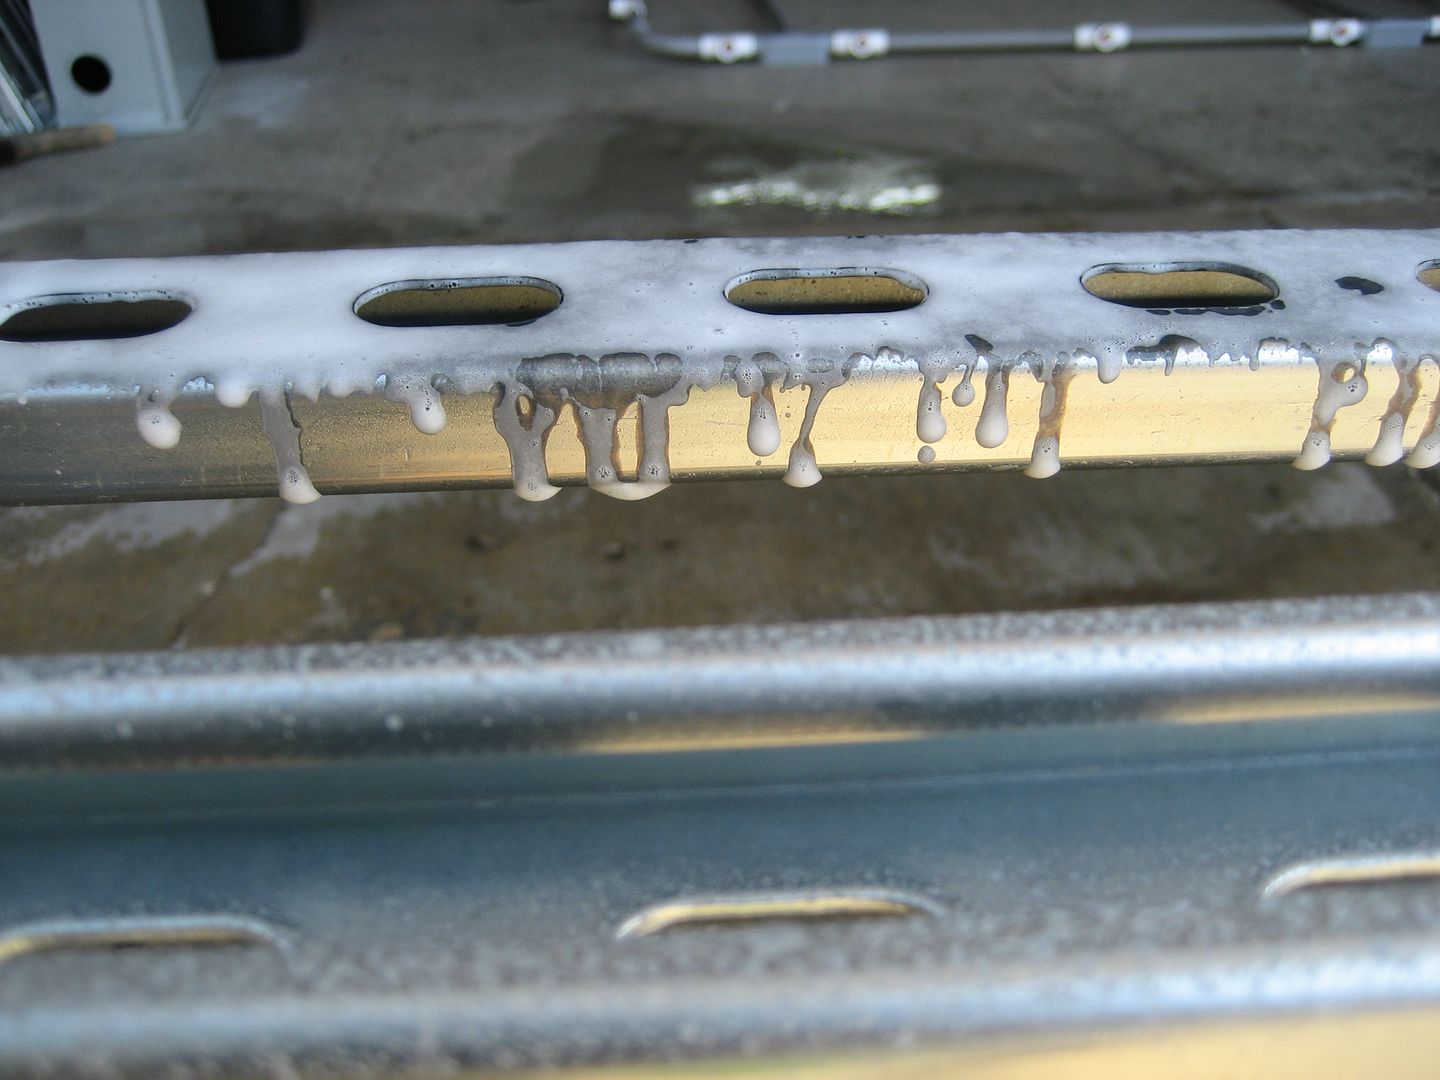
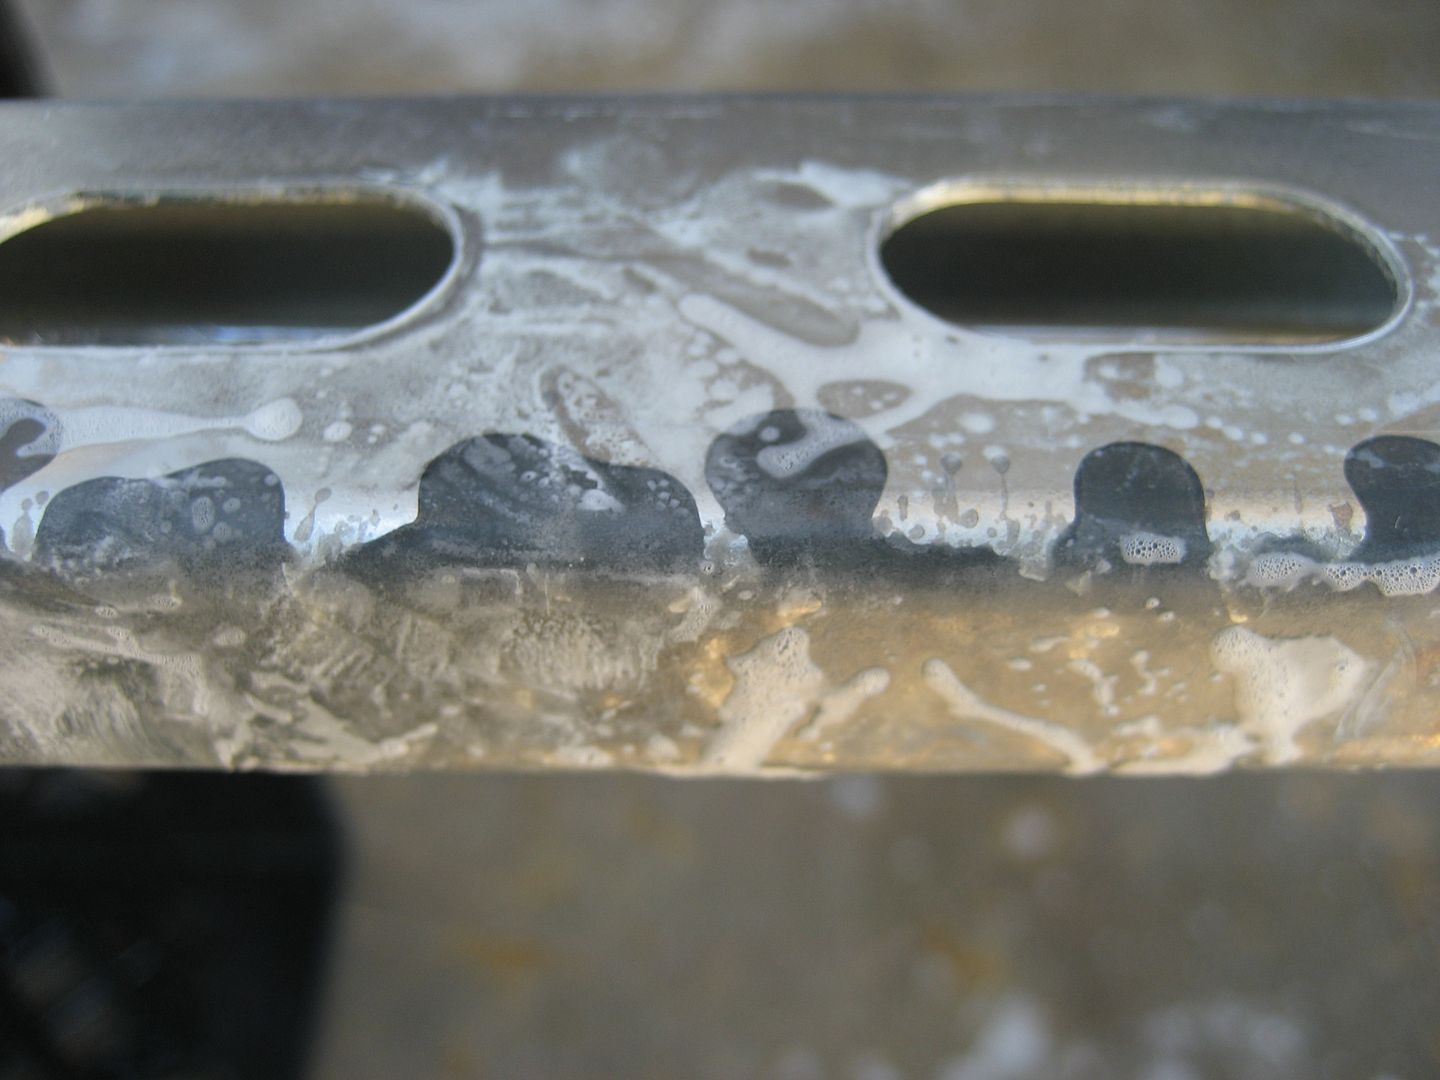
After a good spray coating of the acid and sitting for about 30 minutes the galvanized steel had a gnarly crystallized coating on it:
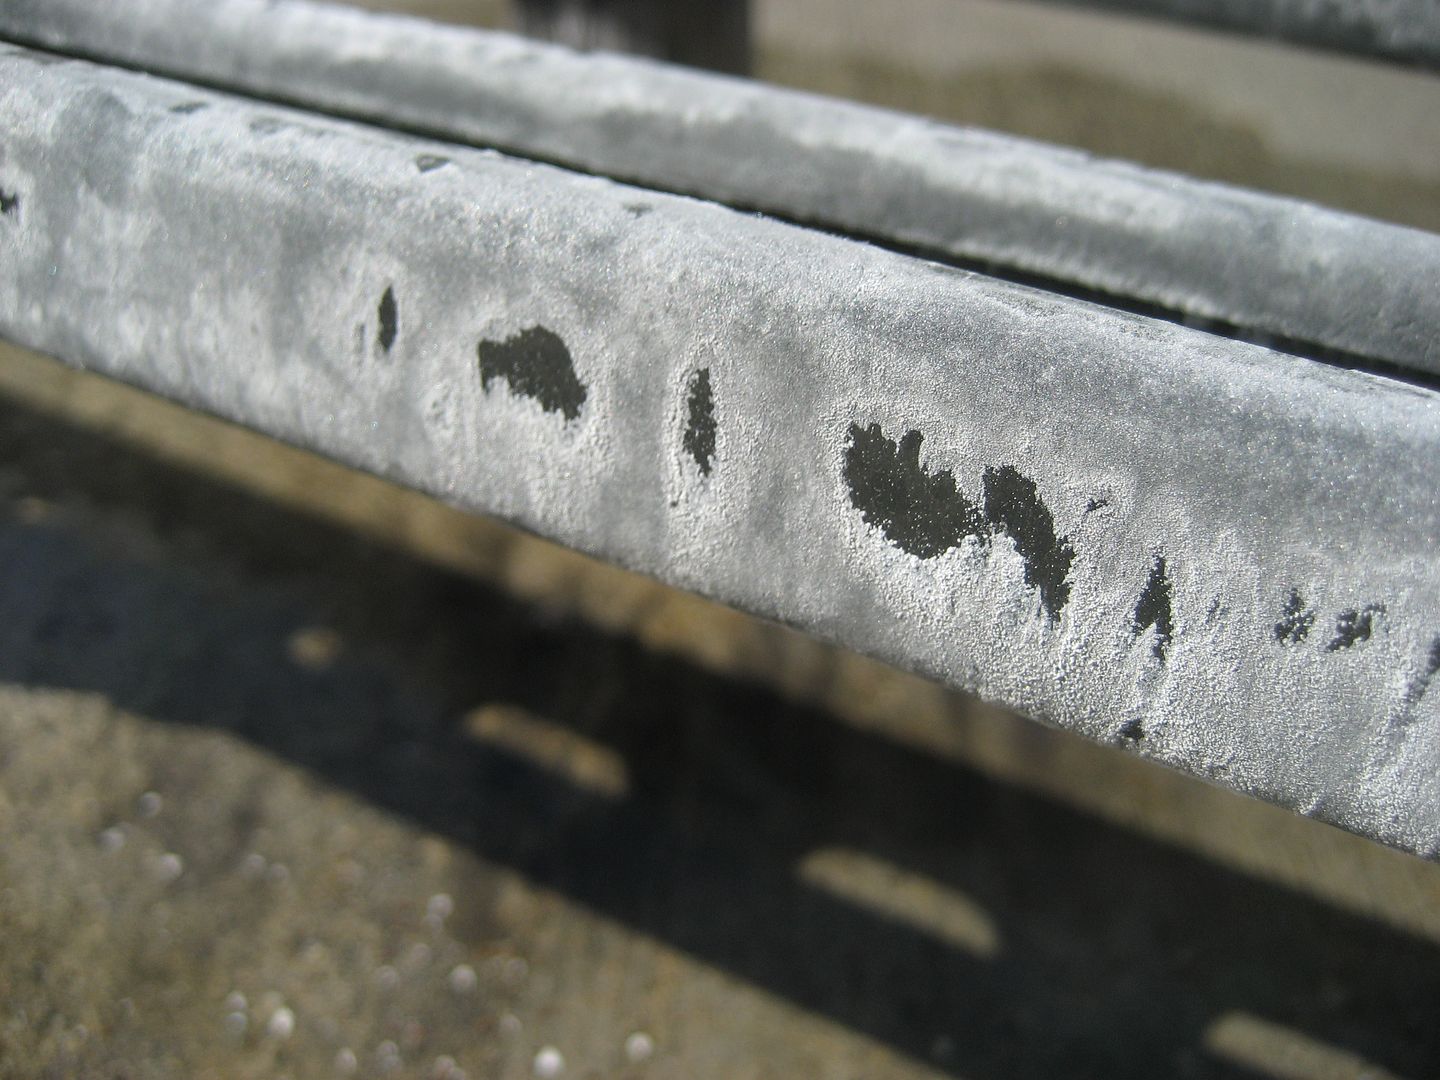
This piece had one side etched and then washed. I then flipped it over to do the other side. Here you can see the washed metal where the crystallized junk has been washed off and has left an "etched" surface. You can see the contrast between a treated and untreated piece of galv steel. If you were to leave a piece of galv steel outside for about 20 years it would have a similar effect on the metal. So essentially the acid is creating the same effect as aging from the natural elements in the atmosphere. I think.
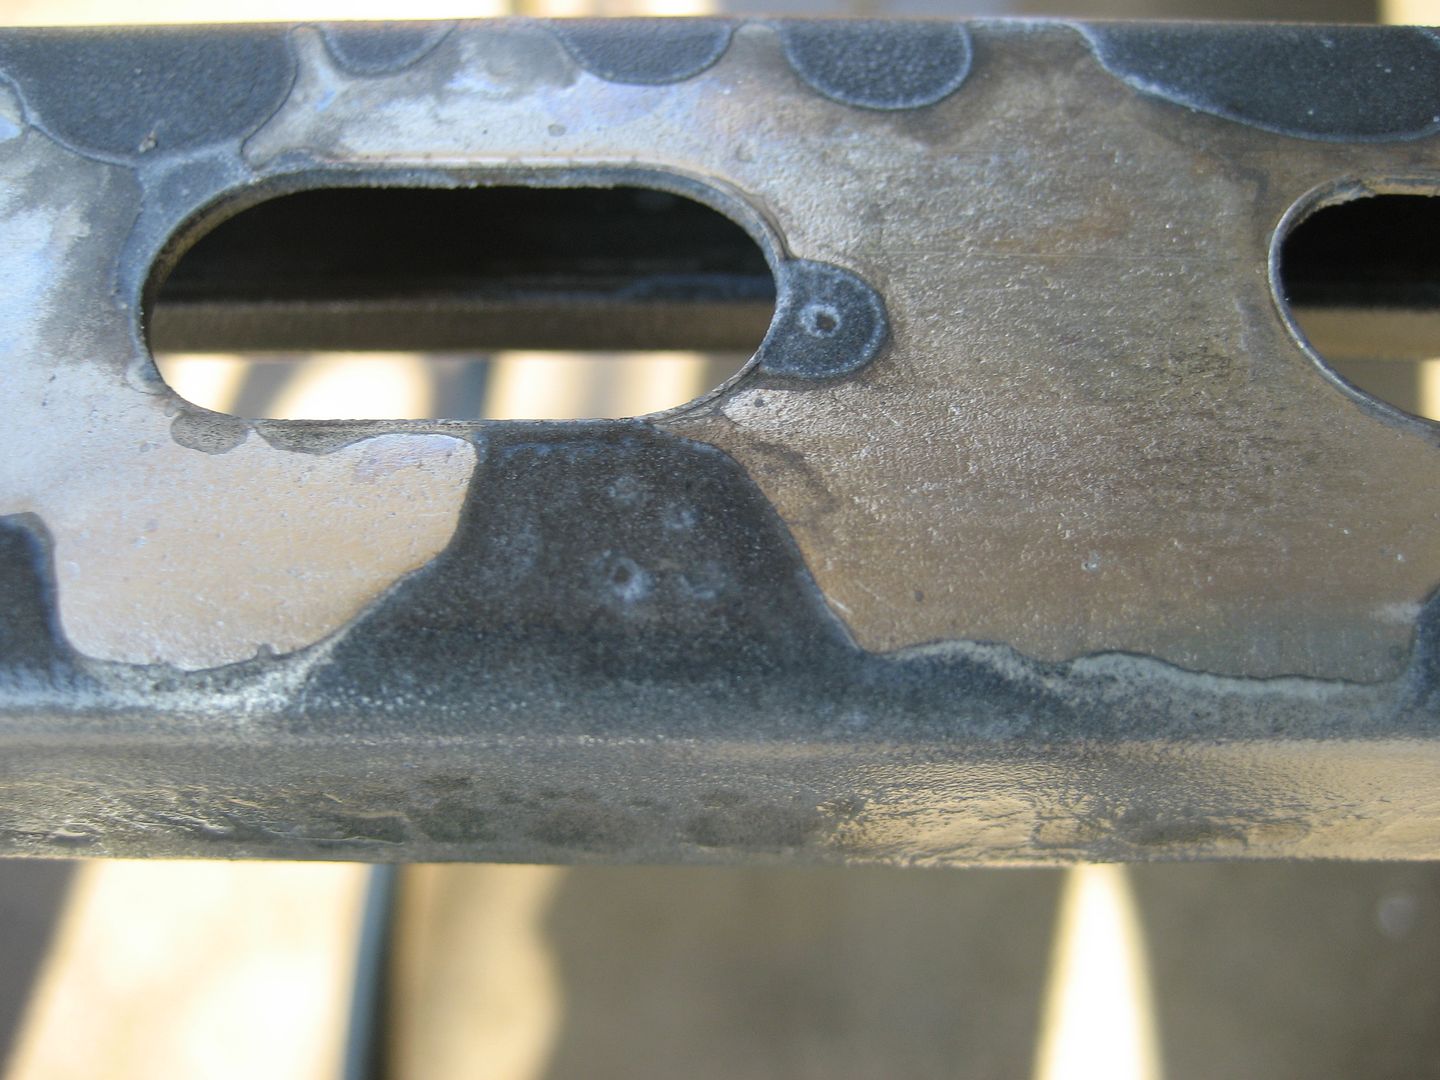
The end result is some really ugly metal:
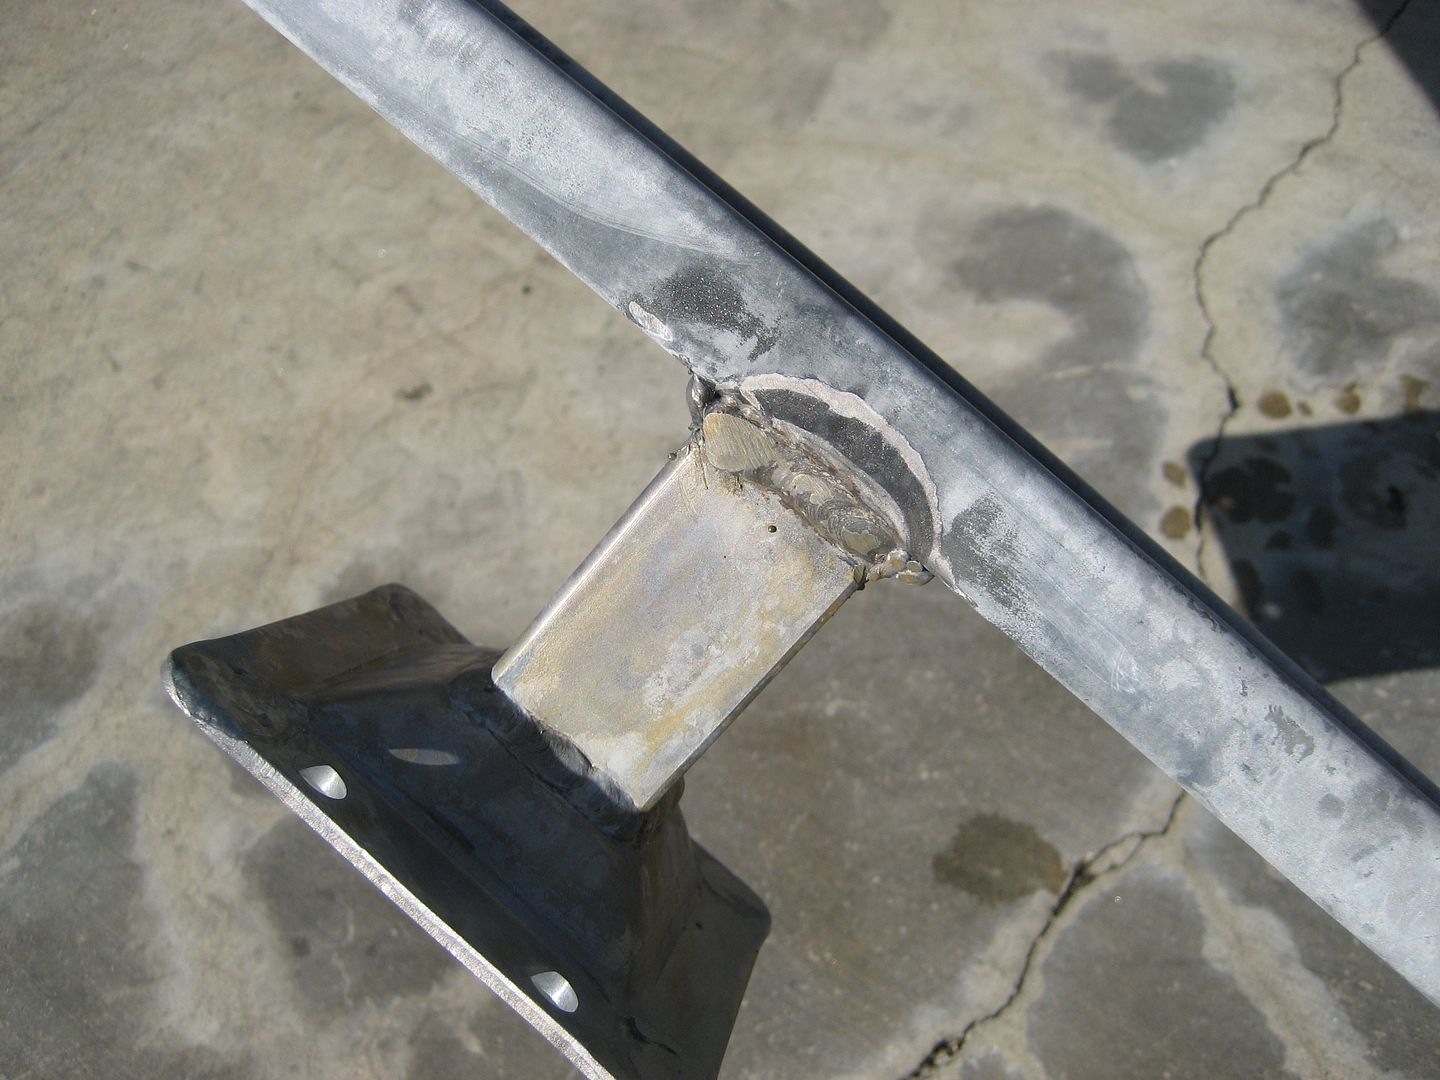
The etch and water really wreaked havoc on the bare steel. It began to rust immediately:
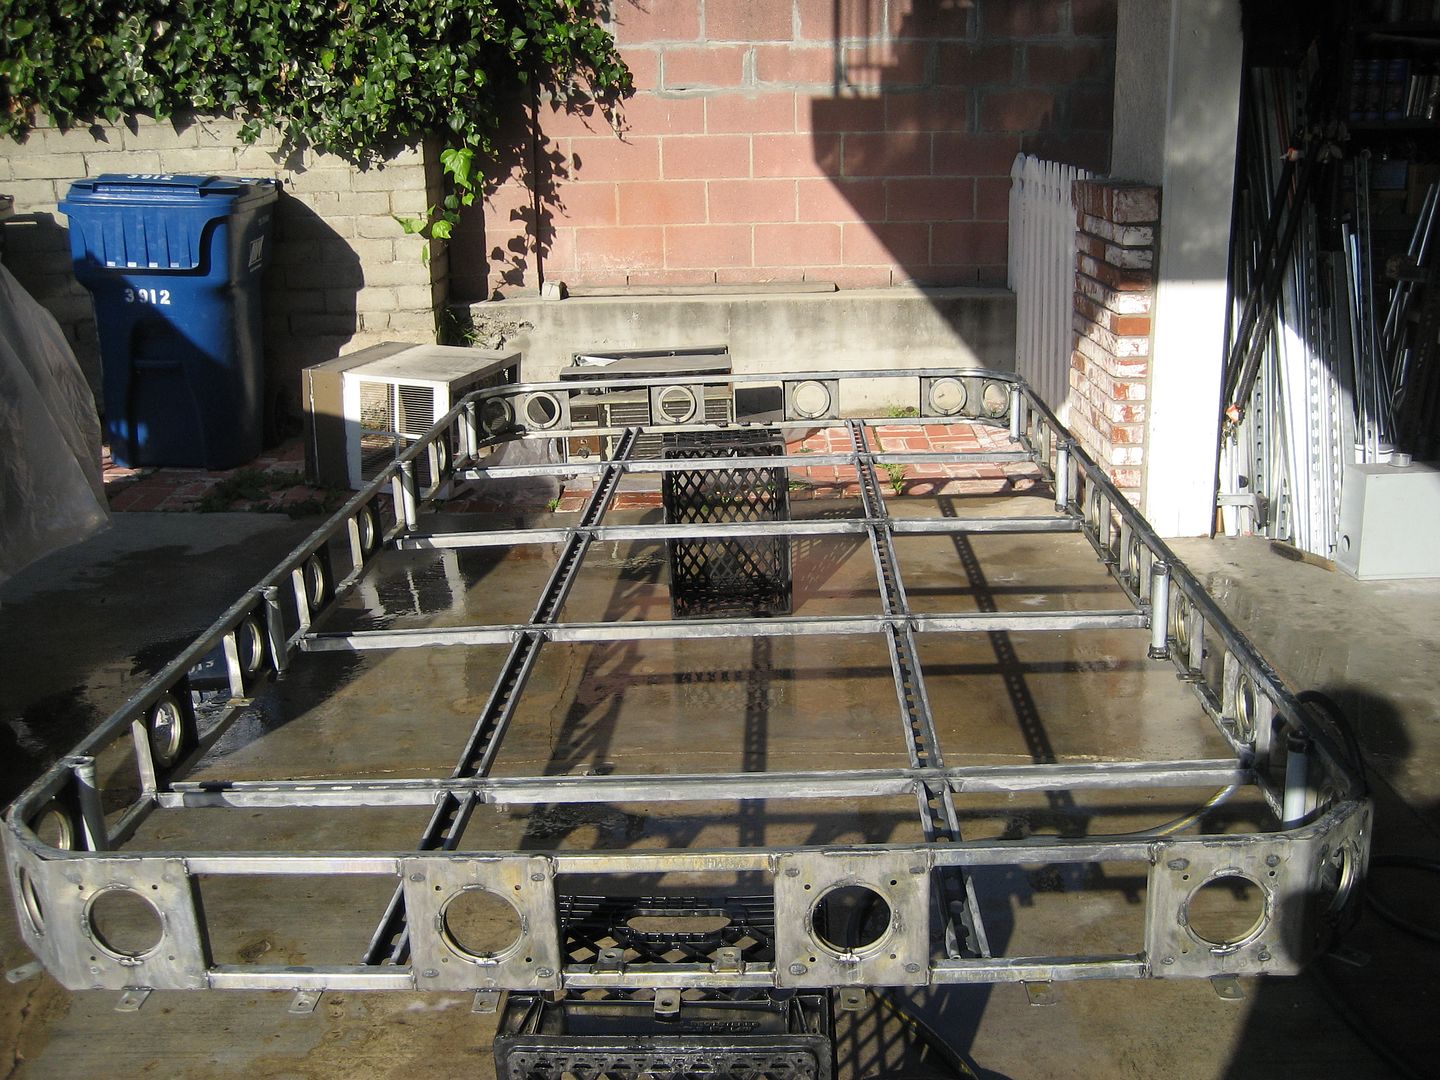
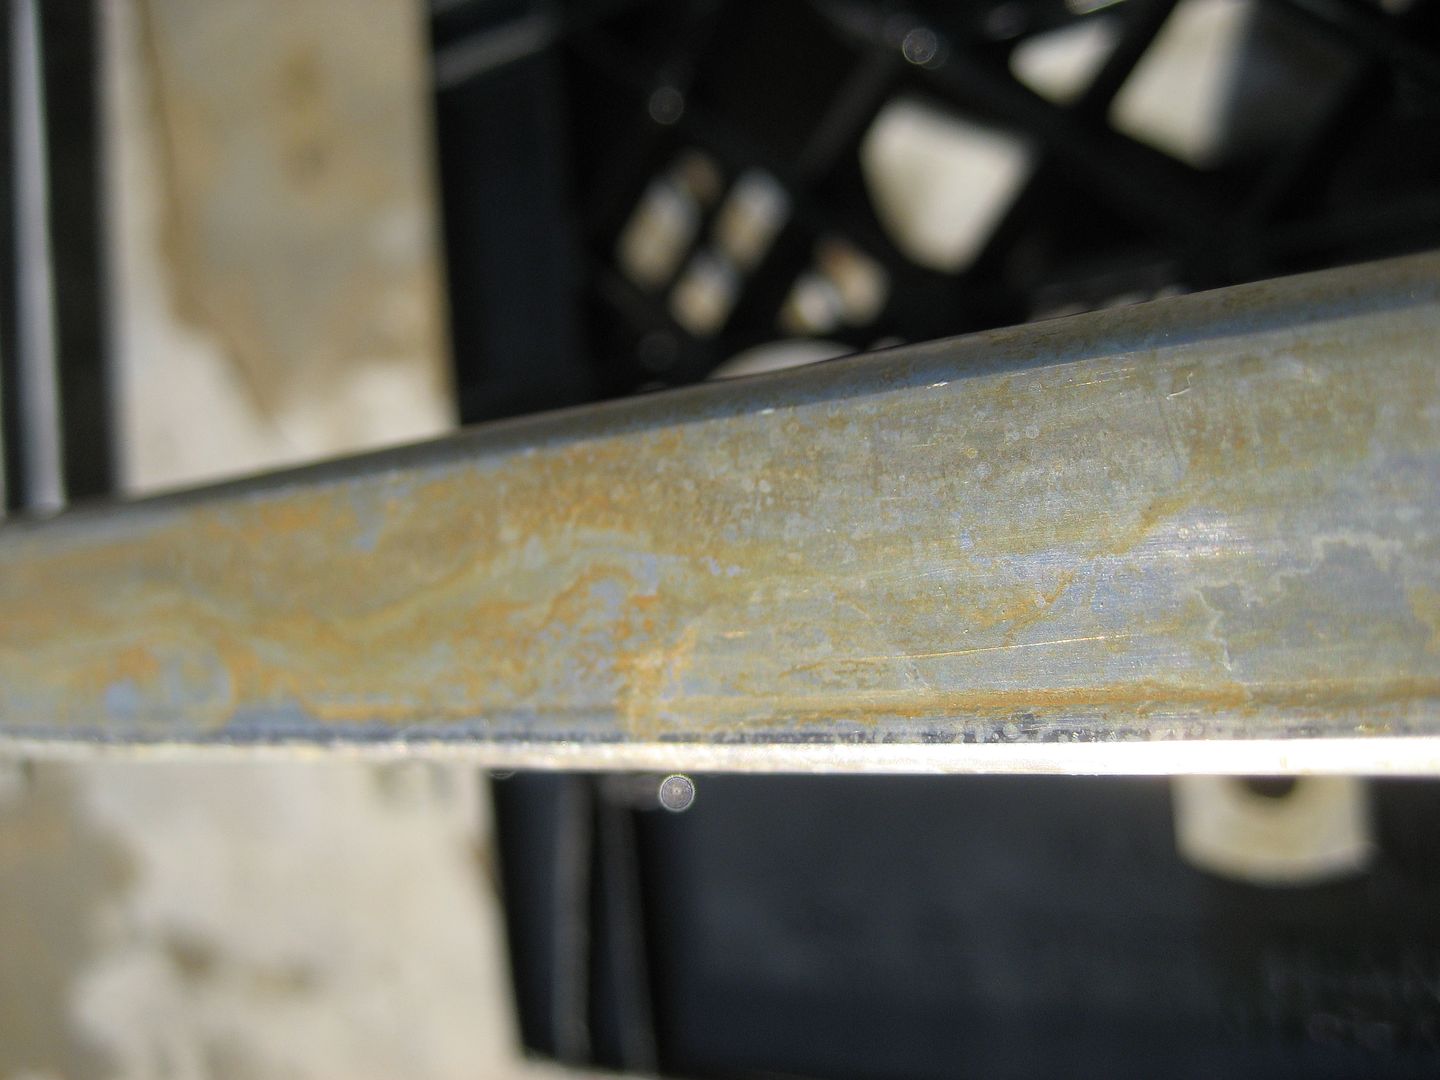
I cleaned off as much of the rust as possible and then began spraying on the metal primer. The primer is for bare and slightly rusted metal. I don't think the rust will be a problem. Funny though, 2 months sitting in my shop and there wasn't even the slightest patch of rust. I had bought "pickled" hot rolled steel. Good stuff.
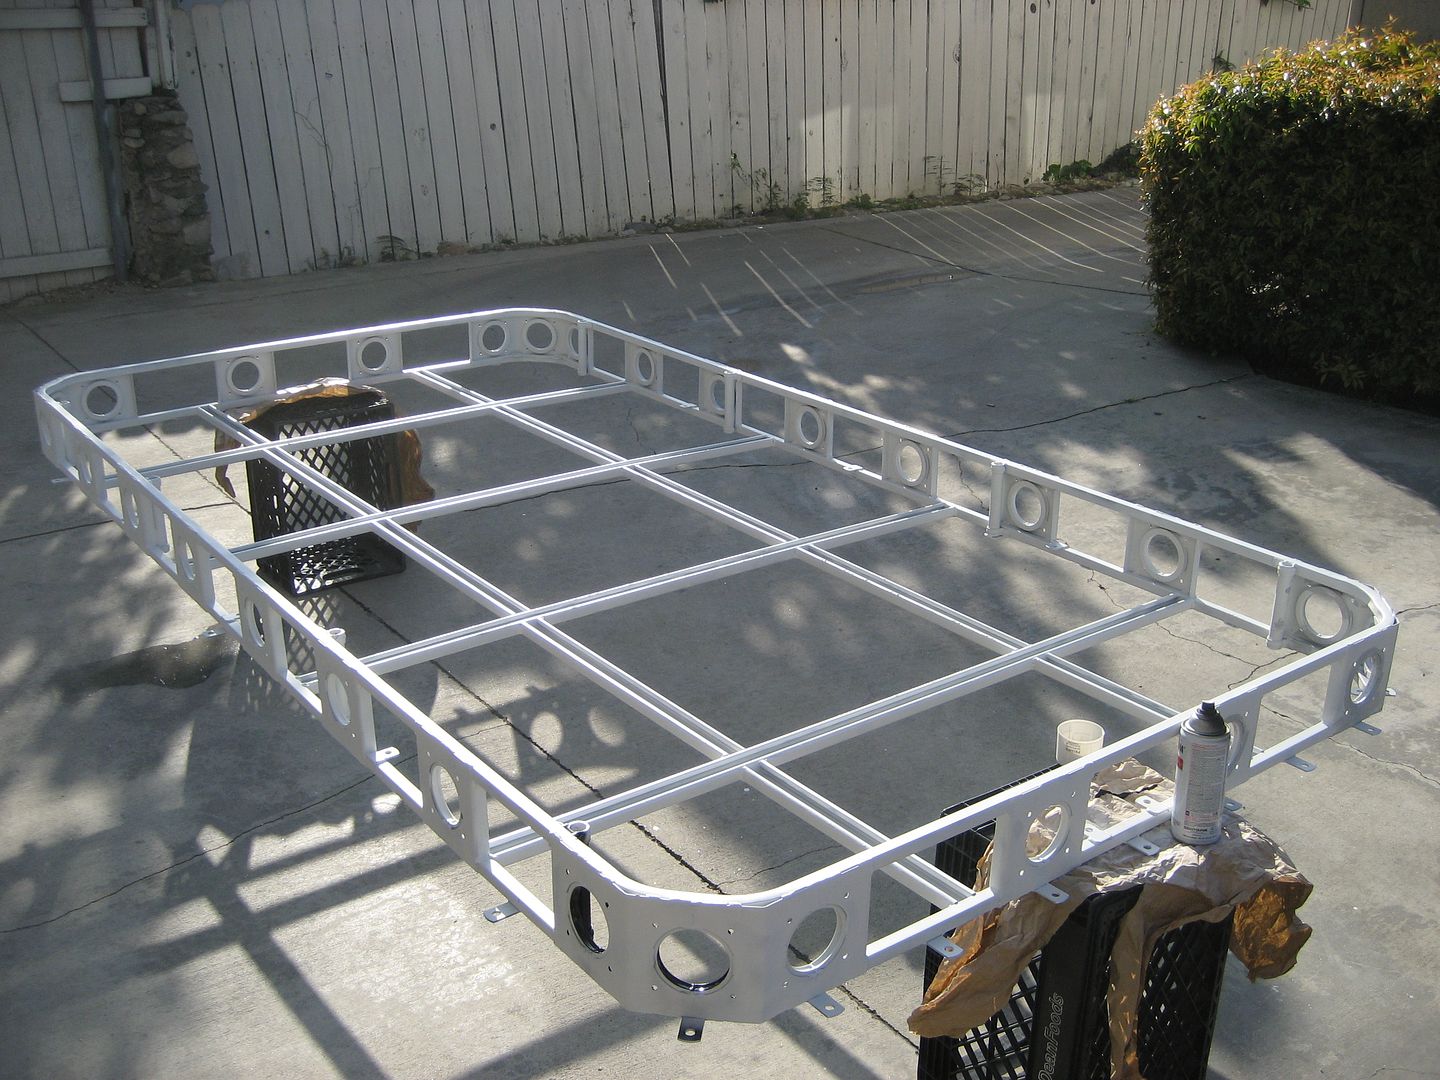
I spray primered the outer edges of the rack:
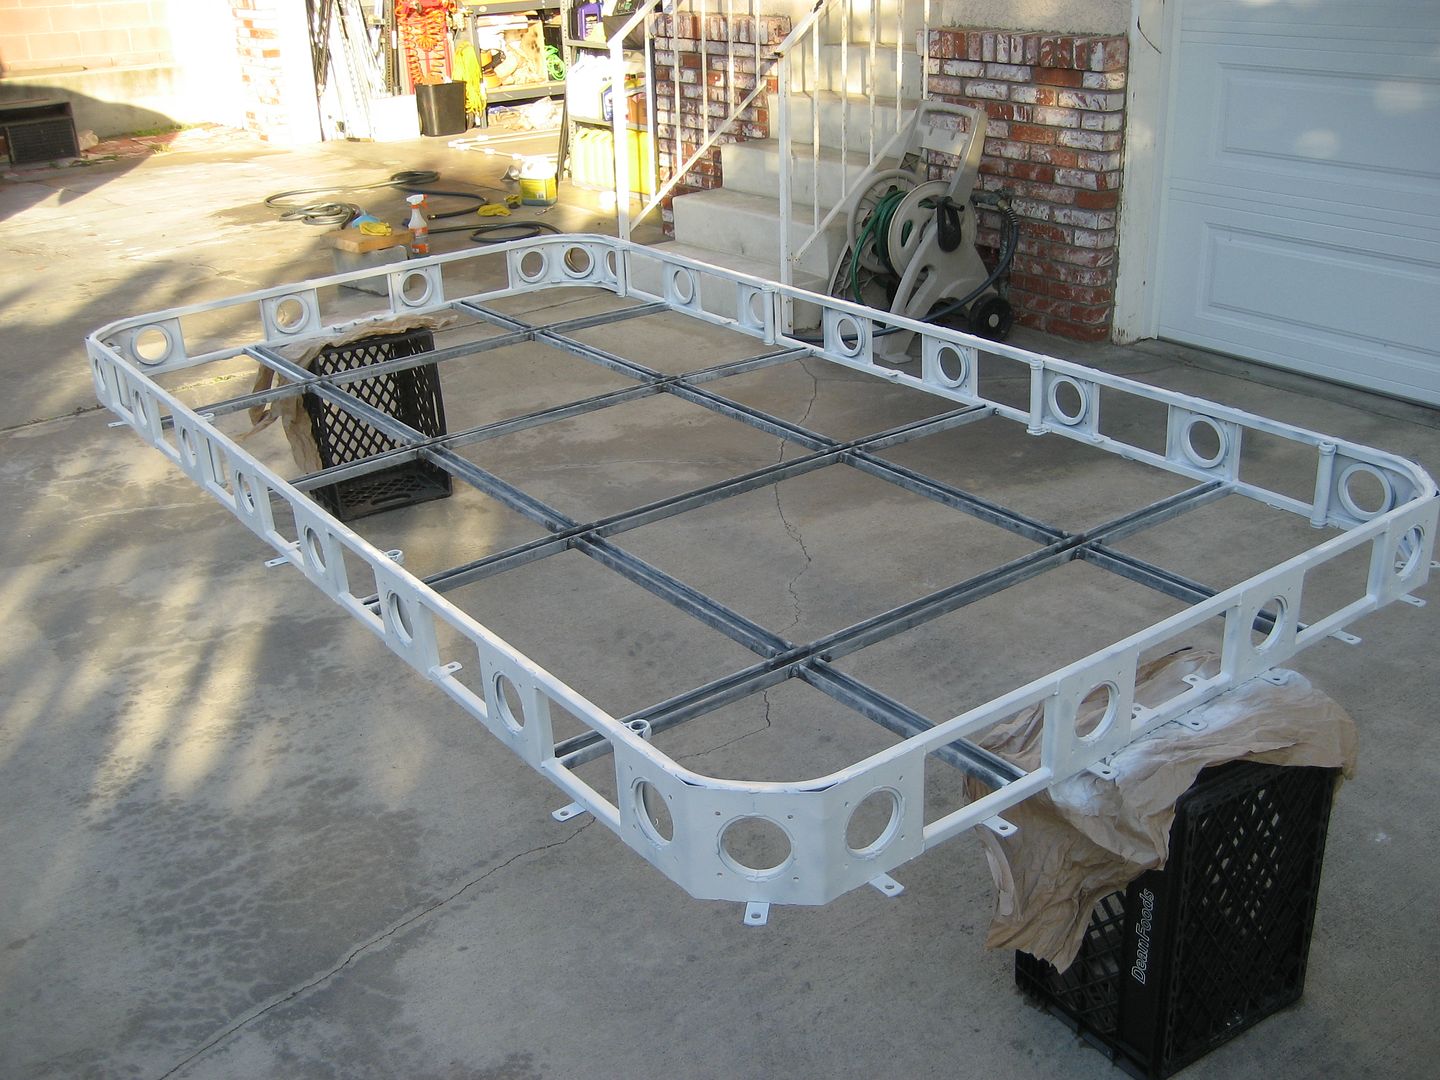
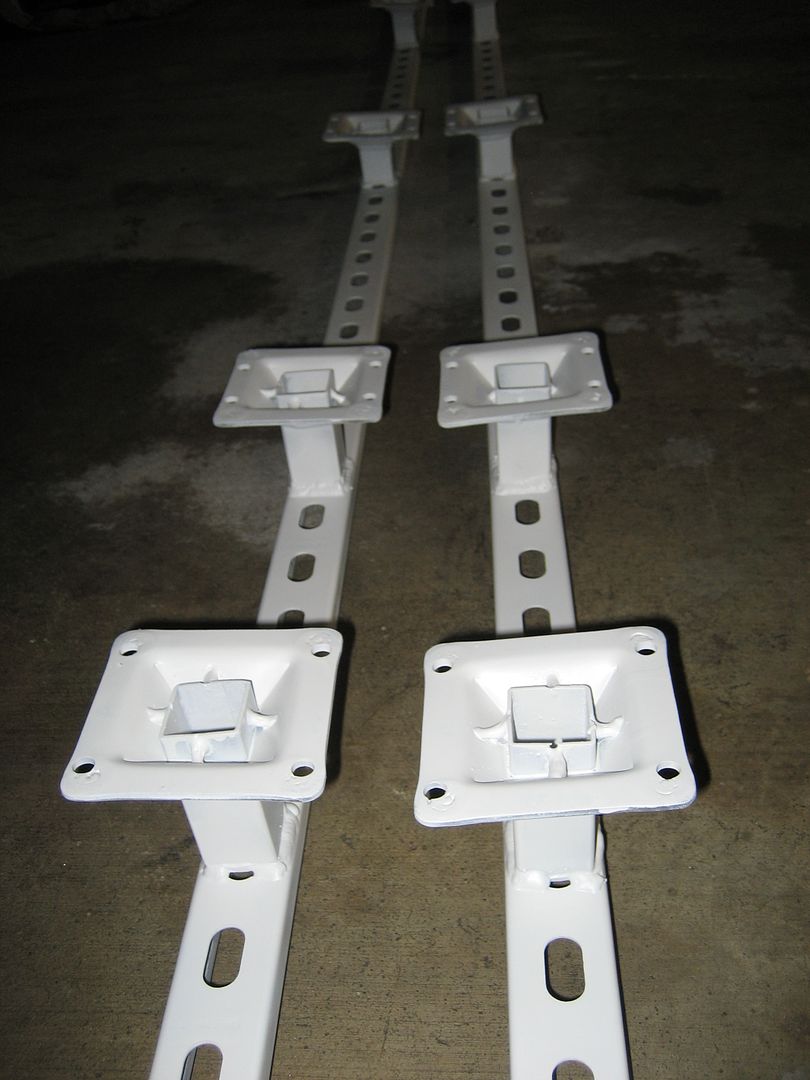
I think I'm going to do the center braces with a brush so I can get up inside the lip of the strut channel. Aint it ugly:
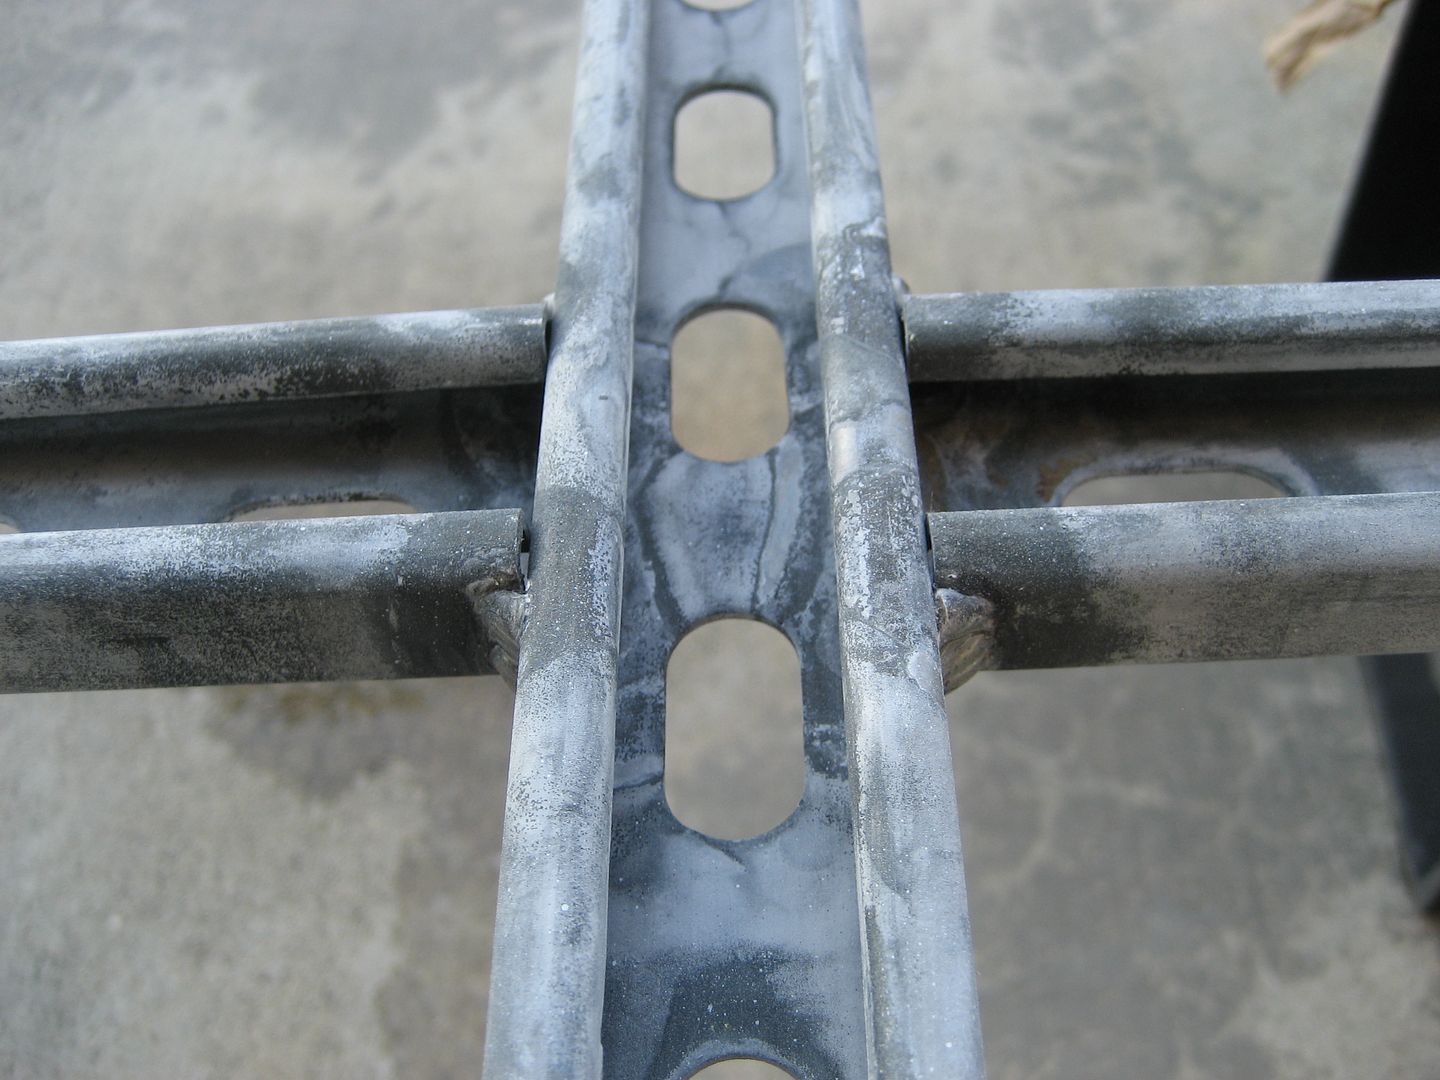
That might have to wait until Saturday.
I also drilled, tapped and threaded in another barbed fitting for the scanner coax cable. I have decided to run both the CB and scanner cable separate from the power wires. I'm not really worried about the cable picking up any stray EMI, since by design it shouldn't, but rather I did not want to damage the dielectric in the cable or kink it by jamming it through the elbow joints. Also, this allows me to attach other antennas to the connector that will come out of the roof to feed these. Soon i will have a photo of the BNC feed thru connector that these coax cables will attach to. They will be mounted on the same plate as the feed for the power wires that gets bolted to the roof, pictured earlier.
I added some heat shrink around the cable to keep the sharp edges of the fitting from cutting the jacket. I also put some zip ties on the cable to keep it from pulling out to far:
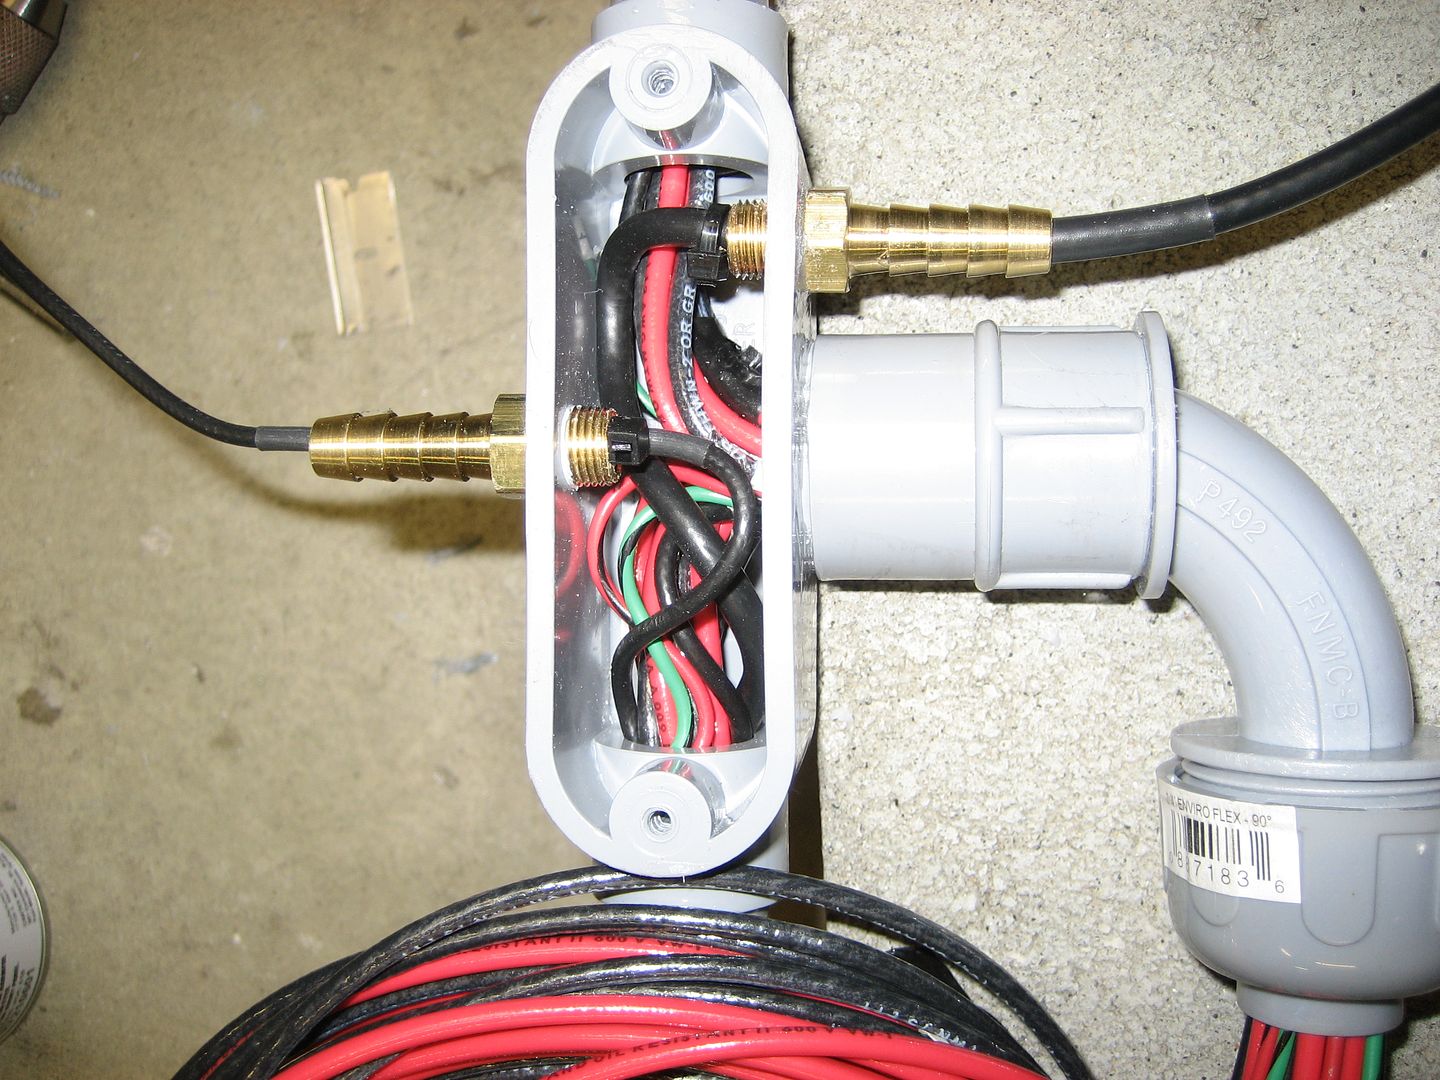
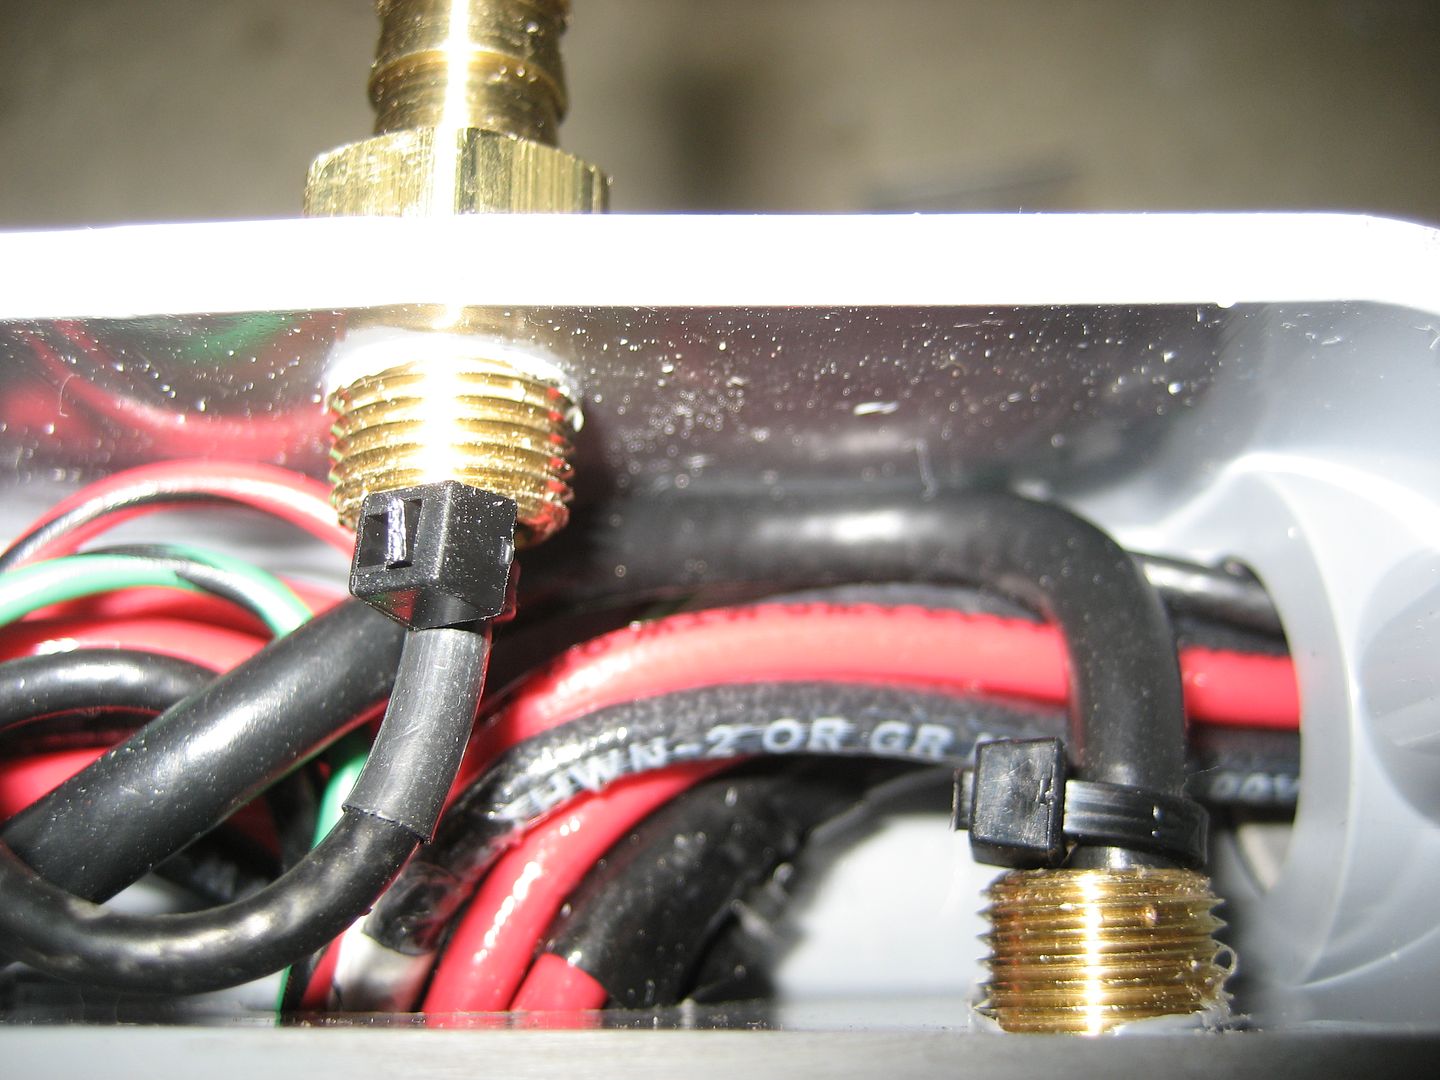
I then labeled the inside lids of the junction boxes and buttoned them up:
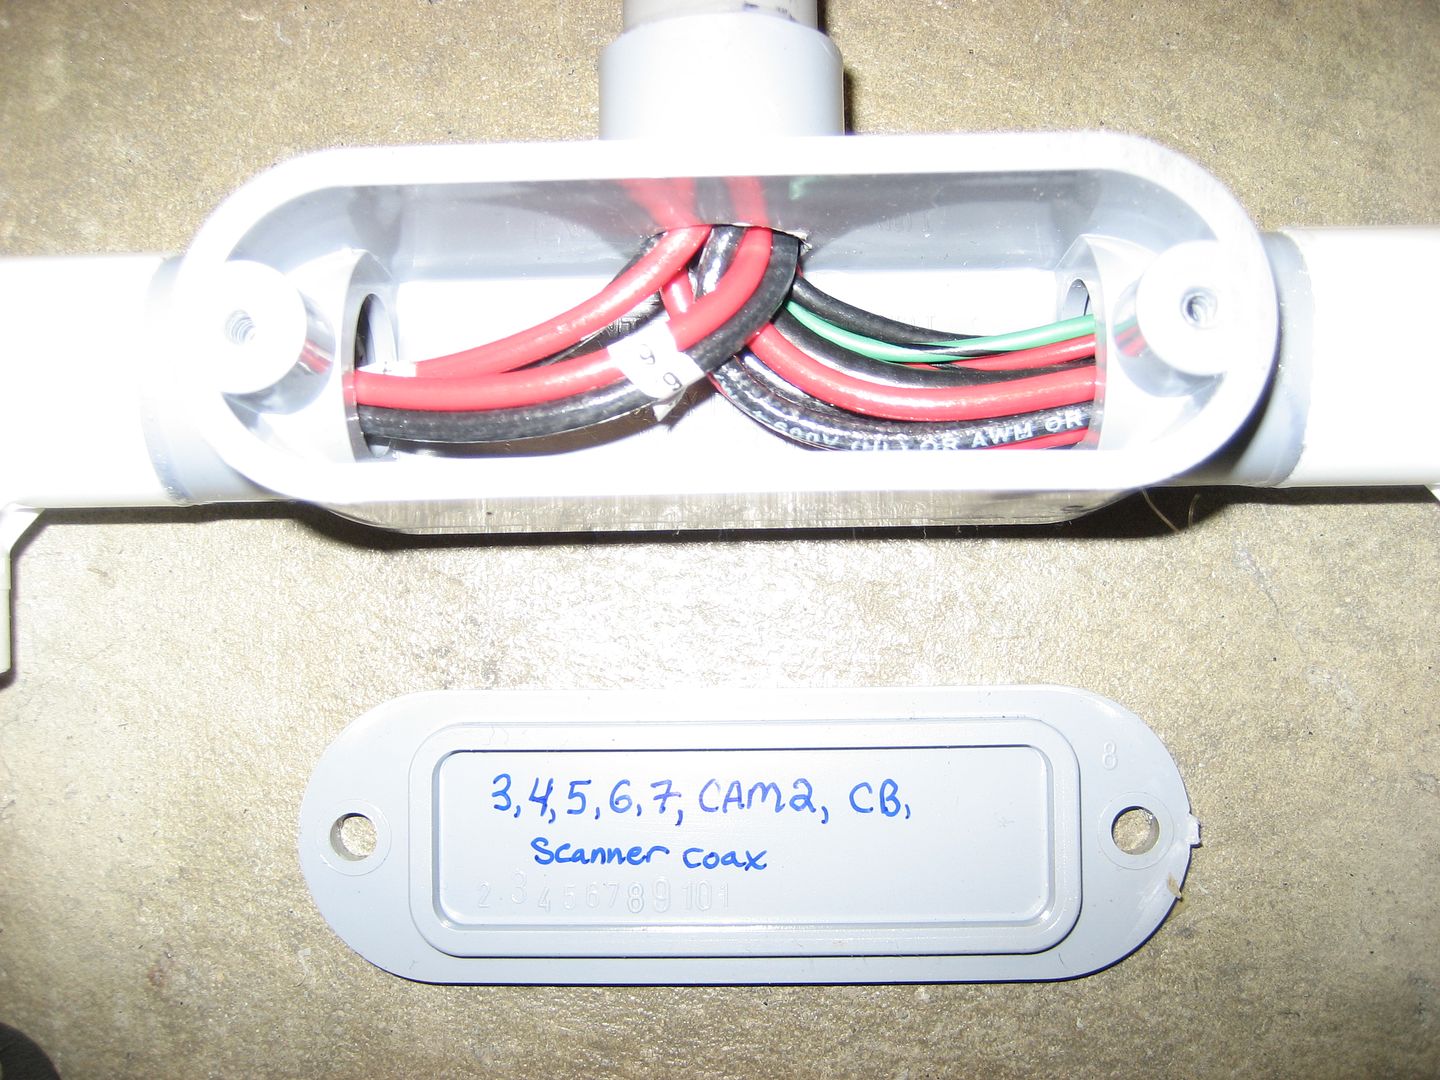
I just need to install some plugs into the tees I will not be using. I'm only installing 8 lights and 3 cameras so I have 9 open sockets that need plugs. After those are in place I can paint the conduit too.
The lights and wiring won't be hooked up yet, but I hope to have this rack painted by end of the day Saturday and installed by the end of the day Sunday. I still need to figure out how to get it on the roof too!
I started my day by waking up at 6:25a.m. and decided I wasn't feelin' well enough to go to work. So I took a mental health day! Then I slept until 11a.m. It looked like prime painting weather outside for the first time in about a month so I got to it.
First I scrubbed all of the metal with Dawn dish-washing detergent to get the oil off. Next treatment was the phosphoric acid metal prep and etch treatment. I mixed that up and began spraying the roof rails.
Instantaneously I could see the galvanized steel have a strong reaction with the acid. It turned the nice shiny zinc to a very dull dark gray color:


After a good spray coating of the acid and sitting for about 30 minutes the galvanized steel had a gnarly crystallized coating on it:

This piece had one side etched and then washed. I then flipped it over to do the other side. Here you can see the washed metal where the crystallized junk has been washed off and has left an "etched" surface. You can see the contrast between a treated and untreated piece of galv steel. If you were to leave a piece of galv steel outside for about 20 years it would have a similar effect on the metal. So essentially the acid is creating the same effect as aging from the natural elements in the atmosphere. I think.

The end result is some really ugly metal:

The etch and water really wreaked havoc on the bare steel. It began to rust immediately:


I cleaned off as much of the rust as possible and then began spraying on the metal primer. The primer is for bare and slightly rusted metal. I don't think the rust will be a problem. Funny though, 2 months sitting in my shop and there wasn't even the slightest patch of rust. I had bought "pickled" hot rolled steel. Good stuff.
I spray primered the outer edges of the rack:


I think I'm going to do the center braces with a brush so I can get up inside the lip of the strut channel. Aint it ugly:

That might have to wait until Saturday.
I also drilled, tapped and threaded in another barbed fitting for the scanner coax cable. I have decided to run both the CB and scanner cable separate from the power wires. I'm not really worried about the cable picking up any stray EMI, since by design it shouldn't, but rather I did not want to damage the dielectric in the cable or kink it by jamming it through the elbow joints. Also, this allows me to attach other antennas to the connector that will come out of the roof to feed these. Soon i will have a photo of the BNC feed thru connector that these coax cables will attach to. They will be mounted on the same plate as the feed for the power wires that gets bolted to the roof, pictured earlier.
I added some heat shrink around the cable to keep the sharp edges of the fitting from cutting the jacket. I also put some zip ties on the cable to keep it from pulling out to far:


I then labeled the inside lids of the junction boxes and buttoned them up:

I just need to install some plugs into the tees I will not be using. I'm only installing 8 lights and 3 cameras so I have 9 open sockets that need plugs. After those are in place I can paint the conduit too.
The lights and wiring won't be hooked up yet, but I hope to have this rack painted by end of the day Saturday and installed by the end of the day Sunday. I still need to figure out how to get it on the roof too!
1997 SAFARI 2WD CARGO

"I do not think there is any thrill that can go through the human heart like that felt by the inventor as he sees some creation of the brain unfolding to success... Such emotions make a man forget food, sleep, friends, love, everything." Nikola Tesla

"I do not think there is any thrill that can go through the human heart like that felt by the inventor as he sees some creation of the brain unfolding to success... Such emotions make a man forget food, sleep, friends, love, everything." Nikola Tesla
-
97CargoCrawler
Topic author - I sleep in my van
- Posts: 754
- Joined: Thu Jan 24, 2008 11:50 pm
- Location: Near Los Angeles, CA
- Contact:
Re: Homebrew Con-Ferr Style Porthole Roof Rack Build
I wasn't feeling very inspired tonight and I kinda just sat around looking at S10 leaf springs on the internet. Then I remembered I needed to make my roof feed plates. So last minute I banged these out (took 30mins):
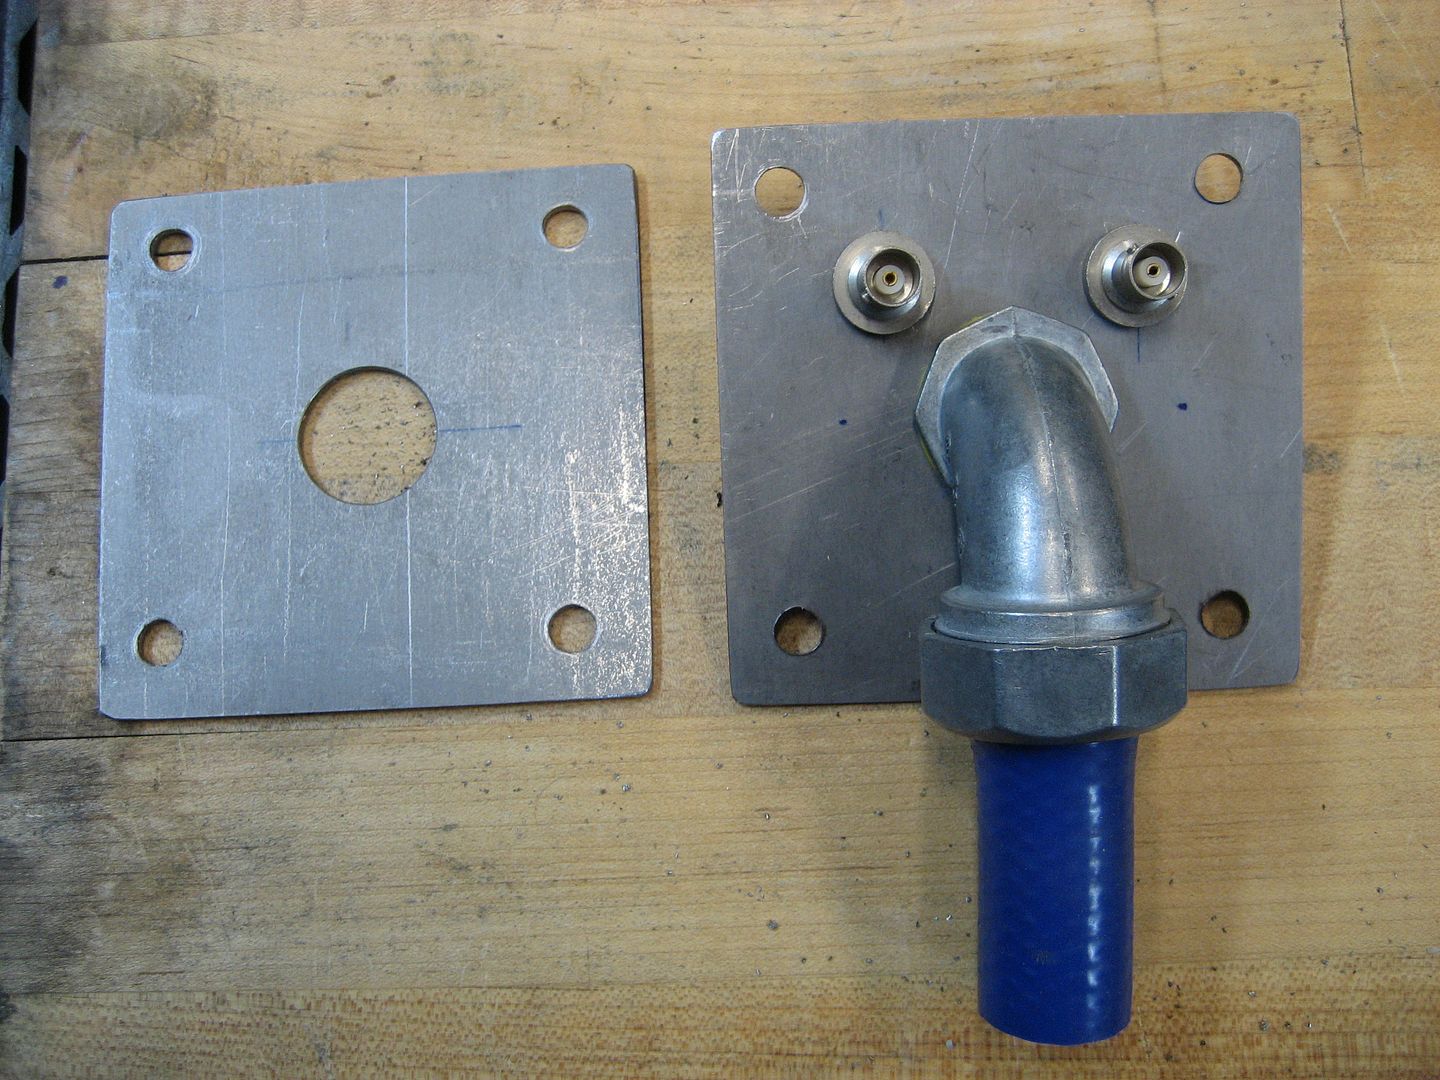
The drivers side has the two BNC feeds for the CB and scanner antennas:
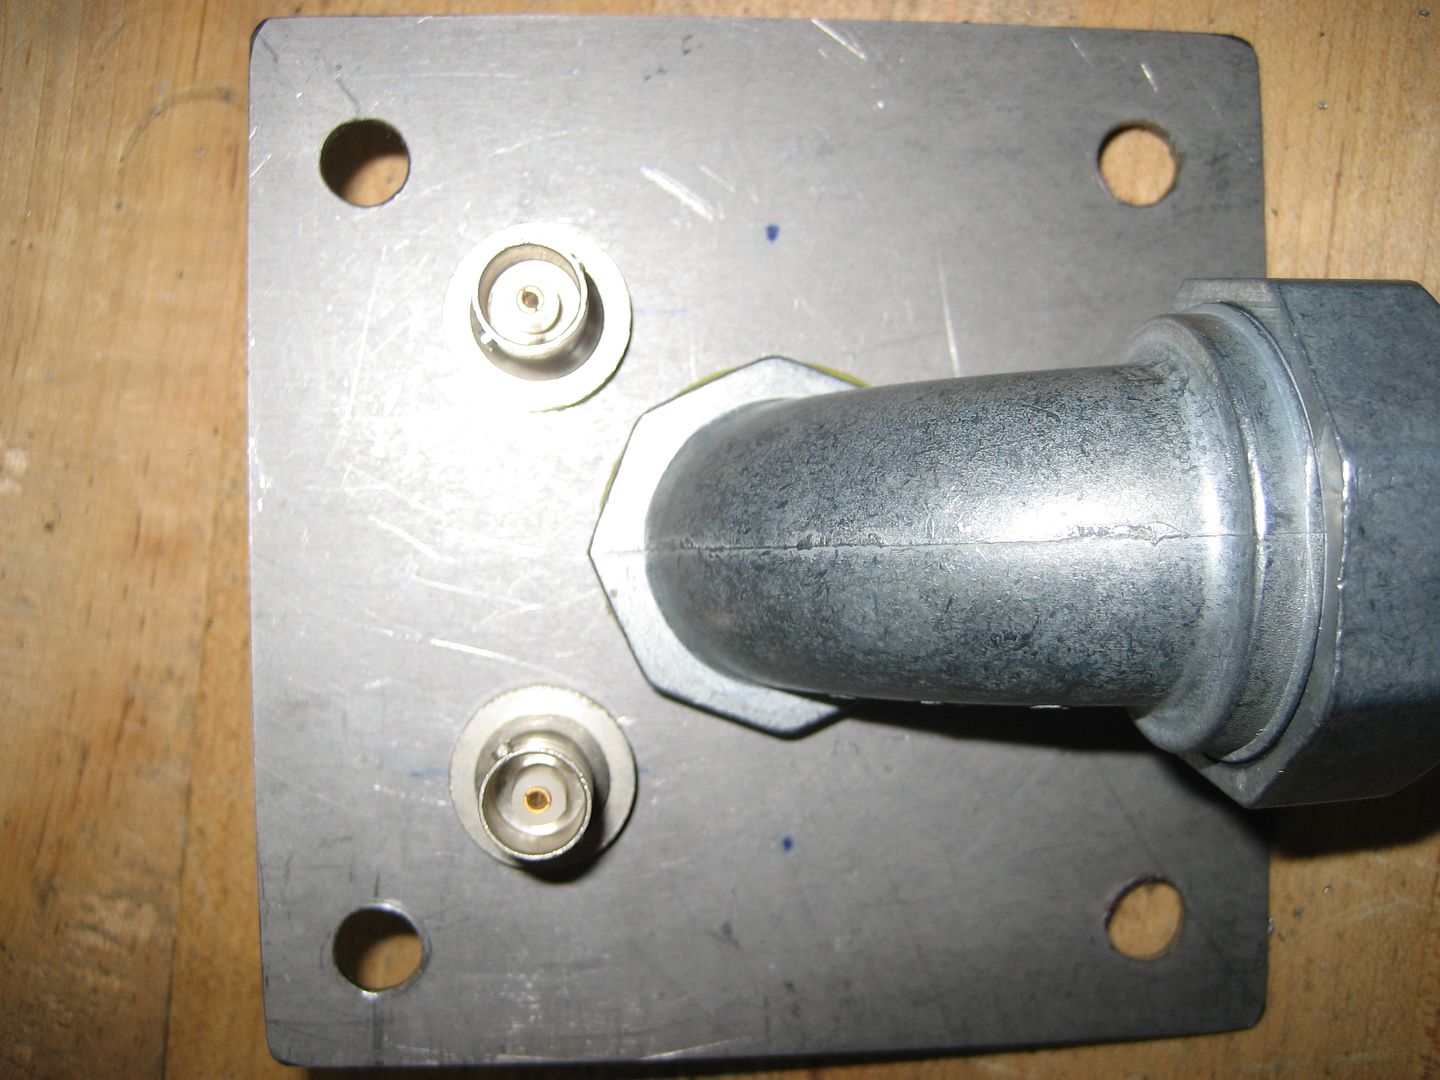
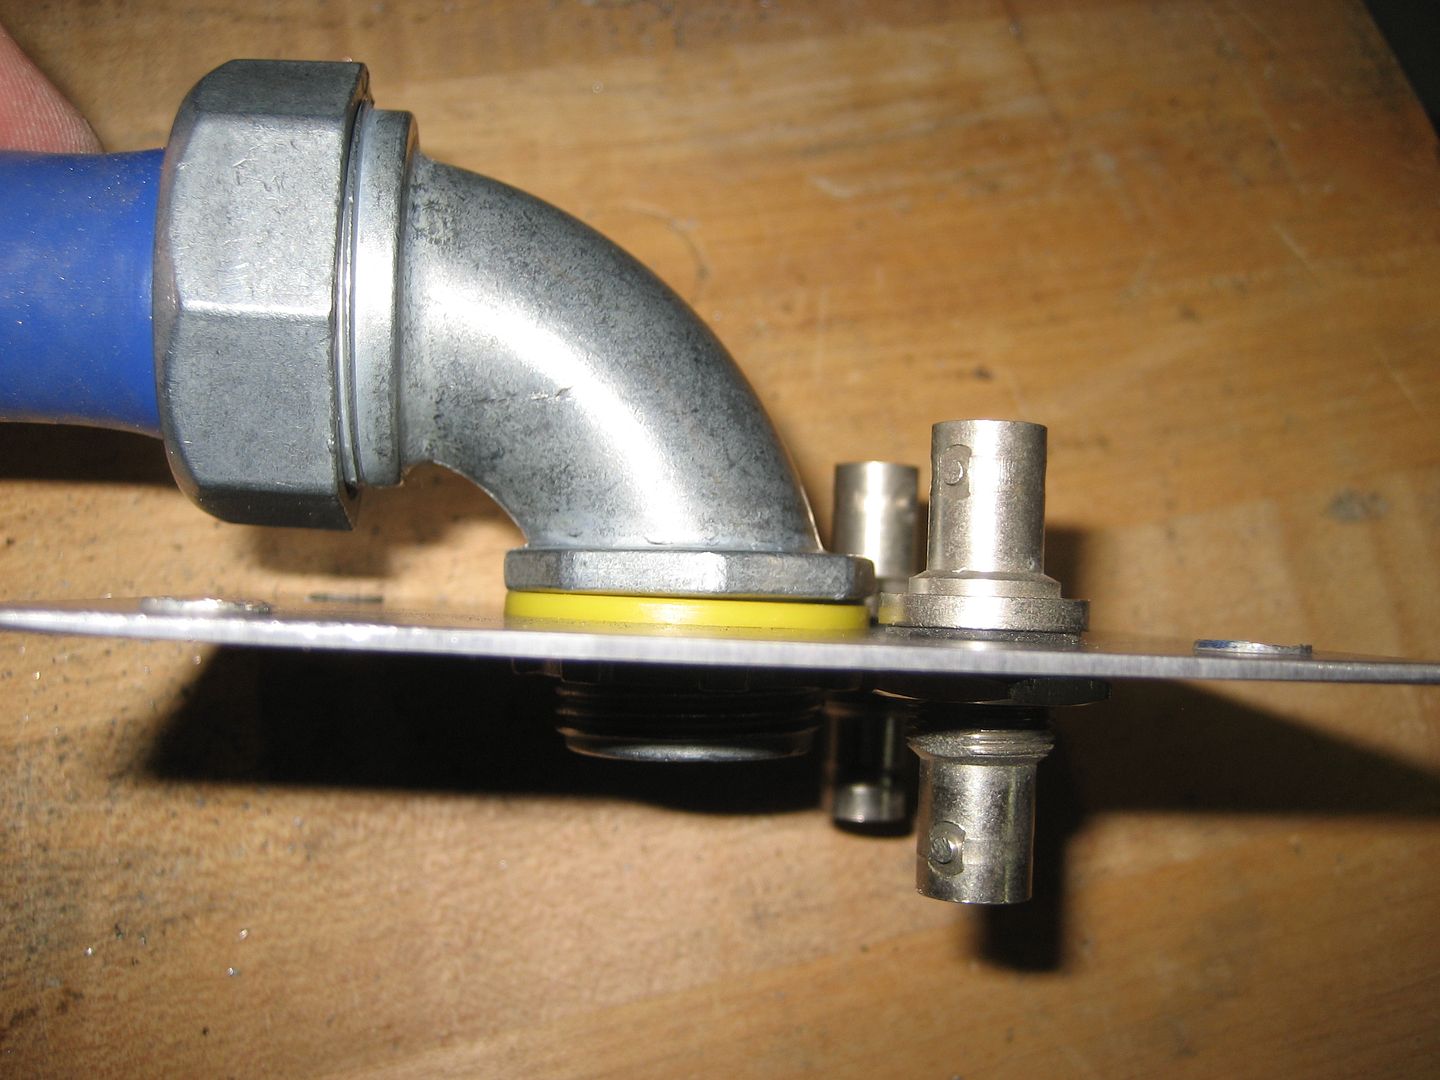
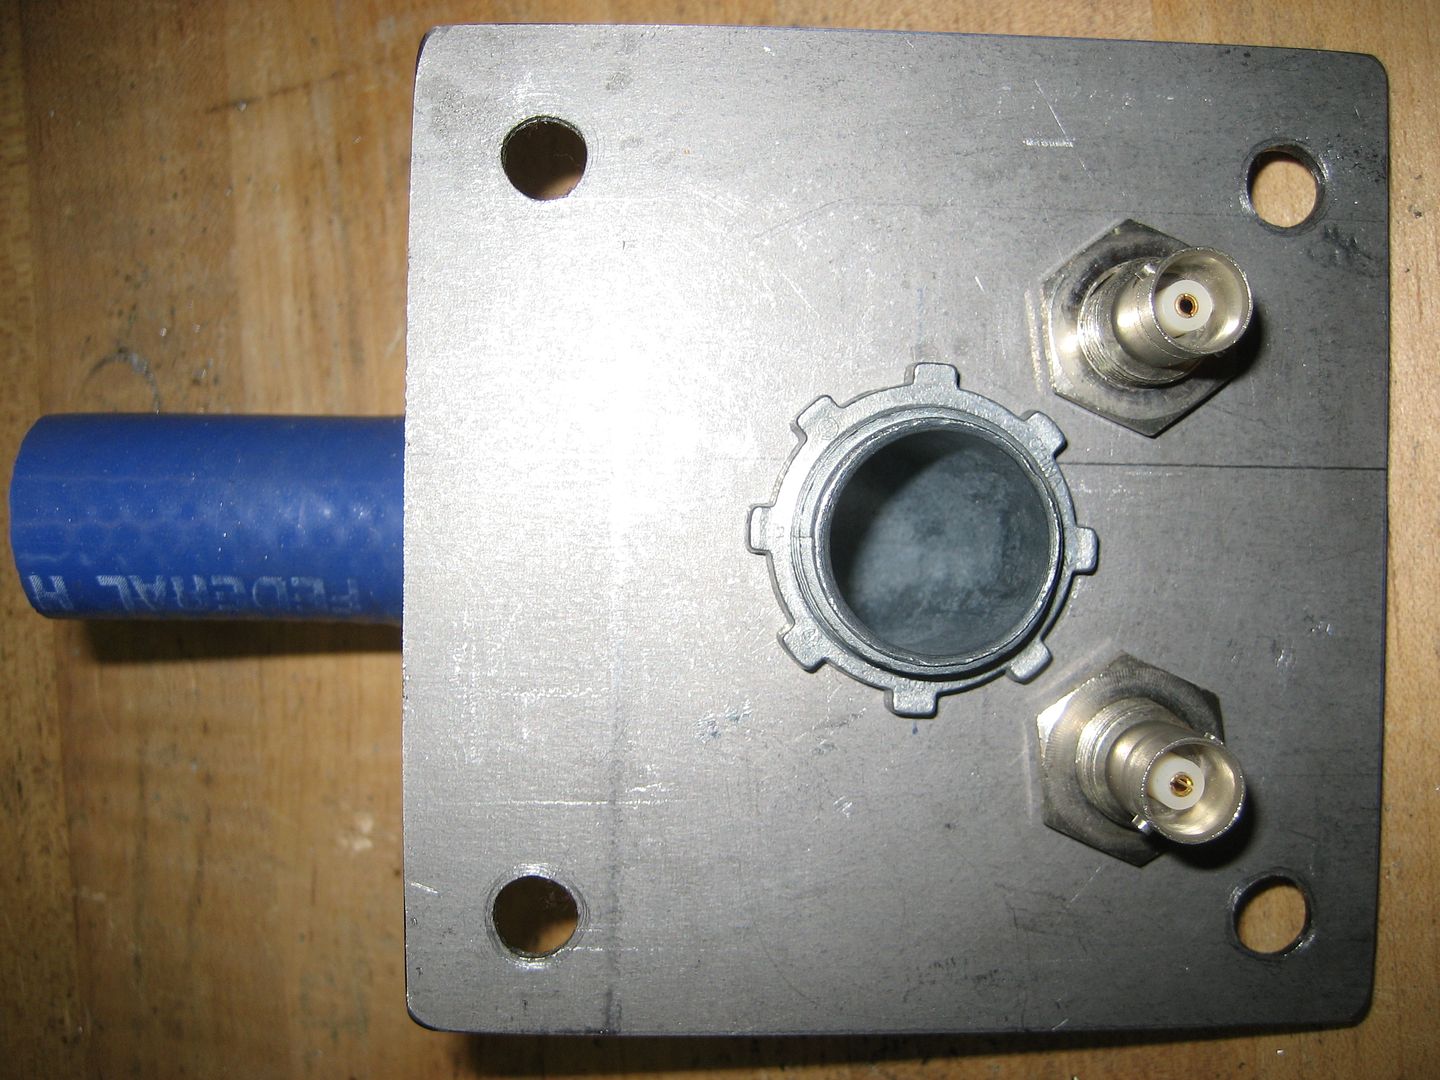
I think the plates will just serve as stiffeners. I will likely drill the same exact holes in the roof and feed this stuff through just like you see here.

The drivers side has the two BNC feeds for the CB and scanner antennas:


I think the plates will just serve as stiffeners. I will likely drill the same exact holes in the roof and feed this stuff through just like you see here.
-
krsowles
- I finally get the smurf thing
- Posts: 158
- Joined: Mon Aug 15, 2011 4:11 am
- Location: Colchester, VT
Re: Homebrew Con-Ferr Style Porthole Roof Rack Build
That acid bath seemes kinda cool. Do you think it would help me get rid of those few extra pounds I've been carrying around? I figure if I could lose about 120#s, I wouldn't have to hear my wife nagging me about my van!

Sometimes, I realize that I'm clueless...Man, I hate those moments!

"S.S. Dark HoMutt"
1999 Chevy Astro AWD
1991 Chevy Astro AWD(retired)
"S.S. Dark HoMutt"
1999 Chevy Astro AWD
1991 Chevy Astro AWD(retired)
-
97CargoCrawler
Topic author - I sleep in my van
- Posts: 754
- Joined: Thu Jan 24, 2008 11:50 pm
- Location: Near Los Angeles, CA
- Contact:
Re: Homebrew Con-Ferr Style Porthole Roof Rack Build
Tonight I painted the inner lips of the channel with primer. It is not possible to get up in there with a spray can so I had to brush on the primer. I'm using the same type of metal primer that I sprayed on the sides of the rack but now from a can.
The paint had settled quite a bit in the can:
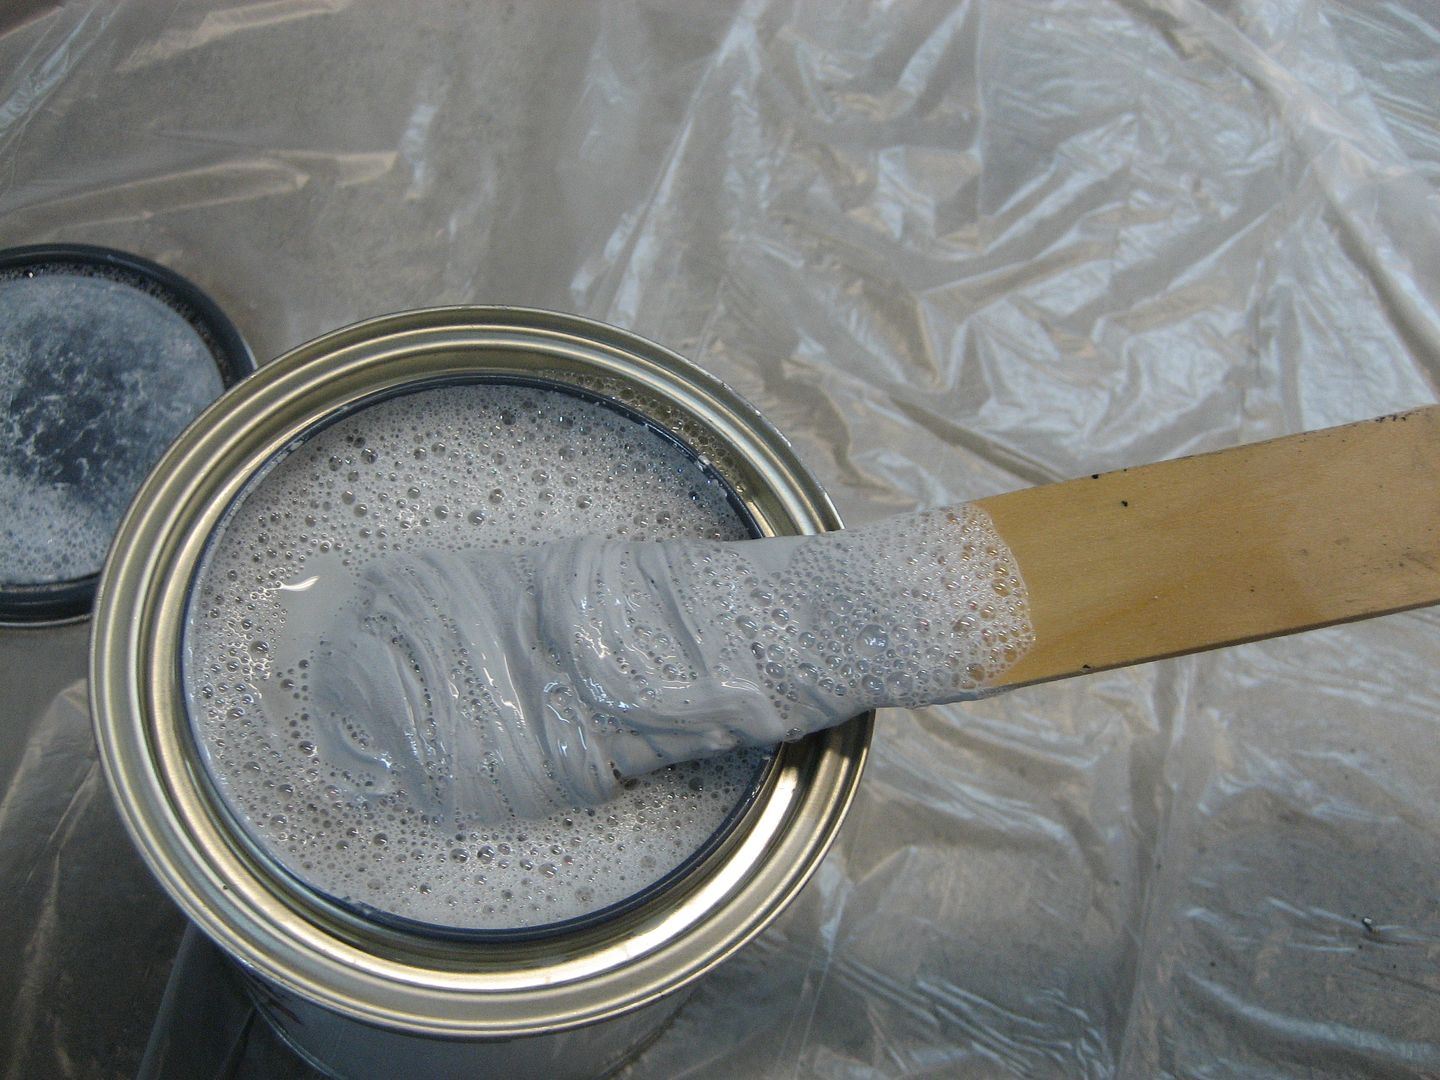
I tried to mix it with a wood stirring stick but that was useless. The sludge was way too thick so I had to use my imagination. I came up with this:
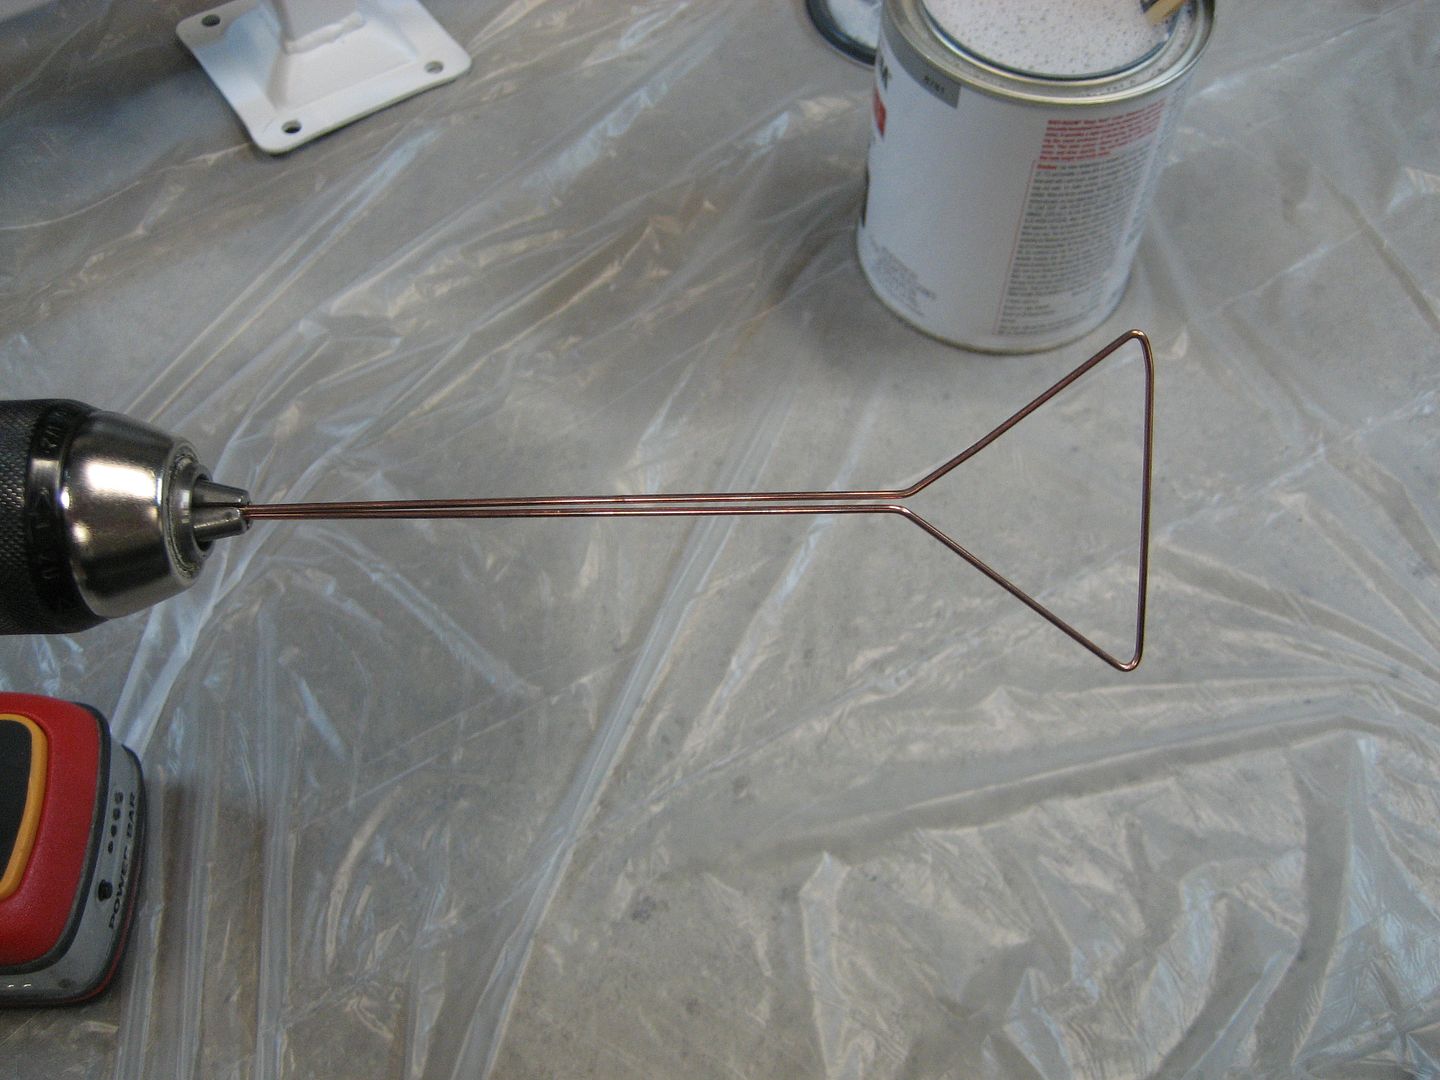
That's a bent up piece of welding wire attached to my drill. Worked like a charm!
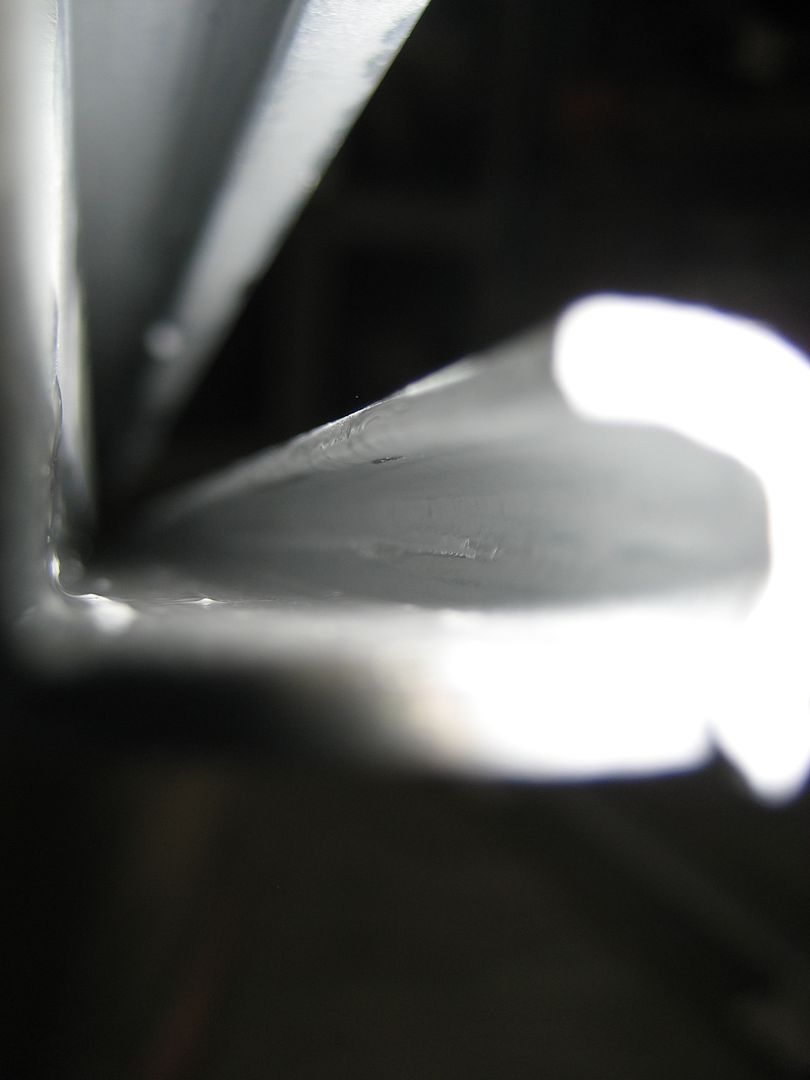
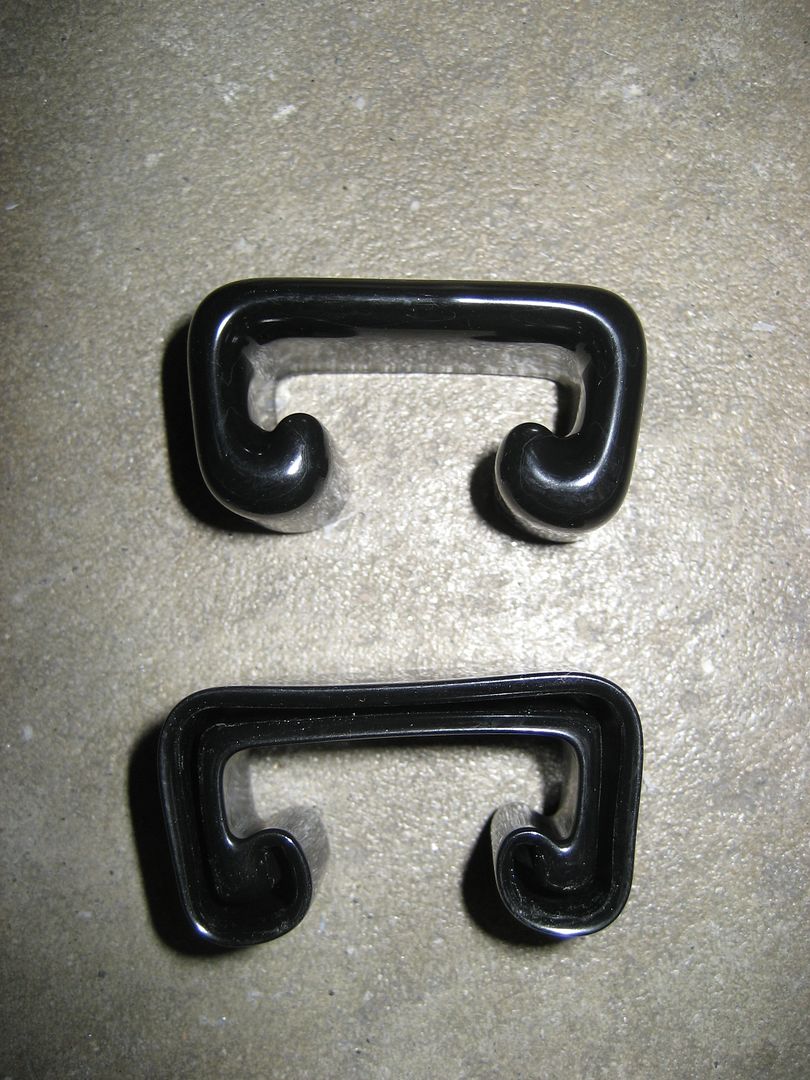
In order to get up under the lip I had to bend up an acid brush:
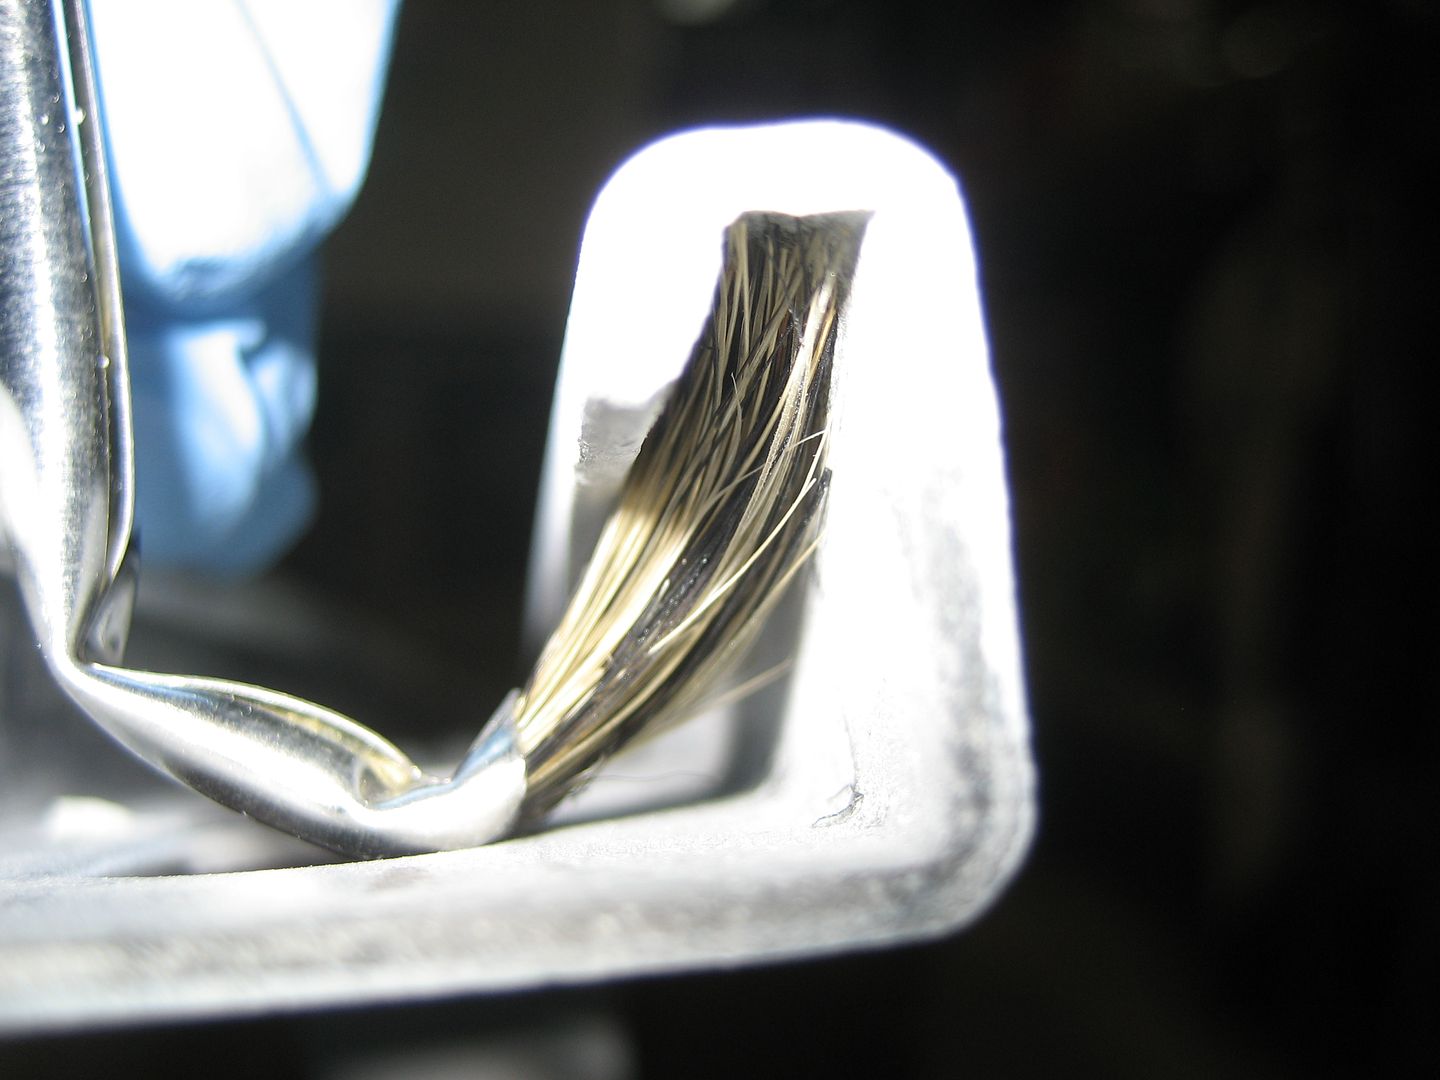
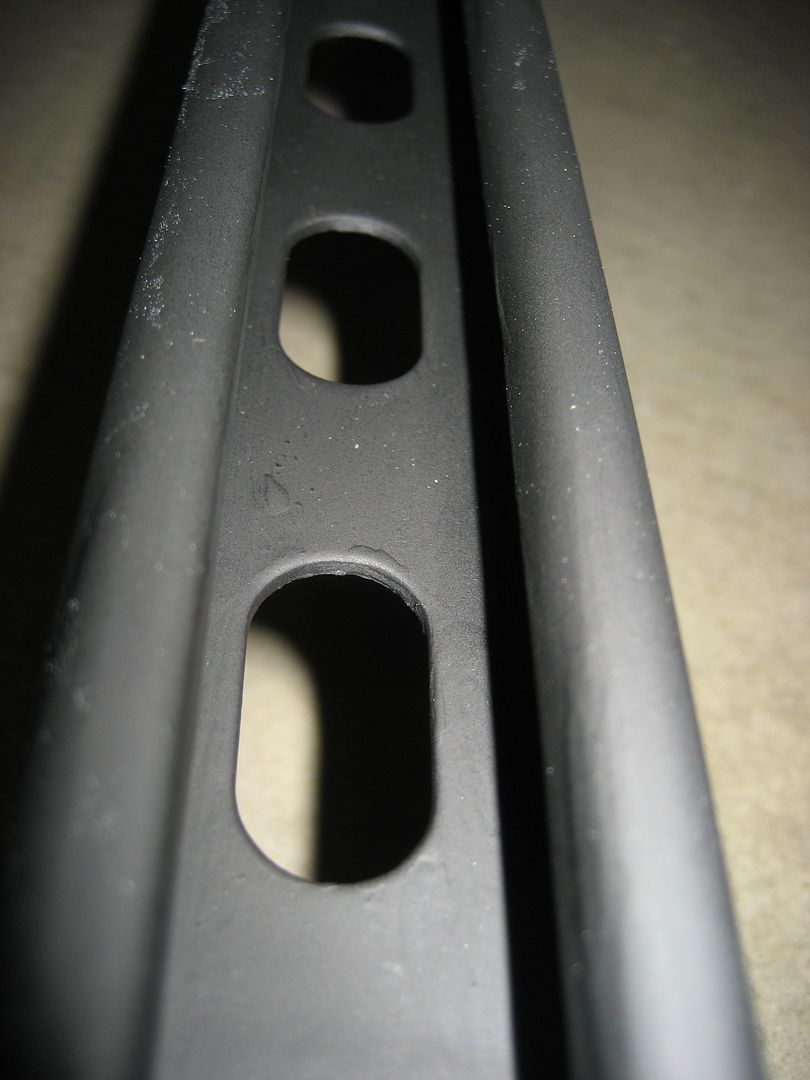
I only painted the inner lip and inner side. I purposely did not paint the center of the channel because it would have collected too much paint along the edges of the oval notches. I didn't want this to become a hideous chunky looking paint job. I will paint the center of the channel with a spray can.
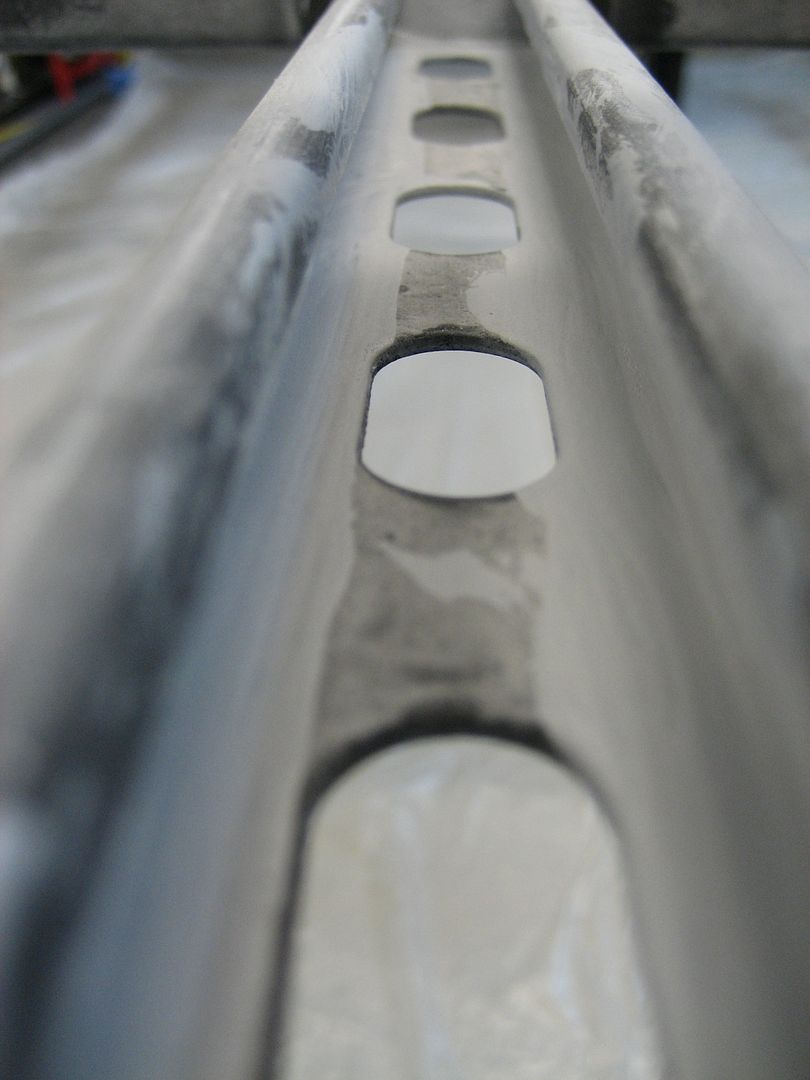
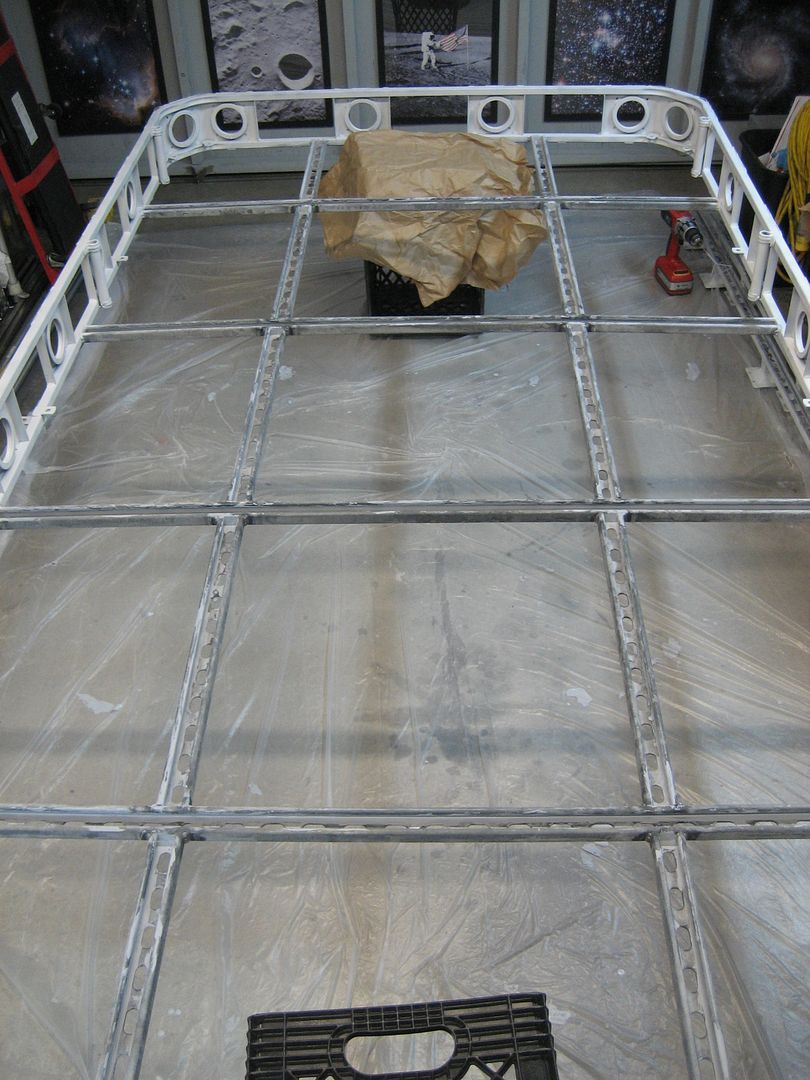
Painting under all that was quite time consuming. Tomorrow I'll do the rest with a spray can. Hopefully the weather is good. With any luck I can do the primer in the morning and final flat black coat later in the day. It's supposed to rain here on Monday, so I'm on a mission to get this rack on before then.
The paint had settled quite a bit in the can:

I tried to mix it with a wood stirring stick but that was useless. The sludge was way too thick so I had to use my imagination. I came up with this:

That's a bent up piece of welding wire attached to my drill. Worked like a charm!
In order to get up under the lip I had to bend up an acid brush:

I only painted the inner lip and inner side. I purposely did not paint the center of the channel because it would have collected too much paint along the edges of the oval notches. I didn't want this to become a hideous chunky looking paint job. I will paint the center of the channel with a spray can.


Painting under all that was quite time consuming. Tomorrow I'll do the rest with a spray can. Hopefully the weather is good. With any luck I can do the primer in the morning and final flat black coat later in the day. It's supposed to rain here on Monday, so I'm on a mission to get this rack on before then.
1997 SAFARI 2WD CARGO

"I do not think there is any thrill that can go through the human heart like that felt by the inventor as he sees some creation of the brain unfolding to success... Such emotions make a man forget food, sleep, friends, love, everything." Nikola Tesla

"I do not think there is any thrill that can go through the human heart like that felt by the inventor as he sees some creation of the brain unfolding to success... Such emotions make a man forget food, sleep, friends, love, everything." Nikola Tesla
-
WoodButcher
- Deputy
-
I sleep in my van
- Posts: 450
- Joined: Wed Apr 06, 2011 7:01 pm
- Location: Woodbury, CT.
Re: Homebrew Con-Ferr Style Porthole Roof Rack Build
rofl,97CargoCrawler wrote: It's supposed to rain here on Monday, so I'm on a mission to get this rack on before then.
Our own deadlines are often more demanding than that which others expect, your doing some nice work there. Good luck, I'm pullin for ya.
'93 Safari shorty, 350 swap
'05 Astro AWD, lifted, 6 liter, cammed, ported and programmed for fast.
'93 cargo, work in progress
'05 Astro AWD, lifted, 6 liter, cammed, ported and programmed for fast.
'93 cargo, work in progress
-
97CargoCrawler
Topic author - I sleep in my van
- Posts: 754
- Joined: Thu Jan 24, 2008 11:50 pm
- Location: Near Los Angeles, CA
- Contact:
Re: Homebrew Con-Ferr Style Porthole Roof Rack Build
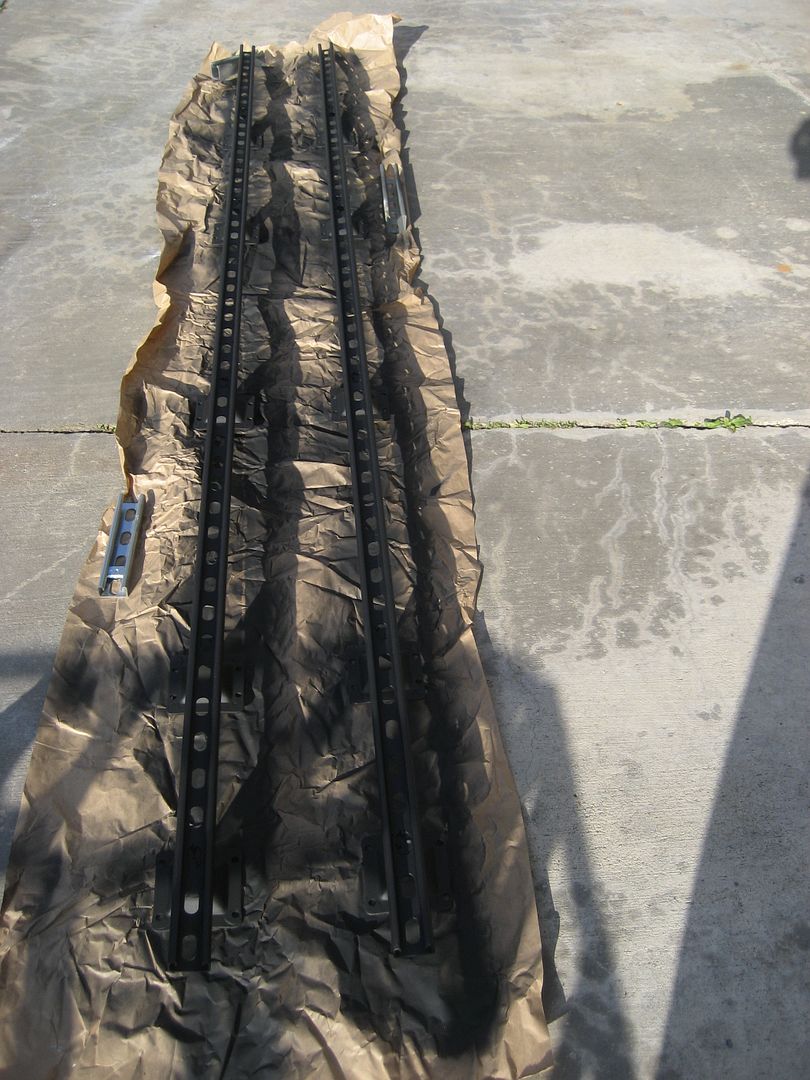
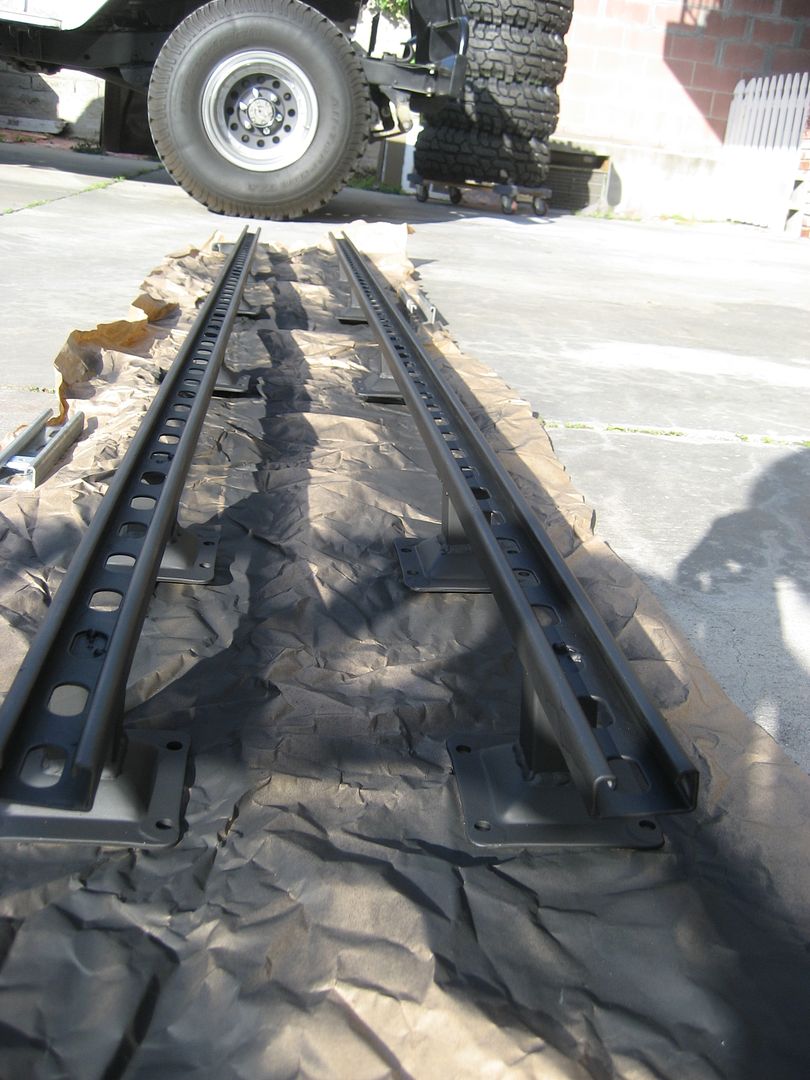
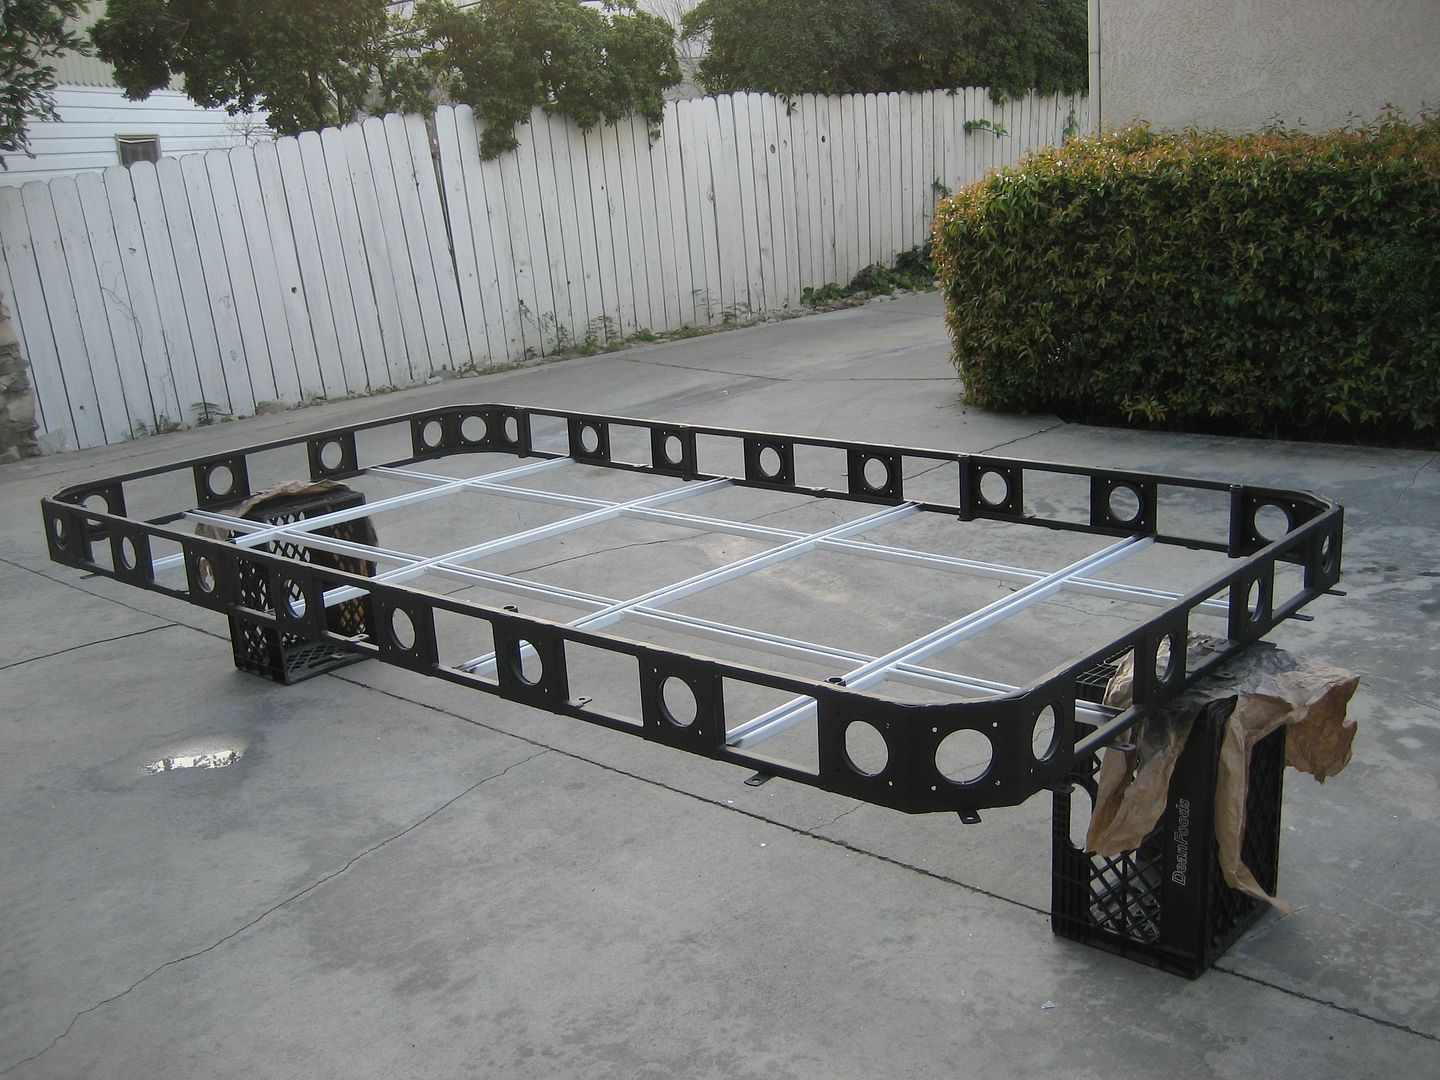
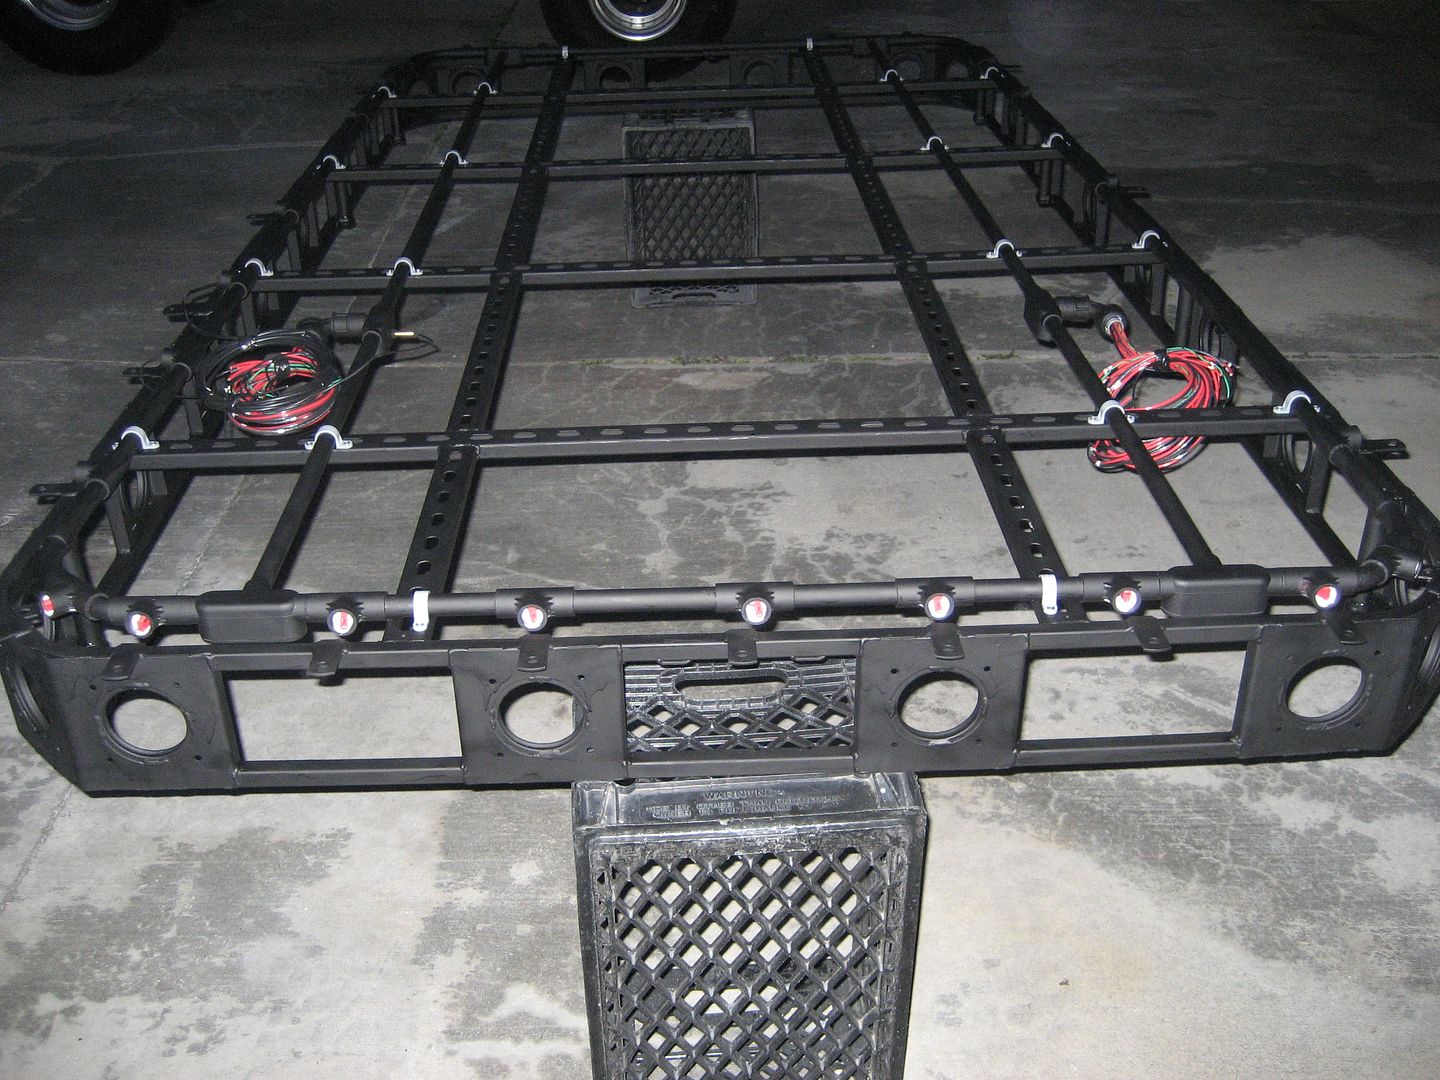
I am exhausted. I worked on this rack for about 10 hours today. I got a lot done but it seems unlikely that I will have it done before Monday. There is still a lot to do. I only got one coat of flat black on everything today. Mind you, that was after two more coats of metal primer. I sprayed the primer on thick and waited for it to dry. So that took a while. While one section was drying I was painting another. I was rotating between rails, basket and electrical conduit. There are so many little nooks and crannies to paint! I did my best to get paint shot in everywhere, I don't want to see any rust a week after I bolt it on. There are tons of places for water to collect so I know I will need to maintain the rack with more paint every so often.
Right now I'm focused on just getting the rack installed. I'm not concerned with the rack floor or roof hatch yet. After the rack is installed I will need to figure out where to drill holes for the wiring feed. I need to be able to see the roof for that. Also, I'm not too happy with the roof hatch I bought. So I either need to get something better or just make my own. I'm leaning towards making my own out of diamond plate. That way it will live up to my expectations, unlike the last two I have purchased and received damaged. Anyway, who wants to read, it's all about the pix right?
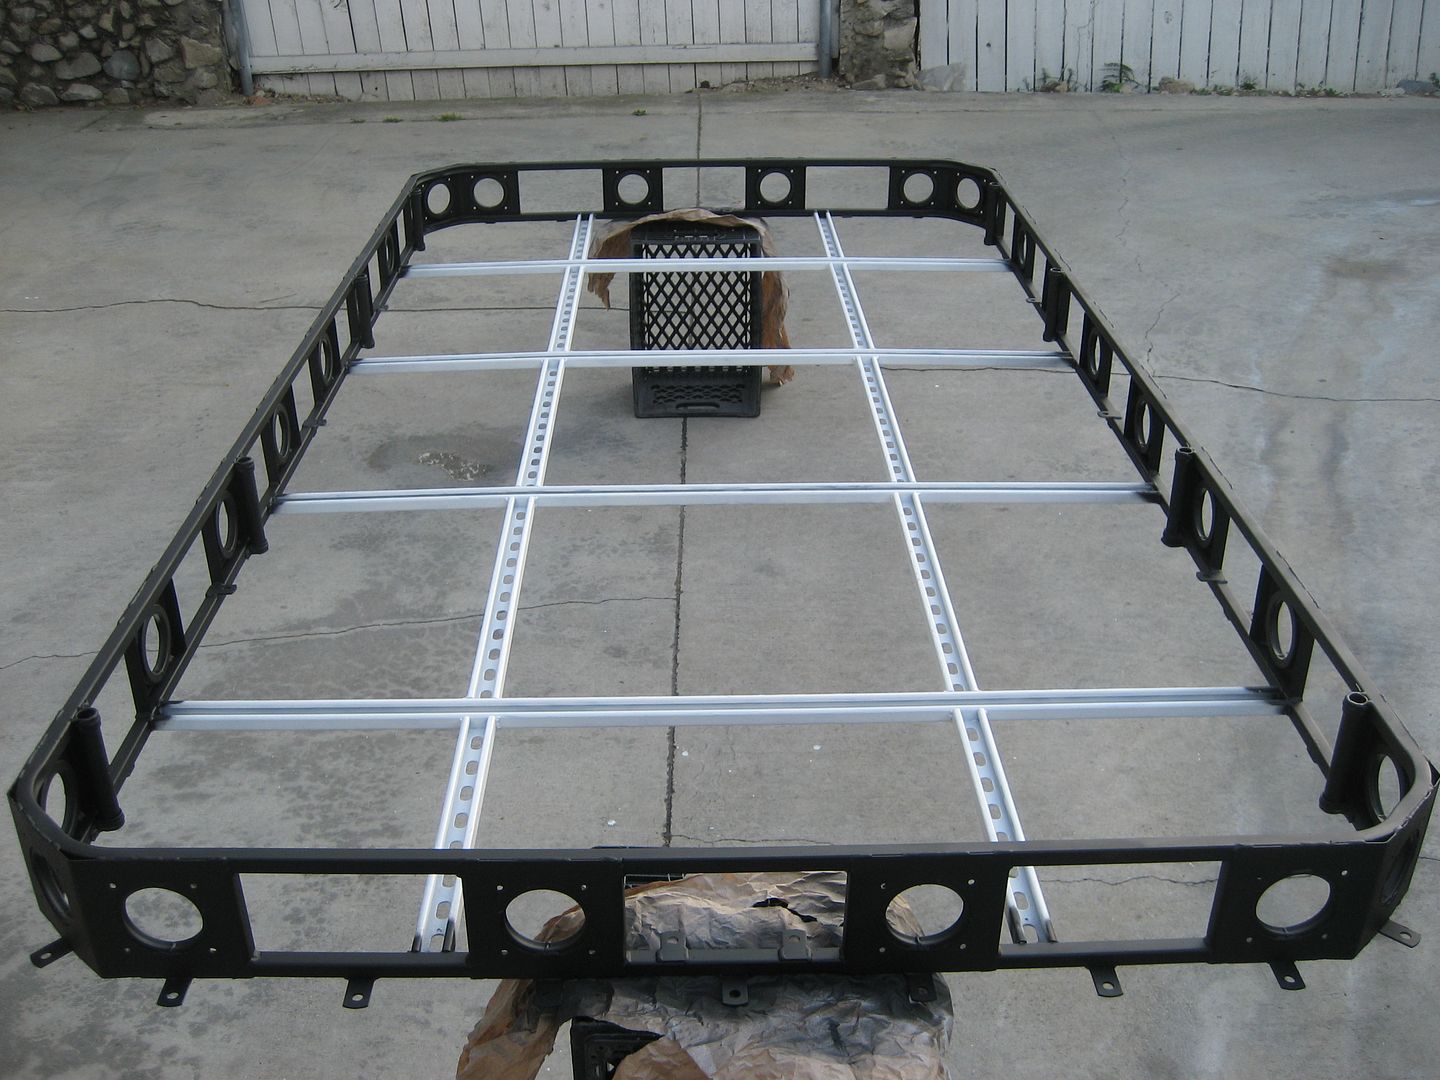
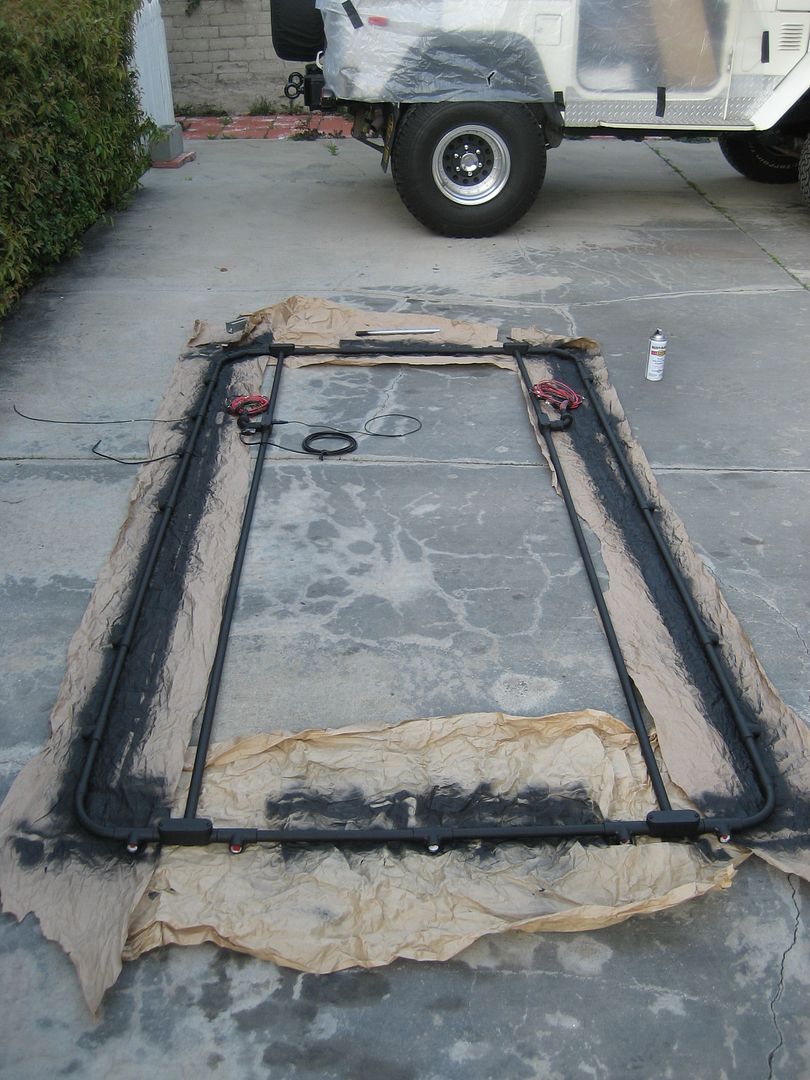
Applying primer to all three sections:
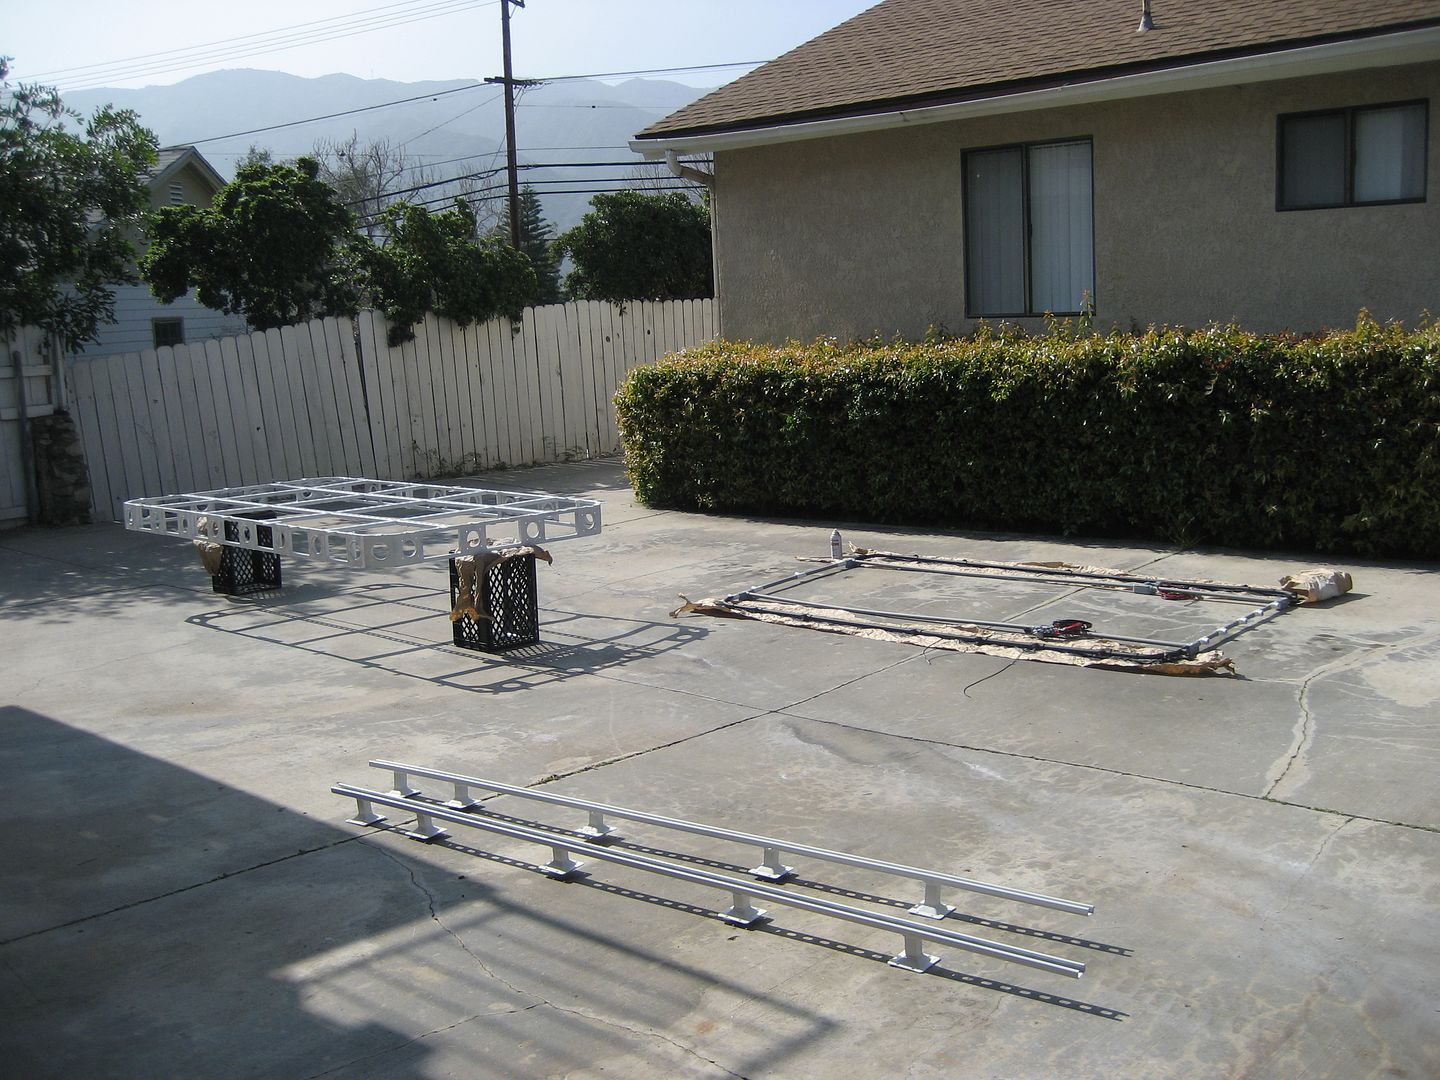
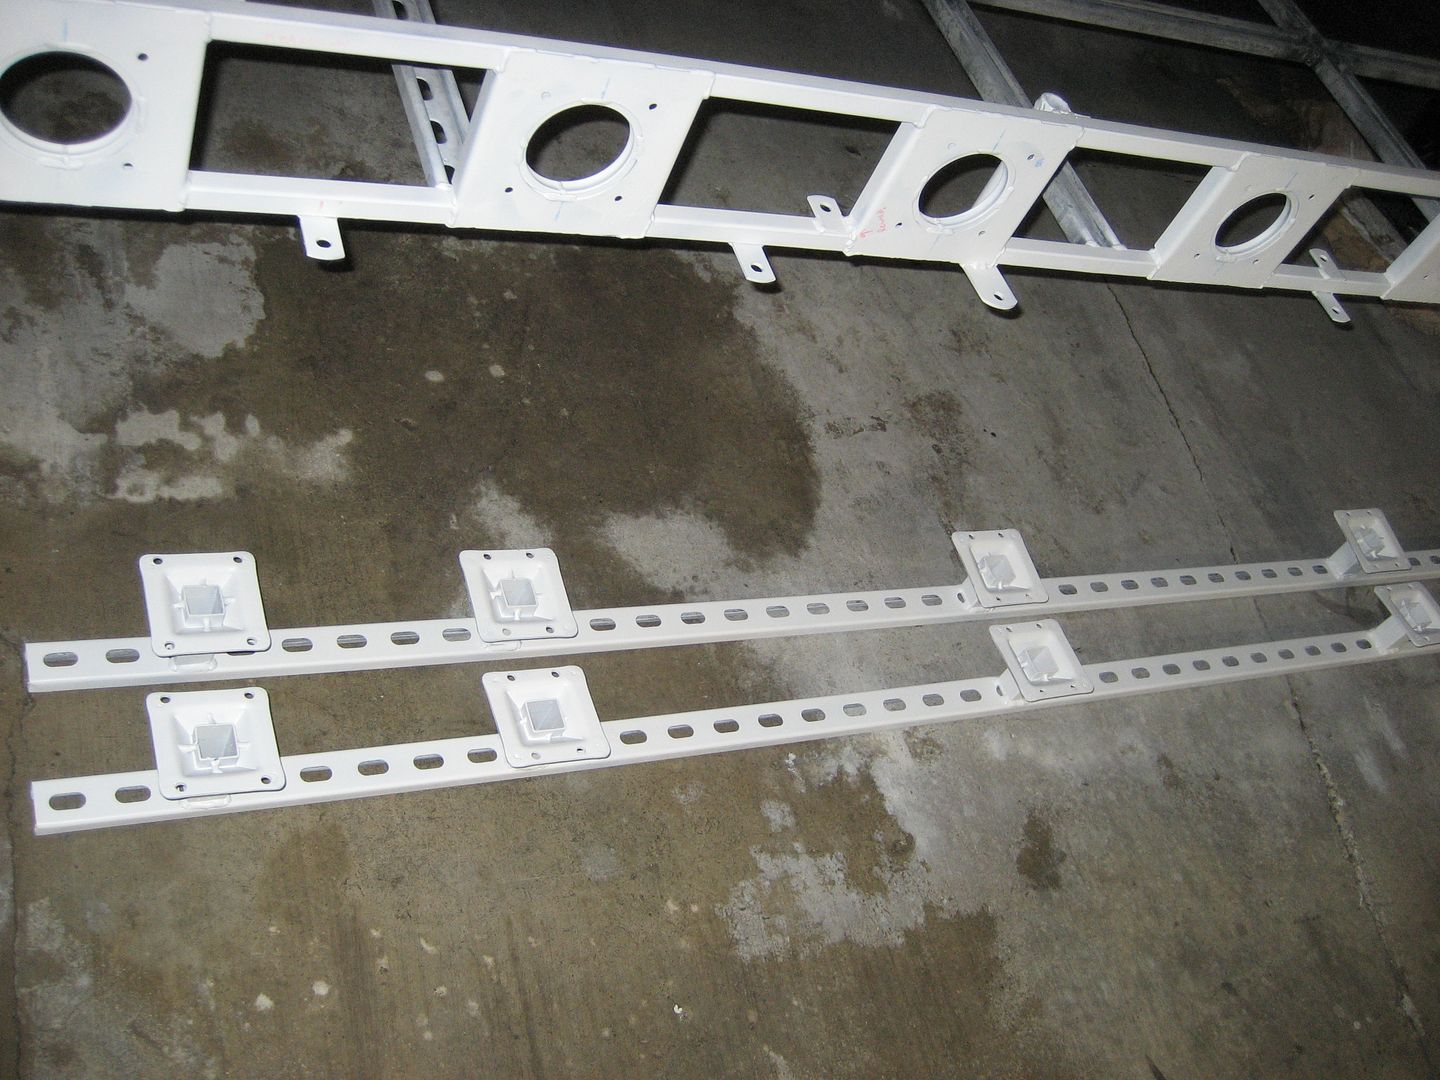
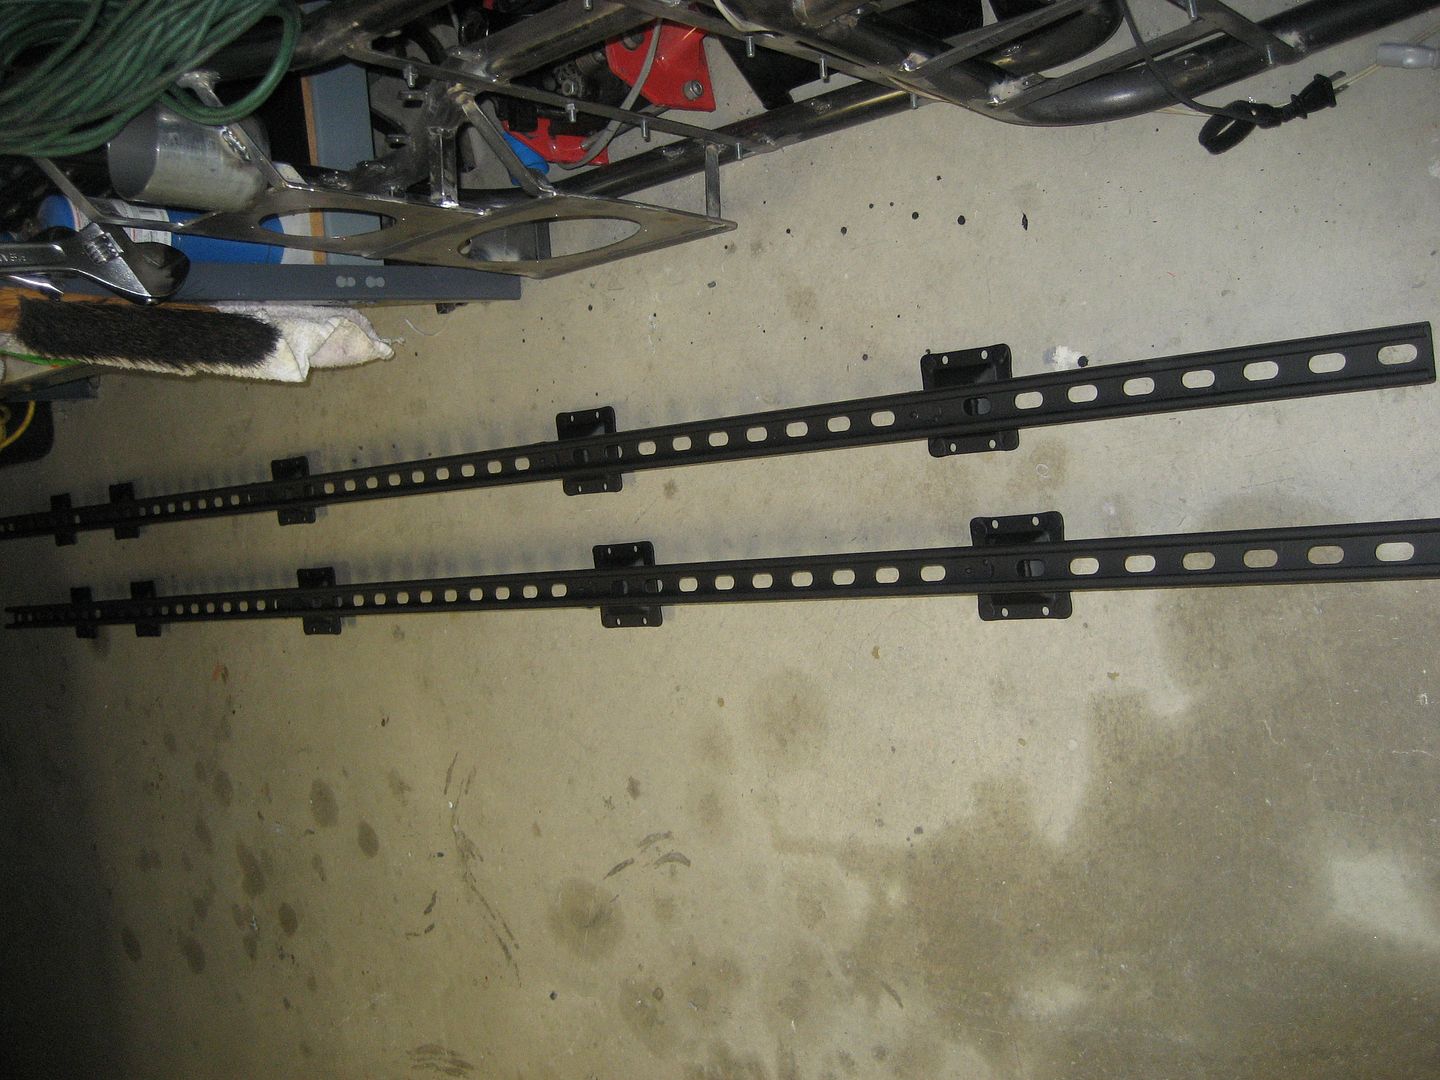
Roof rails painted:
Outer rack perimeter painted:
Painted electrical conduit:
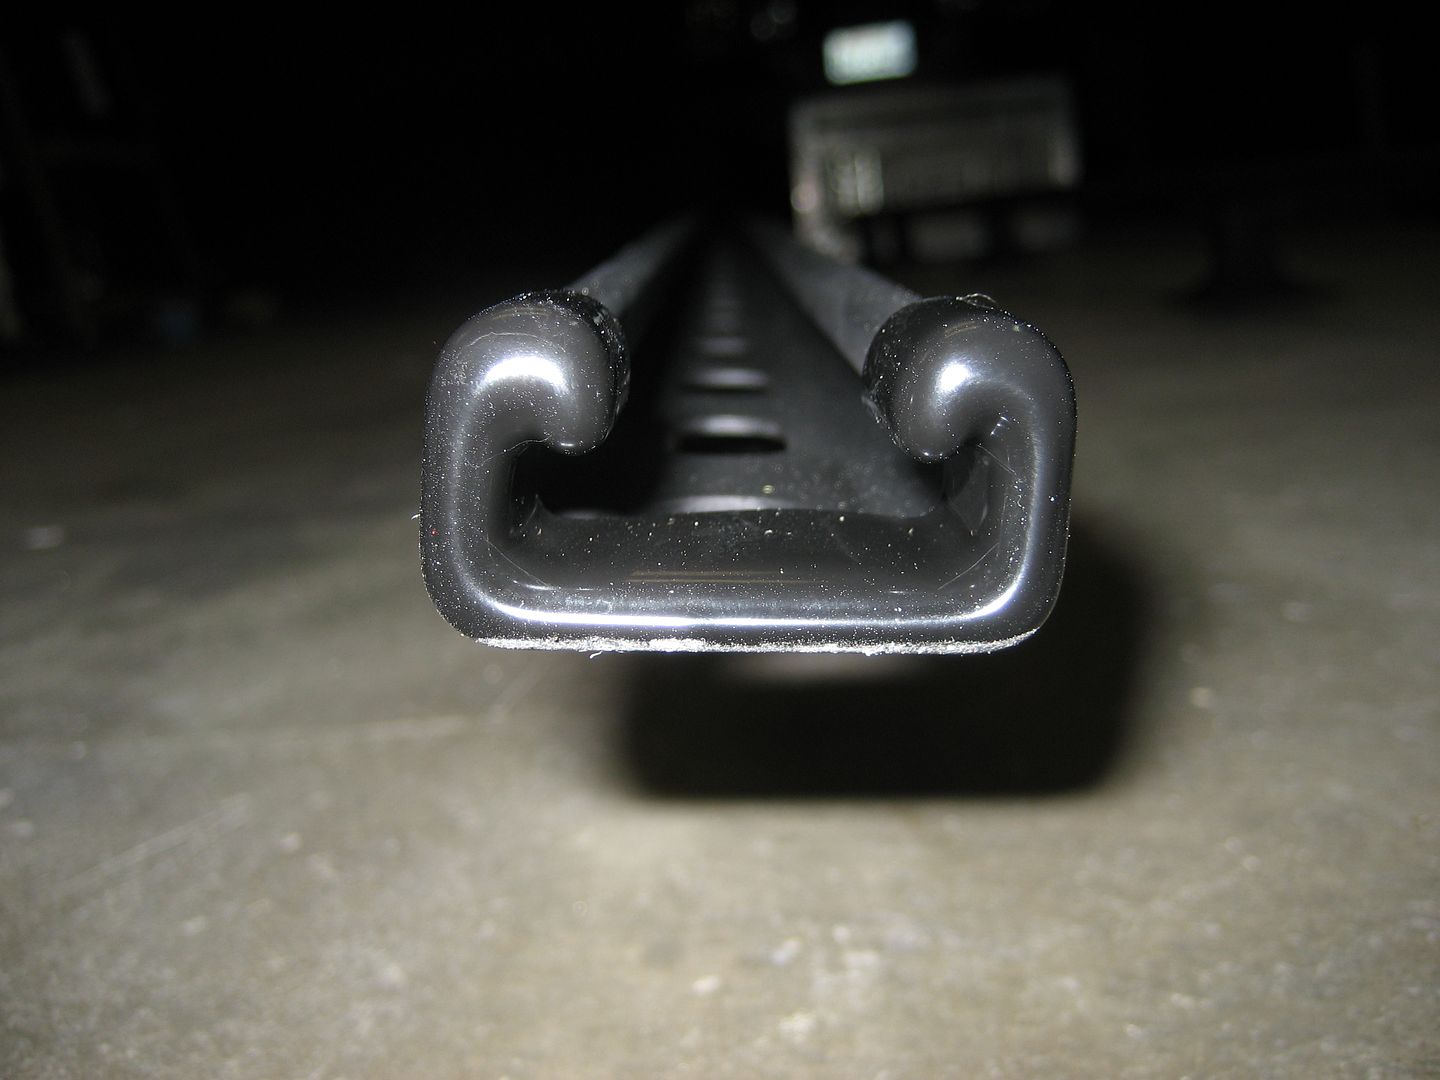
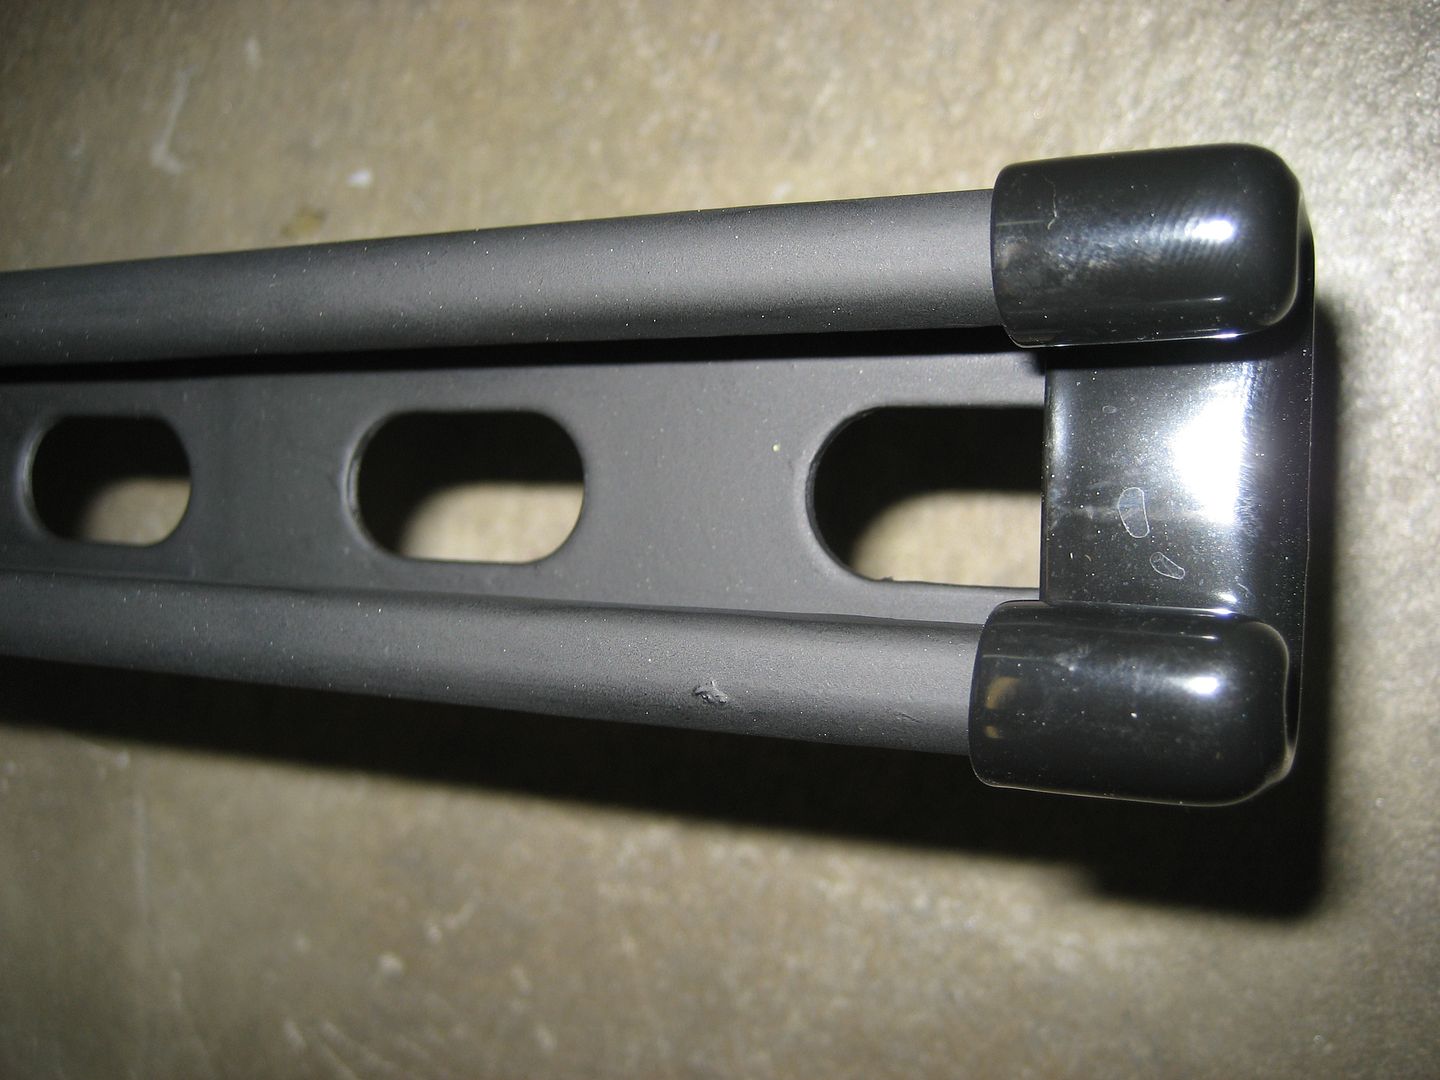
I could not paint the floor cross braces until I gave it the acid brush under the lip paint treatment. If you ever want your own little slice of HELL, try painting for a few hours with an acid brush:
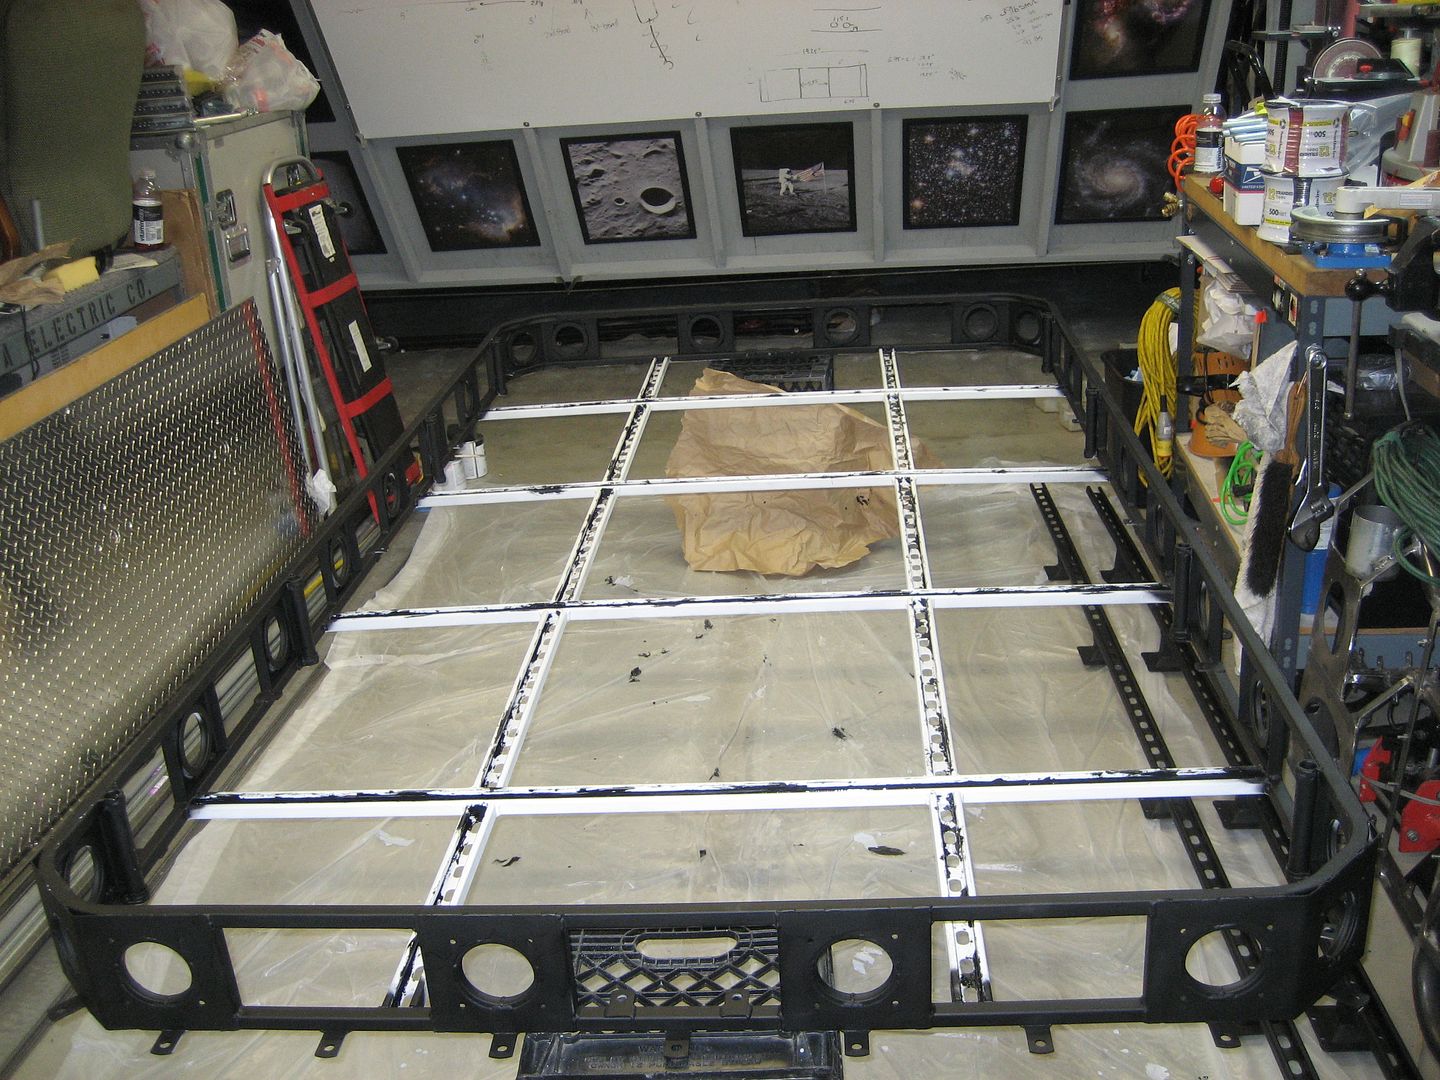
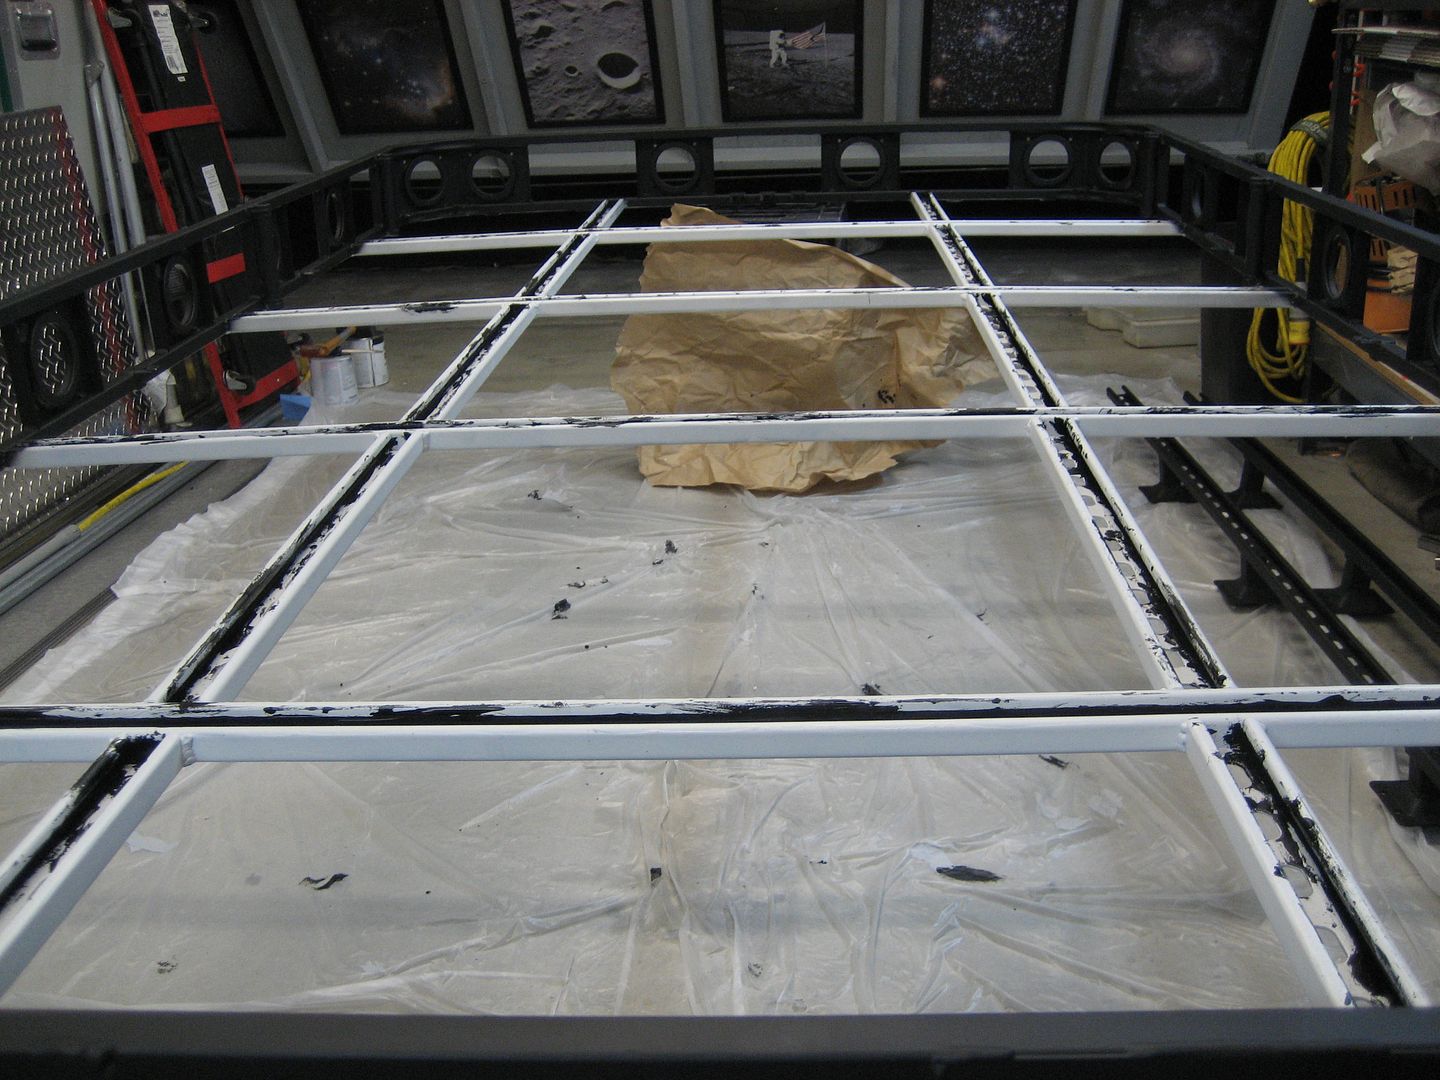
Tomorrow I will finish painting the floor braces and then give everything another coat of flat black. I was hoping to have finished all the painting today but it just wasn't possible. It doesn't look like everything will be done tomorrow like I had hoped. I am happy with the progress I made today. The rack is definitely in the final stages of completion.
Right now I'm focused on just getting the rack installed. I'm not concerned with the rack floor or roof hatch yet. After the rack is installed I will need to figure out where to drill holes for the wiring feed. I need to be able to see the roof for that. Also, I'm not too happy with the roof hatch I bought. So I either need to get something better or just make my own. I'm leaning towards making my own out of diamond plate. That way it will live up to my expectations, unlike the last two I have purchased and received damaged. Anyway, who wants to read, it's all about the pix right?
Applying primer to all three sections:


Roof rails painted:


Outer rack perimeter painted:


Painted electrical conduit:

I could not paint the floor cross braces until I gave it the acid brush under the lip paint treatment. If you ever want your own little slice of HELL, try painting for a few hours with an acid brush:


Tomorrow I will finish painting the floor braces and then give everything another coat of flat black. I was hoping to have finished all the painting today but it just wasn't possible. It doesn't look like everything will be done tomorrow like I had hoped. I am happy with the progress I made today. The rack is definitely in the final stages of completion.
1997 SAFARI 2WD CARGO

"I do not think there is any thrill that can go through the human heart like that felt by the inventor as he sees some creation of the brain unfolding to success... Such emotions make a man forget food, sleep, friends, love, everything." Nikola Tesla

"I do not think there is any thrill that can go through the human heart like that felt by the inventor as he sees some creation of the brain unfolding to success... Such emotions make a man forget food, sleep, friends, love, everything." Nikola Tesla
-
97CargoCrawler
Topic author - I sleep in my van
- Posts: 754
- Joined: Thu Jan 24, 2008 11:50 pm
- Location: Near Los Angeles, CA
- Contact:
Re: Homebrew Con-Ferr Style Porthole Roof Rack Build
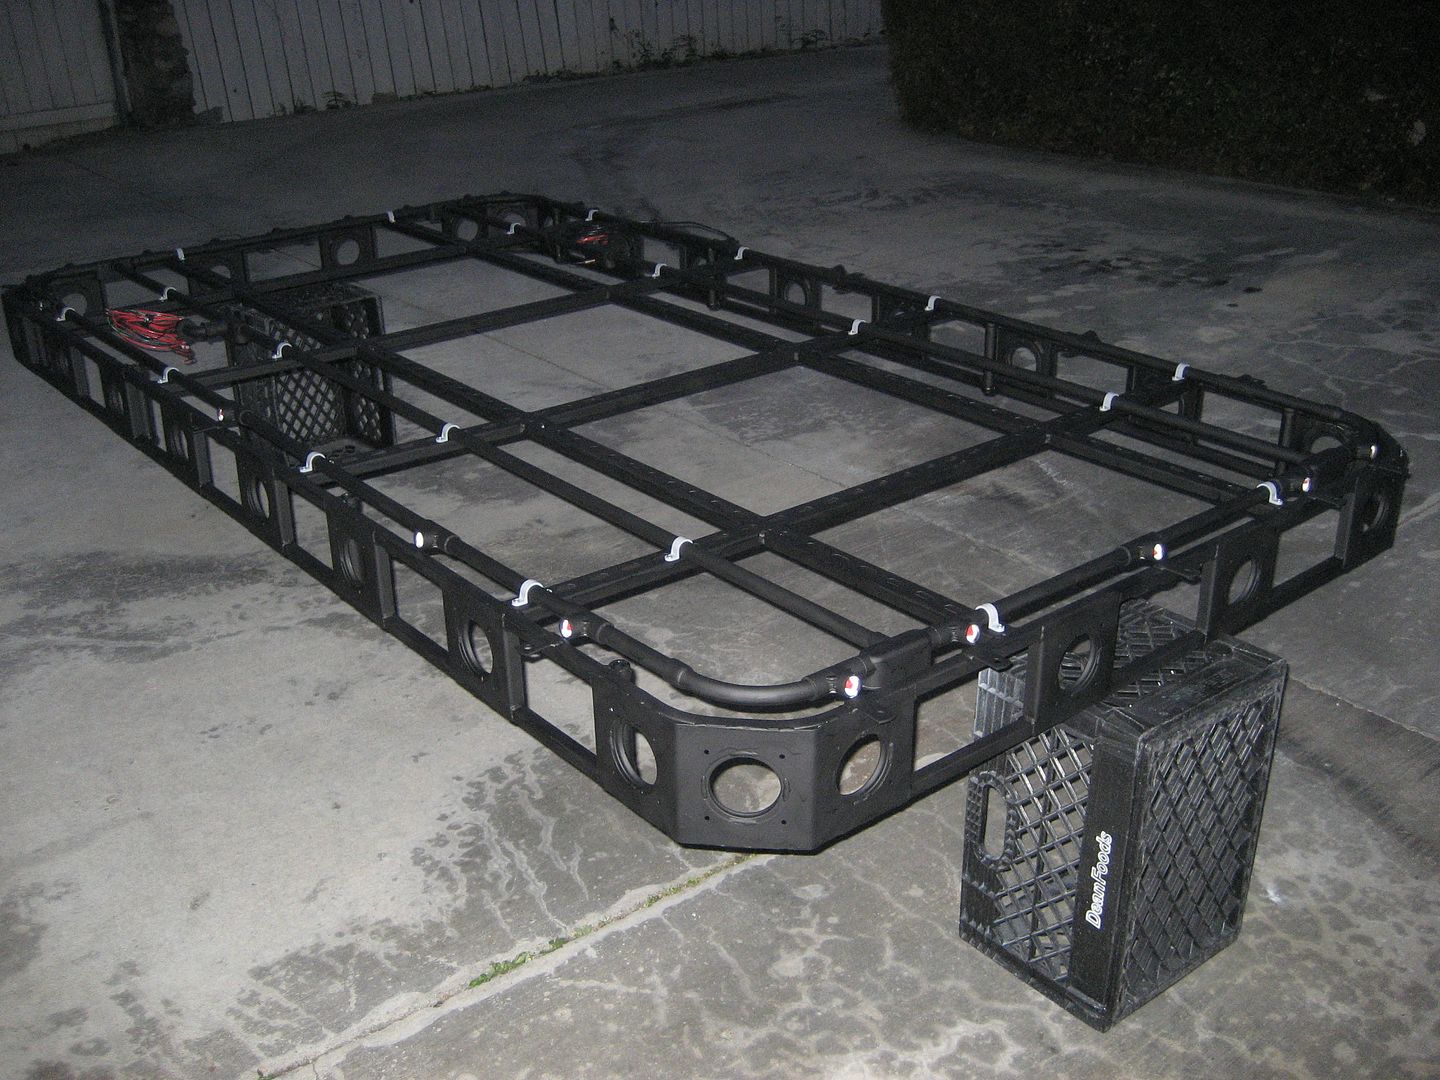
Spent the whole day painting:
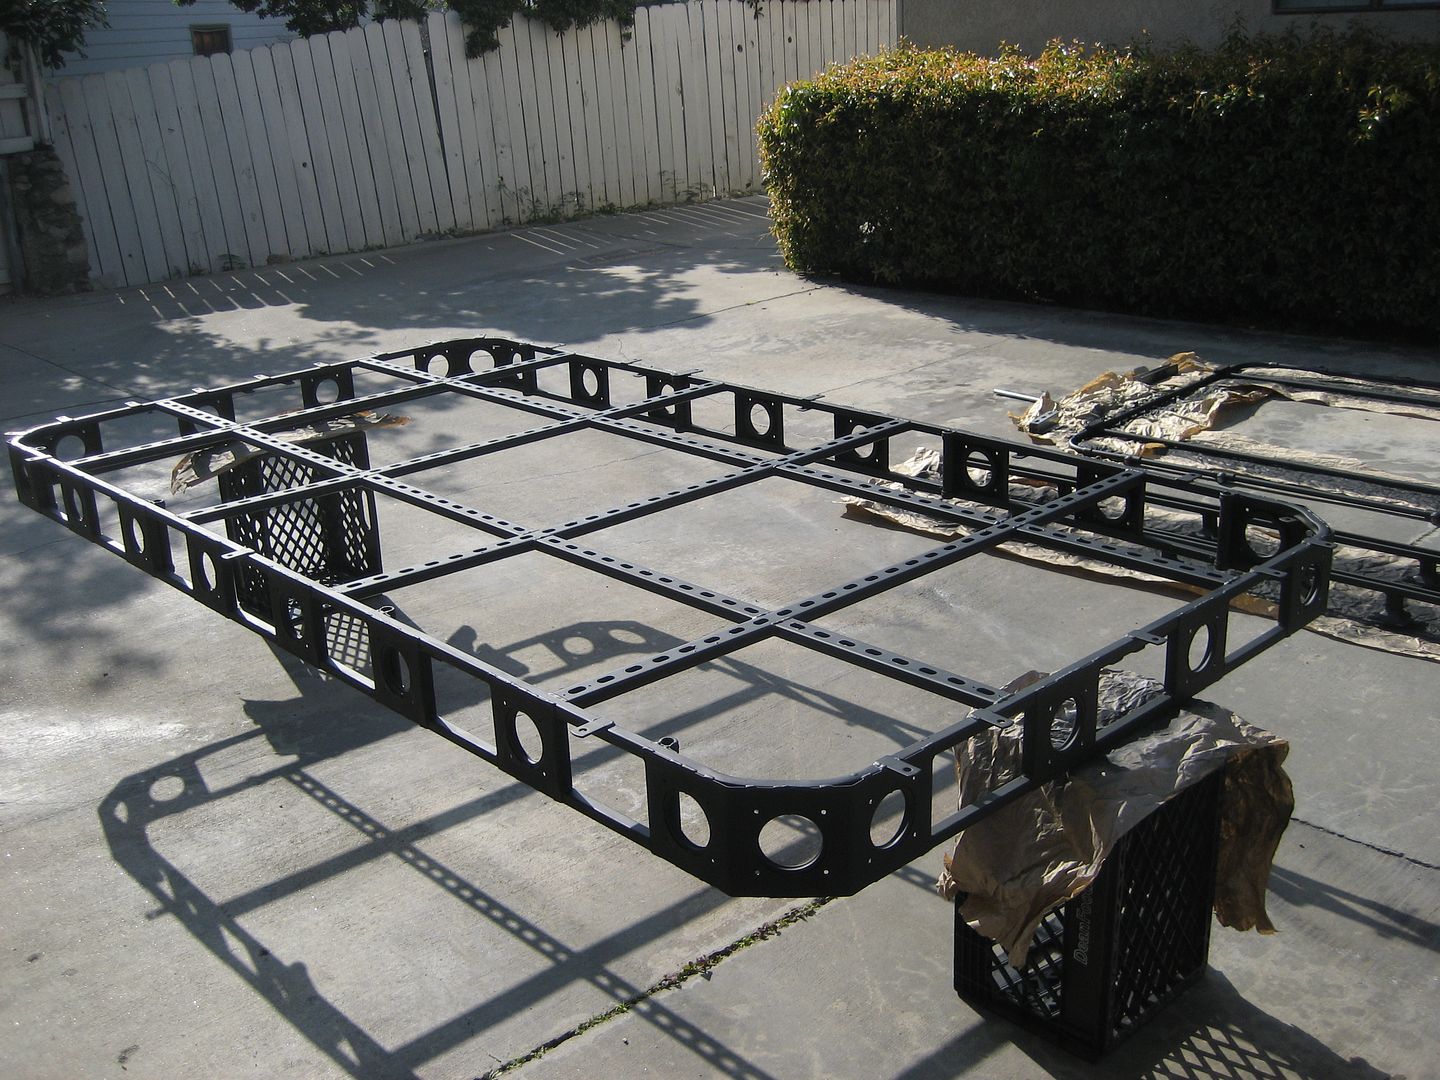
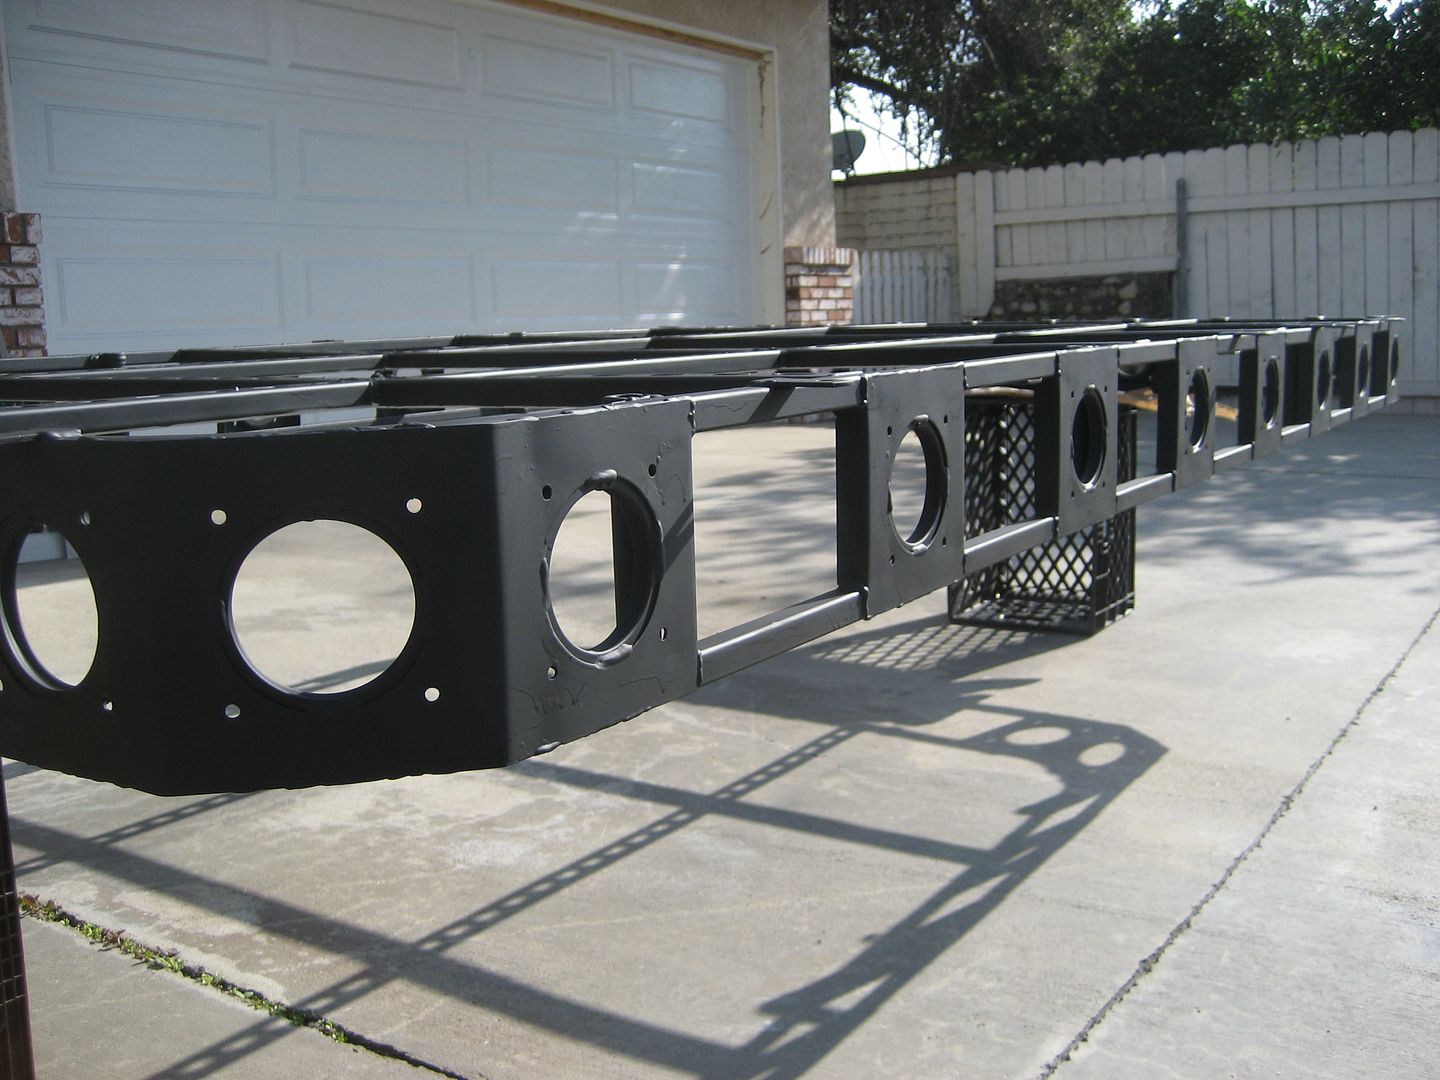
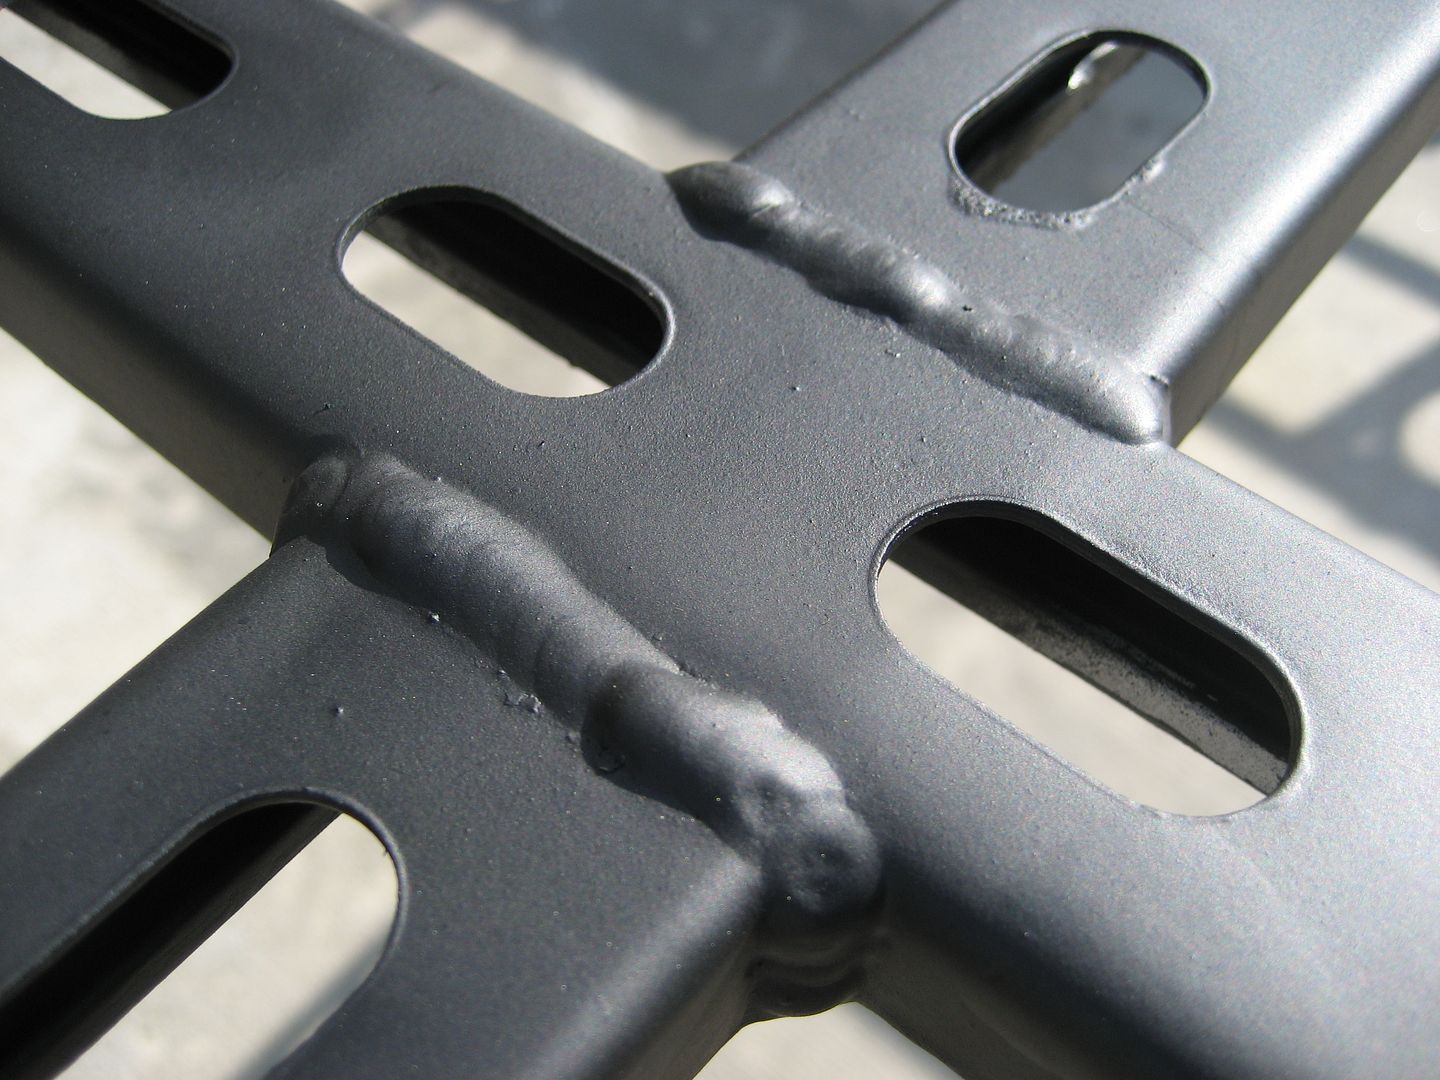
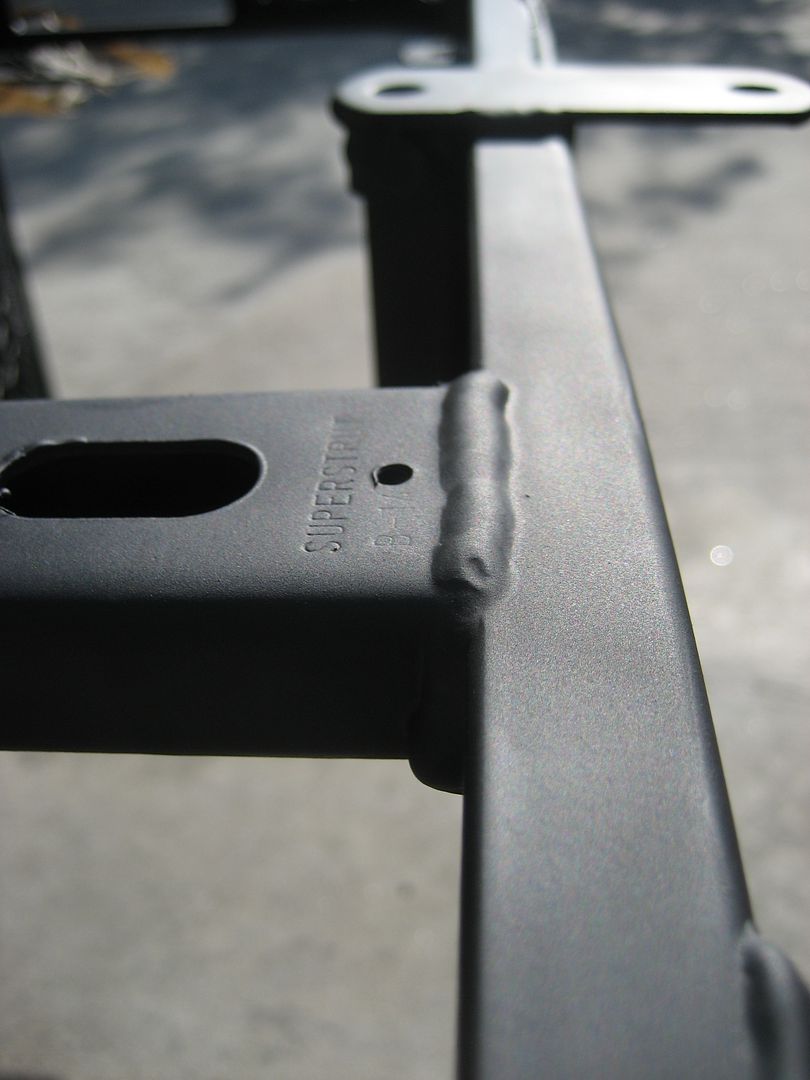
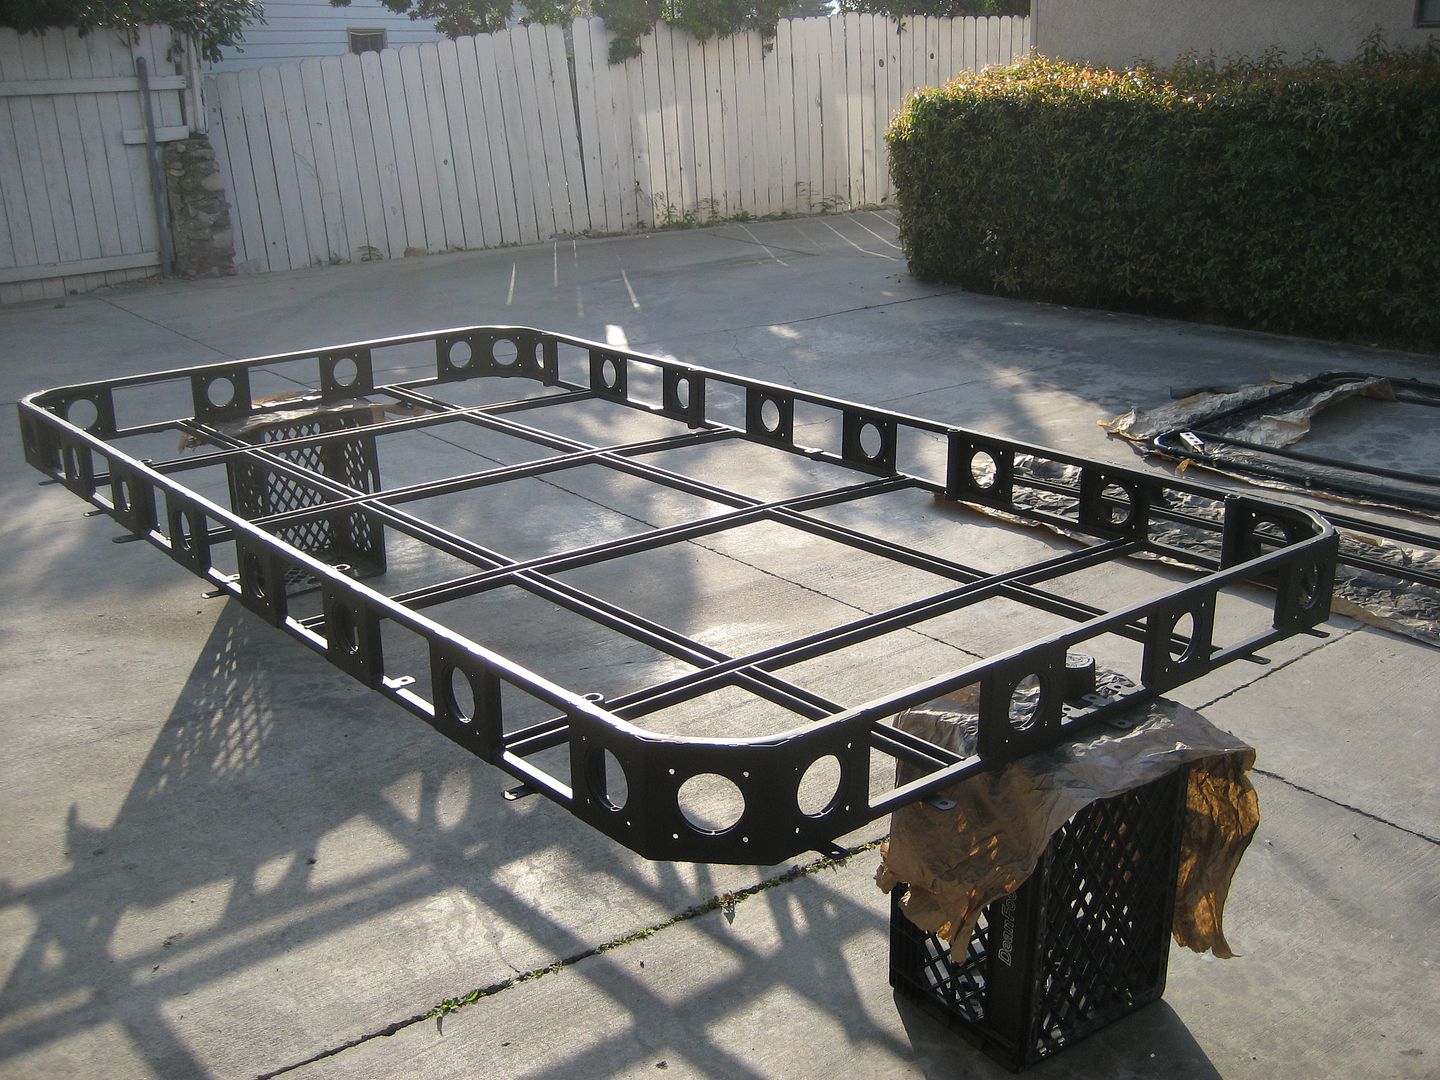
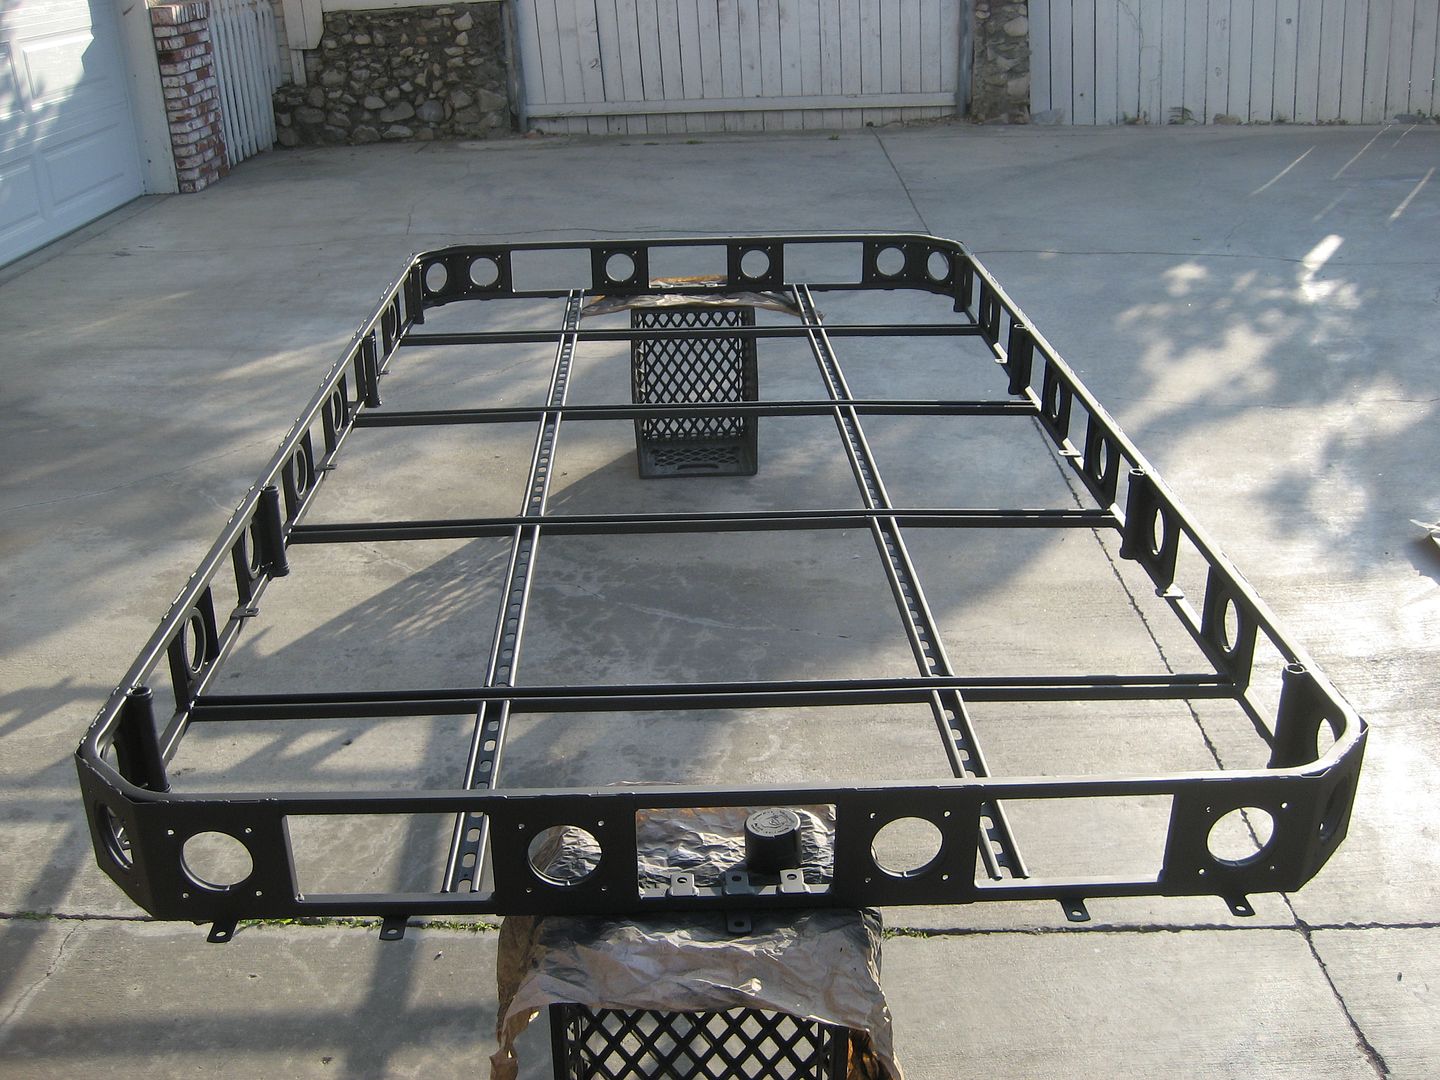
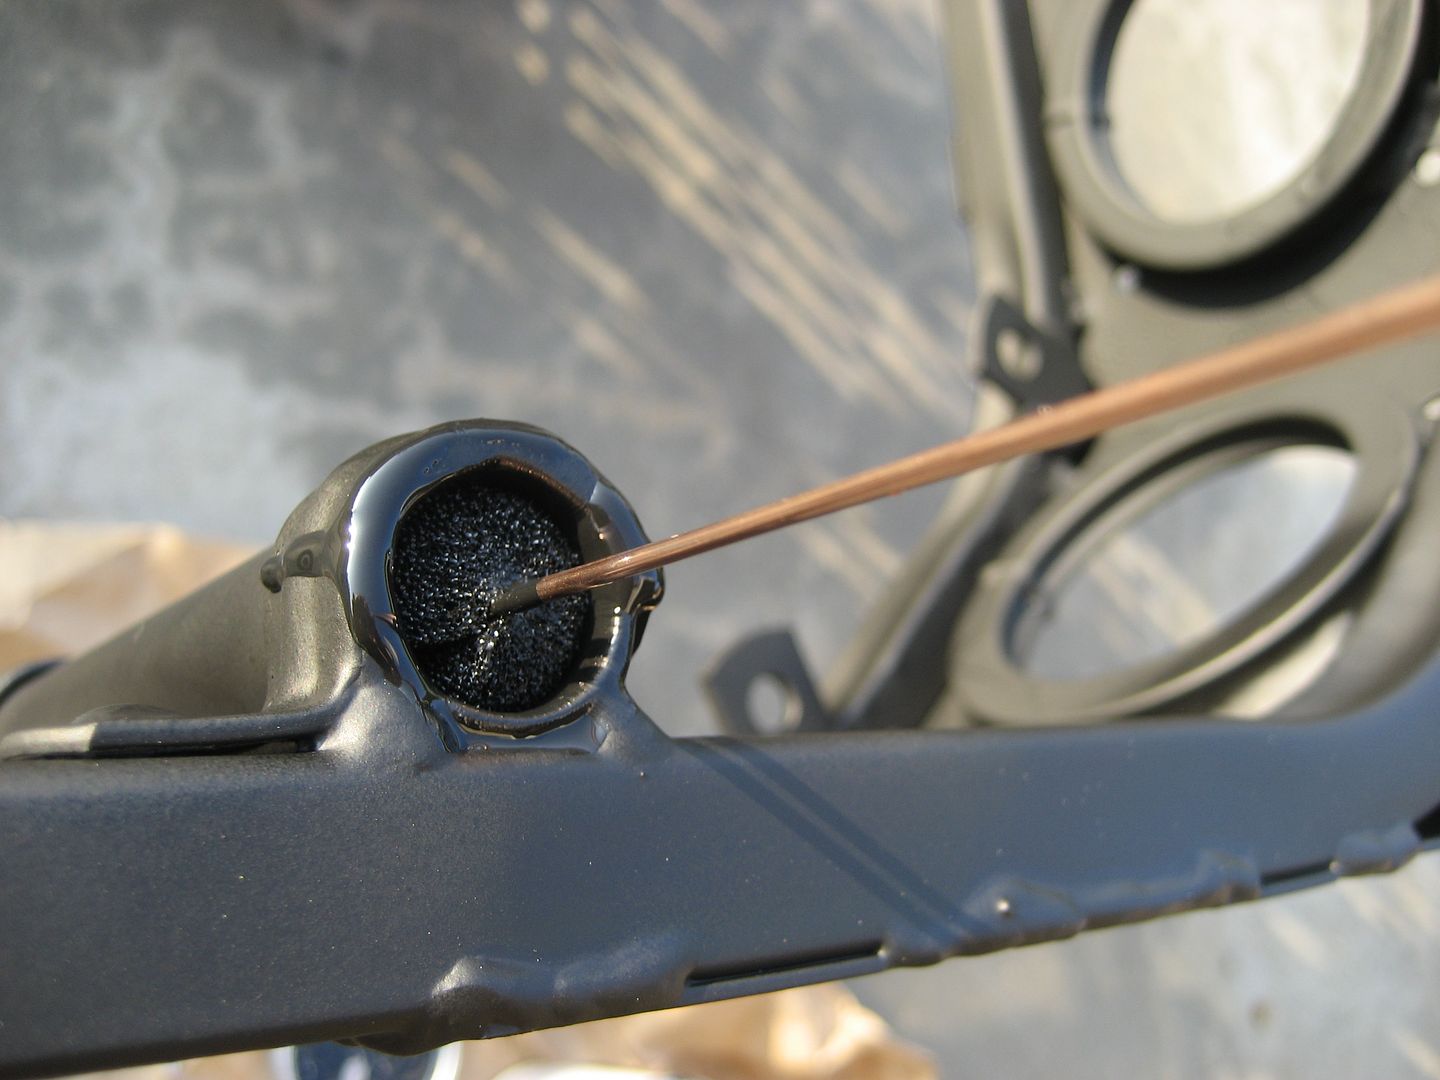
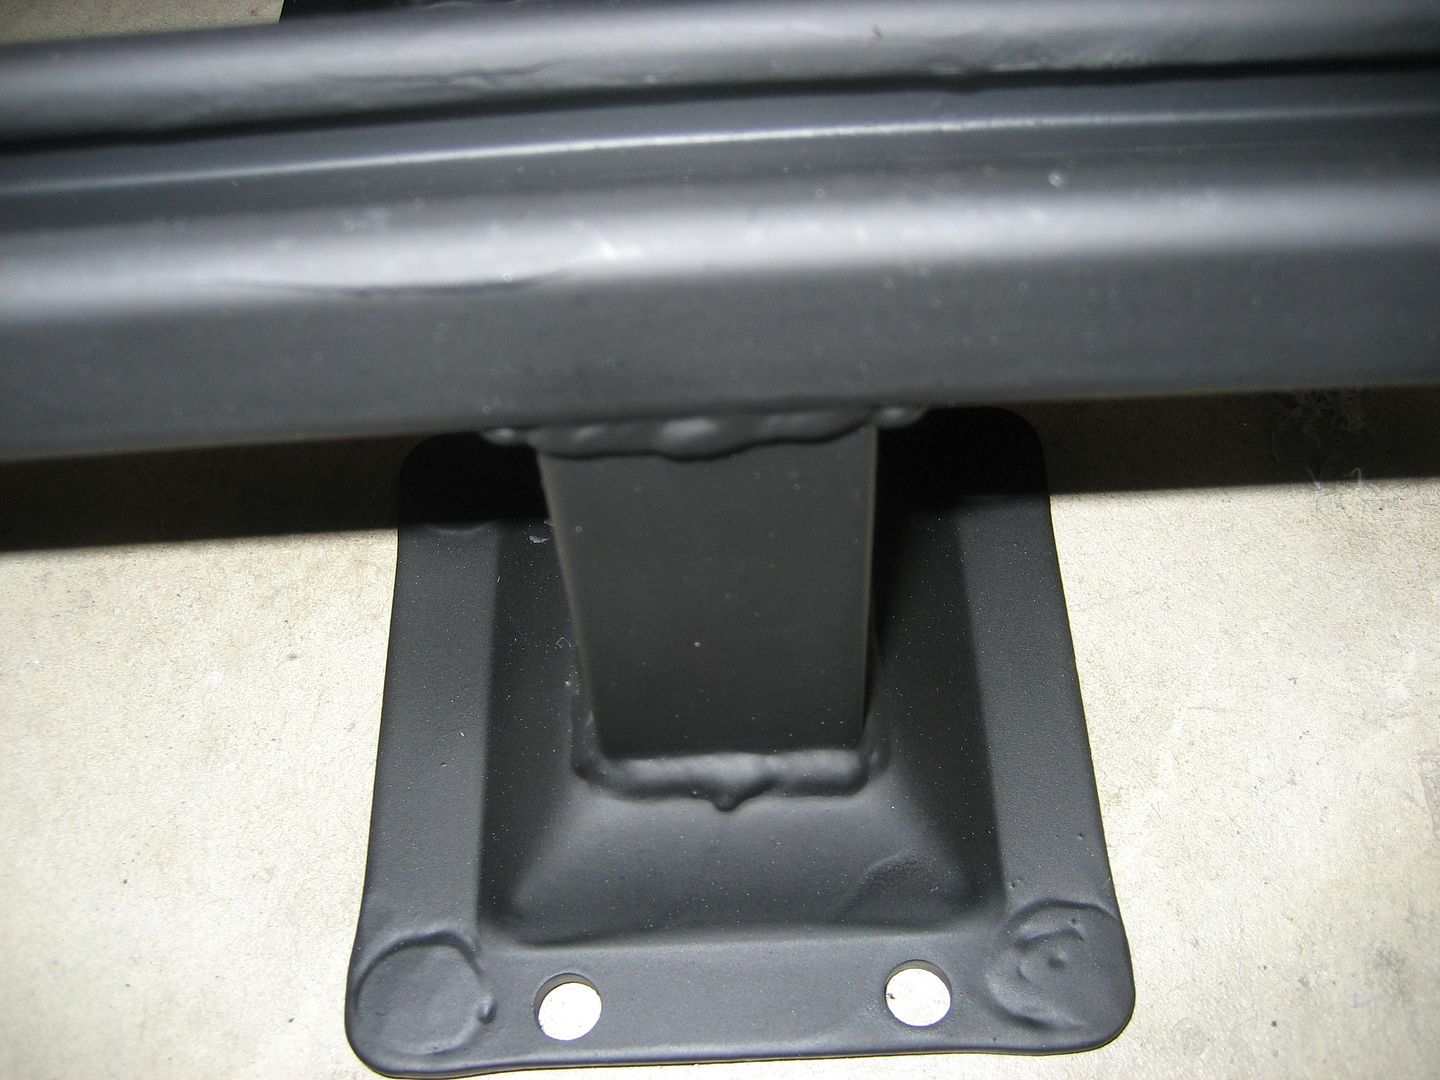
I had to get down inside the tent pole support tubes:
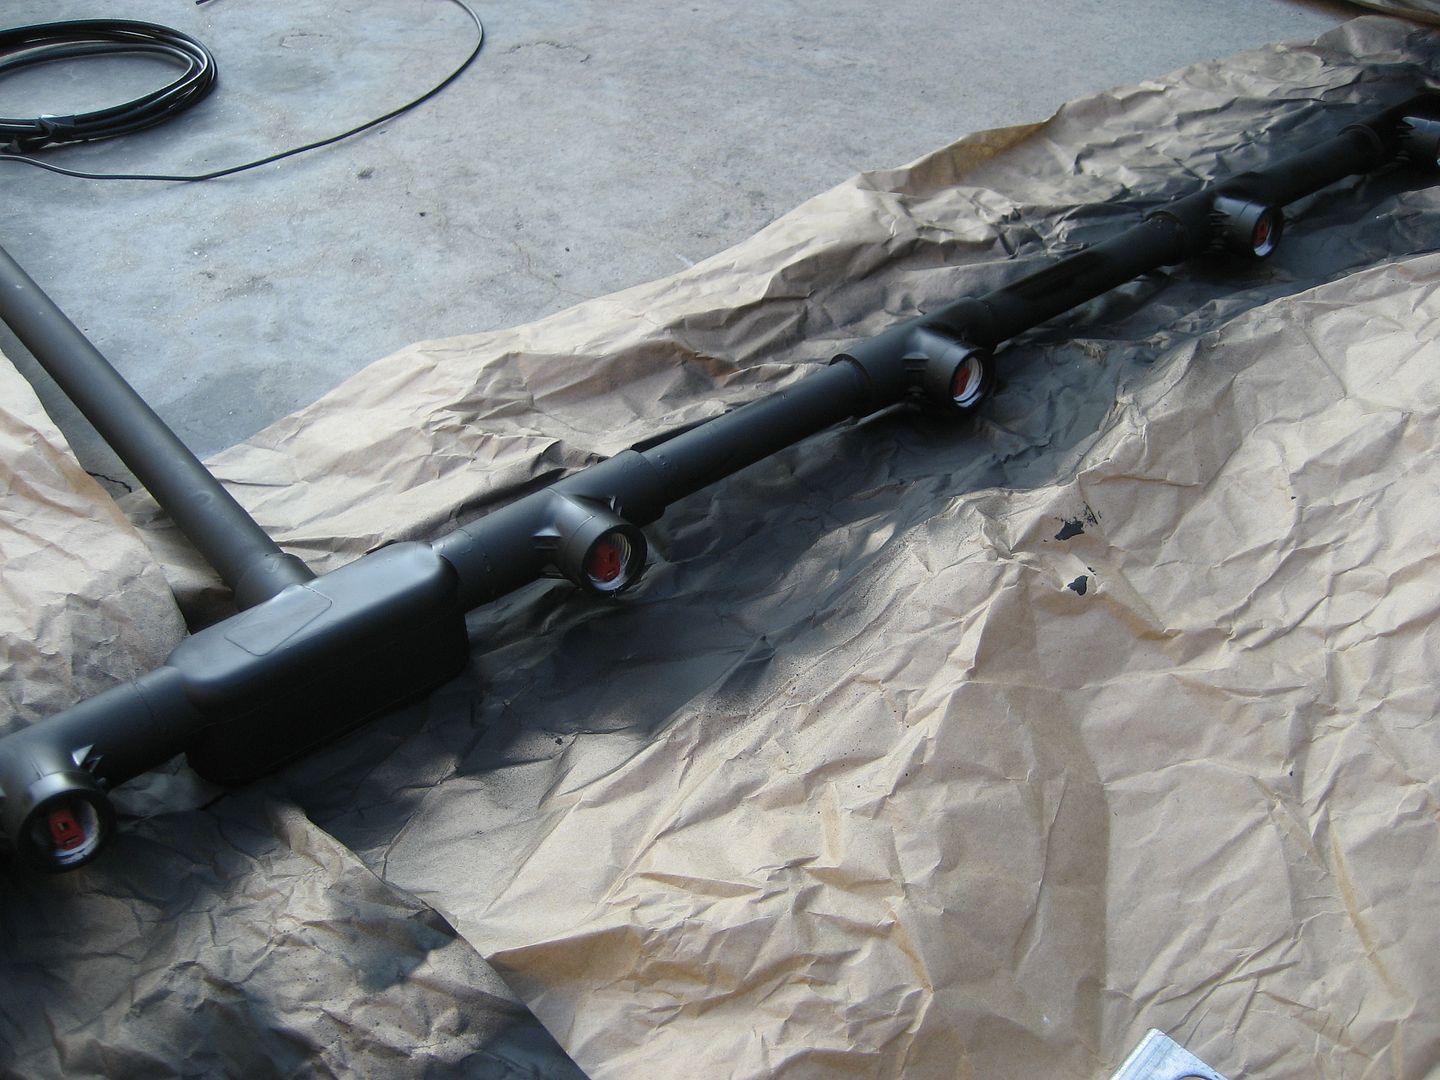
Electrical conduit installed:
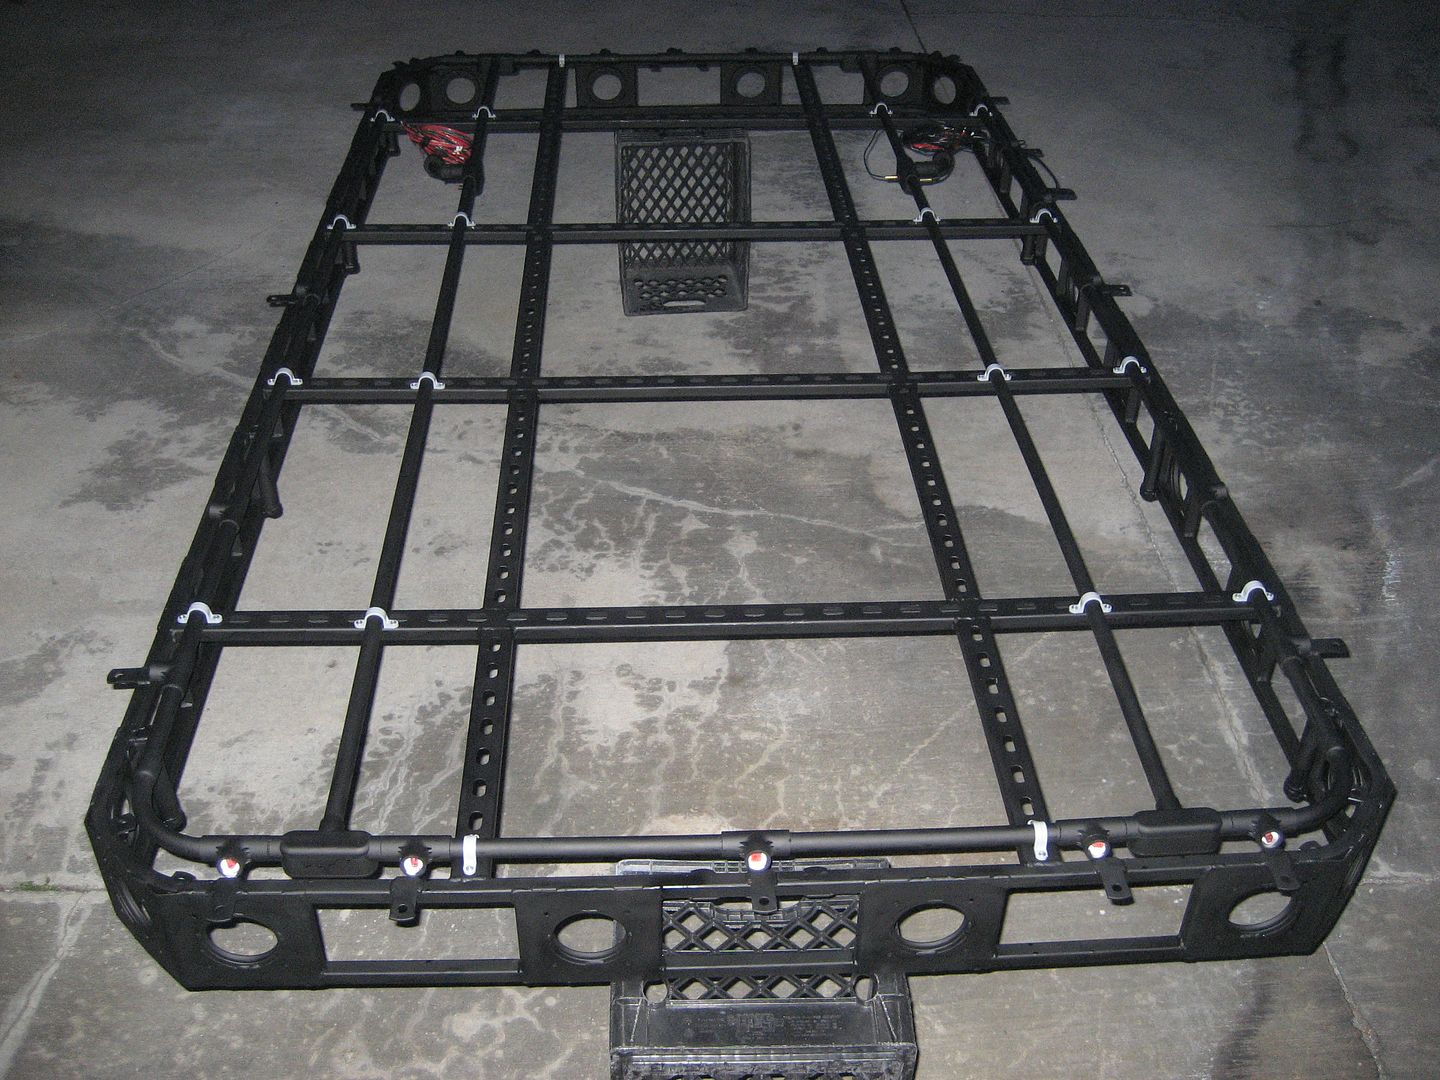
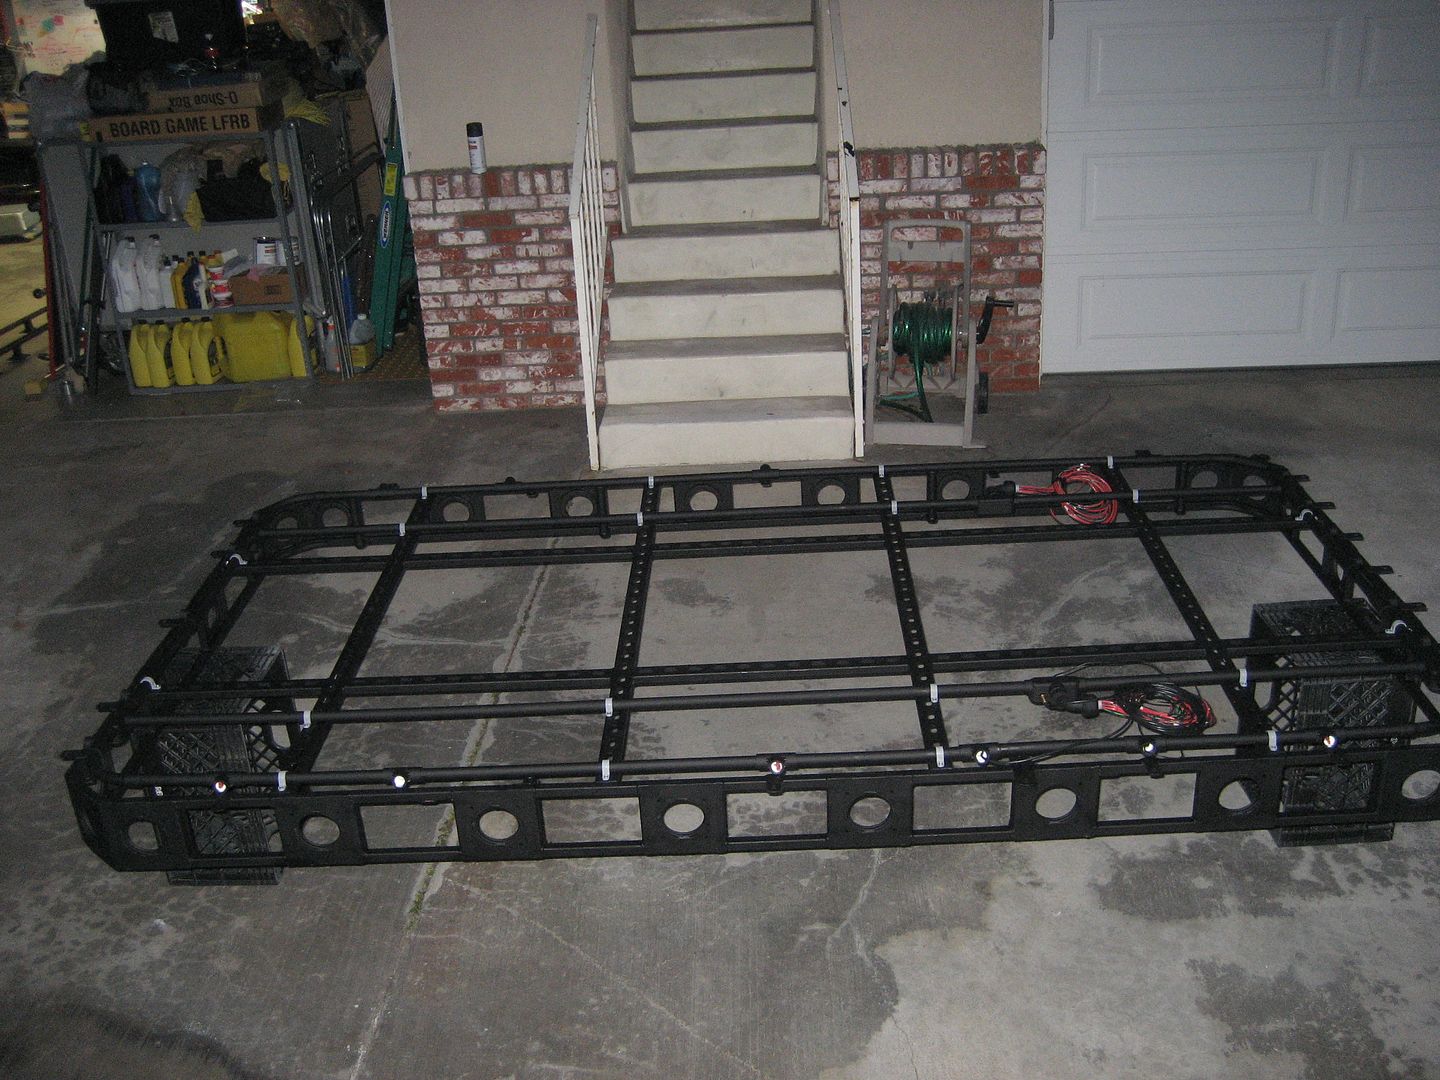
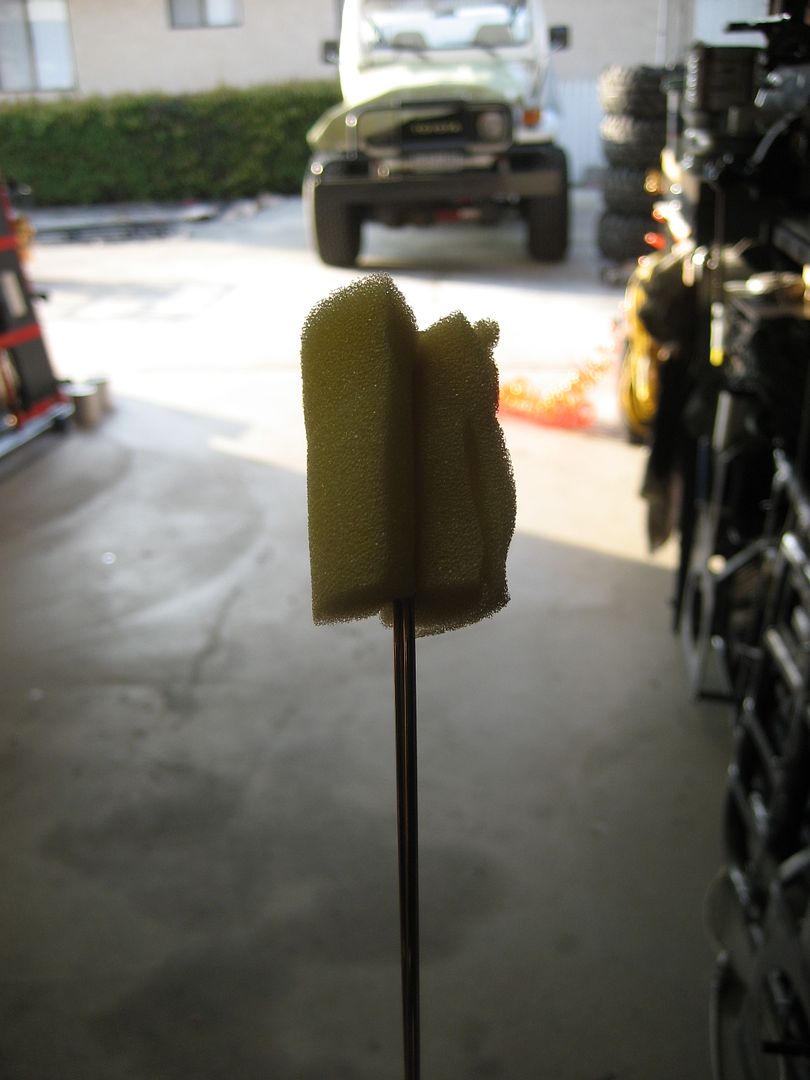
I guess it will have to wait a while:
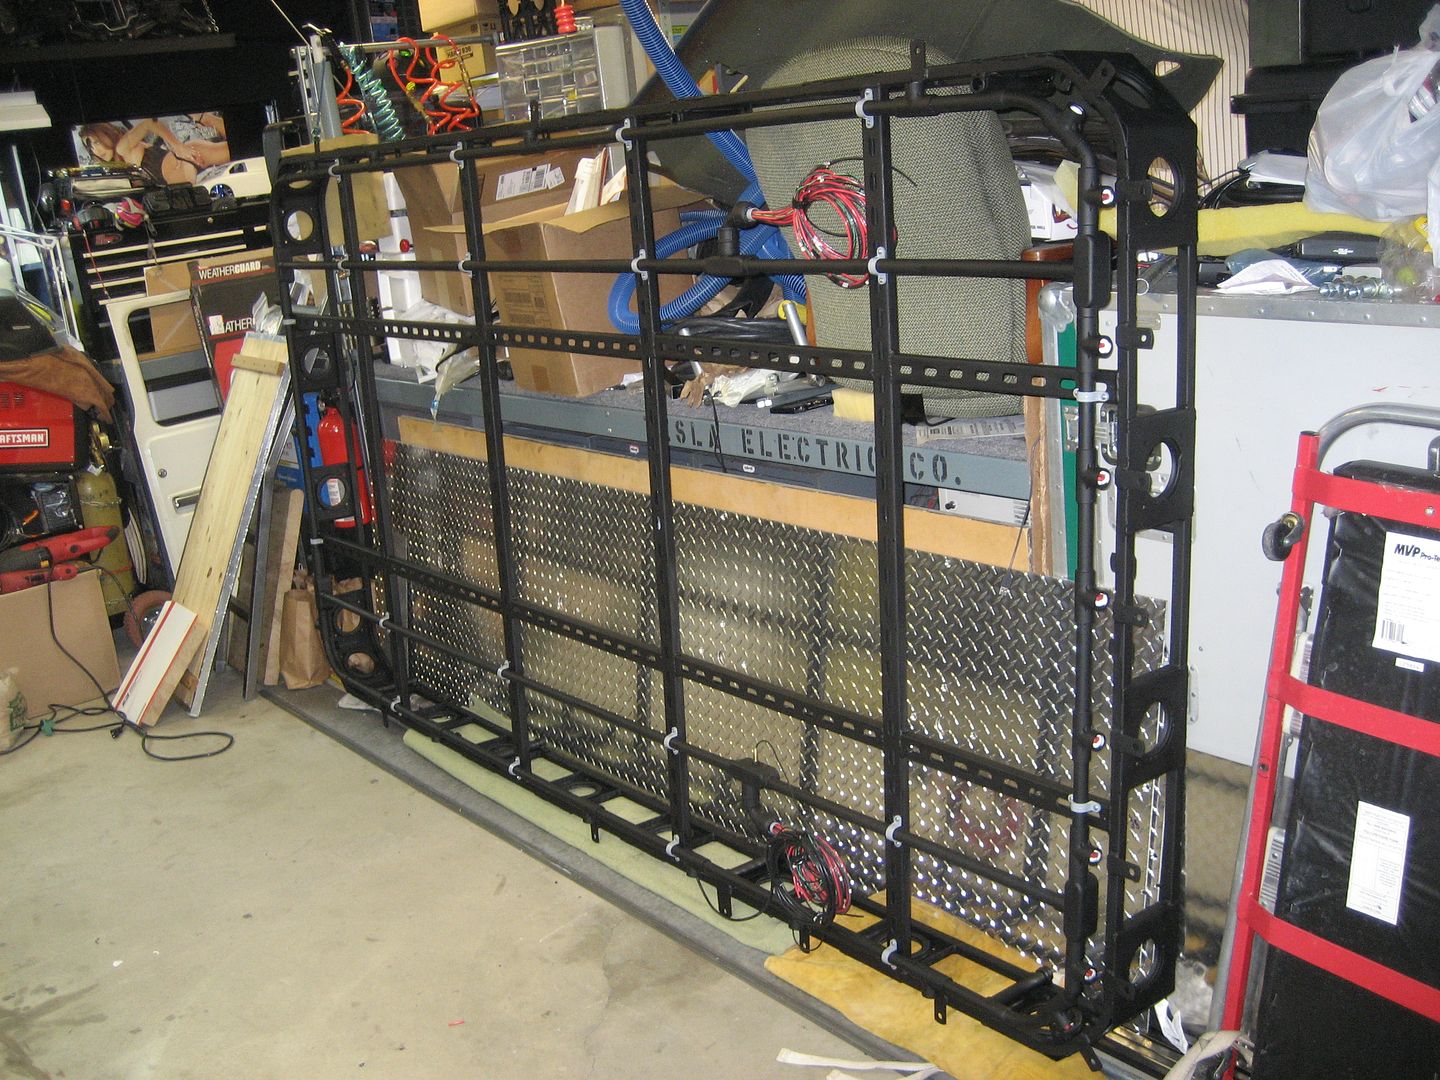
This week I will try to get the rails mounted on the roof and the connectors soldered onto the lamps. I also need to place another hardware order. I want nylocks on all the lamps.
It looked like it was about to start pouring as I was cleaning up. I'm glad I didn't try to rush to get this done today. The polyurethane sealant would not have cured in time.


I had to get down inside the tent pole support tubes:


Electrical conduit installed:


I guess it will have to wait a while:

This week I will try to get the rails mounted on the roof and the connectors soldered onto the lamps. I also need to place another hardware order. I want nylocks on all the lamps.
It looked like it was about to start pouring as I was cleaning up. I'm glad I didn't try to rush to get this done today. The polyurethane sealant would not have cured in time.
1997 SAFARI 2WD CARGO

"I do not think there is any thrill that can go through the human heart like that felt by the inventor as he sees some creation of the brain unfolding to success... Such emotions make a man forget food, sleep, friends, love, everything." Nikola Tesla

"I do not think there is any thrill that can go through the human heart like that felt by the inventor as he sees some creation of the brain unfolding to success... Such emotions make a man forget food, sleep, friends, love, everything." Nikola Tesla
-
LiftedAWDAstro
- I have my van tatooed on my cheeks
- Posts: 4379
- Joined: Sat Sep 09, 2006 3:35 pm
- Location: New Haven, NY
Re: Homebrew Con-Ferr Style Porthole Roof Rack Build
Looking great!
Current rides:
2013 Toyota Tundra DC 4x4
2008 Dodge Nitro 4x4
2005 Nissan Sentra 1.8S Special Edition
Mileage spreadsheet
Vans owned:
1986 Safari 2.5L 4 speed manual - scrapped
1995 Astro 2WD conversion 4.11 posi, shift kit, DHC rock rails - sold to Skippy
1998 Astro 4x4 D44, D60, NP231, full hydraulic system with 9k# Milemarker winch and snow plow - sold to Lockdoc
2003 Astro AWD all stock - traded for a 3/4 ton truck
2005 AWD, 4.10's - sold to skippy


