Re: L05 'VIN K' upgrade to L31 'VIN R' Vortec heads & cam
Posted: Mon Mar 28, 2011 10:58 pm
Ok, now for an update ....... So, we got the engine back together Saturday & I drove it home to collapse & succumb to the cold that I was battling. Since I was feeling sick, I was concentrating on getting the job done - not taking pictures  However, I know that Sanja took some pics.........
Spent a good portion of the morning cleaning the components & performing modifications as required to make it all fit together properly. Because of the different bolt patterns of the intake manifolds, the items (cruise control & MAP sensor) that were normally held on by the intake bolt studs had to be reconfigured to attach somehow.
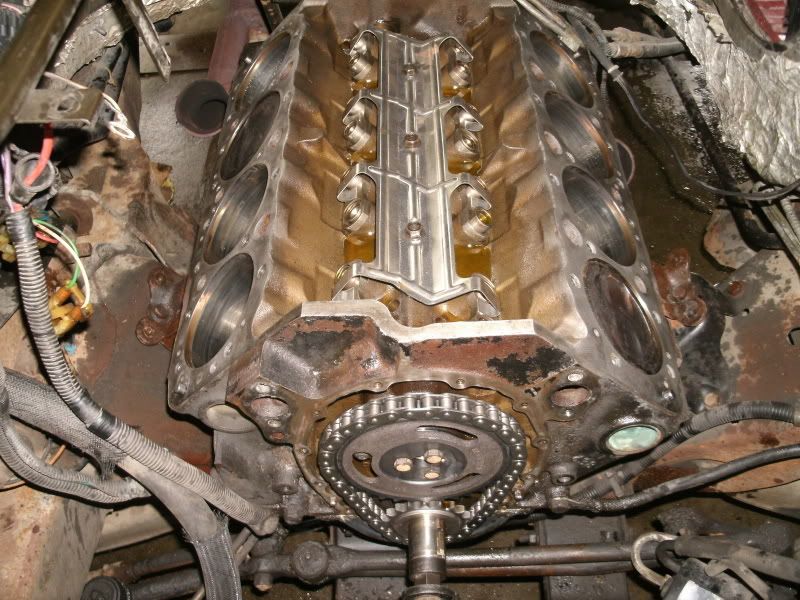
Started the reassembly by installing the roller cam, followed by the roller lifters, guides (o=o) & hold down retainer (spider).
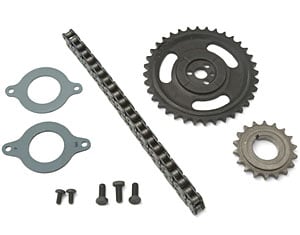
Once this was installed, I was going to install the camshaft thrust retainer & found that I had a 1st design engine but a 2nd design retainer. The difference between these 2 retainers can be seen in this picture.

The spacing of the 2 bolt holes is different between the 2 designs. The 1st design has wider spacing than the 2nd design. As luck would have it, I had the incorrect spacer at work & the correct spacer at home. Simple quick trip to retrieve the correct retainer & back to reassembling. Installed the beefy single roller chain & sprockets to the correct orientation & timing, which brings us to this point of the assembly.

During this time, Sanja was working on the header modification. The head/intake manifold/header was mocked up together on a bench to figure out the EGR tube orientation. A hole was drilled in the header collector & ground large enough for the EGR pipe to be welded to it. This pipe attached to the semi rigid EGR pipe that screws into the left front corner of the intake manifold & snakes along the intake manifold/head/valve cover joint to the back side of the left head. Once set up properly, the header/EGR pipe set up was taken over to the body shop where one of the body men welded it up for me.
Upon completion of this, the components were disassembled & given a wipe down prior to installation onto the engine.
New head gaskets & bolts were used for reassembly & torqued - torque angled on.
Spent a good portion of the morning cleaning the components & performing modifications as required to make it all fit together properly. Because of the different bolt patterns of the intake manifolds, the items (cruise control & MAP sensor) that were normally held on by the intake bolt studs had to be reconfigured to attach somehow.
Started the reassembly by installing the roller cam, followed by the roller lifters, guides (o=o) & hold down retainer (spider).
Once this was installed, I was going to install the camshaft thrust retainer & found that I had a 1st design engine but a 2nd design retainer. The difference between these 2 retainers can be seen in this picture.

The spacing of the 2 bolt holes is different between the 2 designs. The 1st design has wider spacing than the 2nd design. As luck would have it, I had the incorrect spacer at work & the correct spacer at home. Simple quick trip to retrieve the correct retainer & back to reassembling. Installed the beefy single roller chain & sprockets to the correct orientation & timing, which brings us to this point of the assembly.

During this time, Sanja was working on the header modification. The head/intake manifold/header was mocked up together on a bench to figure out the EGR tube orientation. A hole was drilled in the header collector & ground large enough for the EGR pipe to be welded to it. This pipe attached to the semi rigid EGR pipe that screws into the left front corner of the intake manifold & snakes along the intake manifold/head/valve cover joint to the back side of the left head. Once set up properly, the header/EGR pipe set up was taken over to the body shop where one of the body men welded it up for me.
Upon completion of this, the components were disassembled & given a wipe down prior to installation onto the engine.
New head gaskets & bolts were used for reassembly & torqued - torque angled on.


