Page 3 of 5
sheet metal and other questions
Posted: Thu Jun 28, 2007 5:32 pm
by talkdty
do you guy use gas with your welders or the "gasless" wire ?
any pros/cons on either of those ?
Darren, did you tack continuously around the fillers or did you leave about 1/2-3/4 inch between each spot and call it a day ?
what about white reverse lights for backing up at night, or did I miss something ?
Re: sheet metal and other questions
Posted: Thu Jun 28, 2007 9:23 pm
by Jboy2
talkdty wrote:what about white reverse lights for backing up at night, or did I miss something ?
Who needs Reverse lights anyways?

Posted: Thu Jun 28, 2007 10:55 pm
by SoCalli V8
I used a mig welder with shielding gas as I always do and I tacked every 2 inches at first, then when cool every inch, let cool and every 1/2 inch.
Posted: Fri Jun 29, 2007 6:52 pm
by talkdty
was the 3rd cycle of welding necessary for structual integrity or was some of that purely for the "feel-good" factor ?
I'm thinking of shaving the all-door handles and gas filler and
re-boxing the stock license plate location a little more custom
Posted: Fri Jun 29, 2007 7:58 pm
by SoCalli V8
You could tack every 2inches then every 1inch when it is cool, this will be good enough.
Taking your time is most important, if you warp any metal it will cost you extra time and headaches + bondo to fix it.
Posted: Sun Jul 01, 2007 8:22 pm
by Rebel
I used flux core wire but I'm sure gas is much better. Also did as Darren mentioned. Tacked every 2 to 3 in. and then between each tack. I ran into trouble with warping when I did my gas door so this time I made my first couple of tacks and from there held a damp rag inside cad. bucket to keep everything cool. Also used the damp rag to cool the fillers while tacking them in.
Posted: Sun Jul 01, 2007 8:25 pm
by Rebel
Sorry.
No reverse lights right now but will have hidden lights when completed.
next question
Posted: Mon Jul 02, 2007 6:00 am
by talkdty
thanks for the knowledge =D>
next item on the agenda, is anyone here burning chips for a "reasonable" price...?
Posted: Tue Jul 03, 2007 2:40 pm
by peter
[quote="SoCalli V8"]And my Final modification......But I Have Manny more...... UP MY Sleeve......
Uhhh, yeah. The problem, dearest butler, is that they're up your sleeve instead of on your truck....

Posted: Fri Jul 06, 2007 2:07 pm
by SoCalli V8
Perfection takes time...... Mr "Wam Bam Thankyou Mam"......!
Posted: Mon Jul 09, 2007 2:35 pm
by Rebel
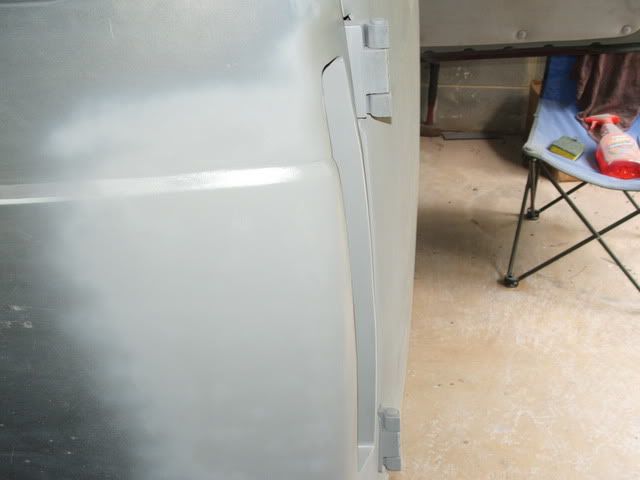
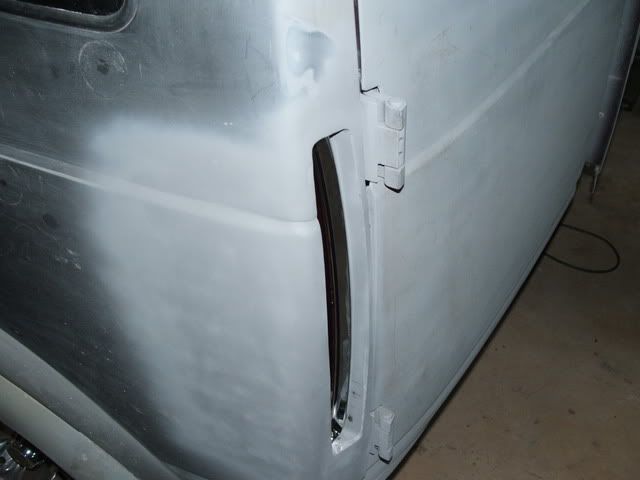
Ok,,got one tail almost completed Sat. and the other ready to tack up. Here's a shot after I completed most of the big sanding. What you see here is with a DA except the upper body line. Not real happy with it yet but went ahead a sprayed primer so I could see the high and low spots when I block sand and will be working on that upper body line again.

As you can see it's a close fit and skinned up the primer. Trick I think is putting the bottom in first and then pushing the top back in the bucket.

That's about it for now. Will probably finish this up this weekend.
Posted: Mon Jul 09, 2007 9:28 pm
by trybe13
peter wrote:SoCalli V8 wrote:And my Final modification......But I Have Manny more...... UP MY Sleeve......
Uhhh, yeah. The problem, dearest butler, is that they're up your sleeve instead of on your truck....


Posted: Mon Jul 09, 2007 10:10 pm
by SoCalli V8
Looking good Larry...... >not easy to install, are they....?
Posted: Tue Jul 10, 2007 5:46 am
by Rebel
Darren,,no,,they aren't that easy and to think I mentioned making the fillers. lol No way. Guess you could make something close but lots of filler would have to be used to get the correct lines again and I wasn't up to that at all.
Cadtails
Posted: Tue Nov 13, 2007 8:54 am
by Rebel


