By Special Request: Auxiliary Battery Installation w/pics

USE THIS FORUM FOR ANY ELECTRICAL QUESTIONS SUCH AS WIRE COLOR CODES, BLOWING FUSES OR WIRING SHORTS.
Post Reply
User avatar

Topic author
WVKayaker
I sleep in my van
Posts: 427
Joined: Tue Dec 25, 2007 9:30 pm
Location: Bowie, MD
Contact:

By Special Request: Auxiliary Battery Installation w/pics

Post by WVKayaker »

Before I went forward with this project, I searched the heck out of the old AS site and, other forums and got a zillion different opinions. I went with a simple, non electronic solution.
Here is a short write up and pics of the installation of my auxiliary AGM Deep Cycle Marine Battery and isolator switch. Why we didn't document this for the site while we were doing the install is beyond me...

About The Battery:
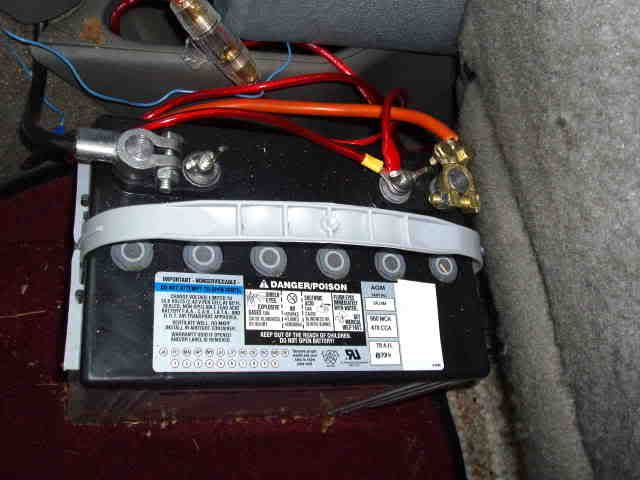
12V AGM, Group 24, 79Ah, 10.9"L x 6.8"W x 9.9"H, 53lbs
Around $200.00 US
Image

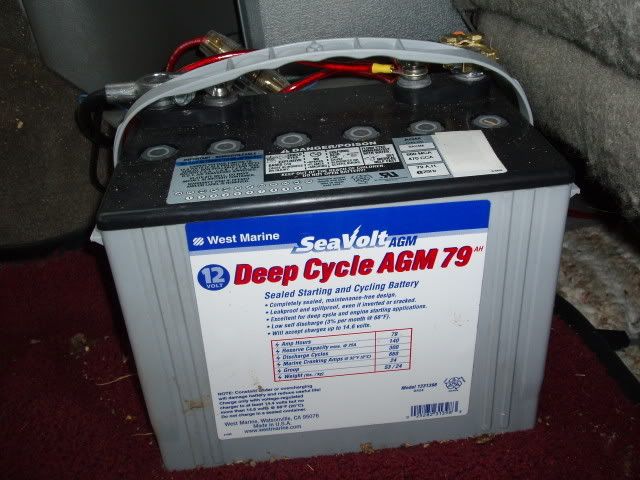
The AGM Deep Cycle battery from West Marine is an "Absorbed Glass Mat" battery.
AGM batteries have several advantages over both gelled and flooded, at about the same cost as gelled:
Since all the electrolyte (acid) is contained in the glass mats, they cannot spill, even if broken. This also means that since they are non-hazardous, the shipping costs are lower. In addition, since there is no liquid to freeze and expand, they are practically immune from freezing damage.

Nearly all AGM batteries are "recombinant" - what that means is that the Oxygen and Hydrogen recombine INSIDE the battery. These use gas phase transfer of oxygen to the negative plates to recombine them back into water while charging and prevent the loss of water through electrolysis. The recombining is typically 99+% efficient, so almost no water is lost.

The charging voltages are the same as for any standard battery - no need for any special adjustments or problems with incompatible chargers or charge controls. And, since the internal resistance is extremely low, there is almost no heating of the battery even under heavy charge and discharge currents. Most AGM batteries have no charge or discharge current limits.

AGM's have a very low self-discharge - from 1% to 3% per month is usual. This means that they can sit in storage for much longer periods without charging than standard batteries.

AGM's do not have any liquid to spill, and even under severe overcharge conditions hydrogen emission is far below the 4% max specified for aircraft and enclosed spaces. The plates in AGM's are tightly packed and rigidly mounted, and will withstand shock and vibration better than any standard battery.

More info here:
http://www.westmarine.com/webapp/wcs/st ... assNum=208
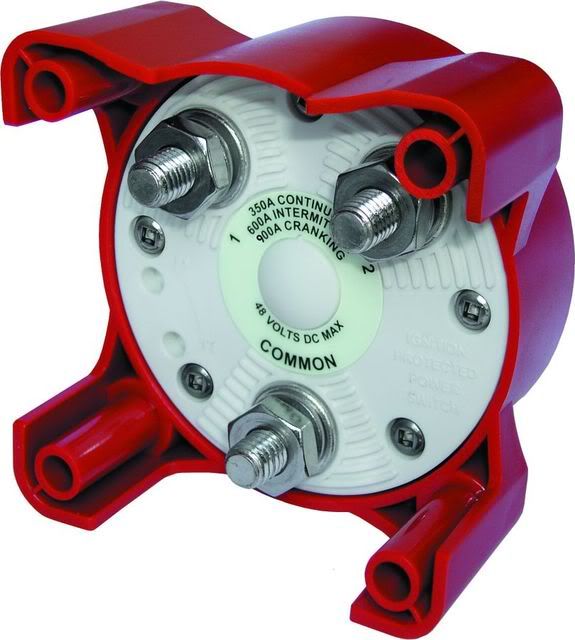
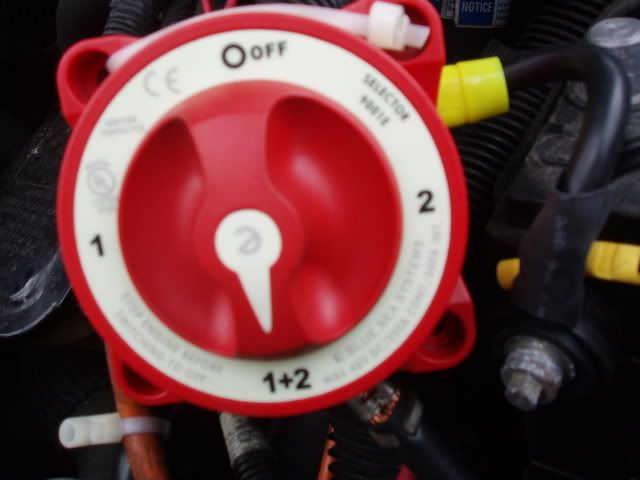
About The Switch:
Around $40.00 US
Make-before-break contact design allows switching between battery banks without power interruption.
Ignition protected - Safe for installation aboard gasoline powered boats
Case design allows surface or rear panel mounting
Meets American Boat and Yacht Council (ABYC) requirements for battery switches
"Blue Sea Systems' switch (9001e) is our choice for best value in a standard-duty battery selector switch. It's made in the U.S. with high grade materials, comes with a lifetime warranty, and is the least expensive switch in our test." - Powerboats Reports, June 2005

Image

Image

More Info here:
http://bluesea.com/category/1/products/9001e

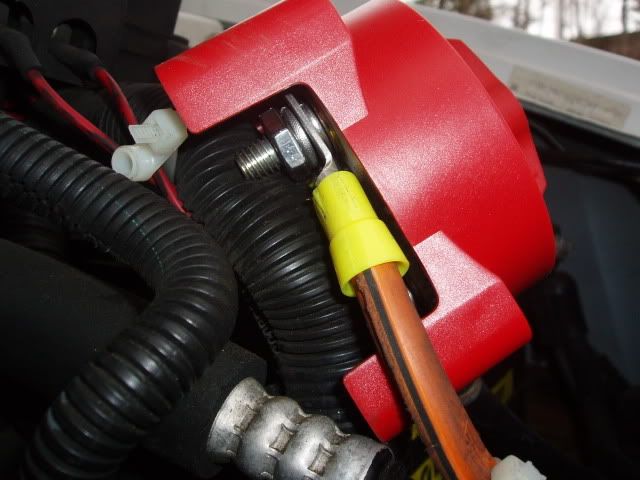
Connecting The Switch
1st thing we did was disconnect both the positive (+) and negative (-) post from the vans battery.
Using the existing positive cable, we removed the protective rubber boot and connected this to the "common" terminal on the switch. [see back of switch]
Next we took a standard 6 inch side post battery cable (purchased from Advanced Auto for about $6.00) and connected this to the "1" terminal on the switch using a ring/crimp connector on the end of the side post cable. Then we connected the side post cable to the (+) Positive terminal on the stock battery.
Next we used a ring/crimp connector and connected the auxiliary battery cable to the "2" connector of the switch. [see back of switch]
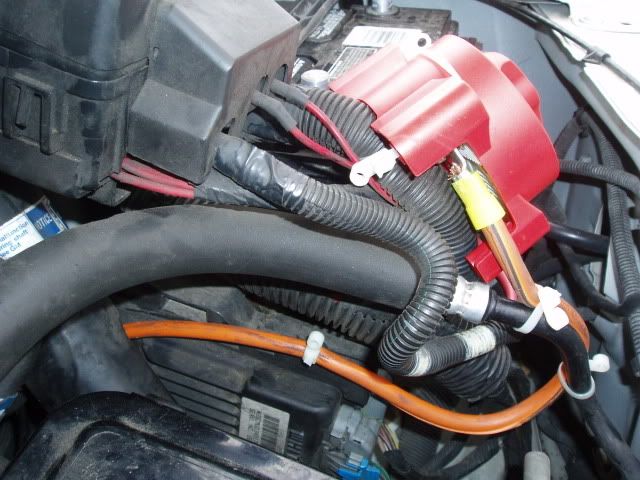
We used tie wraps and secured the switch to the existing conduit. It is very secure, and very easy to remove if you need to.

Image

Image

Image

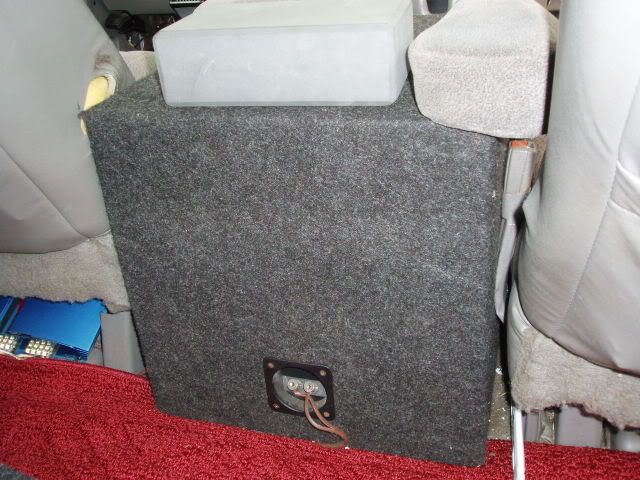
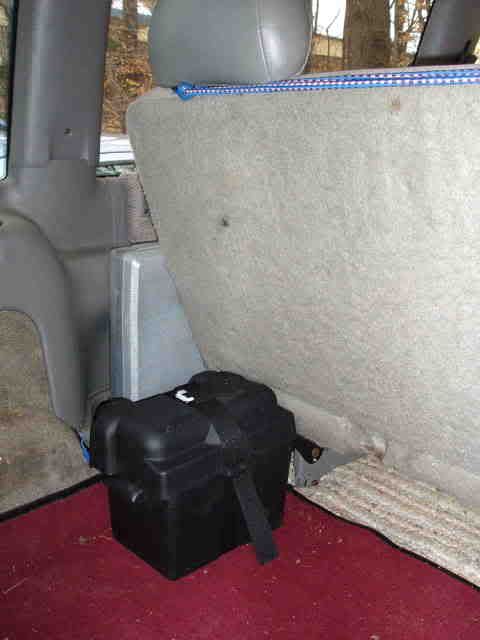
The battery currently is placed behind the 1st row rear seat.
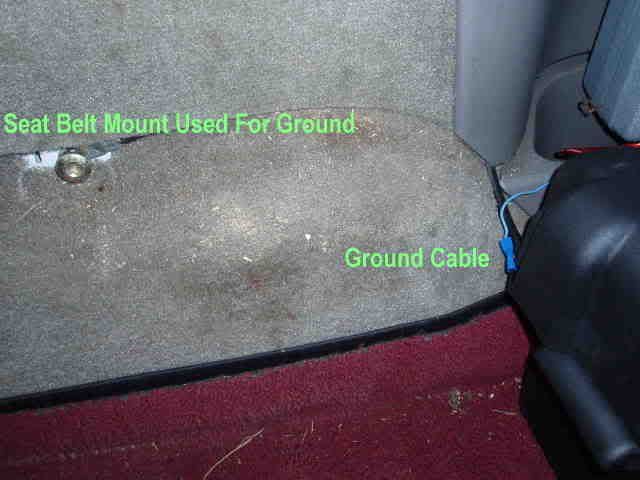
I bought a top post battery cable, 24", and used the seat belt mounting bolt for the ground. [see pic below]

Image

Image

Image

We ran a 6 gauge cable through the firewall close to the steering column.
The cable is from a 16 foot jumper cable that we split and removed the clamps.

Image

When we were finished, I flipped the switch to "2" and started the van using the Aux Battery. Not what I would usually do, just wanted to test it. Switched it back and fourth a few times and everything seems fine. Let it run a while, turned off the ignition, flipped the switch to both "1" and "2" and she fired right up.

I have only been on one road trip so far and the battery has powered my stereo for 8 hours at a time with no issues. To save power I disconnect two of the three amplifiers and run my external speakers.

Image

Image

I use the switch set on "1" + "2", [both batteries in parralel] full time. This way the battery is being charged as needed using the vehicles charging system.

I switch to battery "2" [Aux battery]for when I am running the stereo with the engine off.
The next morning, or after an evening of partying, I turn the switch to "1" [car battery] for starting the engine. After a minute or two, with the engine running, I turn the switch back to "1" + "2" and let the battery recharge.

Of all the deep cycle batteries out there it appears the AGM is best suited for my needs. It can be used inside the vhicle. It can be used as a starting battery and a deep cycle battery and the vehicles charging system will work OK. However, if you run this battery down stone dead, an external charger is recommended to save your alternator.

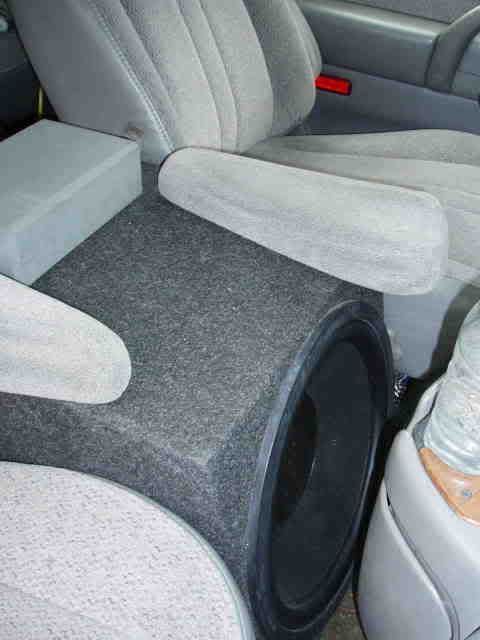
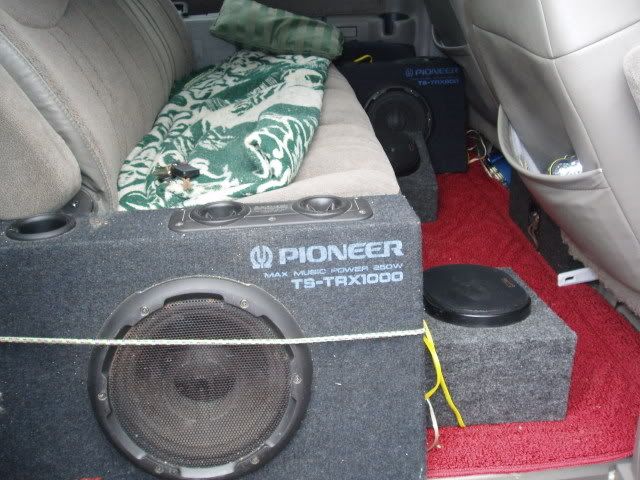
I hooked up my 3 amplifiers directly to the Aux Battery. The CD player is hooked up normally. As most of you guys may know, a battery is like a big ass capacitor, and hooking an amplifier directly to the Aux battery is an ideal set up. I have a 15" subwoofer between the seats, and this new setup really provides the power when it's needed.

Image

I don't yet have the battery fused. Haven't quite figured out what I should use. Any suggestions?

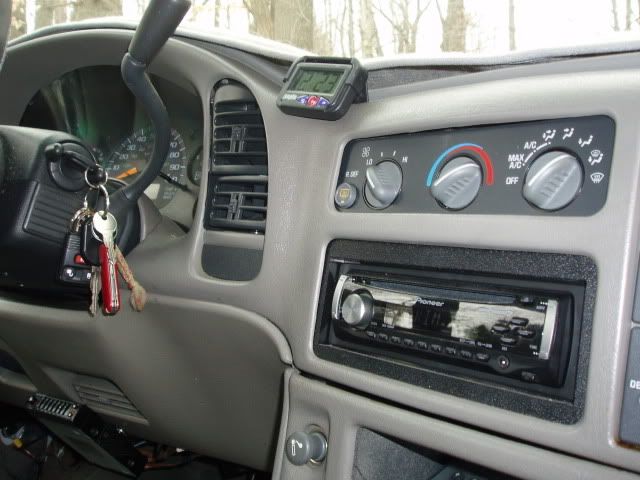
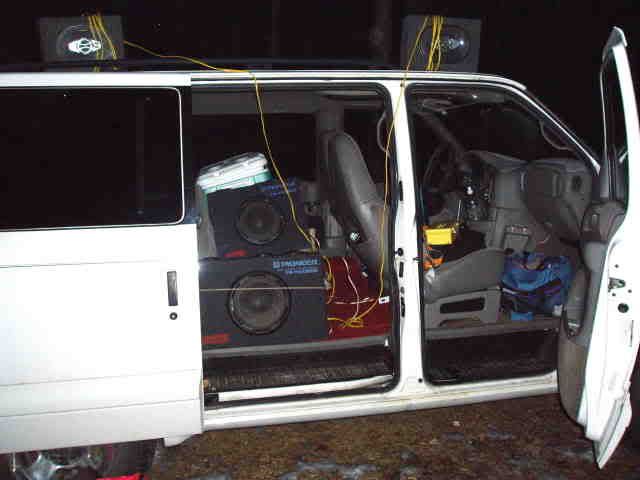
Here's a couple of pics of the stereo and sub.
The armrests had to come off to squeeze the sub enclosure between the seats.
It is actually more comfortable setting the armrests on the sub.

Image

Image

Image
Last edited by WVKayaker on Wed Feb 06, 2008 7:33 pm, edited 1 time in total.
1999 AWD Astro purchased January 2007
2" Overland Vans Lift Kit, Add-a-Leaf, Shackles, Torsion Bars Cranked 1"
AGM Deep Cycle Marine Battery w/Isolator
Helwig Rear Anti-Sway Bar
Auburn Gear Pro Series Limited-Slip Differential
BFG AT KO 235/75/15
Cragar Nomad I Wheels

Dearly Departed 1990 RWD Shorty owned since day one.
Sold Feb 2007 with 193k miles.

Image

astrozam
I have my van tatooed on my cheeks
Posts: 2770
Joined: Fri Sep 08, 2006 2:57 am
Has thanked: 1 time
Been thanked: 2 times

Re: By Special Request: Auxiliary Battery Installation w/pics

Post by astrozam »

Thanks for posting that thread Jim,nice pics and info,as to the type of fuse there are several types you could use but the main thing is to rate it in conjunction with your pos wire,in other words it needs to blow before that wire would burn,so you'd need to figure out your max load and the length of the wire then check out...
http://www.engineeringtoolbox.com/amps- ... d_730.html

heres an even better site...scroll down on the right hand menu you'll see "fuses" click on that and if you scroll down the pg you'll see that 6 ga wire should be fused no higher than 80amps course that depends on length of run,but its a good start.
http://www.bcae1.com/
User avatar

SafariRob
ASV Supporter
ASV Supporter
Posts: 556
Joined: Wed Sep 20, 2006 4:57 pm
Location: Bryan, Ohio, USA

Re: By Special Request: Auxiliary Battery Installation w/pics

Post by SafariRob »

Great post, love the photos.
I do believe I can see another project for my 89...
Rob Shaver
1989 Astro 305 with an MSD 6A ignition and a dash-mounted MSD timing control, a 4160 Holley 465 cfm four barrel carb, and an HEI distributor.
Moog 625 front springs and Energy Suspension poly bushings. Rear OEM sway bar. Edelbrock shocks.

Astrophysics
I sleep in my van
Posts: 974
Joined: Sat Jan 12, 2008 9:23 pm
Been thanked: 9 times

Re: By Special Request: Auxiliary Battery Installation w/pics

Post by Astrophysics »

Good job on the battery. Yes, you should get a nice fuse block and fuse from West Marine also.

I have installed the same AGM group 24 battery like yours as an extra battery in our Chalet pop up camper trailer. I also installed a Xantrex 1500 Watt inverter off of it. I fused the battery (+) output and ran thru a HD switch like you did.

One trick that you might consider on your van so that you can independently charge your aux battery while you drive is the following:

Instead of using a dual output alternator (like some boats) and instead of installing the High current diode isolator up by your alternator ....here is the technique.

buy a 200 Watt inverter that plugs into your cigaretter light.
then buy (West Marine is good) a 6 Amp fully automatic 3 stage battery charger (about $75)
then you can charge your aux battery independent of your under the hood starter battery.

check the power using Ohms law.
6 Amp x 14 volts = 84 Watts
so the 200 Watt inverter has ample spare capcity.

some folks now don't recommend the diode isolators because the 0.7 volt diode drop also drops the charging voltage down from 14.3 VDC to about 13.6 which means the deep cycle battery would not ever get fully charged. The West Marine catalog has a tech how to section on aux battery hook ups.
It also mentions the new device called the ACR, automatic charging relay, ($100 or so) that lets the single alernator charge the first battery to 14.3 VDC and then kicks the relay to charge the next battery.
User avatar

Topic author
WVKayaker
I sleep in my van
Posts: 427
Joined: Tue Dec 25, 2007 9:30 pm
Location: Bowie, MD
Contact:

Re: By Special Request: Auxiliary Battery Installation w/pics

Post by WVKayaker »

Astrozam and Physics,
Thanks for the tips!
1999 AWD Astro purchased January 2007
2" Overland Vans Lift Kit, Add-a-Leaf, Shackles, Torsion Bars Cranked 1"
AGM Deep Cycle Marine Battery w/Isolator
Helwig Rear Anti-Sway Bar
Auburn Gear Pro Series Limited-Slip Differential
BFG AT KO 235/75/15
Cragar Nomad I Wheels

Dearly Departed 1990 RWD Shorty owned since day one.
Sold Feb 2007 with 193k miles.

Image
User avatar

Topic author
WVKayaker
I sleep in my van
Posts: 427
Joined: Tue Dec 25, 2007 9:30 pm
Location: Bowie, MD
Contact:

Re: By Special Request: Auxiliary Battery Installation w/pics

Post by WVKayaker »

I checked out some of the links and it recommends a 60 AMP fuse for 6 Gauge cable.
Is this a big enough fuse that it won't blow when starting the van?

Any opinions on this fuse holder?
http://www.hifisoundconnection.com/Shop ... /SFV/30046
1999 AWD Astro purchased January 2007
2" Overland Vans Lift Kit, Add-a-Leaf, Shackles, Torsion Bars Cranked 1"
AGM Deep Cycle Marine Battery w/Isolator
Helwig Rear Anti-Sway Bar
Auburn Gear Pro Series Limited-Slip Differential
BFG AT KO 235/75/15
Cragar Nomad I Wheels

Dearly Departed 1990 RWD Shorty owned since day one.
Sold Feb 2007 with 193k miles.

Image

astrozam
I have my van tatooed on my cheeks
Posts: 2770
Joined: Fri Sep 08, 2006 2:57 am
Has thanked: 1 time
Been thanked: 2 times

Re: By Special Request: Auxiliary Battery Installation w/pics

Post by astrozam »

That style can work,although that particular fuse holder is for either 4 or 8 gauge wire.

The batt your trying to protect is your aux,so it shouldn't be any problem when you start your van,is your concern that you have the stereo cranked and whatever else running off the Aux batt when you start?
User avatar

Topic author
WVKayaker
I sleep in my van
Posts: 427
Joined: Tue Dec 25, 2007 9:30 pm
Location: Bowie, MD
Contact:

Re: By Special Request: Auxiliary Battery Installation w/pics

Post by WVKayaker »

Since I run the batteries in parallel full time, [with the switch set to 1+2] I want to make sure that the 60 amp fuse won't blow when I start the van.

And if the fuse holder is for 4 or 8 gauge seems like 6 gauge should fit ok.

Thanks!
1999 AWD Astro purchased January 2007
2" Overland Vans Lift Kit, Add-a-Leaf, Shackles, Torsion Bars Cranked 1"
AGM Deep Cycle Marine Battery w/Isolator
Helwig Rear Anti-Sway Bar
Auburn Gear Pro Series Limited-Slip Differential
BFG AT KO 235/75/15
Cragar Nomad I Wheels

Dearly Departed 1990 RWD Shorty owned since day one.
Sold Feb 2007 with 193k miles.

Image

astrozam
I have my van tatooed on my cheeks
Posts: 2770
Joined: Fri Sep 08, 2006 2:57 am
Has thanked: 1 time
Been thanked: 2 times

Re: By Special Request: Auxiliary Battery Installation w/pics

Post by astrozam »

WVKayaker wrote:Since I run the batteries in parallel full time, [with the switch set to 1+2] I want to make sure that the 60 amp fuse won't blow when I start the van.

And if the fuse holder is for 4 or 8 gauge seems like 6 gauge should fit ok.

Thanks!
Only way to find out is to try it,if she blows then you may have to switch your selector to crank with only the veh batt then switch to both for charging,but I doubt your going to have problems.
Post Reply