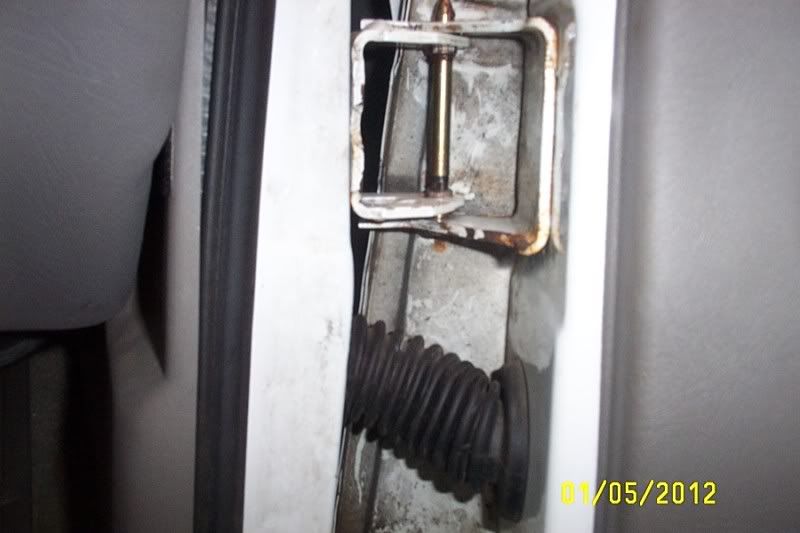
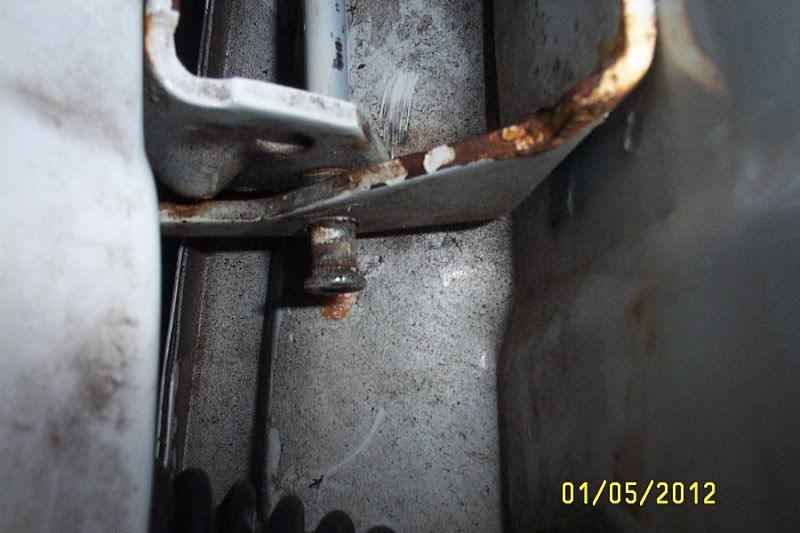
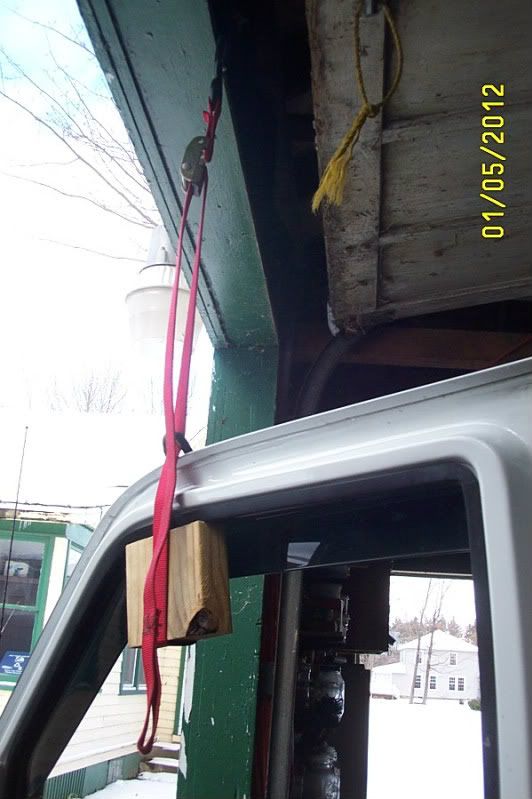
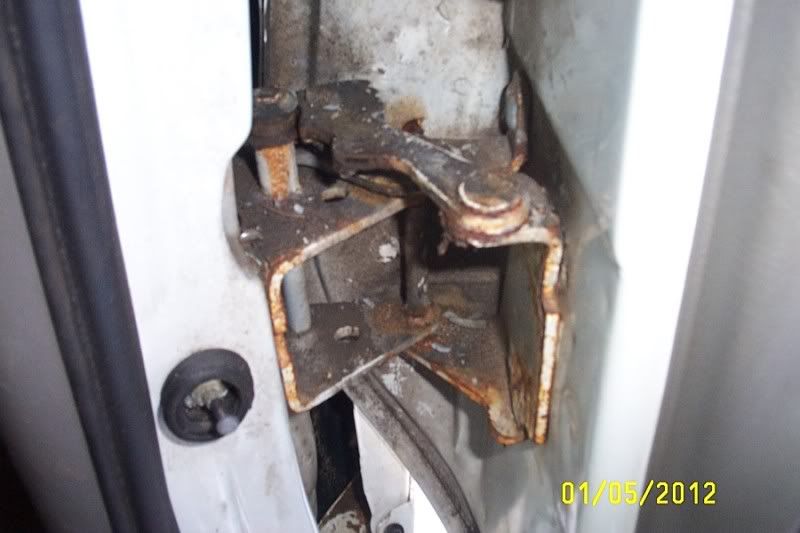
This was done on my 2005. I would imagine most all other years are basically the same. The first step was to figure a way to support the door so I could remove both pins and separate the 2 halves of the hinges to replace the bushings. Since I have ventvisors, I needed to space the strap away from them. These pics are all of the passenger side. Driver side is the same.
Now remove the spring with a pry bar. Be careful as the spring has a ton of pressure behind it.
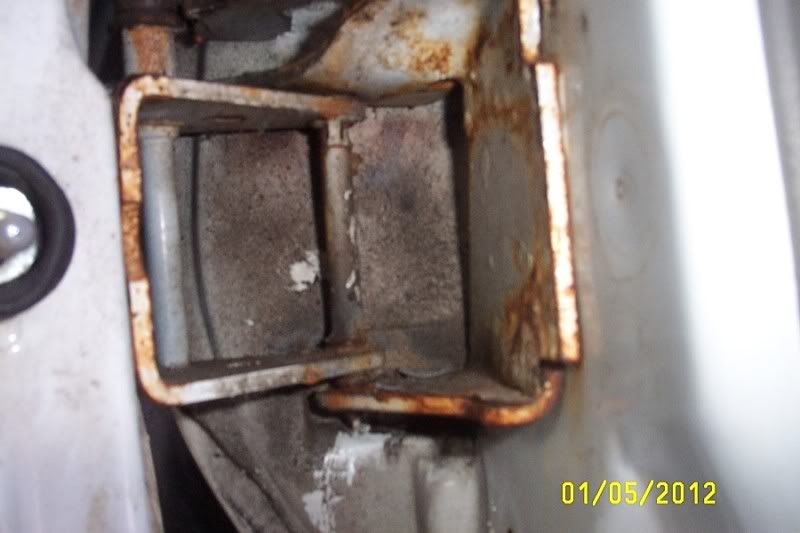
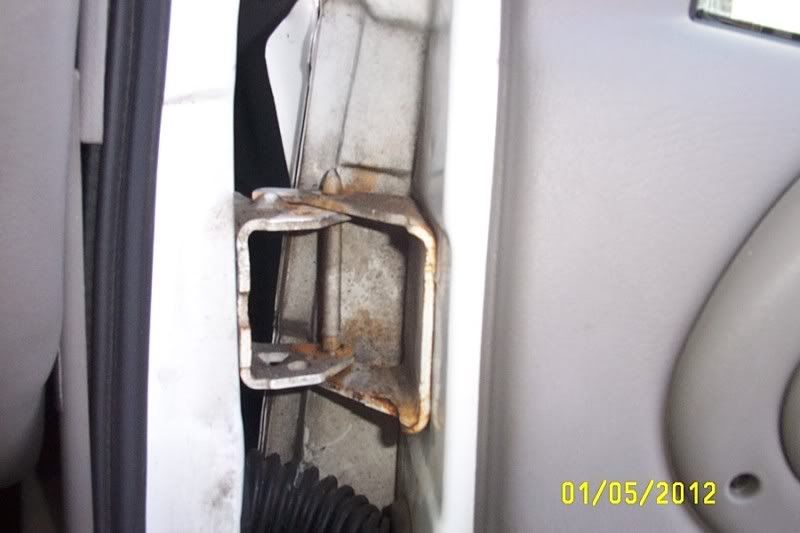
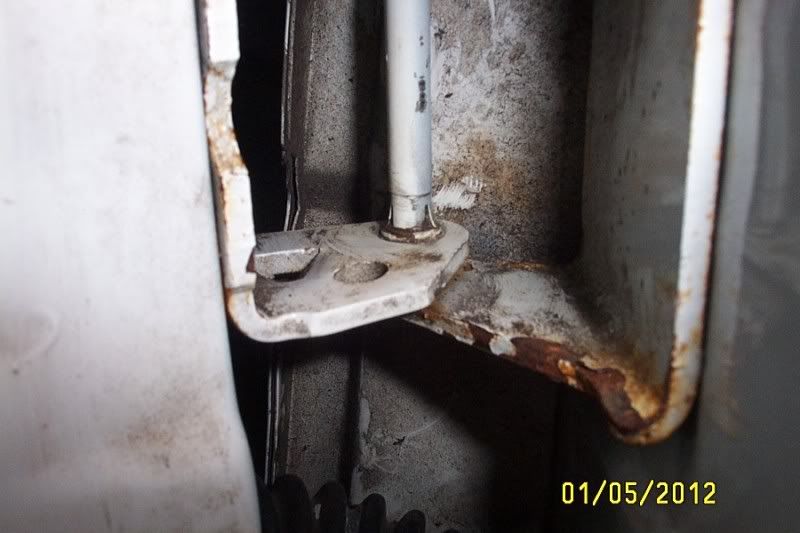
The bottom hinge pin goes in from the top and the top hinge pin goes in from the bottom. They are held in with little clips built onto the pins.
Close up of the clips:
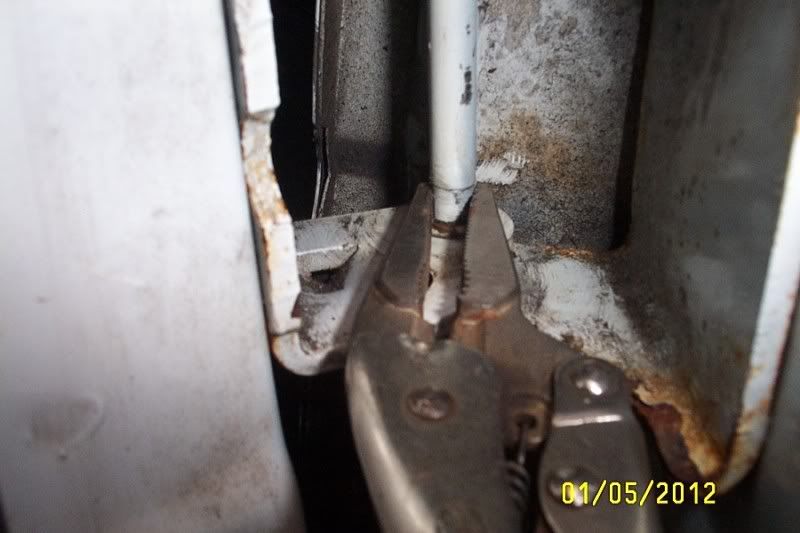
To remove the pins, I used a small pair of needle-nose vise grips to squeeze the clips in. Just give enough pressure to lock them without gripping the pin too tight. You want the pin to slide in the vise grips.
Then hit the pin down or up to get past the clip.
How to change your front door pins and bushings.
-
Topic author - I have my van tatooed on my cheeks
- Posts: 4379
- Joined: Sat Sep 09, 2006 3:35 pm
- Location: New Haven, NY
How to change your front door pins and bushings.
Current rides:
2013 Toyota Tundra DC 4x4
2008 Dodge Nitro 4x4
2005 Nissan Sentra 1.8S Special Edition
Mileage spreadsheet
Vans owned:
1986 Safari 2.5L 4 speed manual - scrapped
1995 Astro 2WD conversion 4.11 posi, shift kit, DHC rock rails - sold to Skippy
1998 Astro 4x4 D44, D60, NP231, full hydraulic system with 9k# Milemarker winch and snow plow - sold to Lockdoc
2003 Astro AWD all stock - traded for a 3/4 ton truck
2005 AWD, 4.10's - sold to skippy
-
Topic author - I have my van tatooed on my cheeks
- Posts: 4379
- Joined: Sat Sep 09, 2006 3:35 pm
- Location: New Haven, NY
Re: How to change your front door pins and bushings.
Now you can use a punch, vise grips or what ever to get the pins out. Once they are loose, wiggling the door up and down will get them out.
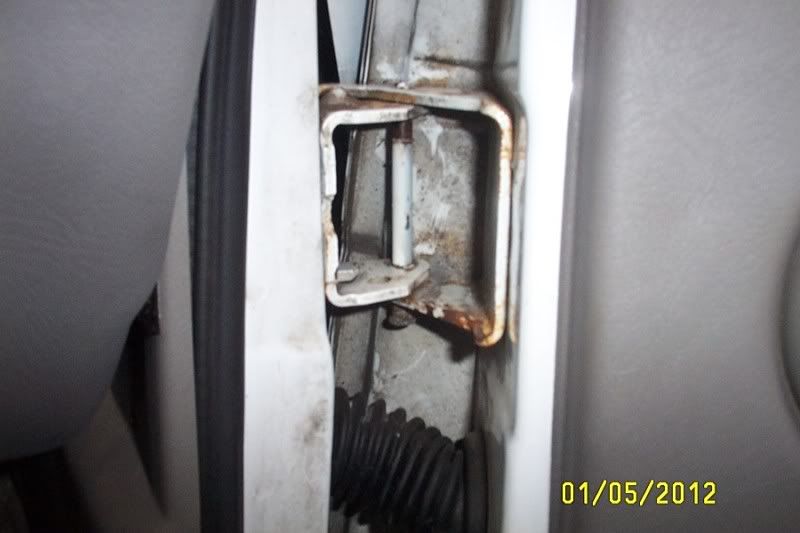
I used a brass drift to knock the bushings out. The top one of each hinge goes out by hitting them up and the bottom one of each hinge goes out by hitting down. The new bushings go in the reverse. Use a flat hammer to seat the bushing. To get the bottom bushings in, use one of the old pins after removing the clip and placing a 5/16" flat washer on the head. This keeps the new bushing from getting messed up by the knurls on the old pin.
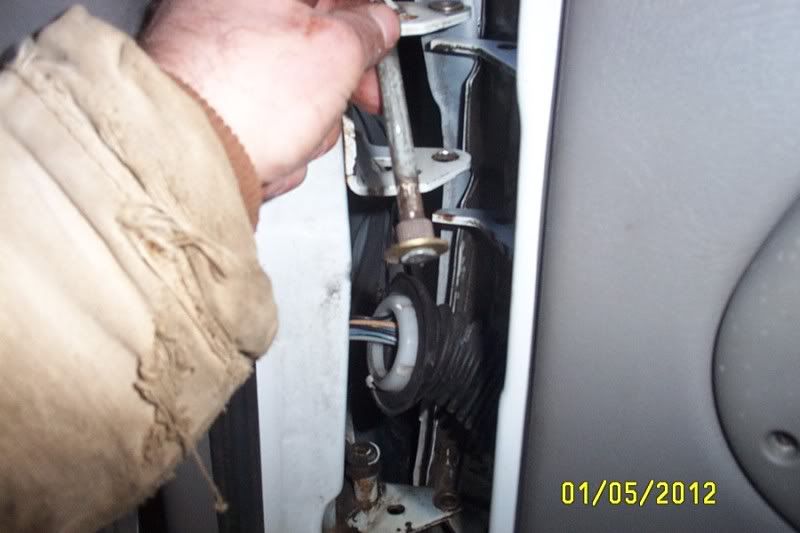
Once all bushings are seated, clean the hinges as needed and grease the bushings. You then can line the door up for inserting the top pin. Remember it goes in from the bottom. Once it's started in both bushings, insert the bottom pin so it just starts in both bushings. This one goes in from the top. At this point I greased the pins where they will be inserted into the bushing the rest of the way. I wanted to make sure there was grease inside when done. Now drive the bushings home with a brass drift to seat the knurls and clips.
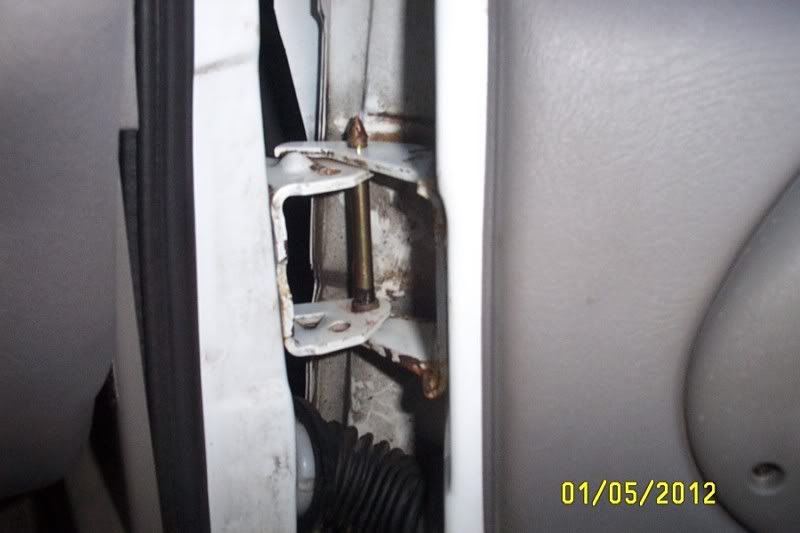
Now you can grease up the bracket that rides on the roller and install the spring. I compressed the spring in a vise and inserted 2 pieces of tie wire to keep it compressed. This is literally the hardest part of the job! Once you get the spring to stay compressed, insert it into place by closing the door 1/2 way then opening it all the way. You'll see where there is more room once you do this. Once the door is opened all the way, you can cut the tie wire and remove it. If you had a spring compressor, it would make life much easier.
Now open and close the door several times and admire your work!
I used a brass drift to knock the bushings out. The top one of each hinge goes out by hitting them up and the bottom one of each hinge goes out by hitting down. The new bushings go in the reverse. Use a flat hammer to seat the bushing. To get the bottom bushings in, use one of the old pins after removing the clip and placing a 5/16" flat washer on the head. This keeps the new bushing from getting messed up by the knurls on the old pin.
Once all bushings are seated, clean the hinges as needed and grease the bushings. You then can line the door up for inserting the top pin. Remember it goes in from the bottom. Once it's started in both bushings, insert the bottom pin so it just starts in both bushings. This one goes in from the top. At this point I greased the pins where they will be inserted into the bushing the rest of the way. I wanted to make sure there was grease inside when done. Now drive the bushings home with a brass drift to seat the knurls and clips.
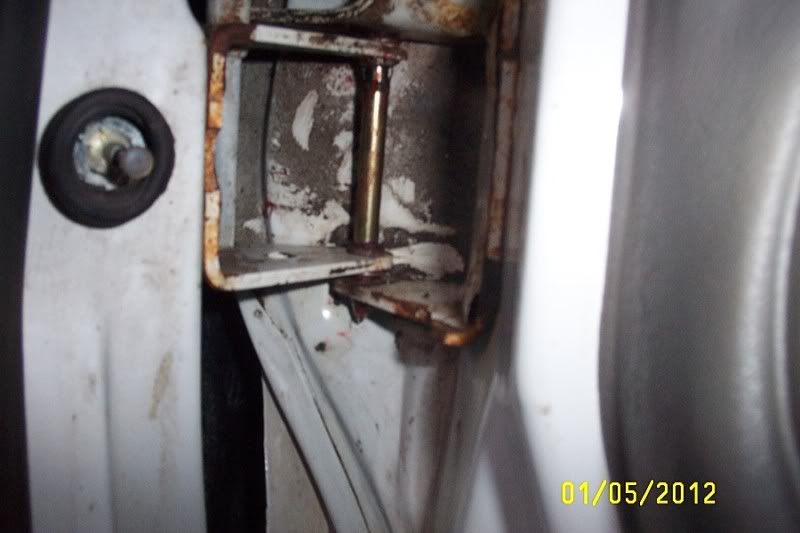
Now you can grease up the bracket that rides on the roller and install the spring. I compressed the spring in a vise and inserted 2 pieces of tie wire to keep it compressed. This is literally the hardest part of the job! Once you get the spring to stay compressed, insert it into place by closing the door 1/2 way then opening it all the way. You'll see where there is more room once you do this. Once the door is opened all the way, you can cut the tie wire and remove it. If you had a spring compressor, it would make life much easier.
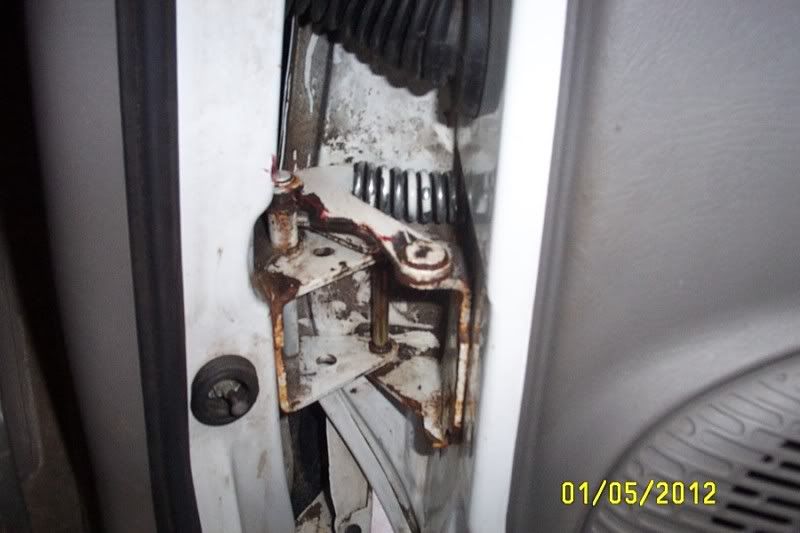
Now open and close the door several times and admire your work!
Current rides:
2013 Toyota Tundra DC 4x4
2008 Dodge Nitro 4x4
2005 Nissan Sentra 1.8S Special Edition
Mileage spreadsheet
Vans owned:
1986 Safari 2.5L 4 speed manual - scrapped
1995 Astro 2WD conversion 4.11 posi, shift kit, DHC rock rails - sold to Skippy
1998 Astro 4x4 D44, D60, NP231, full hydraulic system with 9k# Milemarker winch and snow plow - sold to Lockdoc
2003 Astro AWD all stock - traded for a 3/4 ton truck
2005 AWD, 4.10's - sold to skippy
2013 Toyota Tundra DC 4x4
2008 Dodge Nitro 4x4
2005 Nissan Sentra 1.8S Special Edition
Mileage spreadsheet
Vans owned:
1986 Safari 2.5L 4 speed manual - scrapped
1995 Astro 2WD conversion 4.11 posi, shift kit, DHC rock rails - sold to Skippy
1998 Astro 4x4 D44, D60, NP231, full hydraulic system with 9k# Milemarker winch and snow plow - sold to Lockdoc
2003 Astro AWD all stock - traded for a 3/4 ton truck
2005 AWD, 4.10's - sold to skippy
-
- I plan to be buried in my van
- Posts: 1230
- Joined: Sun Sep 10, 2006 4:50 am
- Location: Billings, MT, 'MERICA!
Re: How to change your front door pins and bushings.
What? No barley pop?
Mike, Billings, MT, 'MERICA!
92 Safari SLE w/Z Motor (sold to a good home)
98 AWD Stro LS
93 Suburban Silverado 4x4
Look for the MISSING Alien in the Right Seat. AL, PHONE HOME!!!
92 Safari SLE w/Z Motor (sold to a good home)
98 AWD Stro LS
93 Suburban Silverado 4x4
Look for the MISSING Alien in the Right Seat. AL, PHONE HOME!!!
-
Topic author - I have my van tatooed on my cheeks
- Posts: 4379
- Joined: Sat Sep 09, 2006 3:35 pm
- Location: New Haven, NY
Re: How to change your front door pins and bushings.
I don't imbibe during work normally. I wait until it's done.
Current rides:
2013 Toyota Tundra DC 4x4
2008 Dodge Nitro 4x4
2005 Nissan Sentra 1.8S Special Edition
Mileage spreadsheet
Vans owned:
1986 Safari 2.5L 4 speed manual - scrapped
1995 Astro 2WD conversion 4.11 posi, shift kit, DHC rock rails - sold to Skippy
1998 Astro 4x4 D44, D60, NP231, full hydraulic system with 9k# Milemarker winch and snow plow - sold to Lockdoc
2003 Astro AWD all stock - traded for a 3/4 ton truck
2005 AWD, 4.10's - sold to skippy
2013 Toyota Tundra DC 4x4
2008 Dodge Nitro 4x4
2005 Nissan Sentra 1.8S Special Edition
Mileage spreadsheet
Vans owned:
1986 Safari 2.5L 4 speed manual - scrapped
1995 Astro 2WD conversion 4.11 posi, shift kit, DHC rock rails - sold to Skippy
1998 Astro 4x4 D44, D60, NP231, full hydraulic system with 9k# Milemarker winch and snow plow - sold to Lockdoc
2003 Astro AWD all stock - traded for a 3/4 ton truck
2005 AWD, 4.10's - sold to skippy
Re: How to change your front door pins and bushings.
Thanks for this write up.. Made it easy, did it today. It is a job that seems a lot worse than it really is.
Scott
Scott
Last edited by sfeaver on Mon Feb 04, 2013 2:46 pm, edited 1 time in total.
-
- I sleep in my van
- Posts: 754
- Joined: Thu Jan 24, 2008 11:50 pm
- Location: Near Los Angeles, CA
- Contact:
Re: How to change your front door pins and bushings.
I'll definitely be referring to this thread soon as well.
-
Topic author - I have my van tatooed on my cheeks
- Posts: 4379
- Joined: Sat Sep 09, 2006 3:35 pm
- Location: New Haven, NY
Re: How to change your front door pins and bushings.
Glad it helped out.
Current rides:
2013 Toyota Tundra DC 4x4
2008 Dodge Nitro 4x4
2005 Nissan Sentra 1.8S Special Edition
Mileage spreadsheet
Vans owned:
1986 Safari 2.5L 4 speed manual - scrapped
1995 Astro 2WD conversion 4.11 posi, shift kit, DHC rock rails - sold to Skippy
1998 Astro 4x4 D44, D60, NP231, full hydraulic system with 9k# Milemarker winch and snow plow - sold to Lockdoc
2003 Astro AWD all stock - traded for a 3/4 ton truck
2005 AWD, 4.10's - sold to skippy
2013 Toyota Tundra DC 4x4
2008 Dodge Nitro 4x4
2005 Nissan Sentra 1.8S Special Edition
Mileage spreadsheet
Vans owned:
1986 Safari 2.5L 4 speed manual - scrapped
1995 Astro 2WD conversion 4.11 posi, shift kit, DHC rock rails - sold to Skippy
1998 Astro 4x4 D44, D60, NP231, full hydraulic system with 9k# Milemarker winch and snow plow - sold to Lockdoc
2003 Astro AWD all stock - traded for a 3/4 ton truck
2005 AWD, 4.10's - sold to skippy
Re: How to change your front door pins and bushings.
I like the strap idea.I have to do the same thing on Rufus's driver door.Thing is the holes for the bushings are oblong-ed worn and I have to take the door completely off to weld up the holes and re-drill them to the size of the bushings.I do have the spring compressor.In fact it has the missing spring I got from a pick and pull in my tool box with the spring already compressed.I just got to figure a long day when I can take it apart.
I got a tip from a guy how to weld up those holes so they are exact.Get a pc of solid bass or copper the same size as the O.D. of the bushing and weld that into the hole.Scuff that up so it doesn't stick.Once the hole is closed up around that pc.grind the weld off,knock the pc out,leaving the proper size for the bushing.Then smooth grind the weld on the flat surfaces.Kind of a pain to do,but a fix.I'll try to remember the camera when I do the job.
1979 Malibu drag race only car
1999 Sonoma 4.3 5 speed-Rufus
1989 Astro-Ole Yellar cancelled-still selling off parts
1985 Astro-shop van R.I.P. my friend
1994 Astro LT RWD W4.3 rod knock RIP
1982 Winnebago single rear wheel-Chevy 350 Scraped 1/28/13-broken dreams......
Rochester,NY
1999 Sonoma 4.3 5 speed-Rufus
1989 Astro-Ole Yellar cancelled-still selling off parts
1985 Astro-shop van R.I.P. my friend
1994 Astro LT RWD W4.3 rod knock RIP
1982 Winnebago single rear wheel-Chevy 350 Scraped 1/28/13-broken dreams......
Rochester,NY