95 Astro Intake gasket replacement info and pics
-
Topic author - I have my van tatooed on my cheeks
- Posts: 2770
- Joined: Fri Sep 08, 2006 2:57 am
95 Astro Intake gasket replacement info and pics
We had this info in our old tech gallery, I've been meaning to switch it to our newer tech gallery but doing so would be a real PITA... So instead I am going to upload and go the P.B route ( it will actually be much easier in this case )
Its gonna take awhile because there are alot of pics and info to sort out, I will put the pics up and then the info for the particular order in which I worked on the van.
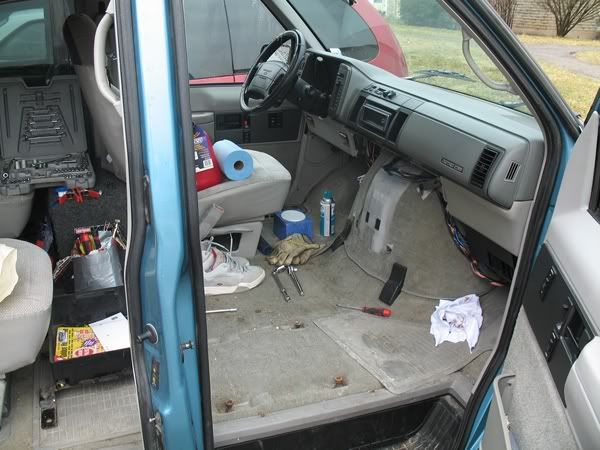
remove front passenger seat...
O.k, most of this project involves working from within the van,in order to help make this easier I would suggest removing the passenger seat.This will allow you a place to sit while your wrenching,putting down a drop sheet wouldn't be a bad idea either,too bad I didn't think of it till now,LOL
removing refrigerant line-from accumulator to compressor...
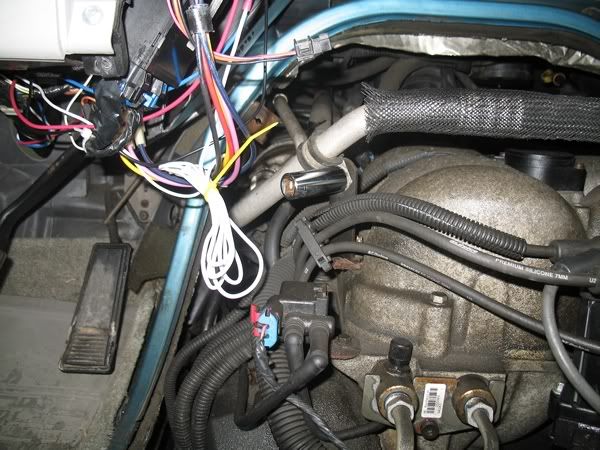
The reason I decided to get rid of my a/c compressor and accumulator was twofold,first the compressor was seized and the system had leaked down,second it would help clean up the engine bay a little and provide alot more room for me to work on things.
* NOTE, If you are not sure that your system is fully drained,then go get it evacuated by a certified shop.There! I said it,LOL
refrigerant line from accumulator to compressor removed...
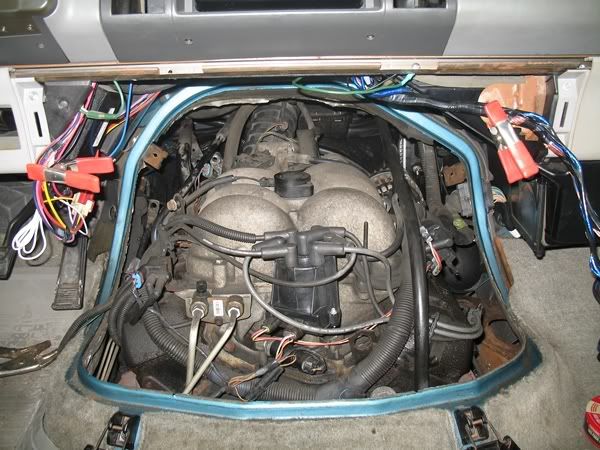
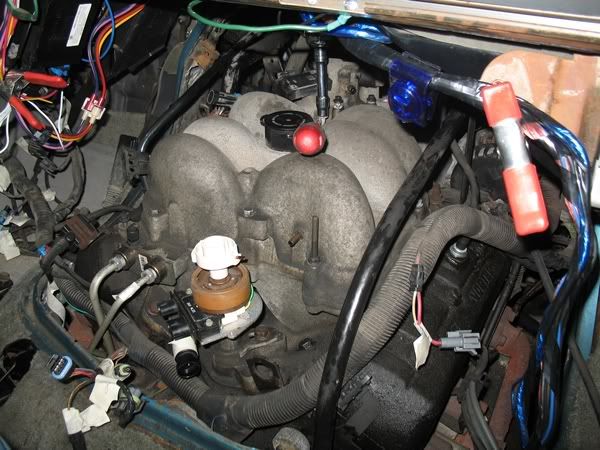
Once I got the line from the accumulator to the a/c compressor off it helped in opening up the area above the upper intake (plennum)
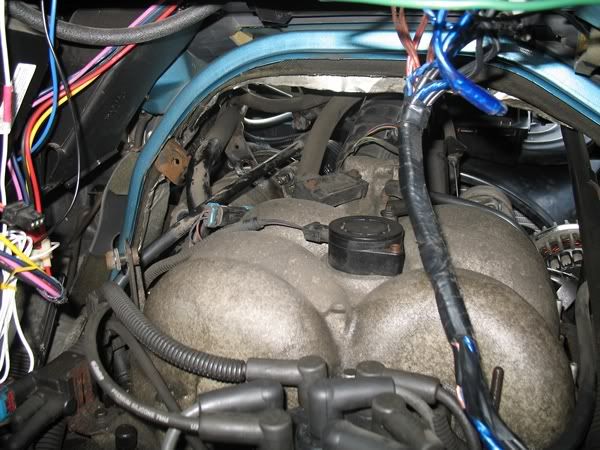
compressor removed...
And another view of the compressor removed,this time from inside the van.
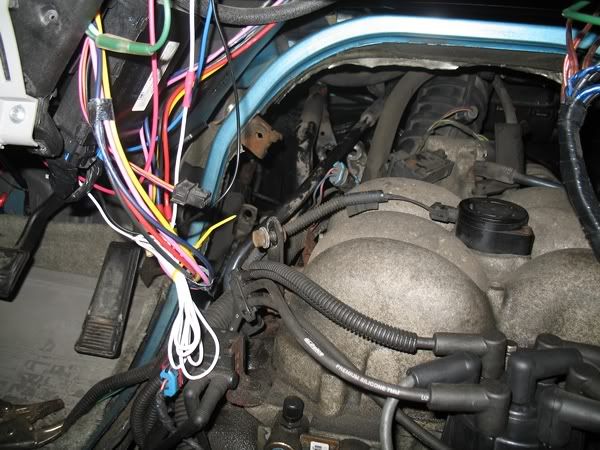
compressor removed front view...
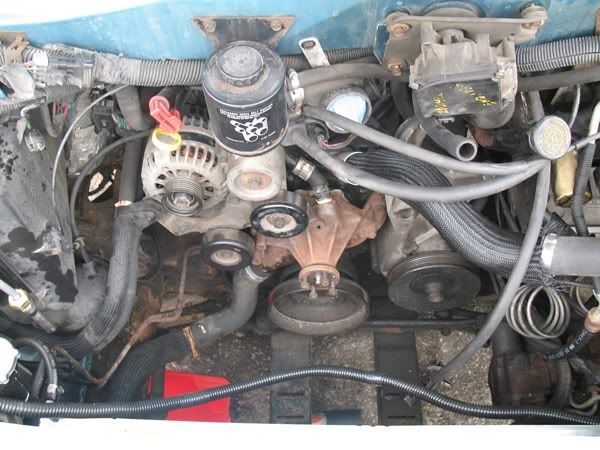
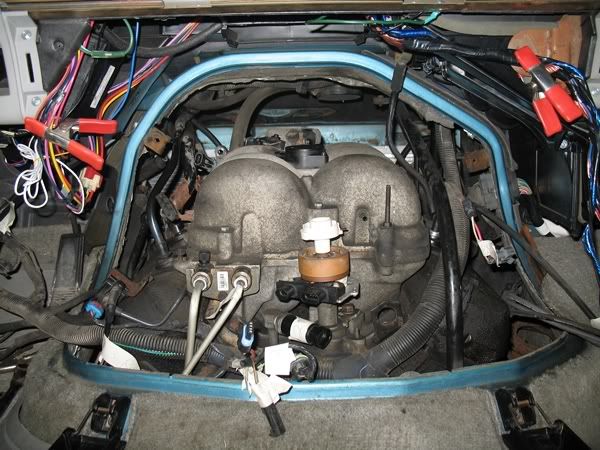
Here is what it looks like from the engine bay with the compressor removed.
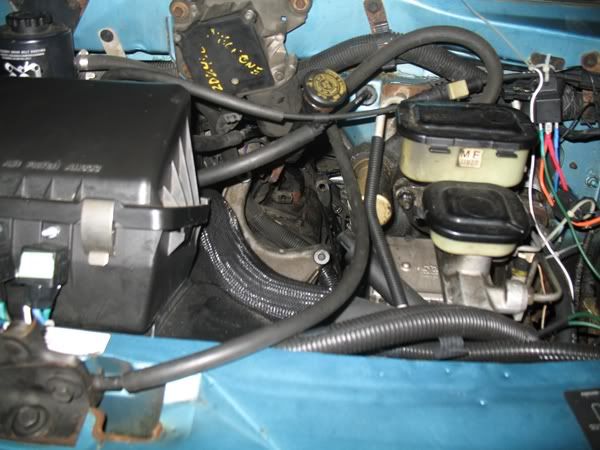
compressor removed from van...
Speaking of the little beast,here it sits,makes a great door-stop.
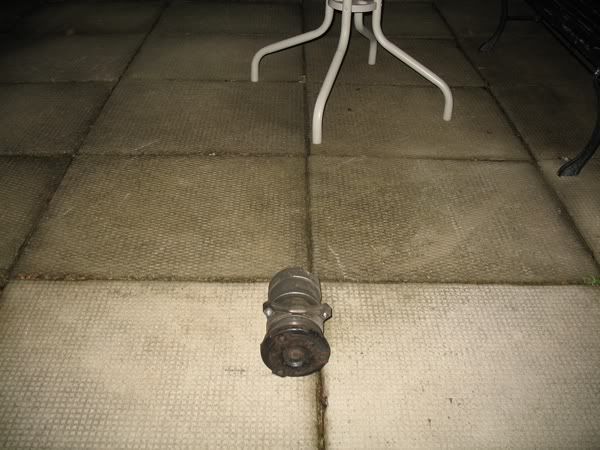
much more to come...
-
Topic author - I have my van tatooed on my cheeks
- Posts: 2770
- Joined: Fri Sep 08, 2006 2:57 am
Re: 95 Astro Intake gasket replacement info and pics
time to start to label everything...
Unless you have a photographic memory,make sure to properly label everything you unplug and remove,and if you have a digicam all the better.
front pic of eng bay-shrouds removed...
Here is a shot of the upper and lower shrouds removed,yes you will have to take them out,but the good part is,you don't necessarily have to re-install them,more on that later.
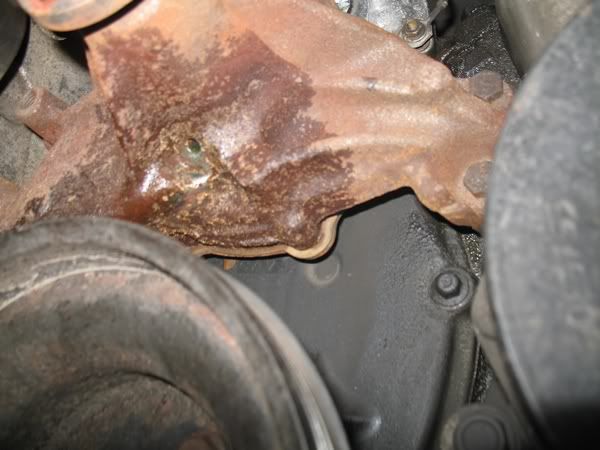
waterpump weep hole leak p10 rs
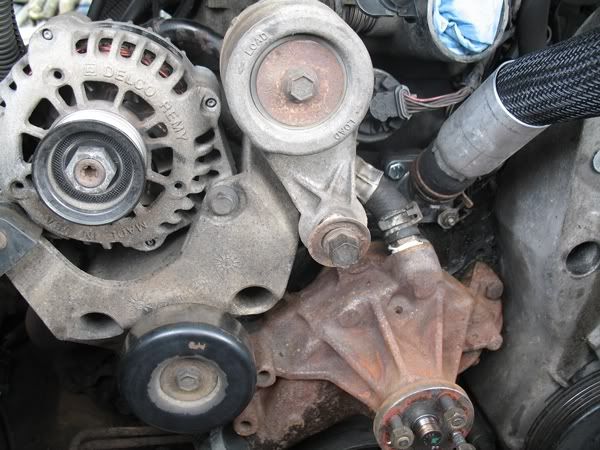
Ah,the classic coolant out the weep hole.Looks like I may as well replace the waterpump while I have everything else out of the way.
Straight on shot of wp and tstat before removal...
all electrical labelled and unplugged-main wire harness moved out of the way...
Once I had all the electrical and so forth labelled,I carefully moved it all out of the way,including the main wiring harness.
removing upper intake bolts...
Now on to the nitty gritty,it was time to take off the Upper Intake (plennum)
BTW,It would be a very good idea to place all components that you remove into ziplock bags,also note that some bolts and studs are slightly longer than the others,make sure you note which ones came out of which holes.
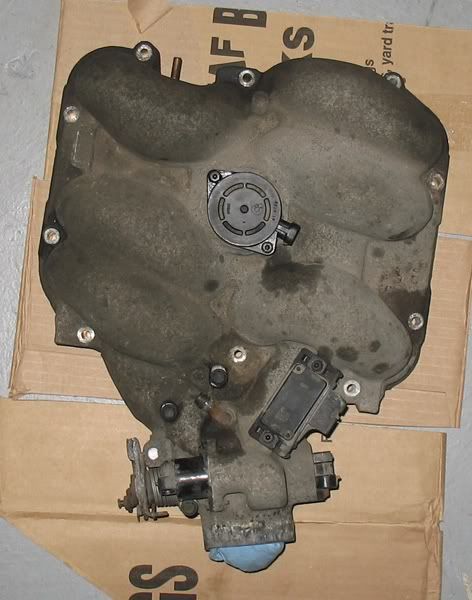
Once you have removed all the upper plennum bolts lift it off, and here is what the top looks like...
-
Topic author - I have my van tatooed on my cheeks
- Posts: 2770
- Joined: Fri Sep 08, 2006 2:57 am
Re: 95 Astro Intake gasket replacement info and pics
fuel injection area of upper intake showing spider & FPR...
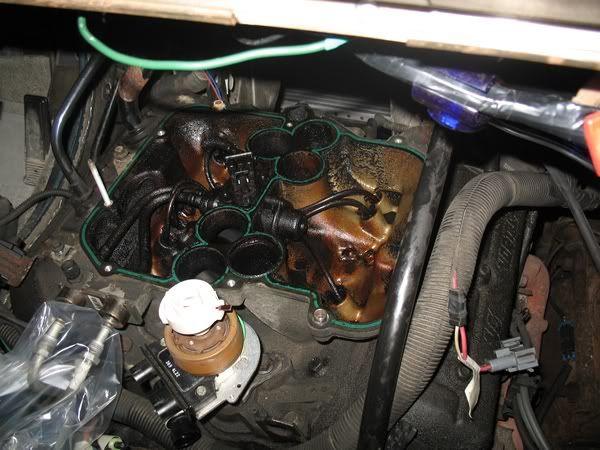
Here is the infamous SPIDER the heart of the CPI. you can also see I've detatched the fuel lines from the intake and bagged them to prevent any dirt from getting in.
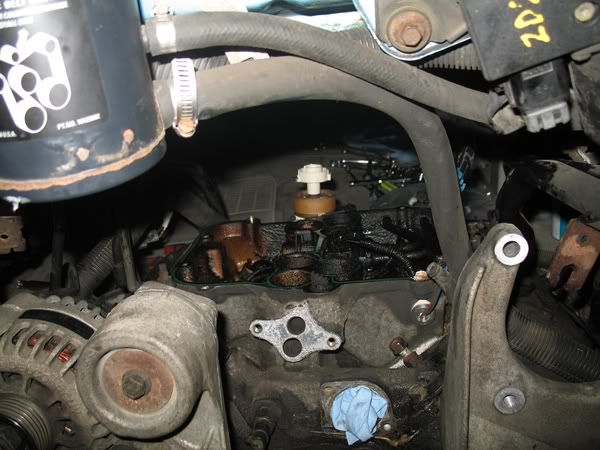
Here is the view from the front side looking in, it also shows the t-stat and egr removed as well as where the compressor used to sit...
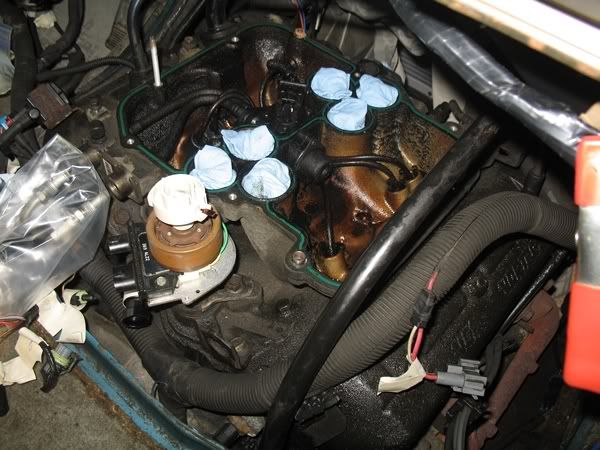
plugging ports with shoptowels...
Now,once you have opened er up you need to start taking precautions,such as stuffing some shoptowels into the port holes,you don't need dirt n crap or other things falling down into the engine, better safe then sorry.
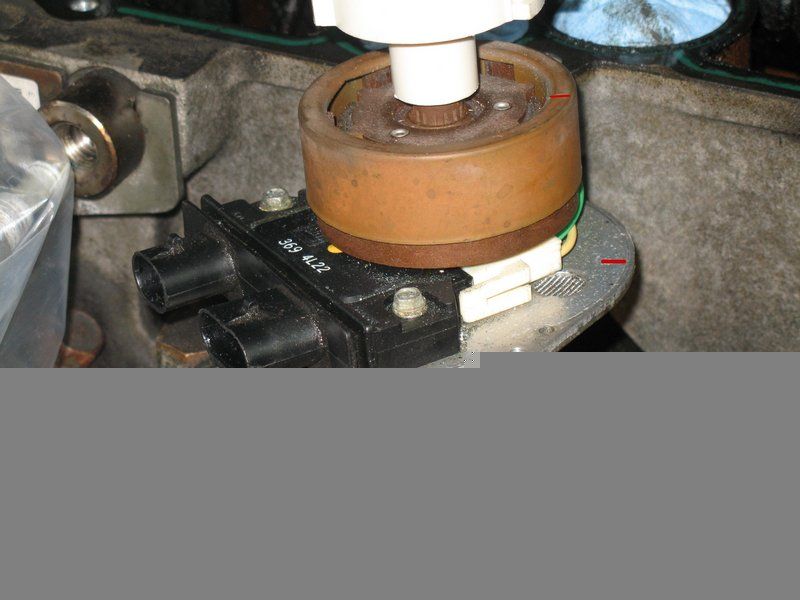
marks on distributor...
It would be nice if you could just pull out the distributor,but its not a very wise idea.You can see in this pic that I have drawn the red marks on the ring and baseplate. make sure to matchmark the distributer base and block and hold-down clamp as well.
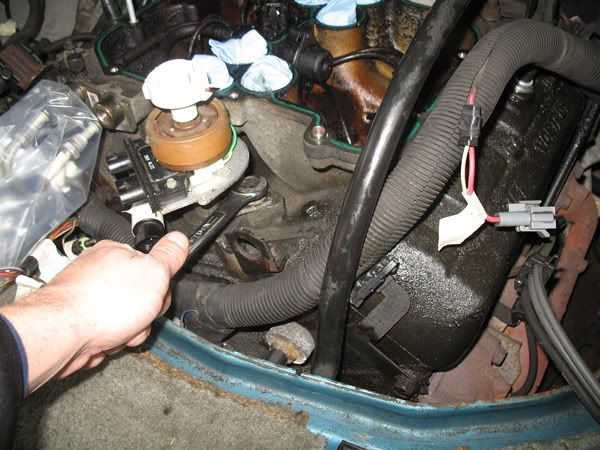
removing dist hold down clamp...
Here is where a gear wrench would come in real handy,carefully remove the distributor clamp hold down bolt.Now comes the tricky part,when you gently pull up on the distributor do so from under the base-plate,as it starts to come up the rotor will rotate slightly to the left (ccw)take a note of where the rotor is now pointing when it stops rotating,this is where you want it pointing when you reinstall it.
dist removed and placed thru box lid...
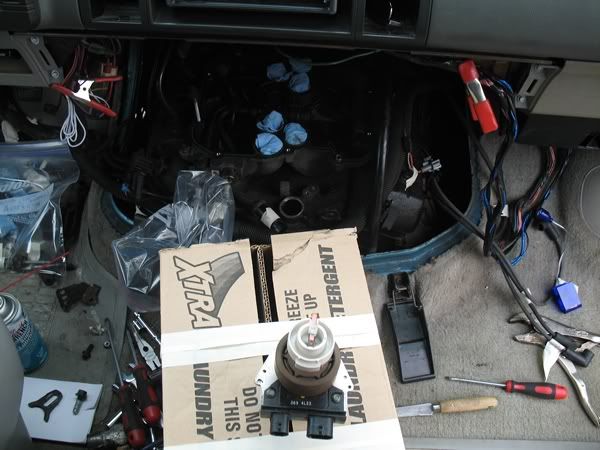
Its a good idea to get a box ready so that you can stand your distributor up in the exact position it came out of the block,line the bottom of the box to catch any oil that may drip off,go put the distributor away in a safe place for the time being.
looking down thru lower intake where dist sat...
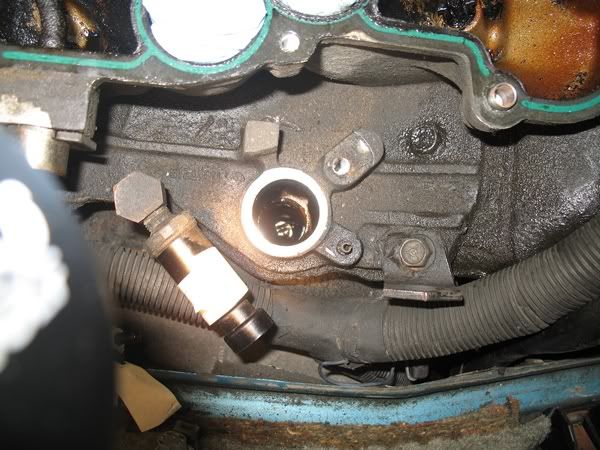
Here's a shot lookin down thru the lower intake where the distributor just came out of,plug the hole with a shoptowel.
Thats all for tonight peeps, lots more to come in the near future
-
- I am smitten with my van
- Posts: 39
- Joined: Mon Jan 28, 2008 6:21 pm
Re: 95 Astro Intake gasket replacement info and pics
I have a 2002 Safari that's leaking cooling fluid. Thanks for this post.
This is an older link; however, replacing the intake gasket will happen.
I found this excellent extensive how to: http://www.handymanlyness.com/archives/ ... Jimmy.html
It's for a Jimmy, but the process is the same other than sheet metal differences.
http://d-tips.com/general/articles/article.aspx?id=3 also give a good how-to but not as complete as the above.
Use Fel-Pro Part Number: MS98002T which contains the metal gasket unlike the separate Fel-Pro which contains the plastic gasket.
I'm feeling a little more inclined to do the procedure myself.
2002 Safari SLT
-
Topic author - I have my van tatooed on my cheeks
- Posts: 2770
- Joined: Fri Sep 08, 2006 2:57 am
Re: 95 Astro Intake gasket replacement info and pics
Its a pretty straight forward repair, nothing too technical, look at 2 days to do it from taking everything apart to cleaning up real good and then letting the new gasket have some cure time. Let us know how you make out...
-
- I am smitten with my van
- Posts: 39
- Joined: Mon Jan 28, 2008 6:21 pm
Re: 95 Astro Intake gasket replacement info and pics
I took the bate and proceeded with the repair. Since I'v not working and presently don't need to have the van running, I did the repair in "puttering" mode. The actual work wasn't that hard. Cleanup took probably as much time as tear down/re-install.
Before I started the process the van had a slight miss in the 1500 to 1800 RPM range. The van now seems to run smoothly so now I expect my P0300 SES will probably not come back. Time will tell.
I used the Fel-Pro kit that included valve cover gaskets and had the metal intake manifold gasket. The Fel-Pro sure fit nicer than the valve cover gaskets that came with the van. I wonder if the original gaskets fit tightly in the valve cover groves. The old ones sure didn't. The right intake gasket was broken both front and rear whereas the left was broker only on front.
Mistakes I made in the process: It initially looked like I would need to removed the intake manifold through the hood, so I did charged the AC as I have rear AC. It ended that I removed the intake into the cab and had no need to remove the AC compressor. The mistake will mean possibly a $100 +/- bill to have the AC recharged as I believe since I totally disconnected the compressor I will need to vacuum the AC before refilling.
It's great to have the van running good again! At least it's value is back into a decent value again. No body will give much for a van what has some obviously mechanical issues. I would really like to keep the van going for at least another 4 years until I turn 70.
2002 Safari SLT
-
- I am smitten with my van
- Posts: 39
- Joined: Mon Jan 28, 2008 6:21 pm
Re: 95 Astro Intake gasket replacement info and pics
Went for a longer drive today, the miss started again with a P0300 so have more work to do. At least it isn't making a mess all over my concrete driveway.
2002 Safari SLT
Re: 95 Astro Intake gasket replacement info and pics
what kind of intake is that? looks nothing the the TBI on my astro's.
1999 AWD Safari
2002 Astro
1996 Astro (sold)
2002 Astro
1996 Astro (sold)
-
Topic author - I have my van tatooed on my cheeks
- Posts: 2770
- Joined: Fri Sep 08, 2006 2:57 am
Re: 95 Astro Intake gasket replacement info and pics
CPI if your asking about my 95 astro...The Mack wrote:what kind of intake is that? looks nothing the the TBI on my astro's.
Re: 95 Astro Intake gasket replacement info and pics
never seen one, only TBI and MPI...cool
1999 AWD Safari
2002 Astro
1996 Astro (sold)
2002 Astro
1996 Astro (sold)