Roof mounted backup lights
Posted: Wed Jan 10, 2007 5:32 pm
Seeing what was in front of me was no longer a problem after the latest light mods I made to the van, however seeing what was behind me when backing up left alot to be desired.
I wanted to add some backup lights but was split on whether to mount them below the bumper or on top of the roof, both installations have there pro's and con's, in the end I went with the roof mounted installation.
The two H3 55 watt bulbs draw approx 9.2 amps, after checking out a couple of wire gauge/length/load charts I found that I could carry up to 10 amps, 18ft using 12g wire this would give me an acceptable voltage drop of 5%
I figured that since these lights are not running for extended periods of time that I was close enough to the recomendations.
I ran a fused 12g wire off the batt to a 30/40 relay, then back and up to the lights, I mounted my switch on the dash and ran a trigger wire over to the relay. I ended up grounding the lights to the bolt that holds the "latch" catch for the window portion of the Dutch door, all the wires ran up the side of the upper hatch and onto the roof.
Here's a couple of pics...
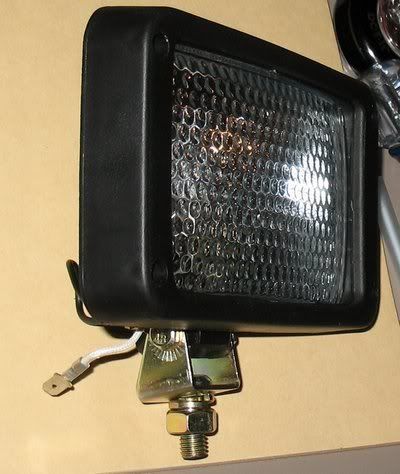
First the light
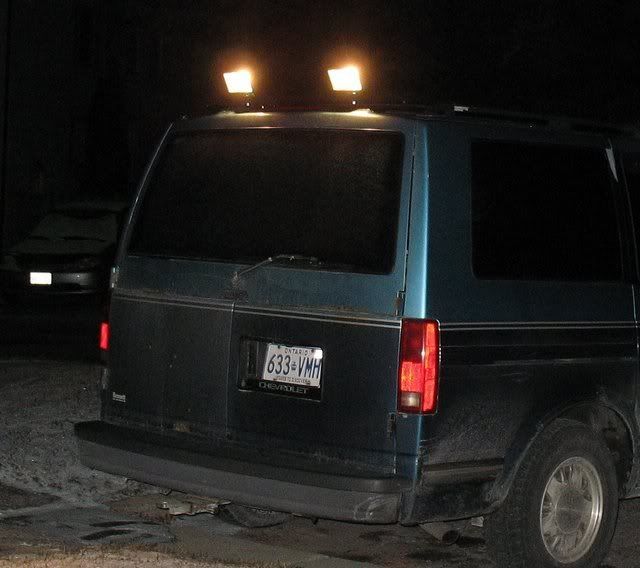
Light on
light cast behind van
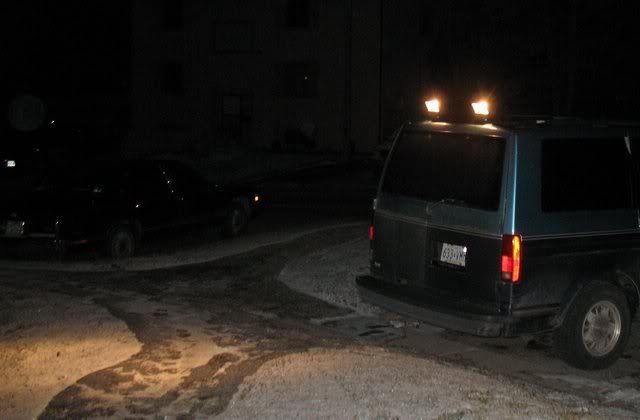
and
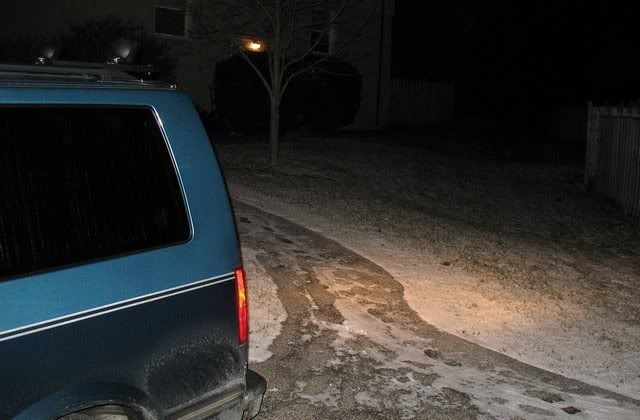
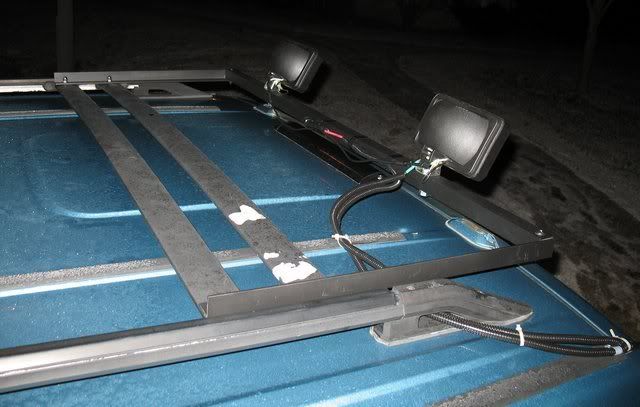
Here's the light rack, just a couple pieces 18" long 1"x1" alumn angle and a 45" long piece of 1" sq alumn, spray painted it all flat black to try and blend in with the roof rack
All in all a fairly straight forward little project easily completed over the wknd, that makes a huge difference
in being able to see
Total cost for project was approx $40 can for 2 lights, relay
alumn, wire and connectors and loom
I wanted to add some backup lights but was split on whether to mount them below the bumper or on top of the roof, both installations have there pro's and con's, in the end I went with the roof mounted installation.
The two H3 55 watt bulbs draw approx 9.2 amps, after checking out a couple of wire gauge/length/load charts I found that I could carry up to 10 amps, 18ft using 12g wire this would give me an acceptable voltage drop of 5%
I figured that since these lights are not running for extended periods of time that I was close enough to the recomendations.
I ran a fused 12g wire off the batt to a 30/40 relay, then back and up to the lights, I mounted my switch on the dash and ran a trigger wire over to the relay. I ended up grounding the lights to the bolt that holds the "latch" catch for the window portion of the Dutch door, all the wires ran up the side of the upper hatch and onto the roof.
Here's a couple of pics...
First the light

Light on

light cast behind van

and

Here's the light rack, just a couple pieces 18" long 1"x1" alumn angle and a 45" long piece of 1" sq alumn, spray painted it all flat black to try and blend in with the roof rack

All in all a fairly straight forward little project easily completed over the wknd, that makes a huge difference
in being able to see
Total cost for project was approx $40 can for 2 lights, relay
alumn, wire and connectors and loom