Now you may have a short somewhere. But some shops, like Advance, will test your alternator for free, so you're just out some time and sanity in pulling it out. Also maybe your battery just dies when parked overnight. That could be a voltage regulator. Unless I'm mistaken, GM put the voltage regulator in your alternator (different from Ford). A bad alternator may leave you needing a tow. Worse, a bad voltage regulator may also fry your battery, so don't waste time waiting for the nerve to get this done. There's no good reason for a backyard mechanic to fail on this, despite how daunting the job of accessing the alternator appears. No specialty tools are required. It just takes a little longer than on your sedan. To give an idea of what is meant here, this is a pic of the alternator:
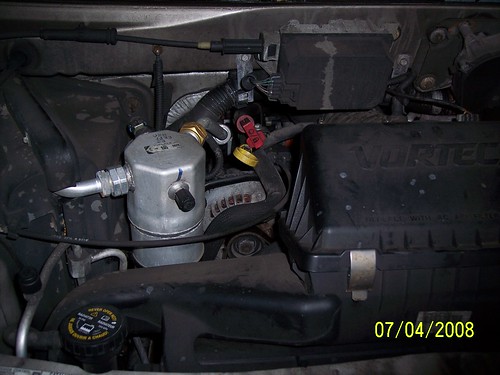
It's between the air filter housing, the AC lines and just below the oil dipstick...no reason to be discouraged.
To begin, proceed as follows:
Edit (addition): This should have been number 1--safety first. Disconnect the battery. SWMBO made me do this, despite the fact that I like to listen to the radio as I work... The bolts on the side terminals of mine were 8 mm.
1. Remove the air intake as per this procedure:
viewtopic.php?f=39&t=2699
2. Remove the upper fan housing as per this procedure:
viewtopic.php?f=39&t=2700
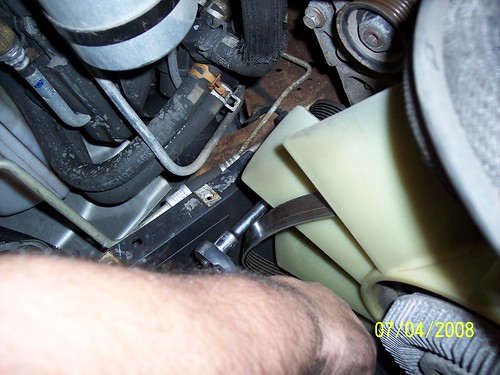
3. To remove the belt from the alternator, slip a 3/8" extention into the belt tensioner, and pull up on the rachet. A good pic of the tensioner wasn't possible, but here's one showing the location with extension already inserted:
For more details on how to deal with that belt, refer to the removal procedure, here:
viewtopic.php?f=39&t=2701
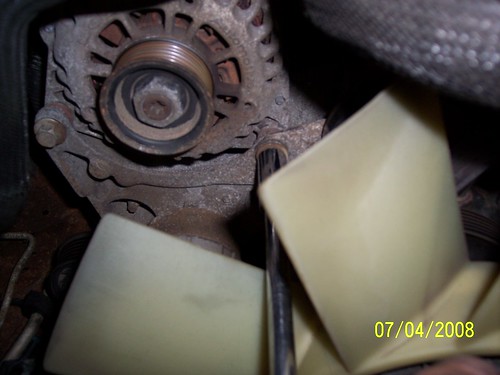
4. Using a 13mm socket with extension(s) remove the two alternator bolts, located at the bottom of the alternator:
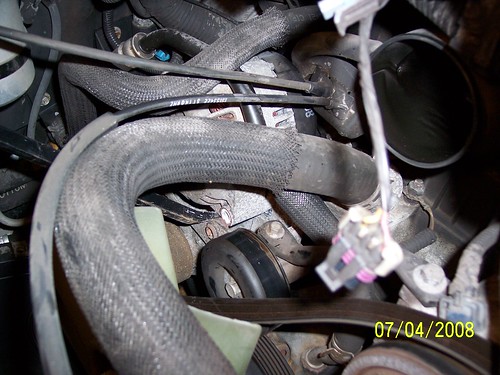
5. The alternator won't just lift right out. It needs coaxing with a pry bar and sturdy screwdriver, seen behind the coolant hose in this pic:
6. Don't just try to yank it out once you've unseated the part, because it's still attached via two wires.
6a. One is on the top, going in through a harness. Pull the clip out and pull the wire harness.
6b. The other is in the back of the alternator, covered by a slip on rubber boot. Slip the boot off and unbolt it (8 or 9 mm socket if memory serves me, but I may be wrong).
7. Now half the job is done. Pull out the alternator, maneuvering as needed, and taking care not to break the plastic fan. And this is what your left with:
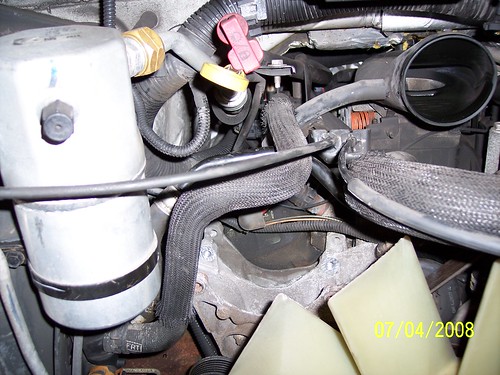
Replacement is the exact reverse of this procedure. To seat the alternator properly, I recommend removing the transmission and oil dipsticks and coaxing with a long socket extension (or screwdriver) and mallet.

