I can't show you a picture of your water pump yet, because we'll need to expose it first.
You'll need your basic metric wrenches, metric sockets and socket extensions. You'll also need a GM fan clutch removal tool. The exact GM tool is J46406, I think, but don't run out and spend $150 on that. Such things are available at places like Advance Auto Parts—they would have rented us a tool kit for this, but they were out so we had to use a Ford Fan Clutch removal wrench set, exactly like this one at the top of the following web site—we found it for $22 so don't pay that price.... http://www.mytoolstore.com/kd/kdengi06.html You may be able to get by with a really large strap wrench and a huge cresent wrench, but we couldn't get that to work.
Edit: Before you do this, disconnect the battery!
Water Pump
1. Make sure the engine and coolant are cool. Place a large basin under the van and open the radiator stopcock found at the bottom of the radiator, facing the interior of the van on the passenger side—make sure that the coolant goes into the basin. You may wish to use pliers on the spring for the lower radiator hose and remove it at this point too at this point.
2. Now remove your air intake as per this procedure: viewtopic.php?f=39&t=2699
3. Next remove the upper fan housing as per this procedure: viewtopic.php?f=39&t=2700
4. The fan clutch removal tool that I used consisted of a large really thin wrench and an even bigger, but just as thin, crows foot wrench. Because of the tight space we simply could not get good photos of the tool in use. To use the tool, first put something with a half inch drive on the crows foot wrench and slip the crows foot wrench over the four small bolts on the fan/water pump pulley. You may need to align the bolts so that they are all flat side facing the sides of the crows foot wrench—sorry for not writing down bolt sizes, I think they're either 10 or 13 mm bolts. Use the box end of a wrench for that task if you need to do it. Now slip the open end wrench on the large nut between the fan and the pulley, hold the crows foot wrench in place and turn the nut between the fan and pulley counterclockwise (from the drivers side to the passenger side). This may be require considerable effort... Here's a photo of the nut I was talking about and the four bolts on the pulley:

5. Now remove the pulley from the water pump. Because the pulley spins, I found it easiest to zip them off with a 3/8” drive impact wrench. If that's not an option for you, try to hold it in place with a large strap wrench and remove the bolts (10mm socket if I remember correctly, could have been 12):

Okay, there's your water pump.
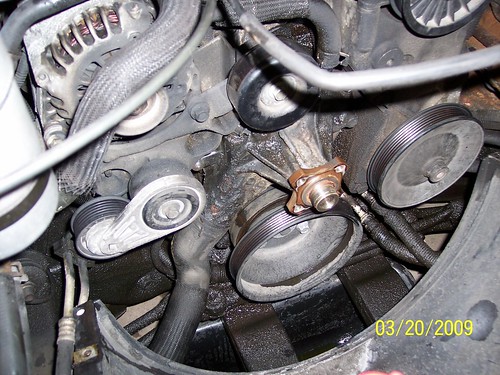
6. If you are changing hoses—and you should be—you'll want to pull out the lower fan housing at this point. It has plastic tabs holding it at the bottom, so try not to break them as you unclip them. You'll also need to remove the lower radiator hose at the bottom of the pump—his wouldn't separate from the water pump so we just cut it with a pair of pruning sheers—the kind you cut branches with. The hose has a spring in it so have wire cutters handy if you do that... Remember to get a basin under the hose before you remove it.
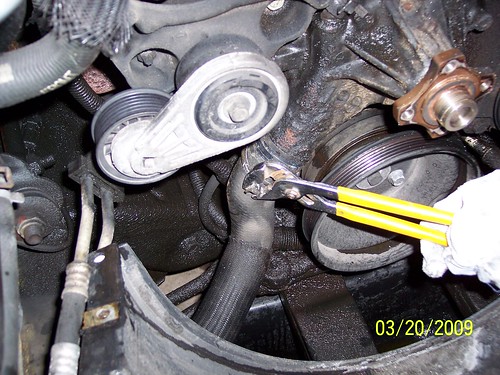
7. Next pull the line off the top of the water pump as shown.
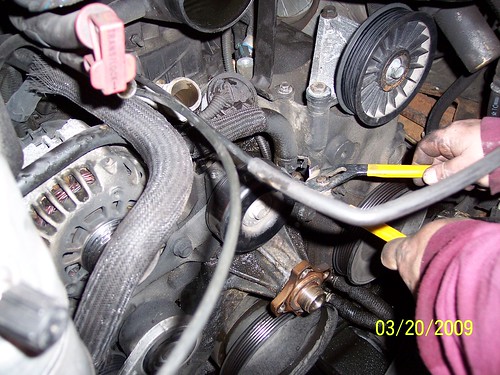
8. It's probably best if you remove the center top pulley, shown below. To remove it, simply remove the bolt in the center.
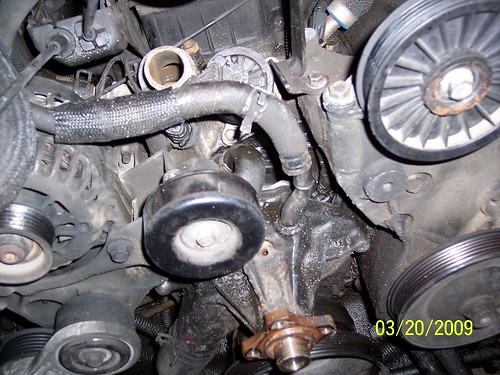
9. This will reveal another hose on the top of the water pump. Remove that hose from the water pump.
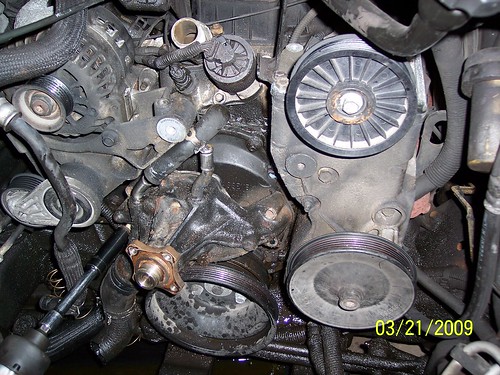
10. Now you're ready to pull of the old water pump. It's held in by four bolts on the front (15mm bolt heads if I remember right). Remove those bolts, but have a hand on the water pump to catch it for the last one.
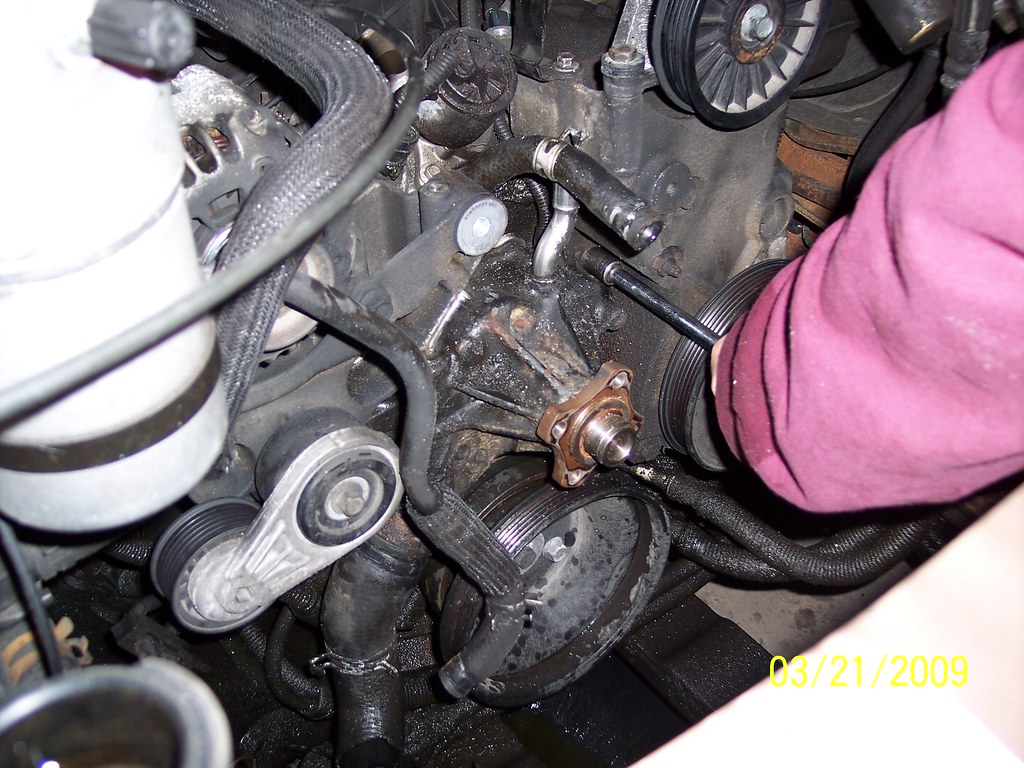
11. Sorry, no photos of this, but you'll find old gasket left behind where the water pump bolted on. Scrape those off as best you can. Sorry, no photos here. Apply rtv to the new water pump, place the new gaskets on the water pump and apply rtv to other sides of the gaskets as well.
12. Now, bolt the new water pump back on.
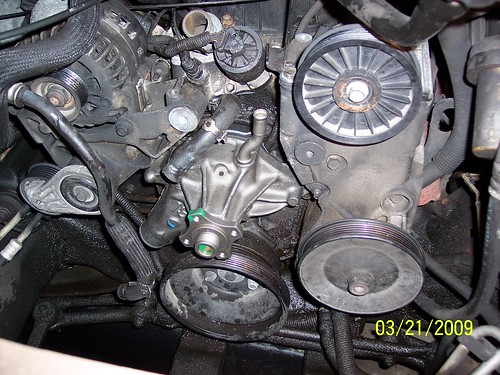
13. Reinstall everything you removed. Sorry, no more photos there.
Thermostat
1. To replace the thermostat, you'll need to first pull the upper radiator hose from the thermostat housing. Here is the upper radiator hose, follow it back toward the motor.

It connects to the thermostat housing. Here is the housing with the thermostat shown inside (hose pulled)
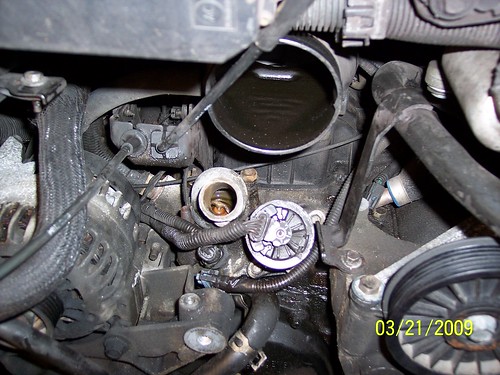
Now pull the wiring harnesses off of the sensors that are in your way.
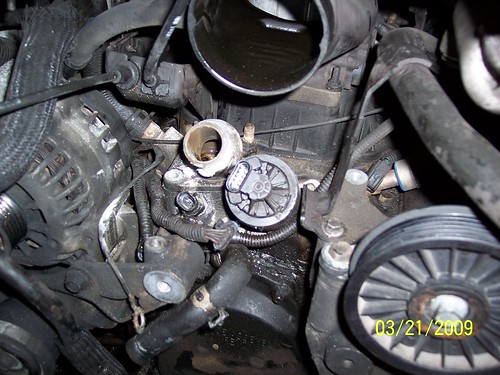
Next unbolt the thermostat housing cover and pull it off. Note: On the back side of it (facing the engine, you'll actually find two nuts. One attaches a ground lead to the back of the stud on the back of the thermostat. I mention it so you don't break the thing trying to pull it off.
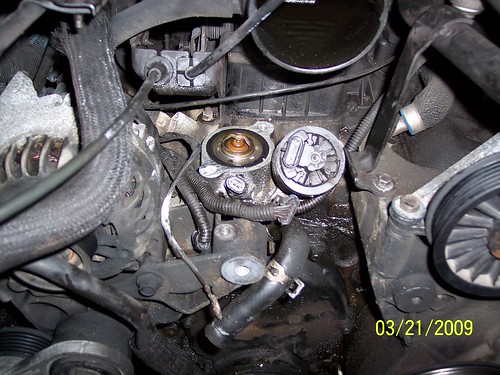
Pull out the old thermostat.
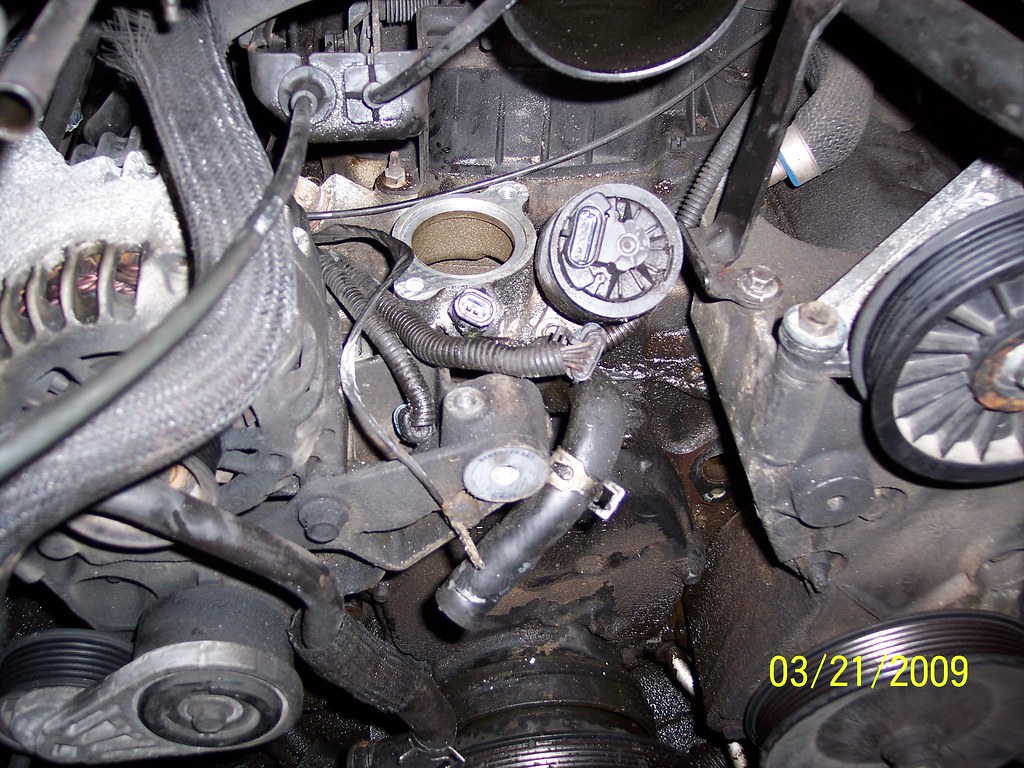
Pop the new thermostat and bolt the cover back on. Remember to reattach the sensor wiring harnesses you just pulled and the pulley. Sorry, no more pics.
Torque Settings
Thermostat cover nuts: 18 ft/lb
Water Pump Bolts: 33 ft/lb
Water Pump/Fan Pulley Bolts: 18 ft/lb
Fan clutch nut: 41 ft/lb – I have no idea how you'd set that...
Notes:
* Someone more experienced may wish to double check my torque specifications
* Engine coolant is poisonous, generally sweet tasting, and harmful to the environment. Be careful to collect all of it and properly dispose of or recycle it. This goes doubly if you have pets
* I am only providing this procedure to tell you how I did this. In no way am I telling anyone to do this, especially if they're not comfortable with this repair. Also note, I'm a chemist not a lisenced mechanic, so as with all things, consider the source.
Dumb question, should this stay here or get moved to general procedures?


